游戏模版框架_键盘移动画的火柴人

python keyborad move sprite键盘移动画的火柴人

python keyborad move sprite键盘移动画的火柴人

以下是部分代码预览:

"""游戏模版框架_键盘移动画的火柴人.py
"""
 
import pygame
 
# 定义颜色常量
BLACK = (0, 0, 0)
WHITE = (255, 255, 255)
GREEN = (0, 255, 0)
RED = (255, 0, 0)
  
def draw_stick_figure(screen, x, y):
    # 画火柴人
  
 
# 启动派gei引擎
pygame.init()
 
# 设置屏幕对象
size = [700, 500]
screen = pygame.display.set_mode(size)
 
pygame.display.set_caption("游戏模版框架_键盘移动画的火柴人.py")
 
# 退出while循环的利器,当单击窗口关闭按钮时的事件发生时它的值会为True
done = False
 
# 这是用来控制帧率的时钟变量
clock = pygame.time.Clock()
 
# 隐藏鼠标指针
pygame.mouse.set_visible(0)
 
# 火柴人每帧在水平和垂直方向移动的像素
x_speed = 0
y_speed = 0
 
# 火柴人当前的坐标
x_coord = 10
y_coord = 10

# -------- 程序主循环 -----------
while not done:
    # --- 迭代所发生的每件事
    for event in pygame.event.get():
        if event.type == pygame.QUIT:
            done = True 
 
 
    # --- 下面是重画代码段
 
    # 清屏幕为白色,然后在上面画一个火柴人
    screen.fill(WHITE) 
    draw_stick_figure(screen, x_coord, y_coord) # 画火柴人 
 
    # 显示
    pygame.display.flip()
 
    # 设置帧率为60
    clock.tick(60)
 
# 安全退出到IDLE
pygame.quit()


如需要查看完整代码,请

成为会员后,登陆才能继续浏览!联系微信scratch8即可办理会员。
(会员专属:能浏览所有文章,下载所有带链接的Python资源。)

发表在 pygame, python | 标签为 , , | 留下评论

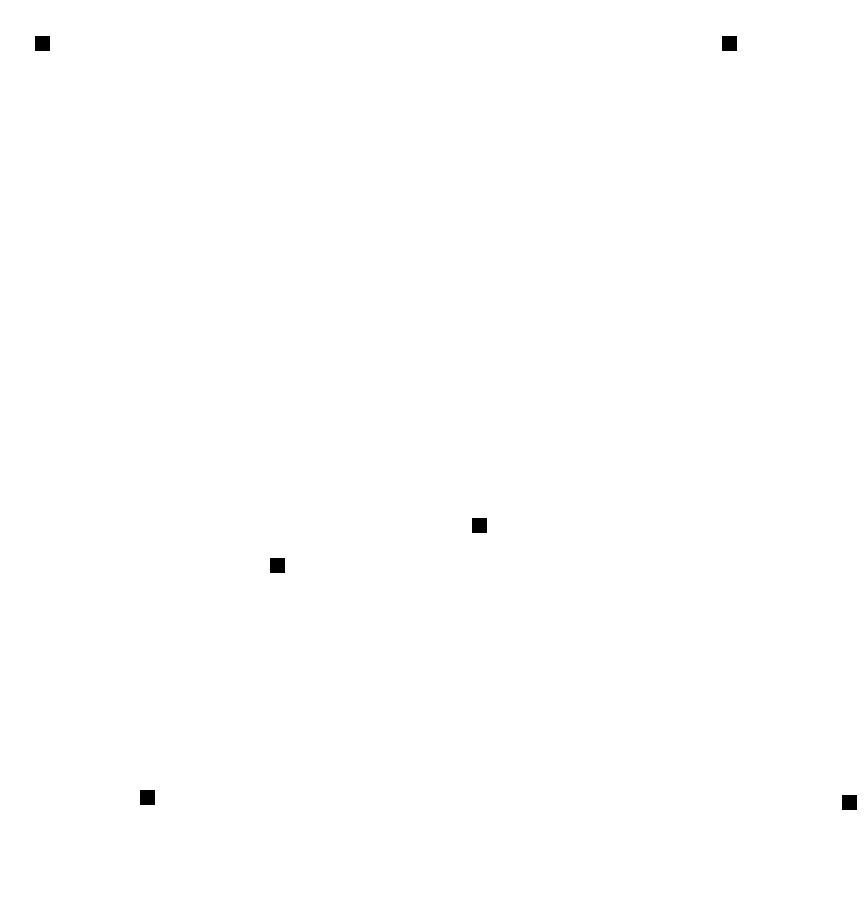
pygame没有定义类通过键盘移动角色核心代码示例.py

pygame simplest move sprite最简移动角色

pygame simplest move sprite最简移动角色

以下是部分代码预览:

"""没有定义类通过键盘移动角色核心代码示例.py,这是没有定义类的一个程序,它通过按键检测,控制一个矩形移动。"""
 
import pygame
 
BLACK = (0, 0, 0)
CYAN = (0, 255, 255)
SCREENSIZE = [800, 600]

# 实始化pygame引擎
pygame.init()
 
# 创建屏幕,它是一个图层
screen = pygame.display.set_mode(SCREENSIZE)
 
# 设置窗口标题
pygame.display.set_caption('通过键盘移动角色示例_作者:李兴球')
 
# 创建方块,用一个surface代表它
square = pygame.Surface([15, 15])
square.fill(CYAN)
square_rect = square.get_rect() 
square_rect.center = SCREENSIZE[0]//2,SCREENSIZE[1]//2
clock = pygame.time.Clock()
done = False
 
while not done:
    #遍历每一个发生的事件
    for event in pygame.event.get():
        if event.type == pygame.QUIT:done = True
        # 否则如果按键,则再判断具体按哪个键来决定
        elif event.type == pygame.KEYDOWN:
            if event.key == pygame.K_LEFT:
                square_rect.x -= 15
            elif event.key == pygame.K_RIGHT:
                square_rect.x += 15
            elif event.key == pygame.K_UP:
                square_rect.y -= 15
            elif event.key == pygame.K_DOWN:
                square_rect.y += 15
 
    # -- 重画所有对象
    # 首先清屏幕为黑色
    screen.fill(BLACK)
 
    # 画 角色
    screen.blit(square,square_rect)
 
    # 显示
    pygame.display.flip()
 
    # fps为40
    clock.tick(40)
 
pygame.quit()


如需要查看完整代码,请

成为会员后,登陆才能继续浏览!联系微信scratch8即可办理会员。
(会员专属:能浏览所有文章,下载所有带链接的Python资源。)
发表在 pygame, python | 标签为 , , | 留下评论

平滑地通过键盘移动角色示例.py

python smoothly control sprite move平滑控制角色移动

python smoothly control sprite move平滑控制角色移动

本程序定义了一个类!
以下是部分代码预览:

"""平滑地通过键盘移动角色示例.py 本程序通过调用pygame.key.get_pressed,判断按键,从而实现对角色的控制.
"""
 
import pygame
from pygame.locals import *

SCREENSIZE = (480,360)
BLACK = (0, 0, 0)
WHITE = (255, 255, 255) 
 
class Player(pygame.sprite.Sprite):
    """ 玩家控制的角色.. """ 
   
    def __init__(self, x, y):
        """类的初始化方法"""  
        pass
 
    def setspeed(self, x, y):
        """ 设置水平和垂直速度"""
        pass
    def update(self):
        """ 更新矩形坐标"""
        pass 
 
# 实始化pygame引擎
pygame.init()
 
# 创建 屏幕,它是一个图层
screen = pygame.display.set_mode(SCREENSIZE)
 
# 设置窗口标题
pygame.display.set_caption('平滑地通过键盘移动角色示例 www.scratch8.net')
 
# 创建玩家,把它加到所有角色列表
player = Player(50, 50)
all_sprites_list = pygame.sprite.Group()
all_sprites_list.add(player)
 
clock = pygame.time.Clock()
running = True

while running:
    
    # 所有角色更新坐标
    all_sprites_list.update()
 
    # -- 重画所有对象
    # 首先清屏幕为白色
    screen.fill(WHITE)
 
    # 重画所有角色
    all_sprites_list.draw(screen)
 
    # 显示屏幕
    pygame.display.flip()
 
    # 每秒显示帧图为60幅
    clock.tick(60)
 
pygame.quit()


如需要查看完整代码,请

成为会员后,登陆才能继续浏览!联系微信scratch8即可办理会员。
(会员专属:能浏览所有文章,下载所有带链接的Python资源。)
发表在 pygame, python | 标签为 , , , | 留下评论

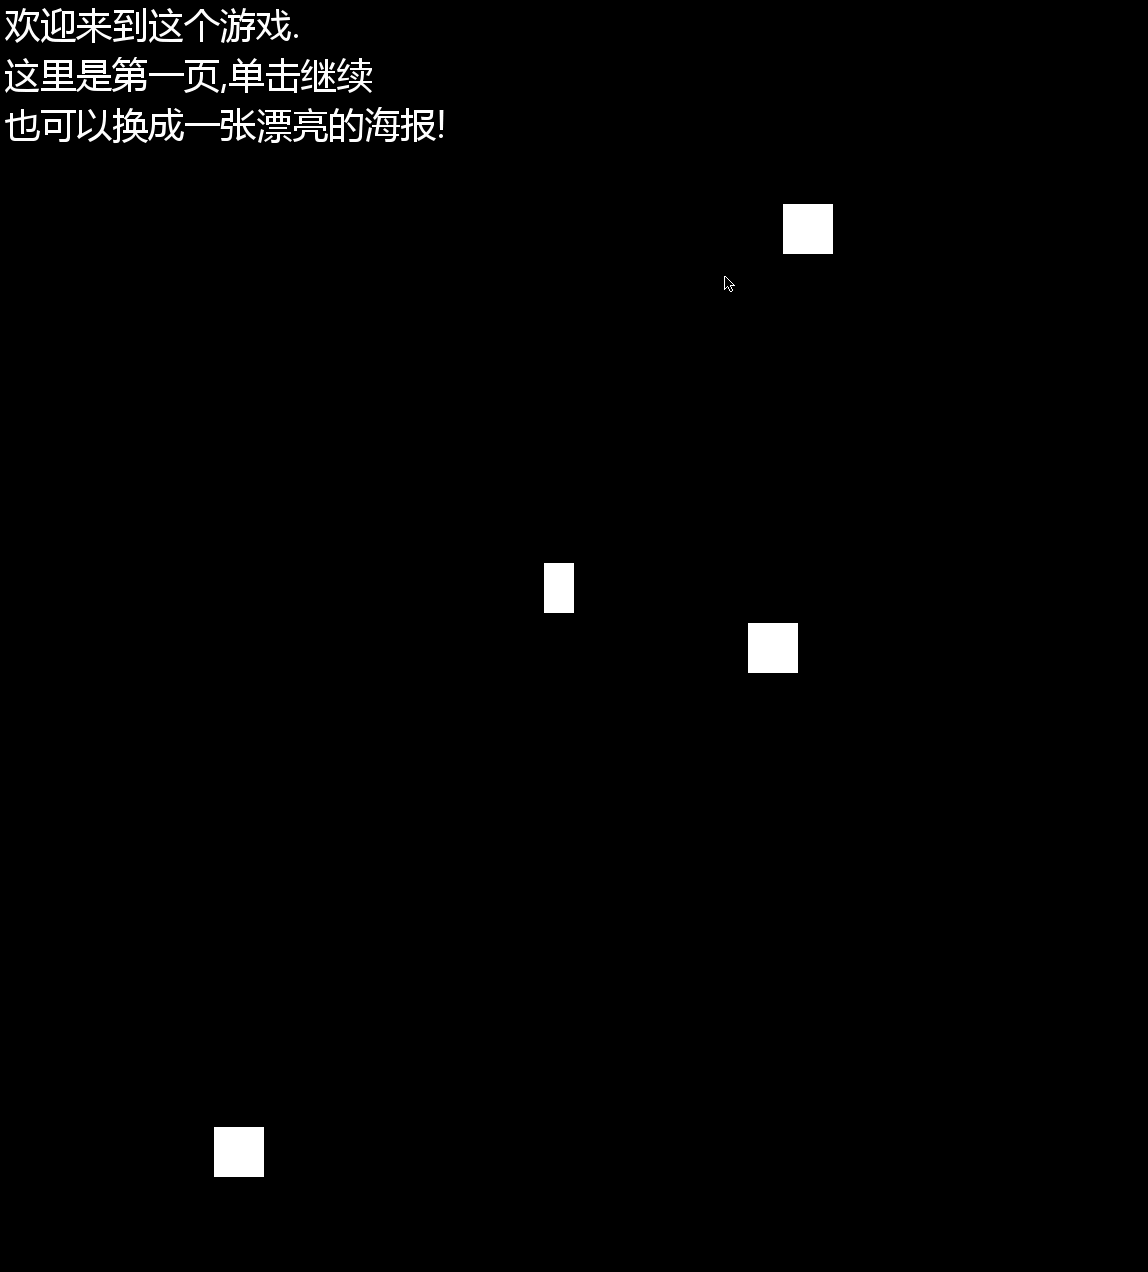
pygame简介屏幕的设计_游戏模版框架.py

cover design source code pygame封面设计

cover design source code pygame封面设计


以下是部分代码预览:

"""pygame简介屏幕的设计_游戏模版框架.py
"""
 
import pygame
 
# 定义颜色常量
BLACK = (0, 0, 0)
WHITE = (255, 255, 255)
GREEN = (0, 255, 0)
RED = (255, 0, 0)
 
pygame.init()
 
# 设置宽度和高度,然后新建屏幕
size = [700, 500]
screen = pygame.display.set_mode(size)
 
pygame.display.set_caption("pygame简介屏幕的设计_游戏模版框架_风火轮编程")
 
# 此变量用来当用户单击了窗口的关闭按扭时,它的值会变成True,从而退出while循环
done = False
 
# 用来设置fps的时钟对象
clock = pygame.time.Clock()
 
# -------- 进入游戏主循环 -----------
while not done:
    for event in pygame.event.get():
        if event.type == pygame.QUIT:
            done = True
 
    # 设置屏幕背景
    screen.fill(BLACK)
 
    # 在screen上画矩形
    pygame.draw.rect(screen, WHITE, [rect_x, rect_y, 50, 50])
 
    # 换矩形坐标,(下一帧就能在新的坐标上画)
    rect_x += rect_change_x
    rect_y += rect_change_y
 
    # 碰到边缘就反弹
    if rect_y > 450 or rect_y < 0:
        rect_change_y = rect_change_y * -1
    if rect_x > 650 or rect_x < 0:
        rect_change_x = rect_change_x * -1
 
    # 设定帧率为60,每秒显示的画面数
    clock.tick(60)
 
    # 重画完后显示出来
    pygame.display.flip()
 
pygame.quit()


如需要查看完整代码,请

成为会员后,登陆才能继续浏览!联系微信scratch8即可办理会员。
(会员专属:能浏览所有文章,下载所有带链接的Python资源。)

发表在 pygame, python | 标签为 , , , , , , , | 留下评论

游戏结束设计_游戏类模板框架.py

以下是部分代码预览:

"""游戏结束设计_游戏类模板框架.py
"""
 
import pygame
 
# 定义颜色常量
BLACK = (0, 0, 0)
WHITE = (255, 255, 255)
GREEN = (0, 255, 0)
 
pygame.init()            # 初始化派gei引擎
 
# 创建屏幕对象
size = [700, 500]
screen = pygame.display.set_mode(size)
 
pygame.display.set_caption("游戏类模板框架_游戏结束设计,风火轮编程")
 
# 当用户单击了关闭按钮时此变量会为真
done = False
 
# 用来设定画面刷新率
clock = pygame.time.Clock()

# 新建矩形对象
rectobj = pygame.Rect(300,200,50,50)

# 矩形每帧水平和垂直移动的距离
dx = 5
dy = 5
 
# 字体对象,用来写字的
font = pygame.font.Font(None, 36)
 
# 触发游戏结束的逻辑变量
game_over = False
 
 
pygame.quit()


如需要查看完整代码,请

成为会员后,登陆才能继续浏览!联系微信scratch8即可办理会员。
(会员专属:能浏览所有文章,下载所有带链接的Python资源。)
发表在 pygame, python | 标签为 , , , , , | 留下评论

pygame收集反弹的彩色小方块.py

以下是部分代码预览:

"""pygame收集反弹的彩色小方块.py"""
 
import pygame
import random
 
# 定义颜色常量
BLACK = (0, 0, 0)
WHITE = (255, 255, 255)
RED = (255, 0, 0) 
 
class Block(pygame.sprite.Sprite):
    """    方块类,继承自角色类    """
 
    def __init__(self, color, width, height,screen):
        """ 初始化方法,传递的参数有颜色和宽度、高度 """
        # 调用父类的初始化方法
        super().__init__()
        pass
        # 水平速度和垂直速度,也代表着方向
        self.dx = random.randrange(-3, 4) 
        self.dy = random.randrange(-3, 4) 
  
    def update(self):
        """ 更新方块的坐标. """
        self.rect.x += self.dx
        self.rect.y += self.dy
        pass

class Player(Block):
    """ 玩家类继承自方块类,但是重写了update方法,它用鼠标指针来操控 """
    pass
 
# 初始化pygame引擎
pygame.init()
 
# 设置宽度和高度并且新建屏幕对象
screen_width = 700
screen_height = 400
screen = pygame.display.set_mode([screen_width, screen_height])
pygame.display.set_caption("pygame收集反弹的彩色小方块 www.scratch8.net")
 
# 这是所有方块角色“列表”,它是Group类建立的
block_list = pygame.sprite.Group()
 
# 这是所有的角色列表,包括方块和玩家
all_sprites_list = pygame.sprite.Group()
 
for i in range(50):
    # 实例化一个方块
    r = random.randint(0,255)
    g = random.randint(0,255)
    b = random.randint(0,255)    
    block = Block((r,g,b), 20, 15,screen)
 
 
    # 所有的方块加到方块列表和所有角色列表
    block_list.add(block)
    all_sprites_list.add(block)
 
# 创建红色玩家对象,并且增加到所有角色列表
player = Player(RED, 20, 15,screen)
all_sprites_list.add(player)
 
# 用来控制while循环结束的逻辑变量
done = False


如需要查看完整代码,请

成为会员后,登陆才能继续浏览!联系微信scratch8即可办理会员。
(会员专属:能浏览所有文章,下载所有带链接的Python资源。)

发表在 pygame, python | 标签为 , , , , , , , | 留下评论

pygame多关卡鼠标操控收集方块核心.py

"""pygame多关卡鼠标操控收集方块核心.py,阅读理解代码重点在于是如何组织多关卡."""
 
import pygame
import random
 
# 定义颜色常量
BLACK    = (   0,   0,   0)
WHITE    = ( 255, 255, 255)
RED      = ( 255,   0,   0)
 
class Block(pygame.sprite.Sprite):
    """方块类,继承自角色类"""
    def __init__(self, color, width, height):
        # 调用父类的初始化方法

 
# 初始化pygame引擎
pygame.init()
 
# 设置屏幕宽高,创建屏幕
SCREEN_WIDTH = 700
SCREEN_HEIGHT = 400
screen = pygame.display.set_mode([SCREEN_WIDTH, SCREEN_HEIGHT])
pygame.display.set_caption("多关卡鼠标操控收集方块核心")
 
# 方块“列表”,由Group类创建
block_list = pygame.sprite.Group()
 
# 所有角色“列表”,由Group类创建
all_sprites_list = pygame.sprite.Group()


如需要查看完整代码,请

成为会员后,登陆才能继续浏览!联系微信scratch8即可办理会员。
(会员专属:能浏览所有文章,下载所有带链接的Python资源。)

发表在 pygame, python | 标签为 , , , , | 留下评论

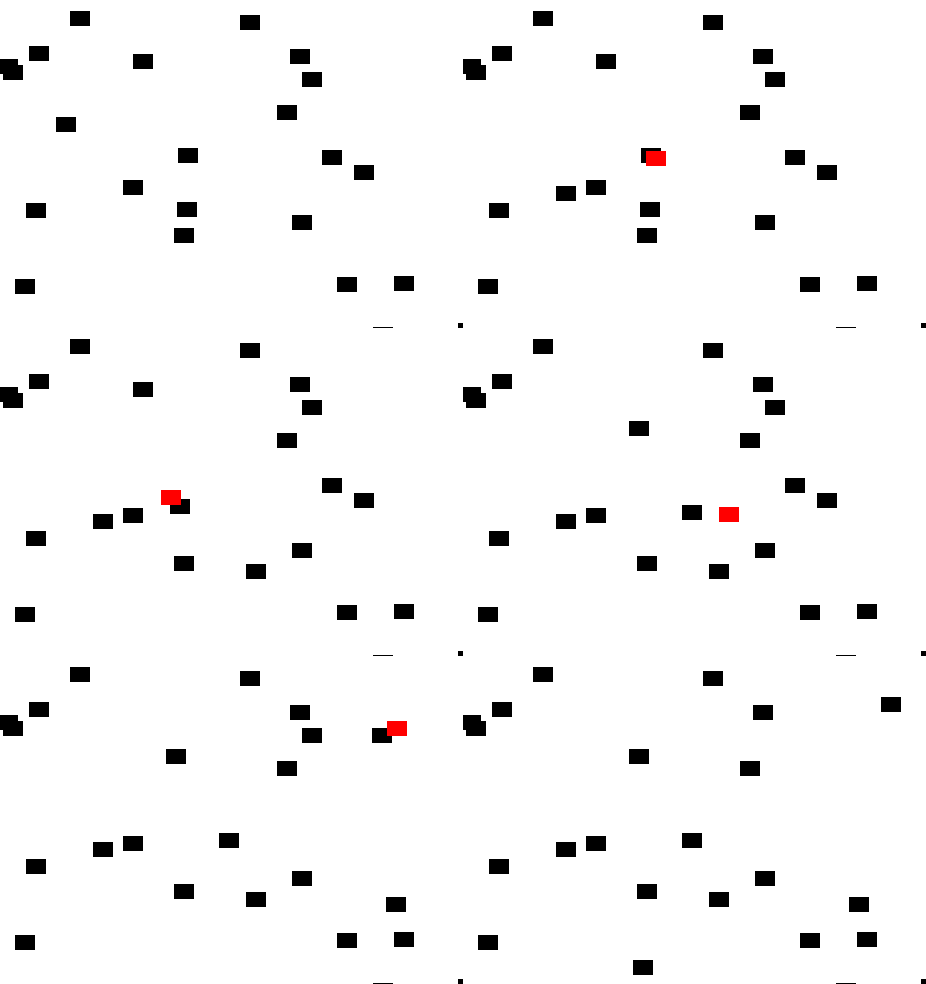
pygame静态方块收集最简单鼠标控制核心代码.py

以下是部分代码预览:

"""静态方块收集最简单鼠标控制核心代码.py
"""
import pygame
from random import randrange
 
# 定义颜色常量
BLACK = (  0,   0,   0)
WHITE = (255, 255, 255)
RED   = (255,   0,   0)
 
class Block(pygame.sprite.Sprite):
    """ 方块类,继承自角色类  """
 
    def __init__(self, color, width, height,selfgroup=None,allgroup=None):
        """ 初始化方法,先调用父类的同名方法,然后创建image. """
 
# 初始化pygame引擎
pygame.init()
 
# 设定屏幕宽度和高度,创建屏幕对象
screen_width = 700
screen_height = 400
screen = pygame.display.set_mode([screen_width, screen_height])
pygame.display.set_caption("静态方块收集最简单鼠标控制核心代码")
 
# 方块“列表”,由组来创建. 
block_list = pygame.sprite.Group()
 
# 所有角色列表,由Group来创建。用来统一重画所有角色.
all_sprites_list = pygame.sprite.Group()

# 生成一些方块 ,用列表推导式,扁平胜于嵌套
[ Block(BLACK, 20, 15,block_list,all_sprites_list) for i in range(50)] 
 
# 创建一个红色的小方块
player = Block(RED, 20, 15)
all_sprites_list.add(player)
 
# 用户单击了关闭按钮会触发QUIT事件,把此变量设为True会退出while循环
# 所以,它初始化的值为False.
done = False
 
# 设置屏幕刷新率的时钟对象
clock = pygame.time.Clock()
 
score = 0
 
# -------- 主程序循环 -----------
while not done:
    for event in pygame.event.get(): 
        if event.type == pygame.QUIT: done = True # 扁平胜于嵌套
 
    # 给屏幕填充为白色
    screen.fill(WHITE)
 
pygame.quit()


如需要查看完整代码,请

成为会员后,登陆才能继续浏览!联系微信scratch8即可办理会员。
(会员专属:能浏览所有文章,下载所有带链接的Python资源。)
发表在 pygame, python | 标签为 , , , , , , | 留下评论

pygame拖动方块示例.py

python drag square demo拖动方块示例

python drag square demo拖动方块示例


以下是部分代码预览:

"""pygame拖动方块示例.py
"""
import pygame
import random
 
# 定义颜色常量
BLACK = (0, 0, 0)
WHITE = (255, 255, 255)
RED = (255, 0, 0)
 
 
class Block(pygame.sprite.Sprite):
    """
    方块类,继承自角色类
    """
 
    def __init__(self, color, width, height):
        """ 初始化方法,传递的参数为颜色,宽度,高度"""
 

class Player(Block):
    """ 此类继承自Block类,重写了update方法 """
 
    # 所携带的方块列表
    carry_block_list = []
 
# 初始化pygame引擎
pygame.init()
 
# 新建屏幕对象,它是一个surface对象
screen_width = 700
screen_height = 400
screen = pygame.display.set_mode([screen_width, screen_height])
pygame.display.set_caption("拖动方块示例")
 
# 所有方块列表
block_list = pygame.sprite.Group()
 
# 所有角色列表
all_sprites_list = pygame.sprite.Group()
 
for i in range(50):
    # 实例化一个方块
    block = Block(BLACK, 20, 15)
 
    # 设定随机坐标
    block.rect.x = random.randrange(screen_width)
    block.rect.y = random.randrange(screen_height)
 
    # 增加到方块列表和所有角色列表
    block_list.add(block)
    all_sprites_list.add(block)
 
# 实例化红色的方块
player = Player(RED, 20, 15)
all_sprites_list.add(player)
 
# 用来结束while循环的逻辑变量
done = False
 
# 设置刷新率的时钟对象
clock = pygame.time.Clock()
 
# 隐藏鼠标指针
pygame.mouse.set_visible(False)
 
# -------- 主程序循环-----------
while not done:
    for event in pygame.event.get():
        if event.type == pygame.QUIT:
            done = True
 
    all_sprites_list.update()
 
    # 填充屏幕为白色
    screen.fill(WHITE)
 
    # 重画所有角色
    all_sprites_list.draw(screen)
 
    # 限制刷新率为60秒
    clock.tick(60)
 
    # 显示
    pygame.display.flip()
 
pygame.quit()


如需要查看完整代码,请

成为会员后,登陆才能继续浏览!联系微信scratch8即可办理会员。
(会员专属:能浏览所有文章,下载所有带链接的Python资源。)

发表在 pygame, python | 标签为 , , , , | 留下评论

pygame转圈圈的方块收集小游戏核心代码.

以下是部分代码预览:

"""转圈圈的方块收集小游戏核心代码.py"""
 
import pygame
import random
import math
 
# 定义颜色常量
BLACK = (0, 0, 0)
WHITE = (255, 255, 255)
GREEN = (0, 255, 0)
RED = (255, 0, 0)
BLUE = (0, 0, 255)
 
 
class Block(pygame.sprite.Sprite):
    """ 方块类,继承自角色类 """ 
    def __init__(self, color, width, height):
        """ 初始化方法,先调用父类的同名方法,然后创建image """
        super().__init__()
        self.image = pygame.Surface([width, height])
        self.image.fill(color)
        self.rect = self.image.get_rect()
 
    def update(self):
        """ 更新角色的坐标 """
   
class Player(pygame.sprite.Sprite):
    """ 玩类类,继承自角色类. """
    def __init__(self, color, width, height):
        """ 调用基类的同名方法,创建玩家图像 """
        super().__init__()
        self.image = pygame.Surface([width, height])
        self.image.fill(color)
        self.rect = self.image.get_rect()
 
# 初始化pygame引擎
pygame.init()
 
# 设定屏幕宽度和高度,创建屏幕对象
SCREEN_WIDTH = 700
SCREEN_HEIGHT = 400
screen = pygame.display.set_mode([SCREEN_WIDTH, SCREEN_HEIGHT])
 
# 方块“列表”,由组来创建.
block_list = pygame.sprite.Group()
 
# 所有角色列表,由Group来创建。
all_sprites_list = pygame.sprite.Group()
 
# 创建一个红色的小方块
player = Player(RED, 20, 15)
all_sprites_list.add(player)
 
# 用户单击了关闭按钮会触发QUIT事件,把此变量设为True会退出while循环
# 所以,它初始化的值为False
done = False
 
# 设置屏幕刷新率的时钟对象
clock = pygame.time.Clock()
 
score = 0
 
# -------- 主程序循环 -----------
while not done:
    for event in pygame.event.get():
        if event.type == pygame.QUIT:
            done = True
 
    # 重画所有角色
    all_sprites_list.draw(screen)
 
    # 显示
    pygame.display.flip()
 
    # 设置帧率为60
    clock.tick(60)
 
pygame.quit()


如需要查看完整代码,请

成为会员后,登陆才能继续浏览!联系微信scratch8即可办理会员。
(会员专属:能浏览所有文章,下载所有带链接的Python资源。)
发表在 pygame, python | 标签为 , , , | 留下评论

游戏类模版框架_鼠标操控收集下落和方块型.py

以下是部分代码预览:

"""游戏类模版框架_鼠标操控收集型.py,
本程序设计了一个Game类,展示如何组织一个游戏的逻辑。
好处是当游戏结束的条件满足时,可以非常方便的重新开始游戏。
"""
 
import pygame
import random
 
# --- 定义全局颜色常量 ---
BLACK = (0, 0, 0)
WHITE = (255, 255, 255)
GREEN = (0, 255, 0)
RED = (255, 0, 0)
 
SCREEN_WIDTH = 700
SCREEN_HEIGHT = 500 
 
class Block(pygame.sprite.Sprite):
    """这个类代表玩家收集的方块"""
 
    def __init__(self):
        """ 调用父类的初始化方法 """
        super().__init__()
        self.image = pygame.Surface([20, 20])
        self.image.fill(BLACK)
        self.rect = self.image.get_rect()
  
 
class Player(pygame.sprite.Sprite):
    """ 玩家类 """
    def __init__(self):
        super().__init__()
        self.image = pygame.Surface([20, 20])
        self.image.fill(RED)
        self.rect = self.image.get_rect()
 
 
class Game:
    """ Game类. """
 
    def __init__(self):
        """ 游戏的初始化方法,游戏中有得分,游戏是否结束等. """
 
        self.score = 0
        self.game_over = False
        self.font = pygame.font.SysFont("serif", 25)
 
        # 游戏的方块列表和所有角色列表
        self.block_list = pygame.sprite.Group()
        self.all_sprites_list = pygame.sprite.Group()
 
        # 创建方块
        for i in range(50):
            block = Block() 
            block.rect.x = random.randrange(SCREEN_WIDTH)
            block.rect.y = random.randrange(-300, SCREEN_HEIGHT)
 
            self.block_list.add(block)
            self.all_sprites_list.add(block)
 
        # 创建玩家,并加入到所有角色列表,方便统一update与draw
        self.player = Player()
        self.all_sprites_list.add(self.player)
 
  
    def display_frame(self, screen):
        """ 重画所有角色. """
        screen.fill(WHITE)   # 清背景为白色
 
        if self.game_over:   # 如果游戏结束 了,显示单击重启动游戏的字        
            text = self.font.render("Game Over, click to restart", True, BLACK)
            center_x = (SCREEN_WIDTH // 2) - (text.get_width() // 2)
            center_y = (SCREEN_HEIGHT // 2) - (text.get_height() // 2)
            screen.blit(text, [center_x, center_y])
 
        if not self.game_over:# 如果游戏没有结束         
            self.all_sprites_list.draw(screen)
 
        pygame.display.flip()
 
 
def main():
    """ 主要流程函数. """
    # 初始化派gei引擎
    pygame.init()
 
    size = [SCREEN_WIDTH, SCREEN_HEIGHT]
    screen = pygame.display.set_mode(size)
 
    pygame.display.set_caption("游戏类模版框架_鼠标操控收集型")
    pygame.mouse.set_visible(False)
 
    # 创建done用来结束while循环
    done = False
    clock = pygame.time.Clock()
 
    # 创建一个游戏实例
    game = Game()
 
    # 游戏主要循环
    while not done:
 
        # 处理所有事件
        done = game.process_events()
 
        # 游戏运行逻辑,更新坐标与检测碰撞,得分等
        game.run_logic()
 
        # 重画所有对象
        game.display_frame(screen)
 
        # 每秒显示60次(到了1/60秒就继续下一次循环
        clock.tick(60)
 
    # 关闭窗口结束
    pygame.quit()
 
if __name__ == "__main__":
    main()


如需要查看完整代码,请

成为会员后,登陆才能继续浏览!联系微信scratch8即可办理会员。
(会员专属:能浏览所有文章,下载所有带链接的Python资源。)
发表在 pygame, python | 标签为 , , , , , | 留下评论

pygame旋转图形核心原理例子_飞碟与外星人旋转与碰撞举例.py

python alien and fly saurce飞碟与外星人

python alien and fly saurce飞碟与外星人

以下是部分代码预览:

""" pygame旋转图形核心原理例子_飞碟与外星人旋转与碰撞举例.py """

__author__ = "李兴球"
__date__ = "2019年1月"

import pygame
import random
 
# 定义颜色常量
BLACK  = (   0,   0,   0)
WHITE  = ( 255, 255, 255)
RED    = ( 255,   0,   0)
 
# 方块类
class Block(pygame.sprite.Sprite):
 
    def __init__(self, filename):
        # 调用基类的构造方法
        super().__init__() 
 
        # 创建源图,此图不画在screen上,只是用来旋转
        self.raw_image = pygame.image.load(filename).convert_alpha()
        self.image = self.raw_image  # 这是旋转后的图形,它是最终渲染的.
 
        # 获取矩形对象,用它代表图形的坐标与宽高
        self.rect = self.image.get_rect()
         
        self.angle = 0          # 角度
        self.angle_change = 0   # 角速度
 
# 实始化pygame引擎
pygame.init()
 
# 设置屏幕宽高,然后创建屏幕
screen_width = 700
screen_height = 400
screen = pygame.display.set_mode([screen_width, screen_height])
pygame.display.set_caption("旋转核心原理_飞碟与外星人旋转_作者:李兴球")
 
# 方块“列表”,用Group类创建
block_list = pygame.sprite.Group()
    
# 创建一个红色的玩家方块
player = Block("ufo.png")
player.angle_change = 0
all_sprites_list.add(player)
 
# 当关闭窗口事件发生时,把下列变量值设为True,从而退出while
done = False
 
# 设定刷新率的时钟对象
clock = pygame.time.Clock()
 
score = 0
 
# -------- 程序主循环-----------
while not done:                       # 当没有结束时,就循环
    for event in pygame.event.get():  # 迭代每个事件
        if event.type == pygame.QUIT: # 如果单击了关闭按钮
            done = True # 这个标志就会True了
 
    # 清屏为白色
    screen.fill(RED)
 
    # 获取鼠标指针坐标 ,玩家跟随鼠标指针坐标
    player.rect.center = pygame.mouse.get_pos()
     
    all_sprites_list.update()
     
    # 设定刷新率为60
    clock.tick(60)
 
    # 显示
    pygame.display.flip()
 
pygame.quit()


下载完整源代码与素材,请

成为会员后,登陆才能继续浏览!联系微信scratch8即可办理会员。
(会员专属:能浏览所有文章,下载所有带链接的Python资源。)

发表在 pygame, python | 标签为 , , , , , | 留下评论

pygame利用音乐结束事件循环播放多首音乐.py

以下是部分代码预览:

"""利用音乐结束事件循环播放多首音乐.py ,本程序在播放完一首音乐后,会自动触发音乐结束事件,从而播放下一首音乐,在游戏中不止播放一首背景音乐时非常需要这段代码"""
import pygame
 
# 定义颜色变量
black = (0, 0, 0)
white = (255, 255, 255)
green = (0, 255, 0)
red = (255, 0, 0)
 
pygame.init()
 
# 设置屏幕宽度和高度
size = (700, 500)
screen = pygame.display.set_mode(size)
 
pygame.display.set_caption("利用事件循环播放多首音乐")
 
# 此变量用来当单击窗口关闭按钮时退出while循环
done = False
 
# 控制每秒显示的帧数的对象
clock = pygame.time.Clock()

music_list = ['纯音乐.mp3','滴水.mp3','海底小纵队.mp3','欢快6搬陶俑.mp3']
music_amounts = len(music_list)
music_index = 0
# 播放音乐,设置音乐结束事件
pygame.mixer.music.load(music_list[music_index])
pygame.mixer.music.set_endevent(pygame.constants.USEREVENT) # 音乐结束事件
pygame.mixer.music.play()
 
# -------- 主循环 -----------
while not done:
     
    for event in pygame.event.get():  # 迭代每个事件
        if event.type == pygame.QUIT:  # 如果单击了关闭按钮
            done = True  # 此标题为True,进而while循环会退出
        elif event.type == pygame.constants.USEREVENT: 
            # 当音乐播放完毕后会触发此事件,这时可以播放列表中的下一首音乐。
            music_index +=1
            music_index = music_index % music_amounts
            pygame.mixer.music.load(music_list[music_index])
            pygame.mixer.music.play()
 
        # 这里可以处理其它事件
 
    # 这里可以处理游戏逻辑,从而更新游戏中角色的坐标
 
    # 背景为白色,然后可以在上面重画其它角色
    screen.fill(white)
 
    # 这里的代码可以是重画所有角色
    
    pygame.display.flip() # 刷新显示
 
    # 设置fps为60
    clock.tick(60)
 
# 安全退出到IDLE
pygame.quit()


下载完整源代码与素材,请

成为会员后,登陆才能继续浏览!联系微信scratch8即可办理会员。
(会员专属:能浏览所有文章,下载所有带链接的Python资源。)

发表在 pygame, python | 标签为 , , , , , , | 留下评论

pygame雷达扫描动画.py

以下是部分代码预览:

"""pygame雷达扫描动画.py 
"""
# 导入pygame库
import pygame
import math
 
# 初始化pygame引擎
pygame.init()
  
# 设置屏幕宽高及新建屏幕对象
size = [400, 400]
screen = pygame.display.set_mode(size)
pygame.display.set_caption("雷达扫描动画")
 
my_clock = pygame.time.Clock() # 新建时钟对象
 
# 新建逻辑变量
done = False

# 起始角度
angle = 0

while not done:
    for event in pygame.event.get(): # 遍历所有事件
        if event.type == pygame.QUIT:
            done = True
 
    # 填充背景为白色
    screen.fill(WHITE) 

 
# 退出pygame.
pygame.quit()


如需要查看完整代码,请

成为会员后,登陆才能继续浏览!联系微信scratch8即可办理会员。
(会员专属:能浏览所有文章,下载所有带链接的Python资源。)

发表在 pygame, python | 标签为 , , , , | 留下评论

pygame基本的雪花动画.py

"""pygame基本的雪花动画.py, 本程序演示一些白点从上到下移动,有点像雪花。"""
  
import pygame       # 导入pygame库
import random       # 导入随机库
 
pygame.init()      # 初始化pygame引擎(读音为pai gei m)
 
BLACK = [0, 0, 0]
WHITE = [255, 255, 255]
 
# 设置屏幕宽高
SIZE = [400, 400]
 
screen = pygame.display.set_mode(SIZE)
pygame.display.set_caption("pygame基本的雪花动画")
 
 
# 结束while循环的逻辑变量
running = True
while running:
 
    for event in pygame.event.get():   # 迭代每个事件
        if event.type == pygame.QUIT:  # 如果按了关闭按钮
            running = False            # 此变量为False
 
    # 填充背景色为黑色
    screen.fill(BLACK)
    # 过了1/20秒后再次循环
    clock.tick(20)        # 每秒显示20幅画面
 
# 退出派gei
pygame.quit()


如需要查看完整代码,请

成为会员后,登陆才能继续浏览!联系微信scratch8即可办理会员。
(会员专属:能浏览所有文章,下载所有带链接的Python资源。)

发表在 pygame, python | 标签为 , , | 留下评论

pygame绘画模块例子集.py

"""pygame绘画模块例子集.py,本模块是在surface上画矩形,圆形,线等等的,screen是一个窗口中渲染的图层surface,一般位于最底层,以下的图形都是画在这个surface上面

"""
 
# 导入派gei模块
import pygame
 
# 初始化派gei引擎
pygame.init()
 
# 定义RGB格式颜色
black = (0, 0, 0)
white = (255, 255, 255)
blue = (0, 0, 255)
green = (0, 255, 0)
red = (255, 0, 0)
 
pi = 3.141592653
 
# 设置屏幕宽度和高度,新建屏幕对象
size = [400, 300]
screen = pygame.display.set_mode(size)
 
pygame.display.set_caption("pygame绘画模块例子集")
 
# 控制while循环结束的变量
done = False
clock = pygame.time.Clock()
 
while not done:
 
    for event in pygame.event.get():
        if event.type == pygame.QUIT:# 单击关闭按钮此事件发生
            done = True
 
    # 设置背景颜色为白色 
    screen.fill(white)
 
    # 在screen上画根绿色的线条,坐标从 (0,0) 到 (50,30),宽度为 5 个像素
    pygame.draw.line(screen, green, [0, 0], [50, 30], 5)
 
    # 在screenh画5像素宽的黑色折线,坐标点如下所示:
    pygame.draw.lines(screen, black, False, [[0, 80], [50, 90], [200, 80], [220, 30]], 5)
 
    # 下面是画抗据齿线条
    pygame.draw.aaline(screen, green, [0, 50], [50, 80], True)
 
    # 画空心的黑色矩形
    pygame.draw.rect(screen, black, [75, 10, 50, 20], 2)
 
    # 画实心的黑色矩形
    pygame.draw.rect(screen, black, [150, 10, 50, 20])
 
    # 画空心椭圆,矩形是它的外接框
    pygame.draw.ellipse(screen, red, [225, 10, 50, 20], 2)
 
    # 画实心椭圆,矩形是它的绑定盒
    pygame.draw.ellipse(screen, red, [300, 10, 50, 20])
 
    # 画多边形,空心,黑边
    pygame.draw.polygon(screen, black, [[100, 100], [0, 200], [200, 200]], 5)
 
    # 画弧线条,使用的角度单位为弧度   
    pygame.draw.arc(screen, black, [210, 75, 150, 125],  0, pi / 2, 2)      # 0度到90度
    pygame.draw.arc(screen, green, [210, 75, 150, 125],  pi / 2, pi, 2)     # 90度到180度
    pygame.draw.arc(screen, blue,  [210, 75, 150, 125],  pi, 3 * pi / 2, 2) # 180度到270度
    pygame.draw.arc(screen, red,   [210, 75, 150, 125], 3 * pi / 2, 2 * pi, 2)# 270度到360度
 
    # 画半径为40的实心蓝色圆形
    pygame.draw.circle(screen, blue, [60, 250], 40)
 
    # 画完后,显示出来
    pygame.display.flip()
 
    # 设定刷新率为60
    clock.tick(60)
 
# 退出派game
pygame.quit()


发表在 pygame, python | 标签为 , | 留下评论

pygame画雪人_函数与图形示例.py

"""pygame画雪人_函数与图形示例.py
"""
 
# 导入pygame模块
import pygame
  
def draw_snowman(screen, x, y):
    """ --- 定义函数在x,y坐标画三个椭圆形.
    """
    pygame.draw.ellipse(screen, WHITE, [35 + x, 0 + y, 25, 25])
    pygame.draw.ellipse(screen, WHITE, [23 + x, 20 + y, 50, 50])
    pygame.draw.ellipse(screen, WHITE, [0 + x, 65 + y, 100, 100])
 
# 初始化pygame引擎
pygame.init()
 
# 定义全局颜色常量
BLACK = [0, 0, 0]
WHITE = [255, 255, 255]
 
# 设置屏幕大小与创建屏幕对象
size = [400, 500]
screen = pygame.display.set_mode(size)
pygame.display.set_caption("画雪人_函数与图形示例.py")
 
# 用来结束while循环的逻辑变量.
done = False
clock = pygame.time.Clock() # 设置fps的clock对象
 
while not done:
 
    for event in pygame.event.get():
        if event.type == pygame.QUIT:
            done = True
 
    # 画背景为黑色
    screen.fill(BLACK)
 
    # 在(10,10)坐标画一个雪人
    draw_snowman(screen, 10, 10)   
    draw_snowman(screen, 300, 10)   
    draw_snowman(screen, 10, 300)
 
    # 更新显示
    pygame.display.flip()
 
    # 设置fps为60
    clock.tick(60)
 
 
# 友好的退出到IDLE
pygame.quit()


发表在 pygame, python | 标签为 , , | 留下评论

pygame翻转及以中心点旋转的文字.py

"""翻转及以中心点旋转的文字.py,这是一个pygame的文本练习,首先新建字体对象,然后具体地渲染成图形,最后合成到screen上。"""
 
# 导入一个叫pygame的模块
import pygame
 
# 初始化pygame模块
pygame.init()
 
# 定义颜色常量
BLACK = (0, 0, 0)
WHITE = (255, 255, 255)
BLUE = (0, 0, 255)
GREEN = (0, 255, 0)
RED = (255, 0, 0)
 
PI = 3.141592653
 
# 设置屏幕的宽度和高度,然后创建屏幕
size = (400, 500)
screen = pygame.display.set_mode(size)
 
pygame.display.set_caption("翻转及以中心点旋转的文字") # 设置窗口标题
 
# 循环直到这个变量的值为True
done = False
clock = pygame.time.Clock()
 
text_rotate_degrees1 = 0 # 旋转角度
text_rotate_degrees2 = 0 # 旋转角度
李兴球center = [180, 350]       # 旋转中心

# 生成字体对象,大小, bold, italics
font = pygame.font.SysFont('Calibri', 25, True, False)
 

# 循环直到done的值为True
while not done:
 
    for event in pygame.event.get():  # 遍历每个事件
        if event.type == pygame.QUIT: # 窗口关闭事件发生
            done = True  # 把此标志设为True
            
    # 填充screen颜色为白色
    screen.fill(WHITE)
 
    # 画两个线条
    pygame.draw.line(screen, BLACK, [100,50], [200, 50])
    pygame.draw.line(screen, BLACK, [100,50], [100, 150])
 
    # 撂一边文字 
    text = font.render("Sideways text", True, BLACK)
    text = pygame.transform.rotate(text, 90)
    screen.blit(text, [0, 0])
 
    # 旋转180度文字
    text = font.render("Upside down text", True, BLACK)
    text = pygame.transform.rotate(text, 180)
    screen.blit(text, [30, 0])
 
    # 翻转的文字
    text = font.render("Flipped text", True, BLACK)
    text = pygame.transform.flip(text, False, True) # 左右翻转,上下翻转
    screen.blit(text, [30, 20])
 
    # 旋转动画,固定左上角
    text = font.render("Rotating text", True, BLACK)
    text = pygame.transform.rotate(text, text_rotate_degrees1)
    text_rotate_degrees1 += 1
    screen.blit(text, [100, 50])

    # 自定义旋转中心
    text = font.render("My name is lixingqiu", True, RED) # 返回图层
    text = pygame.transform.rotate(text, text_rotate_degrees1)
    width,height = text.get_width(),text.get_height()     # 得到新的宽高
    top,left = 李兴球center[0] - width//2,李兴球center[1] -height//2  # 计算左上角坐标
    text_rotate_degrees2 += 1
    screen.blit(text, [top, left])                        # 渲染图层    
 
    # 所有的都画好后,显示出来
    pygame.display.flip()
 
    # fps为60
    clock.tick(60)
 
# 退出pygame
pygame.quit()


发表在 pygame, python | 标签为 , , , , , , | 留下评论

pygame单击翻转颜色的格子阵列.py

pygame click grid flip color单击翻转格子颜色

pygame click grid flip color单击翻转格子颜色

以下是部分代码预览:

"""单击翻转颜色的格子阵列.py"""
import pygame
 
# 定义颜色常量
BLACK = (0, 0, 0)
WHITE = (255, 255, 255)
CYAN = (0, 255, 255)
RED = (255, 0, 0)
 
# 定义每个格子的宽度和高度
WIDTH = 20
HEIGHT = 20
 
# 定义每个格子的间距
MARGIN = 5
 
# 创建一个二维列表,它们是格子的抽象
grid = []
for row in range(10):     
    grid.append([])          # 一行一行添加
    for column in range(10):
        grid[row].append(0)  # 加一个单元
 
# 把第二行第6列的值设为1
grid[1][5] = 1
 
pass
pygame.quit()


如需要查看完整代码,请

成为会员后,登陆才能继续浏览!联系微信scratch8即可办理会员。
(会员专属:能浏览所有文章,下载所有带链接的Python资源。)

发表在 pygame, python | 标签为 , , | 留下评论

pygame最简单的弹球类动画演示

以下是部分代码预览:

""" pygame最简单的弹球类动画演示.py
"""
 
import pygame
import random
 
# 定义颜色常量
BLACK = (0, 0, 0)
CYAN = (0, 255, 255)

# 定义屏幕常量
SCREEN_WIDTH = 700
SCREEN_HEIGHT = 500
BALL_SIZE = 25 
 
class Ball:
    """    非常简单的球类    """
    pass
 
def make_ball():
    """    生成一个弹球    """
    ball = Ball()
    pass
 
def main():
 
    pygame.init()
 
    # 设置屏幕的宽度和高度
    size = [SCREEN_WIDTH, SCREEN_HEIGHT]
    screen = pygame.display.set_mode(size)
 
    pygame.display.set_caption("pygame最简单的弹球类动画演示")
 
    #  此变量用来结束while循环的
    done = False
 
    # 此变量用来设置帧率的
    clock = pygame.time.Clock()
 
    ball_list = []    # 弹球列表用来装弹球的
 
    ball = make_ball()# 生成一个弹球
    ball_list.append(ball) # 把它添加到列表
 
    # -------- 动画主循环 -----------
    pass    

    # 安全退出pygame
    pygame.quit()
 
if __name__ == "__main__":
    main()


如需要查看完整代码,请

成为会员后,登陆才能继续浏览!联系微信scratch8即可办理会员。
(会员专属:能浏览所有文章,下载所有带链接的Python资源。)

发表在 pygame, python | 标签为 , , , , | 留下评论

pygame单击彩色弹球练习.py

以下是部分代码预览:

"""pygame单击彩色弹球练习_事件USEREVENT,组group,sprite角色类练习程序"""

__author__ = "李兴球"
__date__ = "2018年8月"
__company__  = "风火轮编程"

import pygame
from pygame.locals import *
from random import randint,choice
 
class Ball(pygame.sprite.Sprite):
    def __init__(self,radius,x,y,screen,color):
        pygame.sprite.Sprite.__init__(self)      # 初始化父类
        self.radius  = radius                    # 弹球半径
        self.screen_width = screen.get_width()   # 屏幕宽高
        self.screen_height = screen.get_height() # 屏幕高度
        pass
        pygame.draw.circle(self.image,color,(radius,radius),radius) # 在self.image上画圆,颜色,位置,半径
        self.image.set_colorkey((0,0,0))         # 设置不渲染的颜色(透明色)
        self.xspeed = randint(-4,4)              # 初始x速度
        self.yspeed = randint(-4,4)              # 初始y速度

    def bounce(self):
        """碰到边缘就反弹,原理是x或y速度取负"""
        pass      
        
    def update(self):
        """更新坐标,move_ip是在原位移动rect"""
        pass

if __name__ == "__main__":    

    width,height = 800,600
    screen = pygame.display.set_mode((width,height))    # 新建屏幕对象分辨率为800x600
    pygame.display.set_caption("pygame事件USEREVENT,组group,sprite角色类练习参考答案")

    group = pygame.sprite.Group()                        # 新建组
    r = randint(0,255);g = randint(0,255);b = randint(0,255) # 生成rgb三元色
    ball1 = Ball(20,width//2,height//2,screen,(r,g,b))   # 先生成一个球球
    
    group.add(ball1)                                     # 把球球加到组中,以便统一更新坐标与重画.

    produceball = USEREVENT + 1                          # 定义生成球事件
    deleteball = USEREVENT + 2                           # 定义删除球事件
    pygame.time.set_timer(produceball,1000)              # 让生成球事件每隔一秒发生一次
    pygame.time.set_timer(deleteball,1400)               # 让删除球事件每隔一秒发生一次
    clock = pygame.time.Clock()                          # 生成时钟对象
    running = True                                       # 运行为真

    pass


下载完整源代码与素材,请

成为会员后,登陆才能继续浏览!联系微信scratch8即可办理会员。
(会员专属:能浏览所有文章,下载所有带链接的Python资源。)
发表在 pygame, python | 标签为 , , , , , | 留下评论

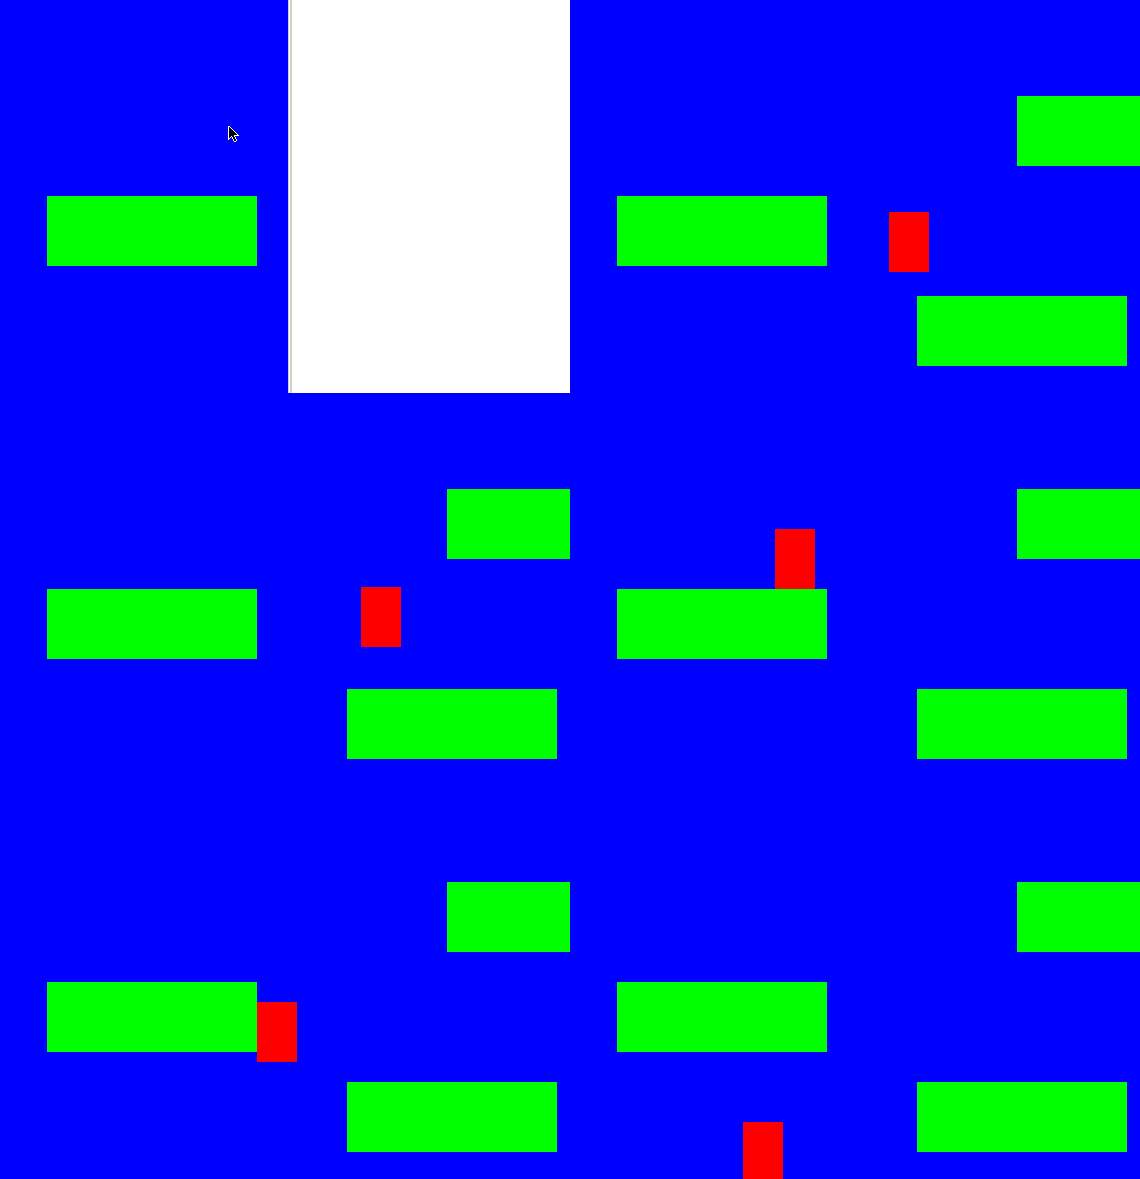
pygame遮罩mask测试练习程序.py

"""pygame遮罩mask测试练习程序.py

mask测试,mask就是膜或罩的意思,可以从一个图片创建一个mask,但要转换alpha的图像,否则就失去了意义.

我们可以想像给一个透明的图片覆一层膜,也就是mask,但是透明的地方这层膜是不会覆盖的。

mask.overlap的offset偏移量是设置两个mask之间的x和y距离。例:Amask是一个迷宫的mask,Bmask是一个小球的mask

那么Amask.overlap(Bmask,offset) 会返回交叉点的坐标,Amask.overlap_area方法会返回交叉了多少像素。

offset的值是(Bmask.x - Amask.x,Bmask.y - Amask.y)

当我们操作这个小球,小球在迷宫中移动时,就可以用Amask.overlap检测小球是否碰到了迷宫的“墙壁”。
根据返回的像素点,判断其所在面的颜色,还能进一步进行颜色判断。


"""
__author__ = "李兴球"
__date__ = "2018年6月"

import pygame
from pygame import *

pygame.init()
screen = pygame.display.set_mode((480,360))
pygame.display.set_caption("pygame的mask测试_作者:李兴球")

小红块 = pygame.image.load("小红块.png").convert_alpha()
小红块rect = 小红块.get_rect()

测试图 = pygame.image.load("测试图.png").convert_alpha()
测试图rect = 测试图.get_rect()

小红块mask = pygame.mask.from_surface(小红块)
测试图mask = pygame.mask.from_surface(测试图)

 
while True:
    for event in pygame.event.get():
        if event.type ==QUIT:pygame.quit()
        if event.type == KEYDOWN:
                            
            if event.key ==K_RIGHT:
                 小红块rect.x = 小红块rect.x + 10
            if event.key ==K_LEFT:
                 小红块rect.x = 小红块rect.x  -10                

            if event.key ==K_UP:
                小红块rect.top = 小红块rect.top - 10
                print(小红块rect)
            if event.key ==K_DOWN:                
                
                小红块rect.move_ip(0,10)
    screen.fill((0,0,0))

    offsetX = 小红块rect.x - 测试图rect.x
    offsetY = 小红块rect.y - 测试图rect.y
    point = 测试图mask.overlap(小红块mask,(offsetX,offsetY))
    
    someArea = 测试图mask.overlap_area(小红块mask,(offsetX,offsetY))
    # 如果碰到了,返回点,区域的像素数,测试图碰点像素值,小红块碰点像素植,这样还能做颜色碰撞检测。
    # 由于point是相对于是screen的坐标,所以这产生了坐标转换的问题,
    if point:
        px,py = point
        cx,cy = px - 测试图rect.x , py - 测试图rect.y
        pixel1 = 测试图.get_at((cx,cy))
   
        qx,qy = px - 小红块rect.x ,py - 小红块rect.y
        pixel2 = 小红块.get_at((qx,qy))
    
        print(point,someArea,pixel1,pixel2)
        
    mx,my = pygame.mouse.get_pos()
    screen.blit(测试图,(0,0))
    screen.blit(小红块,小红块rect)
    pygame.display.set_caption(str(mx) + "," + str(my))
    pygame.display.update()


发表在 pygame, python | 标签为 , | 留下评论

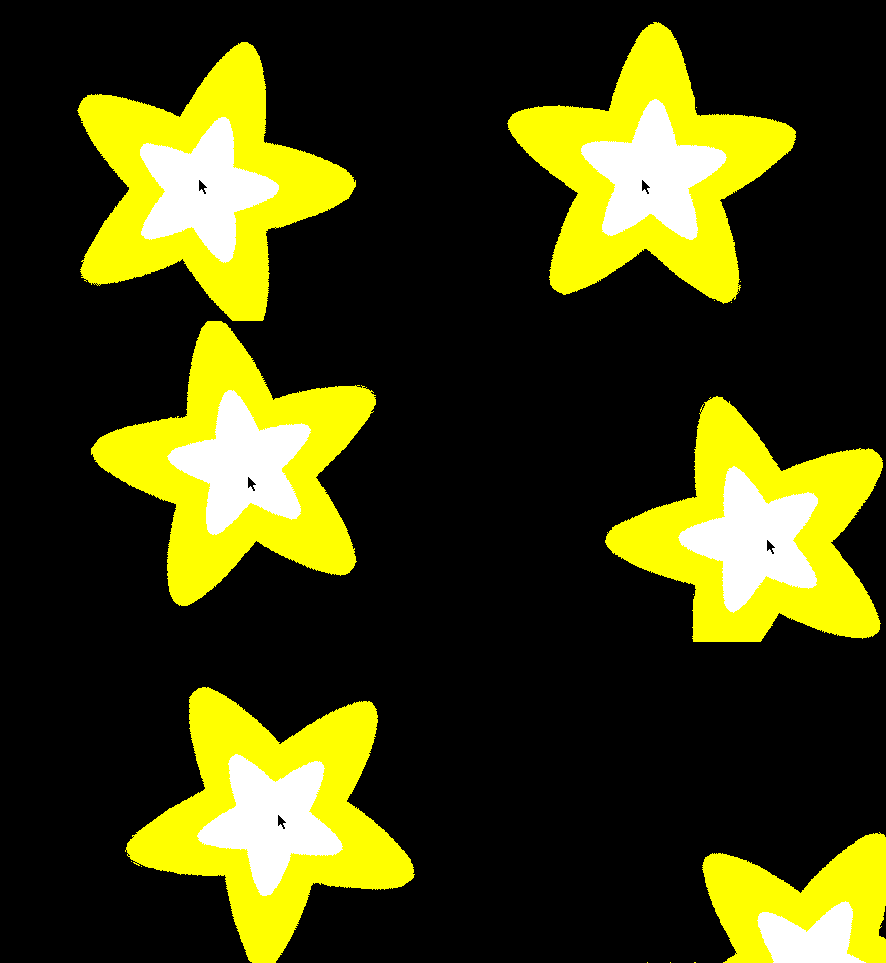
pygame旋转的星星.py_跟着鼠标旋转的星星

python rotate star followed mouse跟随鼠标旋转的星星

python rotate star followed mouse跟随鼠标旋转的星星

以下是部分代码预览:

"""pygame旋转的星星.py_跟着鼠标旋转的星星,Python旋转图像示例程序,本程序用pygame的变功能让星星旋转,
作者:李兴球@2018.通过案例,你能学到如何让图片旋转.
"""

__author__ = "李兴球"
__date__ = "2018年5月"
import pygame
from pygame.locals import *

pygame.init()
screenWidth ,screenHeight = 480,360
screen = pygame.display.set_mode((screenWidth,screenHeight))
pygame.display.set_caption("旋转的星星_pygame旋转图像实例_作者:李兴球")
star = "star1.png"

class Star():
    def __init__(self,image,position):
        self.rawimage = pygame.image.load(image)   # 原始图形
        self.image = self.rawimage                 # 旋转后的图形,初始值就是原始图啦
        self.rect = self.rawimage.get_rect()       # 获取原始图形的矩形.
        self.rect.center = position    
           
    def draw(self):
        screen.blit(self.image,self.rect)

星星 = Star(star,(screenWidth//2,screenHeight//2))

clock = pygame.time.Clock()
running = True
d = 0
pass


下载完整源代码与素材,请

成为会员后,登陆才能继续浏览!联系微信scratch8即可办理会员。
(会员专属:能浏览所有文章,下载所有带链接的Python资源。)
发表在 pygame, python | 标签为 , , , , | 留下评论

地球绕着太阳转月亮绕着地球转.py

python simplest solar system简易太阳地月

python simplest solar system简易太阳地月

以下是部分代码预览:

"""地球绕着太阳转月亮绕着地球转.py"""
__author__ = "李兴球"
__date__ = "2018年5月"

import pygame
from pygame.locals import *
import math

pygame.init()
screenWidth,screenHeight=480,360
screenCenterx = screenWidth//2 -1
screenCentery = screenHeight//2 -1
screen = pygame.display.set_mode((screenWidth,screenHeight))
pygame.display.set_caption("太阳系公转,地月系_地球绕着太阳转月亮绕着地球转_作者:李兴球")

class Ball():
    def __init__(self,r,color,speed):
        """球的半径,颜色和每次转的角速度"""
        self.image = pygame.Surface((2*r,2*r))
        pygame.draw.circle(self.image,color,(r,r),r)
        self.image.set_colorkey((0,0,0))
        self.rect = self.image.get_rect()
        self.speed= speed
        self.angle = 0
    pass
        
def main():
    earth = Ball(20,(0,0,255),1)
    moon = Ball(10,(255,255,200),5)
    clock = pygame.time.Clock()
    运行中 = True
    while 运行中:
        for event in pygame.event.get():
            if event.type==QUIT:运行中 =False
        screen.fill((0,0,0))        
        pass       
        moon.move(earth.rect.centerx,earth.rect.centery,50)
        moon.draw()
        pygame.display.flip()
        clock.tick(60)

    pygame.quit()

if __name__ == "__main__":
    main()


如需要查看完整代码,请

成为会员后,登陆才能继续浏览!联系微信scratch8即可办理会员。
(会员专属:能浏览所有文章,下载所有带链接的Python资源。)

发表在 pygame, python | 标签为 , , | 留下评论

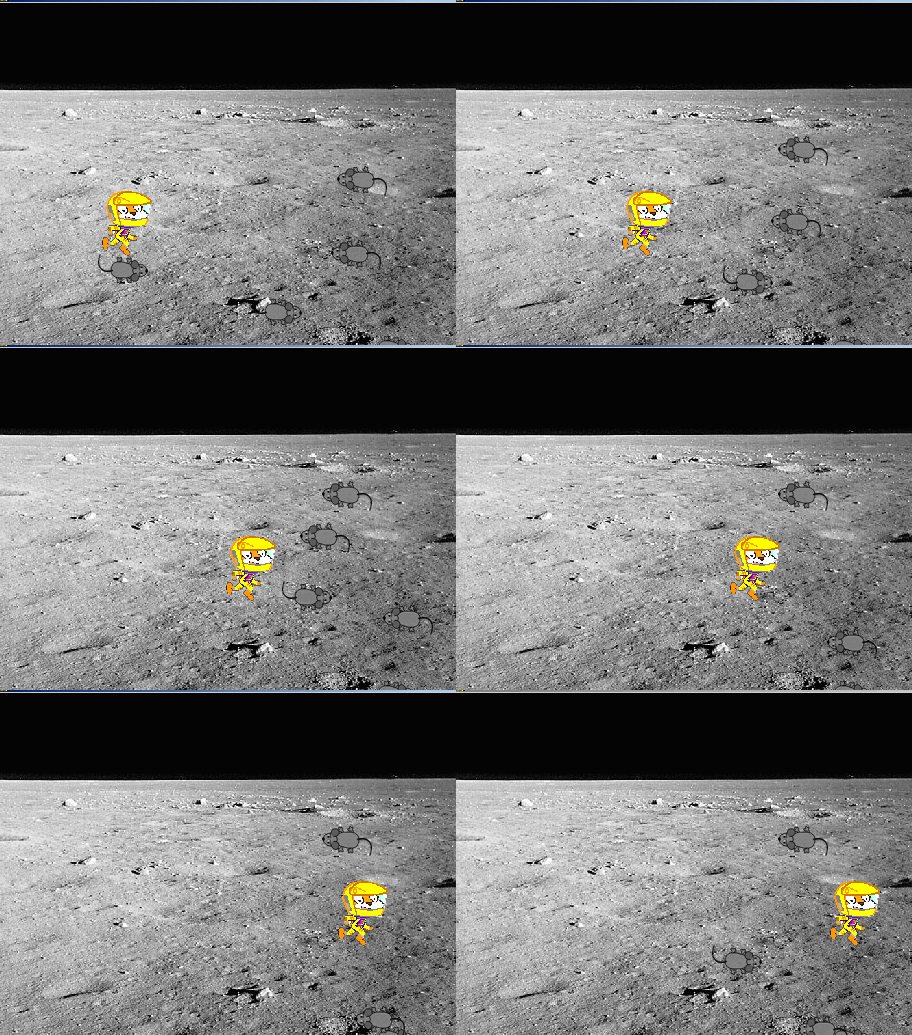
pygame制作的太空猫捉太空鼠小游戏

python cat catch mouse game太空猫捉太空鼠

python cat catch mouse game太空猫捉太空鼠


以下是部分代码预览:


"""pygame制作的太空猫捉太空鼠小游戏,用上下左右方向箭头号操作一只猫在太空中去碰撞老鼠的小游戏."""

__author__ = "李兴球"
__date__ = "2018年7月"

import pygame
from pygame.locals import *
from random import randint,choice
import time

class Rat():
     
    def __init__(self,leftImage,rightImage,screen):
        self.images = [leftImage,rightImage]     # 左图与右图
        self.imageIndex = randint(0,1)           # 图像索引
        self.image = self.images[self.imageIndex]# 确定使用哪个图形
        self.xspeed = self.imageIndex * 2 -1     # 0左图对应-1往左移动,1右图对应1往右移动
        self.yspeed = choice([-2,2])
        pass
        
    def move(self):
        if self.status==1:
            if time.time() - self.moveStartTime > self.moveDelay:
                self.rect.x = self.rect.x + self.xspeed
                self.rect.y = self.rect.y + self.yspeed
                pass
                     
    def collide(self,cat):
        return self.rect.colliderect(cat.rect)
 
    def draw(self):
        self.screen.blit(self.image,self.rect)

class Cat():
    def __init__(self,leftImage,rightImage,screen):
        self.images = [leftImage,rightImage]     # 左图与右图
        self.imageIndex = 1                      # 开始时面向右的方向
        self.image = self.images[self.imageIndex]# 确定使用哪个图形
        self.xspeed = 0                          # 0左图对应-1往左移动,1右图对应1往右移动
        self.yspeed = 0
        pass
        
    def move(self):
        self.rect.move_ip(self.xspeed,self.yspeed)
   
    def draw(self):
        self.image = self.images[self.imageIndex]
        self.screen.blit(self.image,self.rect)
        
def playmusic():    
    pygame.mixer.music.load("Cave.wav")
    pygame.mixer.music.play(-1,0)
        
def main():
    
    pygame.init()
    screen_width,screeh_height=480,360
    screen = pygame.display.set_mode((screen_width,screeh_height))
    pygame.display.set_caption("pygame太空猫捉太空鼠小游戏_作者:李兴球 www.scratch8.net")

    老鼠音 = pygame.mixer.Sound("老鼠音.wav")
    背景图 = pygame.image.load("moon.png")
    鼠左图像 = pygame.image.load("太空鼠_左.png")
    鼠右图像 = pygame.image.load("太空鼠_右.png")
    rats=[]
    for i in range(30):
       rats.append(Rat(鼠左图像,鼠右图像,screen))        
    
    猫左图像 = pygame.image.load("太空猫_左.png")
    猫右图像 = pygame.image.load("太空猫_右.png")
    
    cat = Cat(猫左图像,猫右图像,screen)
    
    clock = pygame.time.Clock()
    运行中 = True
    pass
    pygame.quit()


if __name__ == "__main__":
    pygame.mixer.init()
    playmusic()
    main()       


下载完整源代码与素材,请

成为会员后,登陆才能继续浏览!联系微信scratch8即可办理会员。
(会员专属:能浏览所有文章,下载所有带链接的Python资源。)
发表在 pygame, python | 标签为 , | 留下评论

电影帧还原播放.py

以下是部分代码预览:


"""电影帧还原播放.py,本程序只是不断地播放图像,图像来源于电影视频输出的帧图。"""

import pygame
from pygame.locals import *
import time
import os

gametitle="周星驰审死官电影节简介_作者:李兴球"
pygame.init()
screenWidth,screenHeight=468,360
screen = pygame.display.set_mode((screenWidth,screenHeight))
pygame.display.set_caption(gametitle)

class Video():
    pass

v1 = Video(os.getcwd() + os.sep + "周星驰出场")
clock = pygame.time.Clock()
running = True

while running:
    for event in pygame.event.get():
        if event.type==QUIT:running = False     
    v1.play()
    pygame.display.update()
    clock.tick(20)
    
pygame.quit()


下载完整源代码与素材,请

成为会员后,登陆才能继续浏览!联系微信scratch8即可办理会员。
(会员专属:能浏览所有文章,下载所有带链接的Python资源。)
发表在 pygame, python | 标签为 , | 留下评论

pygame如意金箍棒画笔练习程序.py

"""pygame如意金箍棒画笔练习程序.py"""

__author__ = "李兴球"
__date__ = "2018年7月"

import pygame
from pygame.locals import *

pygame.init()
screen = pygame.display.set_mode((480,360))
pygame.display.set_caption("pygame如意金箍棒,作者:李兴球")

for y in range(50):
    pygame.draw.circle(screen,(255,255,0),(230,50+y),10)
    pygame.display.update()    

for y in range(50,200):
    pygame.draw.circle(screen,(255,0,0),(230,50+y),10)
    pygame.display.update()

for y in range(200,250):
    pygame.draw.circle(screen,(255,255,0),(230,50+y),10)
    pygame.display.update()

while True:
    event=pygame.event.wait()
    print(event.type)
    if event.type in (QUIT,MOUSEBUTTONDOWN,KEYDOWN):
        break
pygame.quit()


发表在 pygame, python | 标签为 , | 留下评论

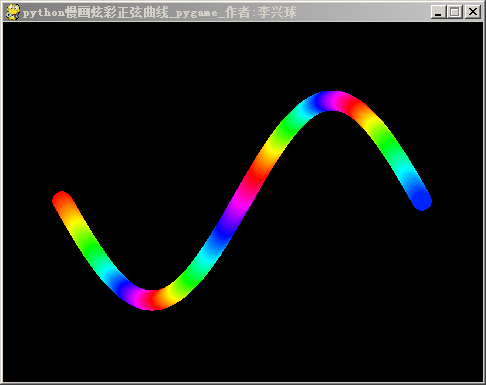
pygame慢画正弦曲线sin.py


慢慢地画一条彩色正弦曲线的动画程序,以下是部分代码预览:

"""pygame慢画正弦曲线sin.py,本程序演示一只看不见的画笔在慢慢地画酷炫的正弦曲线,用到了三角正弦函数与draw的画圆命令。"""

__author__ = "李兴球"
__date__ = "2018年7月"
__company__ = "风火轮编程"

import pygame
from pygame.locals import *
import math
import colorsys

class Pen():
    def __init__(self,radius,color,thickness,screen):
        self.color = color         # 笔颜色
        self.thickness = thickness # 笔迹宽度
        self.sw = screen.get_width()
        self.sh = screen.get_height() 

    def setxy(self,angle):
        self.x = int(self.sw//2 +   angle)
        self.y = int(self.sh//2 -  100*math.sin(math.radians(angle)))
         
    def coloradd(self):
        h,l,s, = colorsys.rgb_to_hls(self.color[0]/255,self.color[1]/255,self.color[2]/255)
        h =  h + 0.01
        
def main():

    pygame.init()
    screenWidth,screenHeight=480,360
    screen = pygame.display.set_mode((screenWidth,screenHeight))
    pygame.display.set_caption("pygame慢画炫彩正弦曲线_作者:李兴球")

    pen  = Pen(100,(255,0,0),2,screen)
    clock = pygame.time.Clock()    
    
for angle in range(-180,181):
        for event in pygame.event.get():
            pass
        pen.setxy(angle)
        pen.coloradd()
        pygame.display.update()      
        clock.tick(60)

    pygame.quit()
 

if __name__=="__main__":
    main()


如需要查看完整代码,请

成为会员后,登陆才能继续浏览!联系微信scratch8即可办理会员。
(会员专属:能浏览所有文章,下载所有带链接的Python资源。)

发表在 pygame, python | 标签为 , , , | 留下评论

pygame慢画炫彩圆圈.py


以下是部分代码预览:

"""pygame慢画炫彩圆圈.py,本程序演示一只看不见的画笔在慢慢地画酷炫的圆圈,用到了三角正弦和余弦函数与draw的画圆命令。"""

__author__ = "李兴球"
__date__ = "2018年7月"
__company__ = "风火轮少儿编程"
import pygame
from pygame.locals import *
import math
import colorsys

class Pen():
    def __init__(self,radius,color,thickness,screen):
        self.color = color         # 笔颜色
        self.thickness = thickness # 笔迹宽度
        self.angle = 0
        self.radius =radius
        
    def move(self):
        self.x = int(self.scr_width//2 + self.radius *  math.cos(math.radians(self.angle)))
        
    def coloradd(self):
        h,l,s, = colorsys.rgb_to_hls(self.color[0]/255,self.color[1]/255,self.color[2]/255)
        h =  h + 0.01
def main():
    
    pygame.init()
    screenWidth,screenHeight=480,360
    
    screen = pygame.display.set_mode((screenWidth,screenHeight))
    pygame.display.set_caption("python慢画炫彩圆圈_pygame_作者:李兴球")
    pen  = Pen(100,(255,0,0),2,screen)
    clock = pygame.time.Clock()
    运行中 = True
        
    pygame.quit()

if __name__=="__main__":
    main()


如需要查看完整代码,请

成为会员后,登陆才能继续浏览!联系微信scratch8即可办理会员。
(会员专属:能浏览所有文章,下载所有带链接的Python资源。)
发表在 pygame, python | 标签为 , , | 留下评论

可爱的Pico动画NPC人物演示.py


以下是部分代码预览:

"""可爱的Pico动画NPC人物演示.py,这个程序演示的是一些可爱的小精灵时不时地移动走来走去的动画"""

__author__ = "李兴球"
__date__ = "2018年7月"

import pygame
from pygame.locals import *
from random import choice,randint
import time

class Pico():
    counter = 0
    def __init__(self,picoRight,picoLeft,screen):
        self.rightList = picoRight        # 向右走的图形列表
        self.leftList = picoLeft          # 向左走的图形列表
        self.list = [self.leftList,self.rightList]
        self.heading = choice([0,1])      # 朝向,1表示为右,0为左
        self.index = 0                    # 走动的图形列表索引
        self.image = self.list[self.heading][self.index]
        self.rect = self.image.get_rect()
        self.rect.x = randint(0,430)
        self.rect.y = Pico.counter * 50 + randint(140,150)
        pass
        
    def move(self):
        pass
    def draw(self):
        self.screen.blit(self.image,self.rect)

def 播放背景音乐():
    pygame.mixer.init()
    pygame.mixer.music.load("OpusOne.wav")
    pygame.mixer.music.play(-1,0)
    
def main():

        
    pygame.init()
    screen = pygame.display.set_mode((480,360))
    pygame.display.set_caption("可爱的Pico演示NPC人物,作者:李兴球")

    picoRight=[]
    picoRight.append(pygame.image.load("0右.png"))
    picoRight.append(pygame.image.load("1右.png"))
    picoRight.append(pygame.image.load("2右.png"))
    picoRight.append(pygame.image.load("3右.png"))


    picoLeft=[]
    picoLeft.append(pygame.image.load("0左.png"))
    picoLeft.append(pygame.image.load("1左.png"))
    picoLeft.append(pygame.image.load("2左.png"))
    picoLeft.append(pygame.image.load("3左.png"))

    背景图 = pygame.image.load("stage.png")
    Picos = [Pico(picoRight,picoLeft,screen) for i in range(4)]
    for pico in Picos:
        pygame.time.set_timer(pico.暂停事件, randint(960,3600)) # 随机时间 触发

    clock = pygame.time.Clock()
    运行中= True
    while 运行中:
        for event in pygame.event.get():
            if event.type == QUIT:运行中 = False
            pass
          
        for pico in Picos:
            pico.move()
            pico.下一个造型()
            
        screen.blit(背景图,(0,0))
        for pico in Picos:
            pico.draw()
            
        pygame.display.update()
        clock.tick(30)
    pygame.quit()

if __name__ == "__main__":

    播放背景音乐()
    main()


下载完整源代码与素材,请

成为会员后,登陆才能继续浏览!联系微信scratch8即可办理会员。
(会员专属:能浏览所有文章,下载所有带链接的Python资源。)

发表在 pygame, python | 标签为 , , , | 留下评论

pygame矩形简易递归画

"""pygame矩形简易递归画"""

import pygame
 
# 定义颜色常量
BLACK = (0, 0, 0)
WHITE = (255, 255, 255) 
 
def recursive_draw(x, y, width, height):
    """ 递归地画矩形函数. """
    pygame.draw.rect(screen, BLACK,[x, y, width, height],1)
 
    # 矩形宽度大于14则再次重画
    if(width > 14):
        # x,y坐标往右下角移
        x += width * .1
        y += height * .1
        width *= .8
        height *= .8
        # 再次画,这是尾递归
        recursive_draw(x, y, width, height)
 
pygame.init()
 
# 设置屏幕宽度和高度并且创建screen对象做为最底层渲染面
size = [700, 500]
screen = pygame.display.set_mode(size)
 
pygame.display.set_caption("pygame矩形简易递归画")
 
done = False
 
# 用来设定帧率的时钟对象
clock = pygame.time.Clock()
 
# -------- 游戏主循环 -----------
while not done:
    for event in pygame.event.get():
        if event.type == pygame.QUIT:
            done = True
 
    # 设定屏幕背景
    screen.fill(WHITE)
 
    # 递归地画矩形
    recursive_draw(0, 0, 700, 500)

    # 显示
    pygame.display.flip()
 
    # 限制 60 的每秒显示帧数。frames per second
    clock.tick(60)
 
pygame.quit()


发表在 pygame, python | 标签为 , , | 留下评论

尖锋时刻pygame方块跳跃小游戏

"""尖锋时刻pygame方块跳跃小游戏,这是用pygame制作的一个小游戏.
   小方块只能跳,从屏幕最右边不定时出现一些尖尖的三角形...
"""
__author__ = "李兴球"
__date__ = "2018年7月"

import pygame
from pygame.locals import *
from random import randint

pygame.init()
screen = pygame.display.set_mode((480,360))
pygame.display.set_caption("尖锋时刻方块跳跃小游戏 作者:李兴球")

class Block():
    def __init__(self,x,y,width,height,color):
        self.image = pygame.Surface((width,height))
        self.image.fill(color)
        self.rect = self.image.get_rect()
        pass

    def move(self):
        self.rect.y = self.rect.y  + self.yspeed
        pass
        
    def jump(self):
        self.yspeed = -18

    def draw(self):
        screen.blit(self.image,self.rect)
        
class Triangle():
    def __init__(self,width,height,color):
        self.image = pygame.Surface((width,height))
        self.image.set_colorkey((0,0,0))
        pass

    def move(self):
        self.rect.x = self.rect.x + self.xspeed
        
    def draw(self):
        screen.blit(self.image,self.rect)
        
def 播放背景音乐():   
    pygame.mixer.music.load("纯音乐 - 快节奏欢快音乐.mp3")
    pygame.mixer.music.play(-1,0)
        
def main():
    
    背景= pygame.image.load("blue sky.png")
    封面= pygame.image.load("封面设计.png")
    哭脸= pygame.image.load("哭脸.png")
    
    小方块= Block(50,100,50,50,(0,55,255))
    三角形列表=[]
    clock = pygame.time.Clock()
    运行中 = True
    # 自定义事件

    #以下是加的封面代码
    运行中= True
    while 运行中:
        for event in pygame.event.get(): 
            if event.type ==QUIT:运行中 = False
            if event.type == KEYDOWN:
                if event.key == K_SPACE: 运行中 = False
        screen.blit(封面,(0,0))
        pygame.display.update() 
        clock.tick(60)

    运行中= True
    while 运行中:
        for event in pygame.event.get(): 
            if event.type ==QUIT:运行中 = False
                
        screen.blit(背景,(0,0))

        if 小方块.delete ==1:结束音效.play();运行中=False
        pygame.display.update()
        
        clock.tick(60)

    #结束界面
    运行中 = True
    while 运行中:
        for event in pygame.event.get(): 
            if event.type ==QUIT:运行中 = False
        screen.blit(背景,(0,0))
        screen.blit(哭脸,(170,100))
        screen.blit(字体图,(170,50))
        pygame.display.update()
        clock.tick(30)
    pygame.quit()

if __name__=="__main__":
    main()


下载完整源代码与素材,请

成为会员后,登陆才能继续浏览!联系微信scratch8即可办理会员。
(会员专属:能浏览所有文章,下载所有带链接的Python资源。)
发表在 pygame, python | 标签为 , | 留下评论

用Pygame制作游戏的基本框架.py

"""用Pygame制作游戏的基本框架.py,这是本人总结的用pygame制作动画与游戏的一个模版程序
"""
# 第一步,导入pygame模块等等
import pygame       

# 第二步,定义在程序要用到的若干类
class Test():
    pass

if __name__ == "__main__":

        
    # 第三步,应该定义一些要用到的常量,如颜色常量
    BLACK = (0, 0, 0)
    WHITE = (255, 255, 255)
    CYAN = (0, 255, 255)
    RED = (255, 0, 0)

    # 第四步,初始化pygame引擎
    pygame.init()     
     
    # 第五步,定义屏幕宽度和高度(定义成常量也可),和其它要用到的变量
    game_title = "用Pygame制作游戏的基本框架_作者:李兴球"
    size = (700, 500)

    # 第六步,新建屏幕对象,设定窗口标题
    screen = pygame.display.set_mode(size) # 新建屏幕对象
    pygame.display.set_caption(game_title)


    # 第七步,准备进入游戏主循环 
    
    # 当单击关闭按钮时,把此变量设为True,while循环就会退出
    running = True     
    # 此变量用来设置屏幕的刷新率,即fps每秒显示的帧数
    clock = pygame.time.Clock()
     
    # -------- 程序主要循环 -----------
    while running:
        # --- 下面的for循环用来迭代所发生的每件事
        for event in pygame.event.get():
            if event.type == pygame.QUIT: # 单击关闭按钮
                running = False
     
        # --- 这里编写的是游戏的运行逻辑,它的最终结果就增/减角色数量,改变了它们的坐标     
        # --- 接下来把屏幕变成白色或其它颜色也可以,当然在这个命令之前不要有draw的命令。     
        # --- 否则,又来一个screen.fill,那所画的当然没有意义了。你也可以渲染一幅背景图,
        # --- fill就不必要了,直接用screen.blit(background,(0,0))就行了

        screen.fill(WHITE)   # 重画屏幕对象
        # --- 重画其它对象的代码
        # --- 画完后用下面这个语句把合成的画面显示出来。
        pygame.display.flip()
     
        # --- 时间到了就继续下一次循环(限制每秒显示60帧画面)。
        clock.tick(60)
     
    # while循环安全退出后,用这句命令退出pygame.
    pygame.quit()


发表在 pygame, python | 标签为 , , | 留下评论

pygame简易画板练习程序


以下是部分代码预览:

"""pygame简易画板练习程序,这个画板只是在image上画圆形,鼠标移动太快的话会形成散列点。
解决方案是用线性插值插入点进去即可,读者可自行改进。"""

import pygame
from pygame.locals import *
    
def main():
    
    pygame.init()
    screenWidth,screenHeight=480,360
    screen = pygame.display.set_mode((screenWidth,screenHeight))
    pygame.display.set_caption("python简易画板_作者:李兴球")
    
    画板 = pygame.image.load("画板.png")     
    pen  = Pen((255,0,0),2)
    clock = pygame.time.Clock()
    运行中 = True
    
    while 运行中:
        for event in pygame.event.get():
            if event.type==QUIT:运行中=False
            if event.type == MOUSEBUTTONDOWN:
                pen.status = 1
            if event.type ==MOUSEBUTTONUP:
                pen.status =0       
       
    pygame.quit()

if __name__=="__main__":
    
    main()


如需要查看完整代码,请

成为会员后,登陆才能继续浏览!联系微信scratch8即可办理会员。
(会员专属:能浏览所有文章,下载所有带链接的Python资源。)

发表在 pygame, python | 标签为 , | 留下评论

pygame红橙黄绿青蓝紫画彩圆练习程序.py

"""pygame红橙黄绿青蓝紫.py,一个pygame画圆练习程序"""

__author__ = "李兴球"
__date__ = "2018年7月"

import pygame
from pygame.locals import *
screenWidth,screenHeight=840,120
pygame.init()
screen = pygame.display.set_mode((screenWidth,screenHeight))
pygame.display.set_caption("红橙黄绿青蓝紫")

pygame.draw.circle(screen,(255,0,0),(60,60),50)     # 红圆
 
pygame.draw.circle(screen,(255,165,0),(180,60),50)  # 橙圆

pygame.draw.circle(screen,(255,255,0),(300,60),50)  # 黄圆

pygame.draw.circle(screen,(0,255,0),(420,60),50)    # 绿圆

pygame.draw.circle(screen,(0,255,255),(540,60),50)  # 青圆

pygame.draw.circle(screen,(0,0,255),(660,60),50)     # 蓝圆

pygame.draw.circle(screen,(160,32,240),(780,60),50)  # 紫圆

clock = pygame.time.Clock()
运行中 = True
while 运行中:
    event = pygame.event.wait()
    if event.type==QUIT:运行中=False
    pygame.display.flip()
    clock.tick(10)
pygame.quit()


发表在 pygame, python | 标签为 , | 留下评论

pygame飞扬小鸟.py

以下是部分代码预览:

"""pygame飞扬小鸟.py,这是本人制作的一个版本,角色没有继承pygame.sprite.Sprite."""

__author__ = "李兴球"
__date__ = "2018年7月"

import pygame
from pygame.locals import *
from random import randint
import time

pygame.init()
screenWidth,screenHeight=480,360
screen = pygame.display.set_mode((screenWidth,screenHeight))
pygame.display.set_caption("飞扬小鸟_李兴球版")

class Bird():
    def __init__(self,costumeList):
        self.costumeId = 0
        self.costumeList = costumeList
        self.cosutmeAmount = len(costumeList)
        self.image = self.costumeList[self.costumeId]
        self.rect = self.image.get_rect()
        self.rect.x = 100
        self.rect.y = 100
        self.xspeed = 0
        self.yspeed = 3
        self.aspeed = 0.5           # 加速度
        self.moveStartTime = time.time()
        self.costumeStartTime  =time.time()
        self.delete =0               # 删除标志
    pass

class Pipe():
    def __init__(self,image,t):
        self.type = t                    # t为up或者down,用于区分上管道和下管道
        self.image = image
        self.rect = self.image.get_rect()
        self.rect.left = screenWidth+1
        self.sety()
        self.xspeed= -5
        self.yspeed = 0
        self.moveStartTime = time.time()
        self.delete = 0                 #待删除标志
    pass

         
def main():
    punch = pygame.mixer.Sound("punch.wav")
    过音= pygame.mixer.Sound("过.wav")
    
    上管道 = pygame.image.load("上管道.png")
    下管道 = pygame.image.load("下管道.png")
    
    背景= pygame.image.load("背景.png")
    cosList = []
    cosList.append(pygame.image.load("costume1.png"))
    cosList.append(pygame.image.load("costume2.png"))
    cosList.append(pygame.image.load("costume3.png"))
    cosList.append(pygame.image.load("costume4.png"))   
    

成为会员后,登陆才能继续浏览!联系微信scratch8即可办理会员。
(会员专属:能浏览所有文章,下载所有带链接的Python资源。)

发表在 pygame, python | 标签为 , , | 留下评论

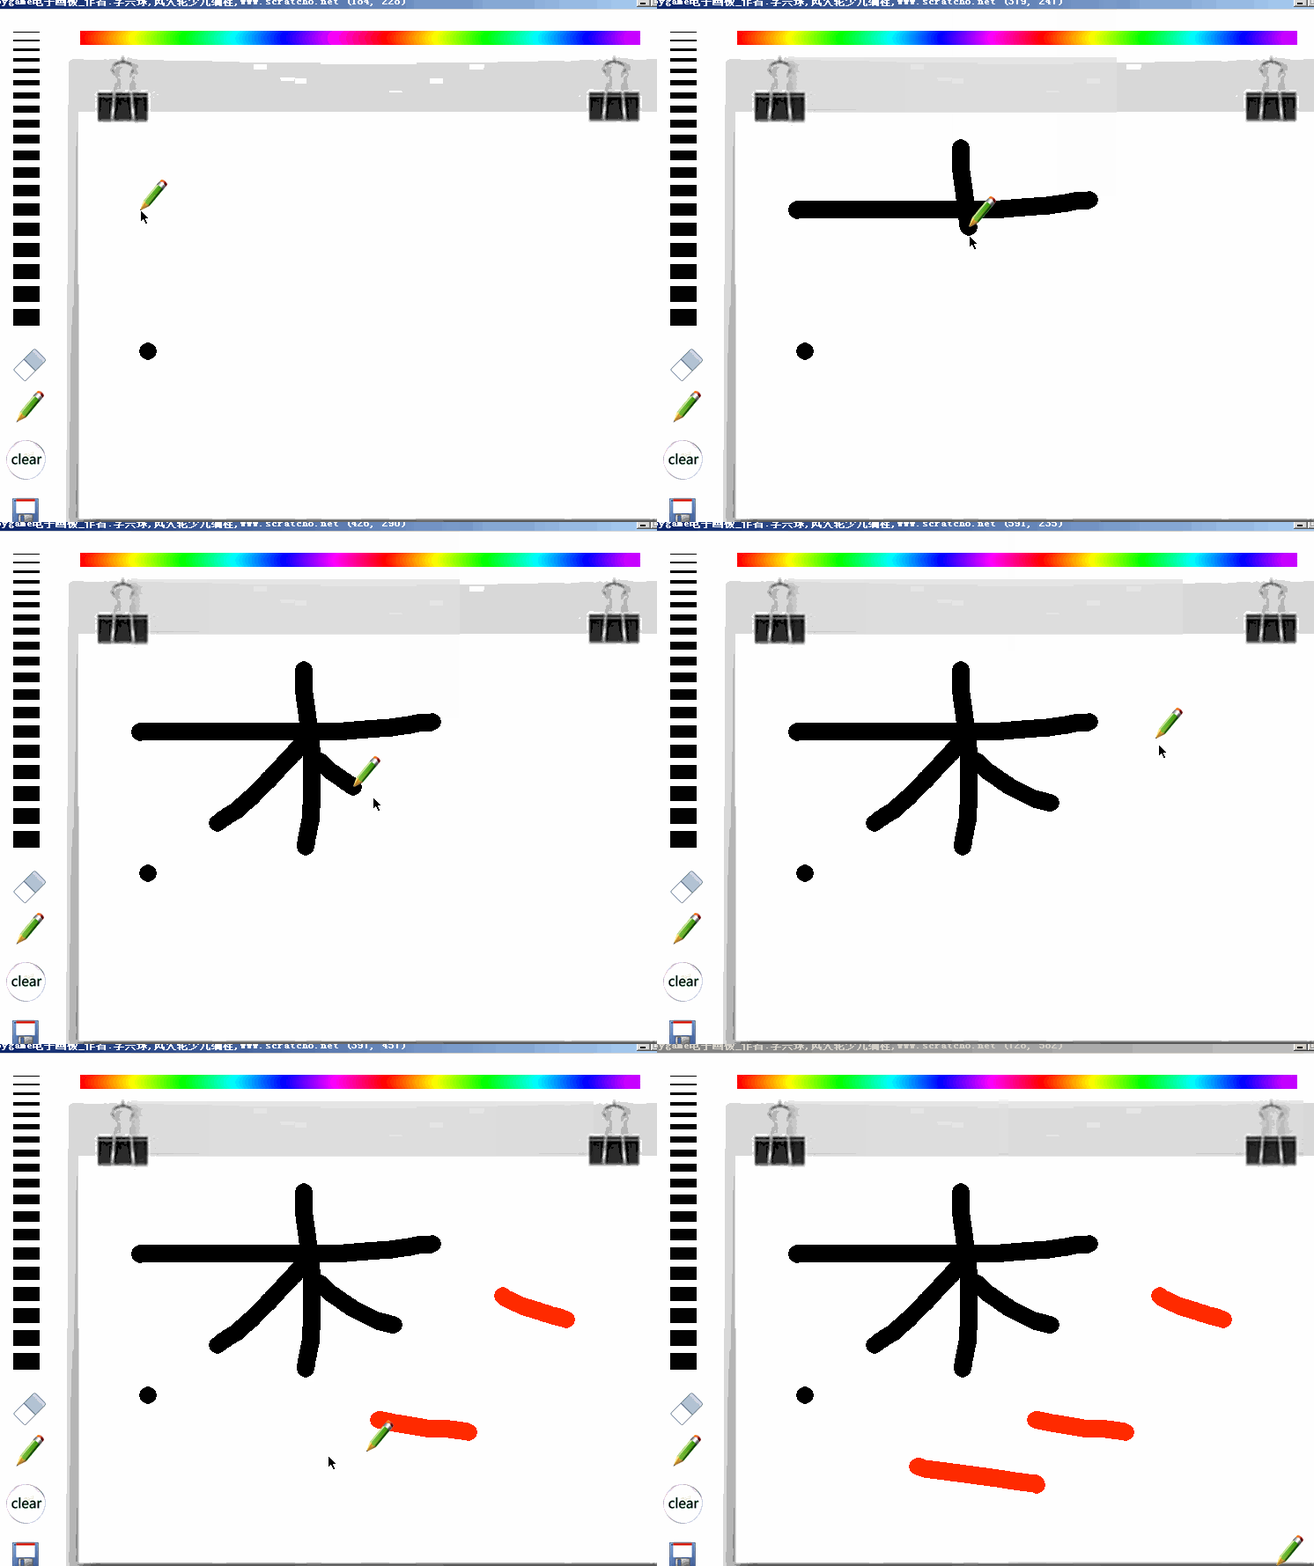
pygame电子画板.py


"""pygame电子画板,简单的可以用来画画的电子画板,带保存功能。采用了插值算法,画的时候不再会有断点。"""

__author__ = "李兴球"
__date__ = "2019年1月"

import os
import time
import pygame,math
from pygame.locals import *

def make_random_filename():
    s0 = "saved"
    if not os.path.exists(os.getcwd() + os.sep + s0):os.mkdir(s0)
    s1 = time.ctime().replace(":","").replace(" ","")[-1:10:-1]
    s2 = str(time.time()).split(".")[-1]
    s3 = ".png"
    return  s0 + os.sep + "".join([s1,s2,s3])
    
class TipBubble():
    def __init__(self,image,font_file,position,screen):
        """font_file是ttf字体文件,position是保存按钮的坐标,screen是最底渲染面"""
        self.image = pygame.image.load(image)     # 字的背景图
        self.font = pygame.font.Font(font_file,18)# 字体对象
        self.rect = self.image.get_rect()
        self.rect.topleft = position
        self.screen = screen                      # 可访问屏幕对象
        self.begin_time = 0
        self.draw_time = 5                        # 渲染时间
    pass     
        
def insert_point(a,b,step):
    """a:起点坐标二元组,b:终点坐标二元组,step:步长"""
    points = []
    x1,y1 = a       # 起点
    x2,y2 = b       # 终点
    dy = y2 - y1
    dx = x2 - x1
    pass

def draw_thickness(thickness_rect):
    """画笔触线条的函数,也就是那一横一横黑色的条,同时记录了它们的矩形对象"""
    left = thickness_rect.x
    top = thickness_rect.y
    thickness_image = pygame.Surface(thickness_rect.size)
    thickness_image.fill((255,255,255))
    pass
 
class Pen():
    def __init__(self,images,screen,board,mouse_pos=None):
        self.images = images         
        self.screen = screen
        self.board = board
        self.thickness = 10
        self.alt_pen(mouse_pos)
        
    def alt_pen(self,mouse_pos):
        """切换到笔模式"""
        self.shape = '笔'
        self.image = self.images[0]
        self.color = (0,0,0)
        self.rect = self.image.get_rect()        
        self.rect.bottomleft = mouse_pos
        
    def alt_erase(self,mouse_pos):
        """切换到橡皮模式"""
        self.shape = '橡'
        self.image = self.images[1]
        self.color = (255,255,255)
        self.rect = self.image.get_rect()
        self.rect.bottomleft = mouse_pos
        
    pass

if __name__ == "__main__":
    
    game_title = "pygame电子画板_作者:李兴球,风火轮少儿编程,www.scratch8.net"
    width,height = 800,600
    background =  "background.png"
    topleft = (120,140)              # 画板左上角坐标
    dsize =  640,430                 # 画板宽度和高度
    
    pass
    tipbubble = TipBubble("dialog.png","msyh.ttf",(90,450),screen)                     
    while running:
        for event in pygame.event.get():
            if event.type == QUIT:
                running = False
                break
            pass
                 
            if event.type == MOUSEBUTTONUP:
                start_draw = 0
                                
        screen.blit(background,(0,0))
        screen.blit(board.image,board.rect)        
        screen.blit(thickness_image,thickness_rect)       
        pen.draw()
        tipbubble.draw()        
        pygame.display.update()
        clock.tick(30)
    pygame.quit()


下载完整源代码与素材,请

成为会员后,登陆才能继续浏览!联系微信scratch8即可办理会员。
(会员专属:能浏览所有文章,下载所有带链接的Python资源。)

发表在 pygame, python | 标签为 | 留下评论

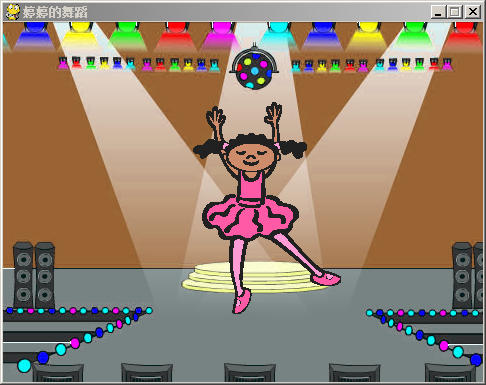
pygame婷婷的舞蹈_小女孩跳舞动画


以下是部分代码预览:

"""婷婷的舞蹈.py,伴随着舞台音响灯光,这是在演示一个小女孩在舞台上跳舞的小动画"""

__author__ = "李兴球"
__date__ = "2018年7月"

import pygame
from pygame.locals import *
import time
   
class Sprite():
    def __init__(self,images,x,y,间隔,screen):
        self.images = images
        self.造型总数 = len(images)
        self.index = 0
        self.image = self.images[self.index]  #初始造型
        self.造型切换间隔 = 间隔
        self.rect = self.image.get_rect()
        self.rect.x = x
        self.rect.y = y
        self.start = time.time()
        self.screen = screen
    
def main():
        
    pygame.init()
    screen = pygame.display.set_mode((480,360))
    pygame.display.set_caption("婷婷的舞蹈_小女孩跳舞pygame小动画_作者:李兴球")
    
    pass    
    bg = Sprite(背景列表,0,0,0.5,screen)
    girl = Sprite(girl_images,190,80,0.6,screen)
    clock = pygame.time.Clock()
    running = True
    while running:
        for event in pygame.event.get():
            if event.type==QUIT:running = False
            
        pass
        pygame.display.update()
        clock.tick(30)
    pygame.quit()

if __name__=="__main__":
    main()


下载完整源代码与素材,请

成为会员后,登陆才能继续浏览!联系微信scratch8即可办理会员。
(会员专属:能浏览所有文章,下载所有带链接的Python资源。)
发表在 pygame, python | 标签为 , , | 留下评论

pygame模块打彩色的圆点组成一个圆形


所有打的小彩点点最终会组成一个圆形的pygame小程序。
以下是部分代码预览:

"""
本程序使用python的pygame模块打彩色的圆点组成一个圆形。

"""

__author__ == "李兴球"
__date__ == "2018年7月"

import pygame
from pygame.locals import *
import math
import colorsys
from random import randint

pygame.init()
screenWidth,screenHeight=480,360
screenCenterx,screenCentery = screenWidth//2 -1 ,screenHeight//2 - 1
screen = pygame.display.set_mode((screenWidth,screenHeight))
pygame.display.set_caption("pygame打彩点实验之圆形_作者:李兴球")

class Pen():
    def __init__(self,radius,color,thickness):
        self.color = color         #笔颜色
        self.thickness = thickness #笔迹宽度        
        self.x = screenCenterx   
        self.y = screenCentery         
        self.radius =radius
    pass
         
  
def main(): 
    pen  = Pen(120,(255,0,0),2)
    clock = pygame.time.Clock()         

    运行中 = True 
    while 运行中:        
        for event in pygame.event.get():
            if event.type==QUIT:运行中=False
        pen.setxy()
        pen.coloradd()
        pygame.display.update()
        clock.tick(30)
    pygame.quit()
 

if __name__=="__main__":
    main()

如需要查看完整代码,请

成为会员后,登陆才能继续浏览!联系微信scratch8即可办理会员。
(会员专属:能浏览所有文章,下载所有带链接的Python资源。)

发表在 pygame, python | 标签为 | 留下评论

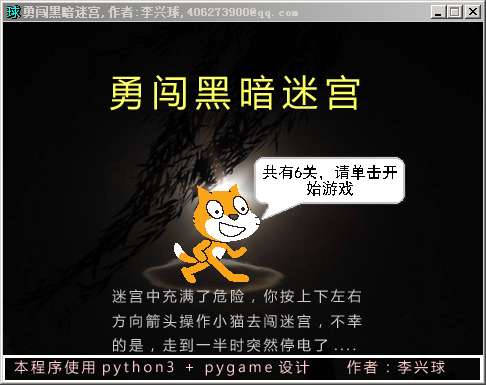
pygame勇闯黑暗迷宫.py


以下是部分代码预览:

"""勇闯黑暗迷宫.py,一个迷宫创意小游戏,本程序运行后操作一只小猫闯过迷宫,
不能碰到迷宫的墙壁,当走到一半路程时会停电,这时玩家只能靠记忆了。
本程序来源于李兴球曾经制作的scratch同名小游戏。
"""
__author__ = "李兴球"
__date__ = "2018年7月"

import pygame
from pygame.locals import *
import time

gametitle = "勇闯黑暗迷宫"
pygame.init()
screenWidth,screenHeight=480,360
screen = pygame.display.set_mode((screenWidth,screenHeight))
pygame.display.set_caption(gametitle + ",作者:李兴球,406273900@qq.com")
icon = "李兴球.ico"
pygame.display.set_icon(pygame.image.load(icon))

ballimage = pygame.image.load("cat.png").convert_alpha()
# 以下是列表导出加载迷宫的每一张图片
mazeimages = [ pygame.image.load("迷宫" + str(i) + ".gif").convert_alpha() for  i in range(1,7) ]

停电音 = pygame.mixer.Sound("停电灭灯.wav")
碰到音 = pygame.mixer.Sound("Meow.wav")
开始音 = pygame.mixer.Sound("勇闯.wav")
通关音 = pygame.mixer.Sound("通关.wav")
过关音 = pygame.mixer.Sound("过关.wav")
失败音 = pygame.mixer.Sound("闯关失败.wav")

class Ball(pygame.sprite.Sprite):
    def __init__(self,image,x,y):
        pygame.sprite.Sprite.__init__(self)
        self.image = image
        self.rect = self.image.get_rect()
        self.rect.x = x
        self.rect.y = y
        self.mask = pygame.mask.from_surface(self.image)
        self.xspeed = 0
        self.yspeed = 0
        pass
    
class Maze(pygame.sprite.Sprite):
    def __init__(self,image):
        pygame.sprite.Sprite.__init__(self)
        self.image = image
        self.rect = self.image.get_rect()
        self.mask = pygame.mask.from_surface(self.image)
        self.start_time = time.time()            #记录开始时间,给停电设计用
    def draw(self):
        screen.blit(self.image,self.rect)
        
def display_cover():
    """显示封面图像,单击鼠标退出循环"""
    cover = pygame.image.load("封面设计.png")
    运行  = True
    exit_flag = False
    while 运行 :
        for event in pygame.event.get():
            if event.type == MOUSEBUTTONDOWN :
               运行  = False
            if event.type==KEYDOWN:
                if event.key ==K_SPACE:运行 = False
            if event.type ==QUIT:exit_flag = True
        screen.blit(cover,(0,0))
        pygame.display.update()
        if exit_flag == True :break
    if exit_flag == True :
        pygame.quit()
        return False
    else:
        return True
    
                    
def main():
        
    闯关结果= None
    ball = Ball(ballimage,60,313)
    mazeindex = 0
    maze = Maze(mazeimages[mazeindex])
    pass
    
    while running:   
        for event in pygame.event.get():
            if event.type==QUIT:pygame.quit()  
       
        screen.fill((128,0,0))
        # 停电设计,不重画maze,那么就是黑乎乎的,相当于停电

        pass
        pygame.display.update()
        clock.tick(30)
    return 闯关结果

def play_background_music():
    """播放背景音乐"""
    pygame.mixer.music.load("OcularNebula_Geometry Dash - Stay Inside Me [mp3clan.com].wav")
    pygame.mixer.music.play(-1,0)
    
if __name__=="__main__":

    pygame.mixer.init()                 # 初始化混音器
    开始音.play()
    play_background_music()             # 播放背景音乐 
    ret = display_cover()               # 显示封面
    
    if ret == True :
        结果= main()                        # 游戏主程序

        pygame.display.set_caption(gametitle + ",游戏结束.作者:李兴球 406273900@qq.com ")
        
        if 结果 == "成功":
            print("通关了")
            end_image = pygame.image.load("通关图像.png")
            通关音.play()
        else:
            print("闯关失败")
            end_image = pygame.image.load("失败图像.png")
            失败音.play()
            
        # 以下是显示游戏结束画面        
        running = True
        while running:
            for event in pygame.event.get():
                if event.type in (MOUSEBUTTONDOWN,KEYDOWN):running = False    # 按鼠标键或任意键结束
                if event.type==QUIT:running=False                             # 按关闭按钮退出pygame
            screen.blit(end_image,(0,0))                                      # 渲染图像
            pygame.display.update()                                           # 更新显示
        pygame.quit()


下载完整源代码与素材,请

成为会员后,登陆才能继续浏览!联系微信scratch8即可办理会员。
(会员专属:能浏览所有文章,下载所有带链接的Python资源。)

发表在 pygame, python | 标签为 | 留下评论

利用pygame的混音器模块制作的非常简单的命令行播放器

"""一个利用pygame的混音器模块制作的非常简单的命令行播放器"""
import os
try:
    from pygame import mixer
    mixer.init()
except:
    print("无法导入混音器,请在命令提示符输入 pip install pygame --user 安装pygame")
    input()

def playmusic(filename,times=-1):
    """音乐文件名与播放次数,-1表示重复播放"""
    if os.path.exists(filename):
        try:
            mixer.music.load(filename)
            mixer.music.play(times,0)
        except:
            print("音乐文件格式无法识别哦。")
            print(filename)
            input()
    else:
        print("音乐文件没找到呢 :-) ")
        input()
def pausemusic():
    mixer.music.pause()
    
def unpausemusic():
    mixer.music.unpause()
    
def stopmusic():
    mixer.music.stop()

continueplay = unpausemusic   # 定义别名

if __name__ == "__main__":

    playmusic("背景音乐.WAV",1)


发表在 pygame, python | 标签为 , | 一条评论

pygame最简单关卡平台跳跃游戏核心原理.py

如需要查看完整代码,请扫码付款:

"""最简单关卡平台跳跃游戏核心原理.py

"""
 
import pygame
 
# 全局变量定义
BLACK = (0, 0, 0)
WHITE = (255, 255, 255)
GREEN = (0, 255, 0)
RED = (255, 0, 0)
BLUE = (0, 0, 255)
 
# 屏幕尺寸定义
SCREEN_WIDTH = 800
SCREEN_HEIGHT = 600
 
 
class Player(pygame.sprite.Sprite):
    """ 玩家控制的角色类 """
 
    def __init__(self):
        """ 初始化方法 """
 
        # 调用父类的初始化方法
        super().__init__()
        #玩家角色图形,是红色的,也可以加载外加图像
        self.image = pygame.Surface([40, 60])
        self.image.fill(RED)
 
        # 创建矩形对象,代表角色的坐标和宽高
        self.rect = self.image.get_rect()
 
        # 设置玩家的速度向量
        self.change_x = 0
        self.change_y = 0
 
        # 玩家所在的关卡对象,每个关卡有很多(玩家可能会碰到的方块)
        self.level = None
 
    def update(self):
        """ 更新玩家坐标. """
        pass
 
    def calc_grav(self):
        """加上受重力效果"""
        if self.change_y == 0:  # 如果停止移动了,则让垂直速度为1,下一帧则会往下移1
            self.change_y = 1
        else:
            self.change_y += .35
 
        # 检测是否到达地面
        if self.rect.y >= SCREEN_HEIGHT - self.rect.height and self.change_y >= 0:
            self.change_y = 0
            self.rect.y = SCREEN_HEIGHT - self.rect.height
 
    def jump(self):
        """ 按上移键跳跃起的代码"""
 
        pass


class Platform(pygame.sprite.Sprite):
    """ 平台类,就是玩家站在上面的一个个方块 """
 
    def __init__(self, width, height):
        """ 初始化方法"""
        super().__init__()
 
        self.image = pygame.Surface([width, height])
        self.image.fill(GREEN)
 
        self.rect = self.image.get_rect()

   
def main():
    """ 主要程序结构 """
    pygame.init()
 
    # 新建屏幕对象
    size = [SCREEN_WIDTH, SCREEN_HEIGHT]
    screen = pygame.display.set_mode(size)
 
    pygame.display.set_caption("平台跳跃游戏核心代码")
 
    # 创建角色
    player = Player()
 
    # 创建所有的关卡
    level_list = []
    level_list.append( Level_01(player) )
 
    # 设置当前的关卡
    current_level_no = 0
    current_level = level_list[current_level_no]
 
    active_sprite_list = pygame.sprite.Group()
    player.level = current_level
 
    player.rect.x = 340
    player.rect.y = SCREEN_HEIGHT - player.rect.height
    active_sprite_list.add(player)
    
    done = False
 
    # clock对象用来设置屏幕的fps,每秒显示的帧数
    clock = pygame.time.Clock()
 
    # --------进入主程序循环 -----------
    while not done:
        for event in pygame.event.get():
            if event.type == pygame.QUIT:
                done = True
 
            pass         
 
        clock.tick(60)
  
        pygame.display.flip()
 
    pygame.quit()
 
if __name__ == "__main__":
    main()


如需要查看完整代码,请

成为会员后,登陆才能继续浏览!联系微信scratch8即可办理会员。
(会员专属:能浏览所有文章,下载所有带链接的Python资源。)

发表在 pygame, python | 标签为 | 留下评论

pygame最简单关卡迷宫游戏核心原理

以下是部分代码预览:

""" 0_最简单关卡迷宫游戏核心原理.py """
 
import pygame 
 
# 颜色常量定义
BLACK = (0, 0, 0)
WHITE = (255, 255, 255)
CYAN = (0, 250, 255)
 
# 屏幕尺寸常量定义
SCREEN_WIDTH = 800
SCREEN_HEIGHT = 600
 
class Player(pygame.sprite.Sprite):
    """ 这是玩家控制的角色. """ 
   
    def __init__(self, x, y):
        # 调用父类的初始化方法
        super().__init__()
 
        # 生成图形对象,填充为白色
        self.image = pygame.Surface([15, 15])
        self.image.fill(WHITE)
 
        pass
 
    def changespeed(self, x, y):
        """ Change the speed of the player. """
        self.xspeed += x
        self.yspeed += y
 
    def update(self):
        """ 更新玩家坐标 """
        # 左右移动,(通过按左与右方向箭头控制xspeed从而控制横向坐标)
        self.rect.x += self.xspeed
 
        pass
 
 
class Wall(pygame.sprite.Sprite):
    """ 墙类 """
    def __init__(self, x, y, width, height):
        super().__init__()
 
        # 墙的imgage,填充为青色
        self.image = pygame.Surface([width, height])
        self.image.fill(CYAN)
 
        # 墙的矩形对象
        self.rect = self.image.get_rect()
        self.rect.y = y
        self.rect.x = x
        pass
 
# 初始化pygame
pygame.init()
 
# 创建800x600的画面
screen = pygame.display.set_mode([SCREEN_WIDTH, SCREEN_HEIGHT])
 
# 设置标题
pygame.display.set_caption('最简单关卡迷宫游戏核心原理')
 
# 所有的角色列表,包括墙和移动的小方块,为了一起update和draw
all_sprite_list = pygame.sprite.Group()
 
# 所有的墙列表
wall_list = pygame.sprite.Group()
 
wall = Wall(0, 0, 10, 600)     # 实例化一睹墙
wall_list.add(wall)            # 加入到墙列表
all_sprite_list.add(wall)      # 加入到所有列表
 
wall = Wall(10, 0, 790, 10)
wall_list.add(wall)
all_sprite_list.add(wall)
 
wall = Wall(10, 200, 100, 10)
wall_list.add(wall)
all_sprite_list.add(wall)

wall = Wall(200, 50, 10, 160)
wall_list.add(wall)
all_sprite_list.add(wall)

 
# 创建玩家对象,它就是一个小方块
player = Player(50, 50)
player.walls = wall_list

# 把它加到所有角色列表
all_sprite_list.add(player)

# 建立时钟对象,用来设定帧率的
clock = pygame.time.Clock()
 
done = False
 
while not done:
 
    for event in pygame.event.get():
        if event.type == pygame.QUIT:
            done = True
 
        pass
 
    all_sprite_list.update()              # 所有角色更新坐标
    screen.fill(BLACK)                    # 重画screen
    all_sprite_list.draw(screen)          # 重画所有角色
    pygame.display.flip()                 # 更新显示
    clock.tick(60)
 
pygame.quit()


如需要查看完整代码,请

成为会员后,登陆才能继续浏览!联系微信scratch8即可办理会员。
(会员专属:能浏览所有文章,下载所有带链接的Python资源。)

发表在 pygame, python | 标签为 | 留下评论

pygame仿3D星空_右出.py

以下是部分代码预览:

"""仿3D星空.py,本程序定义了一个Dot类,点越大,移动的速度越快,所以有种3D效果"""

__author__ = "李兴球"
__date__  = "2018年6月"
__company__ = "风火轮少儿编程"

import pygame
from pygame.locals import *
from random import randint

class Dot():
    def __init__(self,r,screen):
        self.radius = r   # 半径
        self.screen = screen        
        self.sw = screen.get_width()
        self.sh = screen.get_height()
        self.image = pygame.Surface((2*r,2*r))     # 建立表面,长宽为2*r,2*r
        self.image.set_colorkey((0,0,0))           # 设置表面的透明色
        pass    

def main():

    pygame.init()
    title = "3D星空_点类:作者:李兴球 www.scratch8.net"
    screen_width,screen_height = 480,360
    screen = pygame.display.set_mode((screen_width,screen_height)) 

    t = pygame.time.Clock()    
    dotList = []
    running = True
    while running:
        dotList.append(Dot(randint(1,4),screen))
        for event in pygame.event.get():
            if event.type == QUIT:running = False
        pygame.display.set_caption(title + str(pygame.mouse.get_pos()))
        pass       
        pygame.display.update()
        t.tick(30)                 # fps每秒显示30帧
    pygame.quit()
    

if __name__ =="__main__":
    main()
        

如需要查看完整代码,请

成为会员后,登陆才能继续浏览!联系微信scratch8即可办理会员。
(会员专属:能浏览所有文章,下载所有带链接的Python资源。)

发表在 pygame, python | 标签为 , , , | 留下评论

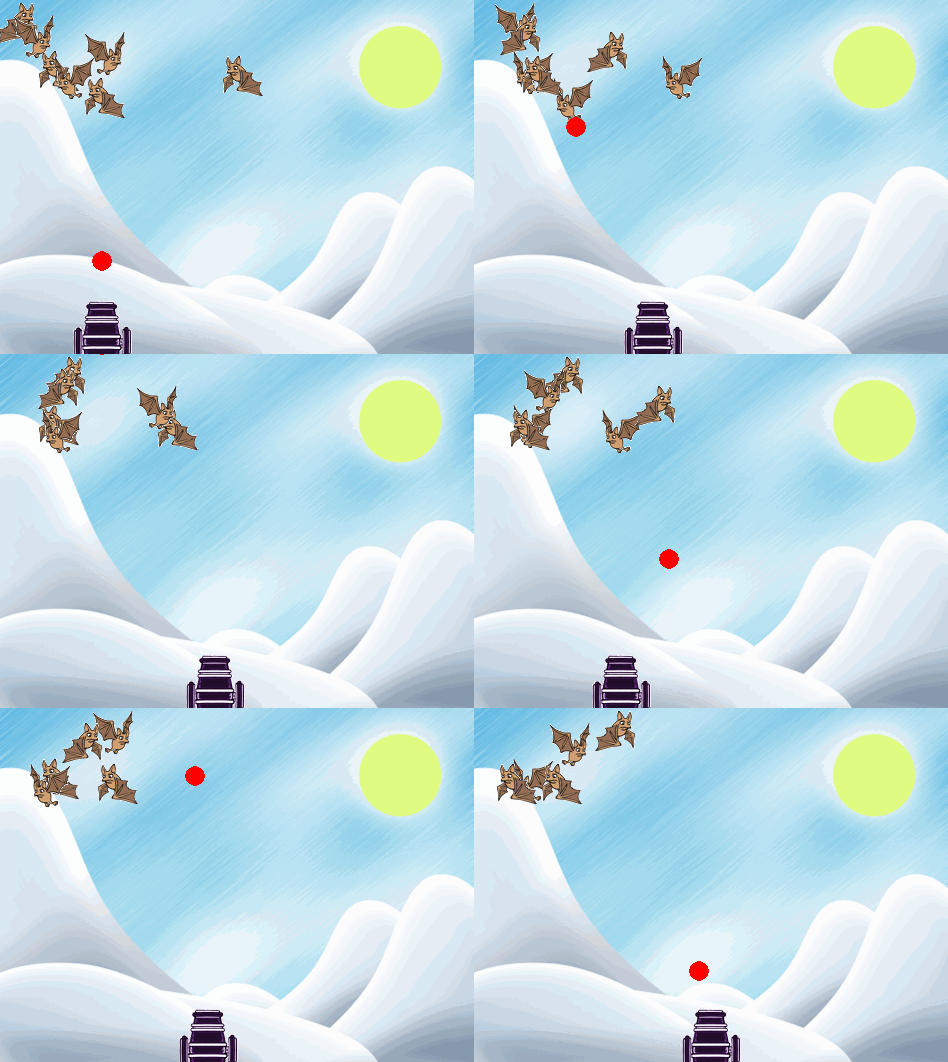
pygame雪地打蝙蝠射击游戏.py

pygame shoot bat in snow ground雪地打蝙蝠

pygame shoot bat in snow ground雪地打蝙蝠

精心配音的一个pygame射击小作品。以下是部分代码预览:

"""pygame雪地打蝙蝠射击游戏.py,在冰天雪地中,蝙蝠竟然不冬眠全部飞出来了,这是不合情理的,请按左右方向键头操作大炮朝天空打死这些不冬眠的奇怪蝙蝠."""

__author__ = "李兴球"
__date__ = "2018年6月"
__company__ = "风火轮编程"

import time
import pygame
from random import randint
from pygame.locals import *

class Sprite():
    def __init__(self,framesRight,framesLeft,x,y,w,h,sound = None):
        self.frames_right = framesRight
        self.frames_left = framesLeft
        self.costume_amounts = len(self.frames_left) # 造型数量
        self.costume_index=0                         # 造型索引号
        pass
        self.sound = sound                           # 声音
        
    def next_costume(self):
        """切换造型"""

    def move(self):
       """移动更新"""
        
   def draw(self):
        if self.xspeed>0:
            screen.blit(self.frames_right[self.costume_index],self.rect)
        else:            
            screen.blit(self.frames_left[self.costume_index],self.rect)

"""大炮类的建立"""
class Canon():
    pass     # 大炮类的代码最简单,如果看懂了全部代码,相信读者可以自行写出代码

"""炮弹类"""
class Bomb():
    pass
        
pygame.init()
screen_width,screen_height=480,360
screen = pygame.display.set_mode((screen_width,screen_height))
pygame.display.set_caption("雪地打蝙蝠--作者:李兴球_风火轮少儿编程")
背景 = pygame.image.load("slopes.png")
frame0 = pygame.image.load("bat1-a.png")
frame1 = pygame.image.load("bat1-b.png")
framesRight = [frame0,frame1]
framesLeft = [pygame.transform.flip(f,True,False) for f in framesRight]

font = pygame.font.Font("c:/windows/fonts/msyh.ttf",30)
textImage =font.render(" ",True,(0,25,255))
(tx,ty,tw,th) = textImage.get_rect()
textpos=(screen_width//2 - tw //2,screen_height//2 - th/2 -100)

pygame.mixer.init()
吱声  = pygame.mixer.Sound("Cricket.wav")
炮声  = pygame.mixer.Sound("榴弹炮.wav")
pygame.mixer.music.load("Melee- Menu.wav")
pygame.mixer.music.play(-1,0)

# 新建一些蝙蝠bat 
bat0 = Sprite(framesRight,framesLeft,100,20,40,40,吱声)
bat1 = Sprite(framesRight,framesLeft,130,40,40,40,吱声)
bat2 = Sprite(framesRight,framesLeft,40,80,40,40,吱声)
bat3 = Sprite(framesRight,framesLeft,160,120,40,40,吱声)
bat4 = Sprite(framesRight,framesLeft,320,160,40,40,吱声)
bats = [bat0,bat1,bat2,bat3,bat4 ]

大炮 = Canon("大炮.png",(200,300))        
炮弹发射中= False
发射间隔 = 100
running = True
while running:
    # 时不时地生成一只蝙蝠
    if randint(0,1000) ==0:
        randx = randint(0,screen_width)
        randy = randint(0,100)
        bats.append(Sprite(framesRight,framesLeft,randx,randy,40,40,吱声))
        
    for event in pygame.event.get():
        if event.type==QUIT:running = False        
 
    pass      
 
    screen.blit(背景,(0,0))
    [bat.draw() for bat in bats if bat.delete==0]
    大炮.draw()
    if '炮弹' in locals():  炮弹.draw()
    
    screen.blit(textImage,textpos)
    pygame.display.update()
    [bats.remove(bat) for bat in bats if bat.delete==1]

pygame.quit()
print("游戏结束,谢谢")


下载完整源代码与素材,请

成为会员后,登陆才能继续浏览!联系微信scratch8即可办理会员。
(会员专属:能浏览所有文章,下载所有带链接的Python资源。)

发表在 pygame, python | 标签为 , , | 留下评论

pygame小鸟捕手.py_飞扬小鸟变种趣味小游戏


配音效果不错的一个捕小鸟的小游戏,以下是部分代码预览:

"""小鸟捕手.py 这是飞扬小鸟变种小游戏,在这个游戏中不再是帮助小鸟飞了,而是按空格键操作管道去"捕"小鸟"""
__author__ = "李兴球"
__date__ = "2018年6月"

import pygame
from pygame.locals import *
from random import randint

class Button():
    def __init__(self,images,position):
        self.images = images              # 造型列表     
        self.index=0                      # 造型索引号
        self.image = images[self.index]
        self.rect = self.image.get_rect()
        self.rect.center = position
        self.cursor_in= False           # 鼠标指针是否在按钮矩形内
        
    def contain_point(self,point):
        """判断某点是否在矩形范围内"""
        pass
             
    def draw(self):        
        screen.blit(self.image,self.rect) 

class Bird():
    """定义鸟类"""    
        
class Pipe():
    def __init__(self,图像,x,y,yspeed):
        self.image = 图像
        self.rect = self.image.get_rect()
        self.rect.x = x
        self.rect.y = y
        self.yspeed = yspeed
        self.move_counts = 0          #按空格键时让它的值为10
    def move(self):
        if self.move_counts >0:
           self.rect.move_ip(0,self.yspeed)
           self.move_counts = self.move_counts  - 1
           if self.move_counts ==5:   # 移动次数为5就反向移动
               self.yspeed = - self.yspeed
        
screen_size = (480,360)
screen = pygame.display.set_mode(screen_size)
pygame.display.set_caption("小鸟捕手_作者:李兴球_萍乡风火轮少儿编程")
background = pygame.image.load("backdrop2.png")
开始按钮0 = pygame.image.load("开始按钮0.png")
开始按钮1 = pygame.image.load("开始按钮1.png")
按钮们 = [开始按钮0,开始按钮1]
 
鸟0 = pygame.image.load("鸟0.png")
鸟1 = pygame.image.load("鸟1.png")
鸟2 = pygame.image.load("鸟2.png")
上管道 = pygame.image.load("上管道.png")
下管道 = pygame.image.load("下管道.png")

开始按钮 = Button(按钮们, (screen_size[0]//2,screen_size[1]//2)) 
        
pygame.mixer.init()
pygame.mixer.music.load("Itty Bitty 8 Bit.wav")
pygame.mixer.music.play(-1,0)
捕声效 = pygame.mixer.Sound("footstep grass.wav")

pygame.font.init()
font = pygame.font.Font("c:/windows/fonts/msyh.ttf",30)
fontSurface = font.render("小鸟捕手",True,(255,0,0))
开始界面= True

pass

print("进入游戏中...")

bird_images = [鸟0,鸟1,鸟2]
pipe_up = Pipe(上管道,400,0,5)        
鸟 = Bird(bird_images,0,180)

clock = pygame.time.Clock()
游戏中 = True
while 游戏中:
    for event in pygame.event.get():
        if event.type ==QUIT:
            游戏中 = False
    pass
    pipe_up.move()    
 
    screen.blit(background,(0,0))
    screen.blit(fontSurface,(200,50))
    鸟.draw()
    pipe_up.draw()
    
    pygame.display.update()
    clock.tick(30)   
        
pygame.quit()       


下载完整源代码与素材,请

成为会员后,登陆才能继续浏览!联系微信scratch8即可办理会员。
(会员专属:能浏览所有文章,下载所有带链接的Python资源。)

发表在 pygame, python | 标签为 , | 留下评论

pygame跳跳猫类超级玛丽接金币多关卡解迷游戏

python like super mario game跳跳猫类超级玛丽游戏

python like super mario game跳跳猫类超级玛丽游戏

和超级玛丽有点像的接金币小游戏,以下是部分代码预览:

"""跳跳猫接金币多关卡解迷游戏,本程序给上一个版本加上Coin类。
   本程序设计有10多个关卡,有些金币需要动脑筋才能接收到。"""

__author__ = "李兴球"
__date__ = "2018/12/18"

import os
import pygame
from pygame.locals import *

class Coin():
    def __init__(self,images,position,player,level_number,sound):
        self.images = [pygame.image.load(image).convert_alpha() for image in images]
        self.images = [pygame.transform.scale(image,(int(20 * image.get_width()/image.get_height()),40)) for image in self.images]
        self.position = position        
        self.current_costume = self.images[0]             # 当前造型
        self.costume_amounts = len(self.images)           # 造型数量,注意每个图片的矩形对象不一样
        self.rects = [ costume.get_rect() for costume in self.images]  # 所有造型的矩形对象        
        self.rect = self.current_costume.get_rect()       # 第一个造型的矩形对象
        self.rect.center = position                       # 第一个造型的设定坐标
        self.player = player                              # 可访问玩家对象
        self.level_number = level_number                  # 每枚金币能记住自己的关卡号,不是它的关卡,则自我死亡
        self.screen = self.player.screen                  # 屏幕对象
        self.sound = sound                                # 金币声
        self.dead = False
        self.index = 0
        self.switch_costume_interval  = 2                 # 切换造型间隔
        self.switch_costume_counter  = 0                  # 切换造型计数器
    def next_costume(self):
        if not self.dead:
           self.switch_costume_counter = self.switch_costume_counter + 1
           if self.switch_costume_counter > self.switch_costume_interval:              
              self.index = self.index + 1
              self.index = self.index % self.costume_amounts
              self.switch_costume_counter = 0
              self.current_costume = self.images[self.index]
              self.rect = self.rects[self.index]                 # 矩形对象
              self.rect.center = self.position                  # 重新设定坐标
              
    def level_check(self,current_level_number):
        """关卡号不对,则自杀"""
        if self.level_number != current_level_number:
            self.dead = True
            
    def draw(self):
        if not self.dead:
            self.screen.blit(self.current_costume,self.rect)

    def collide_player_check(self):
        if self.rect.colliderect(self.player.rect) and not self.dead:
            self.player.coins += 1
            self.dead = True
            try:
               self.sound.play()
            except:
                pass        
        
class Detector(pygame.sprite.Sprite):
    def __init__(self,screen):
        pygame.sprite.Sprite.__init__(self)
        self.screen = screen
        self.image = pygame.Surface((20,20)).convert_alpha()
        self.image.fill((0,155,123))
        self.rect = self.image.get_rect()
        self.mask = pygame.mask.from_surface(self.image)
            
class Player(pygame.sprite.Sprite):
    """玩家类"""
    def __init__(self,image,screen,level,detectors):
        """image:图像
           screen:屏幕
           level:关卡对象
           detectors:左,右,上,下碰撞检测器
        """
        pygame.sprite.Sprite.__init__(self)
        self.lifes = 3                                        # 有三条生命
        self.image = pygame.image.load(image).convert_alpha() # 小猫的造型
        self.image.set_colorkey((255,255,255))          # 设置不渲染的颜色
        self.rect = self.image.get_rect()               # 设置矩形对象,表示坐标与大小的
        self.screen = screen                            # 设置这个属性以便能访问screen  
        self.levels = levels                            # 所有关卡
        self.levels_index = 0                           # 当前关卡索引号,可以在这里直接设定起始关卡
        self.current_level = levels[self.levels_index]  # 当前关卡        
        self.level_amounts = len(levels)                # 关卡总数量
        self.detectors = detectors                      # 4个侦测器,是个列表
        self.screen_width = screen.get_width()          # 以便能访问屏幕宽度
        self.screen_height = screen.get_height()        # 设这个属性以便能访问屏幕高度
        self.xspeed = 0                                 # 水平速度
        self.yspeed = 0                                 # 垂直速度
        self.aspeed = 0.5                               # 加速度
        self.rect.centerx = self.screen_width//2        # 小猫初始的x中间坐标
        self.rect.centery = self.screen_height//2 - 100 # 小猫初始的y中间坐标
        self.__is_in_the_air = True                     # 描述是否在空中的变量

        self.mask = pygame.mask.from_surface(self.image) # 新建掩膜mask,用于碰撞检测        
        self.cantoleft = True
        self.cantoright = True
        "新增加的金币数量属性"
        self.coins = 0
        
    def update(self):        
        """模拟重力的坐标更新"""
        self.rect.move_ip(self.xspeed,self.yspeed)        
        self.yspeed = self.yspeed + self.aspeed
        
    def dead_check(self):
        if self.rect.top > self.screen_height:
            self.lifes -= 1
            self.rect.centerx = 50
            self.rect.centery = self.screen_height//2 - 100
            self.xspeed = 0 
            self.yspeed = 0
        return self.lifes
        
    def bump_obstacle_check(self):        
        """碰地形(障碍物)检测,小猫自带4个侦测器,用它们进行检测即可。"""
        pass
            
    def jump(self):
         
        if not self.__is_in_the_air:
           self.__is_in_the_air = True           
           self.yspeed = -11.5           
           
    def move_left(self):
        if self.cantoleft:self.xspeed = -5
        
    def move_right(self):
        if self.cantoright:self.xspeed = 5
        
    def stop_move(self):
        self.xspeed = 0        
        
    def draw(self):
        self.screen.blit(self.image,self.rect)
        
    def level_check(self):        
        """过关检测,坐标判断"""        
        if self.rect.right > self.screen_width:              # 超过右边缘,下一关                        
            self.levels_index = self.levels_index + 1                     
            if self.levels_index >= self.level_amounts:      # 关卡结束
                return False,self.levels_index                
            else:
                self.next_level(self.levels[self.levels_index])
                return True,self.levels_index  
                
        if self.rect.left < 0 :                               # 超过左边缘,上一关                        
            self.levels_index = self.levels_index - 1                    
            if self.levels_index < 0:                         # 关卡结束
                return False,self.levels_index                  
            else:
                self.previous_level(self.levels[self.levels_index])
                return True,self.levels_index
        return True,self.levels_index
    
    def next_level(self,level):
        self.rect.left = 10
        self.current_level = level
        
    def previous_level(self,level):
        self.rect.right = self.screen_width
        self.current_level = level                
        
class Level(pygame.sprite.Sprite):
    def __init__(self,image,screen):
        self.image = pygame.image.load(image).convert_alpha()         
        self.rect = self.image.get_rect()
        self.mask = pygame.mask.from_surface(self.image)
        self.rect.top = screen.get_height() - self.image.get_height()

def detectors_follow_cat():
    """跟随小猫有左右上下四个小方块,用来对小猫的移动进行检测"""
    detectors[0].rect.left = cat.rect.left                  # 左侦测器x坐标
    detectors[0].rect.centery = cat.rect.centery
    detectors[1].rect.right = cat.rect.right                # 右侦测器x坐标
    detectors[1].rect.centery = cat.rect.centery
    detectors[2].rect.centerx = cat.rect.centerx            # 上侦测器x坐标
    detectors[2].rect.top = cat.rect.top
    detectors[3].rect.centerx = cat.rect.centerx            # 下侦测器x坐标
    detectors[3].rect.bottom = cat.rect.bottom          

if __name__ == "__main__":

    game_title = "跳跳猫接金币多关卡解迷游戏_作者:李兴球,风火轮编程出品 www.scratch8.net"
    backgrounds_png = ["BG" + str(i+1) + ".png" for i in range(14)]
    levels_png = ["Level" + str(i+1) + ".png" for i in range(14)]
    cat_image = "catx.png"
    width,height = 960,720

    pass


下载完整源代码与素材,请

成为会员后,登陆才能继续浏览!联系微信scratch8即可办理会员。
(会员专属:能浏览所有文章,下载所有带链接的Python资源。)

发表在 pygame, python | 标签为 | 留下评论

pygame天空之城渐隐渐显虚像效果演示程序fade in fade out

pygame fade in fade out封面显示淡入淡出

pygame fade in fade out封面显示淡入淡出

以下是部分代码预览:

"""pygame天空之城渐隐渐显虚像效果演示程序fade in fade out,本程序对一些图像进行一幅幅的淡入淡出显示。背景音乐为《天空之城》。
   需要pygame模块安装,如果没有安装,请在命令提示符里输入   pip install pygame --user
   程序中设计了一个Dream类,然后生成了一个“梦”,在“梦”中调用了相关函数实现梦的效果。
"""

__author__ = "李兴球"
__date__ = "2018/11/26"
__company__  = "风火轮少儿编程"

try:
    import pygame
except:
    print("没有安装pygame模块,请在安装Python3后,在命令提示符窗口输入: pip install pygame --user 进行安装。")
    
import os
import winsound
from pygame.locals import *

class Dream():
    def __init__(self,size):
         
        self.screen = pygame.display.set_mode(size)
        self.clock = pygame.time.Clock()
        self.end = False
        self.title("pygame淡入淡出_渐隐渐显效果_作者:李兴球_风火轮少儿编程")
        
    def title(self,title):
        pygame.display.set_caption(title)
        
    def playmusic(self,wavfile,loop = True):
  
        
    def quit(self):
        self.end = True
        try:
            pygame.quit()
        except:
            pass
    def fadeshow(self,imagefile,speed=1,time=1):
        """淡入淡出显示图像,参数说明:
           imagefile:图像文件
           speed:速度,1-255的值
           time:显示时间,秒为单位
           
        """
pass
        
if __name__ == "__main__":
    
    "如果不是做为模块导入,那么就执行以下语句"
    
    size = (480,360)                         # 尺寸元组
    梦 = Dream(size)                         # 新建梦对象,就像做了一个梦
    梦.playmusic("天空之城.wav")             # 播放背景音乐
    path = os.getcwd() + os.sep + "图片素材" # 要淡入淡出显示的图片文件夹
    for image in os.listdir(path):           # 遍历每一张图片
        imagefile= path + os.sep + image     # 组合历全路径文件名
        if 梦.end:  break                    # 按了关闭按钮,这个变量会为真,就退出for循环      
        梦.fadeshow(imagefile,speed=1)
    梦.quit() 


pygame fade in fade out封面显示淡入淡出花梦想

pygame fade in fade out封面显示淡入淡出花梦想

下载完整源代码与素材,请

成为会员后,登陆才能继续浏览!联系微信scratch8即可办理会员。
(会员专属:能浏览所有文章,下载所有带链接的Python资源。)

发表在 pygame, python | 标签为 , , , , , , | 留下评论

pygame经典游戏space invader太空入侵者核心原理程序

封面pygame space invader cover

封面pygame space invader cover

space invader,是外星人入侵地球的一个经典街机射击小游戏,曾经风靡世界。 以下是用pygame设计的部分代码预览:


"""pygame经典游戏space invader太空入侵者核心原理程序,本程序给作品加了封面,做了结尾设计,读者可自行完善."""

__author__ = "李兴球"
__date__ = "2018年11月"

import pygame
from pygame.locals import *

class Block(pygame.sprite.Sprite):
    def __init__(self,width,height,color,x,y,screen):
        pygame.sprite.Sprite.__init__(self)
        self.screen = screen
        self.width = width
        self.height = height
        "敌人的图像,可自行更换成漂亮的图像用pygame.image.load命令"
        self.image = pygame.Surface((width,height))
        self.image.fill(color)
        self.rect = self.image.get_rect()
        self.rect.centerx,self.rect.centery = x,y
        self.xspeed = 0
        self.yspeed = height
     pass
        
def make_enemis():
    
    pass

def make_fighter():
    
    fighter = Block(50,25,(255,0,0),screenwidth//2,screenheight - 50,screen)
    return fighter

def shoot(posx,posy):
    
    red = (255,0,0)
    bullete = Block(15,25,red,posx,posy,screen)
    bullete.yspeed = -5
    bullete_group.add(bullete)
    
def display_shell(image):
    """显示封面"""
    pass
    
def display_result(image):
    """显示结果"""
    pass
 
    
if __name__ == "__main__":

    died_enemy_counter = 0                        # 用来统计敌人死的数量
    screenwidth,screenheight = 800,600
    screen = pygame.display.set_mode((screenwidth,screenheight))
    pygame.display.set_caption("太空入侵_封面设计与结尾")

    display_shell(pygame.image.load("封面.png"))  # 显示封面,单击鼠标就会进入游戏环节

    enemy_group = make_enemis()                   # 创建敌人组
    enemy_amount = len(enemy_group)               # 敌人总数
    print("共有",str(enemy_amount),"架敌机")
    
    fighter = make_fighter()                      # 创建战斗机
    bullete_group = pygame.sprite.Group()         # 子弹组 

    timer_move = USEREVENT + 1                    # 定时移动事件
    pygame.time.set_timer(timer_move,3000)        # 每3秒种发生一次
    
    clock = pygame.time.Clock()                   # 时钟对象
    running = True
    "新增的startshoot变量让主角不能连续发射"
    startshoot = -10                              #让发射有间隔,而不是能连续发射.
    while running:
        if startshoot < 0 : startshoot = startshoot  + 1   # 自增1,到0的时候就不会增了
        clock.tick(30)
        pass
            
        ret = pygame.sprite.spritecollideany(fighter,enemy_group)            # 我方与敌方的碰撞检测
        if ret : running = False
        
        screen.fill((0,0,0))                  # 背景色
        enemy_group.draw(screen)              # 在screen上重画所有小方块
        
        bullete_group.update()                # 更新坐标位置
        bullete_group.draw(screen)            # 重画子弹
        
        mousex,mousey = pygame.mouse.get_pos()
        fighter.rect.centerx = mousex
        fighter.draw()
        
        pygame.display.update()

    if died_enemy_counter < enemy_amount :
        image =  pygame.image.load("失败.png")
    else:
        image = pygame.image.load("成功.png")
    display_result(image)


下载完整源代码与素材,请

成为会员后,登陆才能继续浏览!联系微信scratch8即可办理会员。
(会员专属:能浏览所有文章,下载所有带链接的Python资源。)

发表在 pygame, python | 标签为 , | 留下评论

pygame水平卷轴平台跳跃游戏核心原理程序

pygame horizontal scroll水平卷轴

pygame horizontal scroll水平卷轴

以下是部分代码预览:

"""水平卷轴平台跳跃游戏核心原理.py"""

import pygame

# 全局常量定义
BLACK = (0, 0, 0)
WHITE = (255, 255, 255)
GREEN = (0, 255, 0)
RED = (255, 0, 0)
BLUE = (0, 0, 255)

# 屏幕尺寸定义
SCREEN_WIDTH = 800
SCREEN_HEIGHT = 600

class Player(pygame.sprite.Sprite):
    """这是玩家控制的小方块"""

    def __init__(self):
        """初始化方法,首先调用父类的同名方法 """
        super().__init__()

        # 创建角色的外形图,也可以从磁盘加载一张漂亮的图片
        self.image = pygame.Surface([40, 60])
        self.image.fill(RED)

        # 设置矩形对象,表示坐标和宽高
        self.rect = self.image.get_rect()

        # 设置玩家水平速度和垂直速度
        self.xspeed = 0
        self.yspeed = 0

        # 玩家所在关卡对象,关卡内有一些小方块,它们是平台对象
        self.level = None

    def update(self):
        """ 更新玩家坐标 """
        # 重力代码段
        self.calc_grav()

        pass

        # 上下移动

    def calc_grav(self):
        """ 设定受重力的效果"""
        pass

    def jump(self):
        """ 按跳跃键的时候让它往上跳 """
        pass
            
    def go_left(self):
        """ 按左移键时水平速度为负数 """
        self.xspeed = -6

    def go_right(self):
        """ 按右移键时水平速度为正数 """
        self.xspeed = 6

    def stop(self):
        """ 没有按键时水平速度为零 """
        self.xspeed = 0

class Platform(pygame.sprite.Sprite):
    """ 平台类,就是一个方块类,玩家能站在上面 """

    def __init__(self, width, height):
        """初始化方法,定义了image属性和rect属性"""
        super().__init__()

        self.image = pygame.Surface([width, height])
        self.image.fill(GREEN) # 填充为绿色
        self.rect = self.image.get_rect()


class Level():
    """ 这是所有关卡的父类"""

    def __init__(self, player):
        """ 关卡内都有很多长方形块块,这就是平台,它们组成一个组 """
        self.platform_list = pygame.sprite.Group()
        self.enemy_list = pygame.sprite.Group()
        self.player = player

        # 本关的偏移距离,按右键时它的值越来越小
        self.world_shift = 0

    def update(self):
        """ 更新关卡中对象的坐标"""
        self.platform_list.update()
        self.enemy_list.update()

    def draw(self, screen):
        """ 重画此关卡所有对象 """

        # 最后面的层是screen,所以它要先画
        screen.fill(BLUE)

        # 画所有的对象
        self.platform_list.draw(screen)
        self.enemy_list.draw(screen)

    def shift_world(self, shift_x):
        """ 玩家按左右键时要移动每个对象 """

        pass

class Level_01(Level):
    """ 定义第一关. """

    def __init__(self, player):
        
        Level.__init__(self, player)

        self.level_limit = -1000 # 关卡的长度

        # 第一关每个平台的宽高和坐标
        level = [[210, 70, 500, 500],
                 [210, 70, 800, 400],
                 [210, 70, 1000, 500],
                 [210, 70, 1120, 280],
                 ]

        # 遍历每个参数生成平台,并添加到列表中
        for platform in level:
            block = Platform(platform[0], platform[1])
            block.rect.x = platform[2]
            block.rect.y = platform[3]
            block.player = self.player
            self.platform_list.add(block)


class Level_02(Level):
    """ 定义第2关"""

    def __init__(self, player):

        Level.__init__(self, player)
        self.level_limit = -1000       
        level = [[210, 30, 450, 570],
                 [210, 30, 850, 420],
                 [210, 30, 1000, 520],
                 [210, 30, 1120, 280],
                 ]
        for platform in level:
            block = Platform(platform[0], platform[1])
            block.rect.x = platform[2]
            block.rect.y = platform[3]
            block.player = self.player
            self.platform_list.add(block)


def main():
    """ 主程序代码 """
    pygame.init()

    # 新建屏幕对象,它是一个surface
    size = [SCREEN_WIDTH, SCREEN_HEIGHT]
    screen = pygame.display.set_mode(size)

    pygame.display.set_caption("水平卷轴平台跳跃游戏核心原理程序")

    # 创建玩家对象
    player = Player()

    # 创建所有的关卡
    level_list = [Level_01(player),Level_02(player)] 

    # 设置当前的关卡
    current_level_no = 0
    current_level = level_list[current_level_no]

    active_sprite_list = pygame.sprite.Group()
    player.level = current_level

    player.rect.x = 340
    player.rect.y = SCREEN_HEIGHT - player.rect.height
    active_sprite_list.add(player)

    # 当玩家单击关闭按钮时done的值就翻转为True让循环退出.
    done = False

    # 使用它来控制屏幕的刷新速度
    clock = pygame.time.Clock()

    # -------- 游戏主循环 -----------
    while not done:
        for event in pygame.event.get():
            if event.type == pygame.QUIT:
                done = True

            pass


        # 设置fps为60
        clock.tick(60)

        # 把所画的显示出来
        pygame.display.flip()

    pygame.quit()

if __name__ == "__main__":
    main()


如需要查看完整代码,请

成为会员后,登陆才能继续浏览!联系微信scratch8即可办理会员。
(会员专属:能浏览所有文章,下载所有带链接的Python资源。)

发表在 pygame, python | 标签为 , | 留下评论