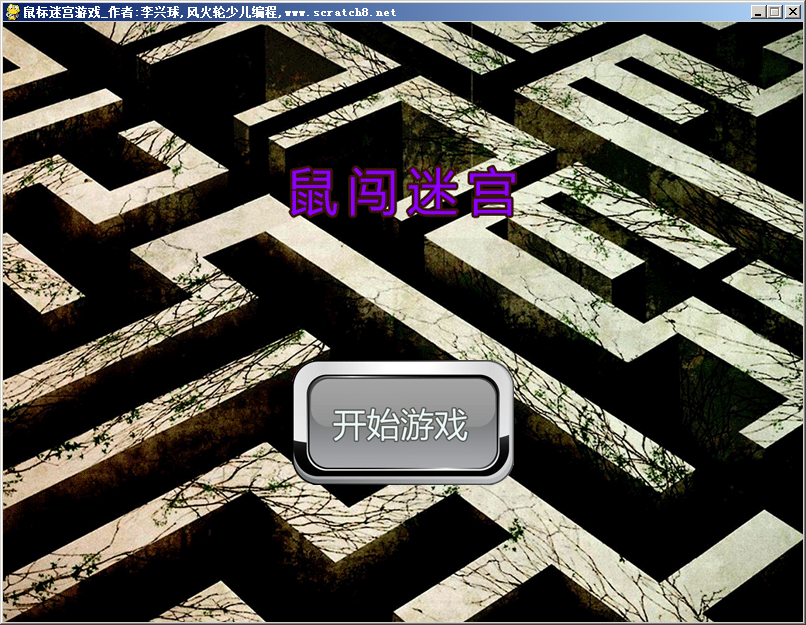
pygame鼠闯迷宫闯关小游戏

pygame mouse maze game 鼠闯迷宫pygame鼠标牵引游戏

pygame mouse maze game 鼠闯迷宫pygame鼠标牵引游戏

以下是部分代码预览:

"""鼠闯迷宫闯关小游戏.一只老鼠在一个巨大的迷宫中,它要出去才不致于被饿死,用鼠标牵引它移动即可。
碰撞使用的是mask,老鼠是相对于迷宫的移动(迷宫在动)"""

__author__ = "李兴球"
__date__ = "2018年12月左右"

import os,math,sys
import pygame
from pygame.locals import *

class Maze(pygame.sprite.Sprite):
    def __init__(self,image,scale,screen):
        pygame.sprite.Sprite.__init__(self)
        self.screen = screen
        pass
        
    def update(self,dx,dy):
        """迷宫朝相反的dx和dy移动"""
        self.rect.move_ip(dx*0.05,dy*0.05)      
        
    def draw(self):
        self.screen.blit(self.image,self.rect)
        
class Mouse(pygame.sprite.Sprite):
    def __init__(self,image,position,screen,maze=None):
        pygame.sprite.Sprite.__init__(self)
        self.position = position                                  # 原始坐标
        self.screen = screen
        self.maze = maze                                          # 引用当前的迷宫对象
        pass
        
    def distance(self,mousexy):
        """到鼠标指针的距离"""
        dy = mousexy[1] - self.rect.centery
        dx = mousexy[0] - self.rect.centerx
        return math.sqrt(dx * dx  + dy * dy)        
        
    def update(self,mousexy,logic):
        """根据方向角度更新图像"""
        if self.distance(mousexy) > 50 :
            self.image = pygame.transform.rotate(self.raw_image,self.angle).convert_alpha()
            self.image.set_colorkey((0,0,0))
            self.mask = pygame.mask.from_surface(self.image)        # 设定掩膜属性,以后用于和迷宫mask的碰撞检测
            pass                  
            
    def bump_check(self):
        """对碰黑墙和碰绿门进行碰撞检测,实际上是对maze进行通过mask的碰撞检测,返回point坐标。
        ,再侦测像素值就知道是碰到门还是碰到绿色"""
        level_end = False
        point = pygame.sprite.collide_mask(self.maze,self)
        pass
    def draw(self):
        self.screen.blit(self.image,self.rect)

       
def display_shell(screensize,shell_image,begin_button_images):
    width,height = screensize
    index = 0
    button_image = begin_button_images[index]
    
    button_rect = button_image.get_rect()
    button_width = button_rect.width
    button_height = button_rect.height
    button_rect.center = (width//2,100+height//2)
    clock = pygame.time.Clock()
    running = True
    continue_game = True
    while running:
        for event in pygame.event.get():
            if event.type == QUIT:
                running = False
                pass
        pygame.display.update()
        clock.tick(30)
    
    return continue_game

def display_end(end_image):
    clock = pygame.time.Clock()
    running = True    
    while running:
        for event in pygame.event.get():
            if event.type == QUIT:
                running = False              
                break
        mousekeys = pygame.mouse.get_pressed()        
        if mousekeys[0] : running = False
            
        screen.blit(end_image,(0,0))                    
        pygame.display.update()
        clock.tick(30)       
    
    
if __name__ == "__main__":
    
    pass


下载完整源代码与素材,请

成为会员后,登陆才能继续浏览!联系微信scratch8即可办理会员。
(会员专属:能浏览所有文章,下载所有带链接的Python资源。)
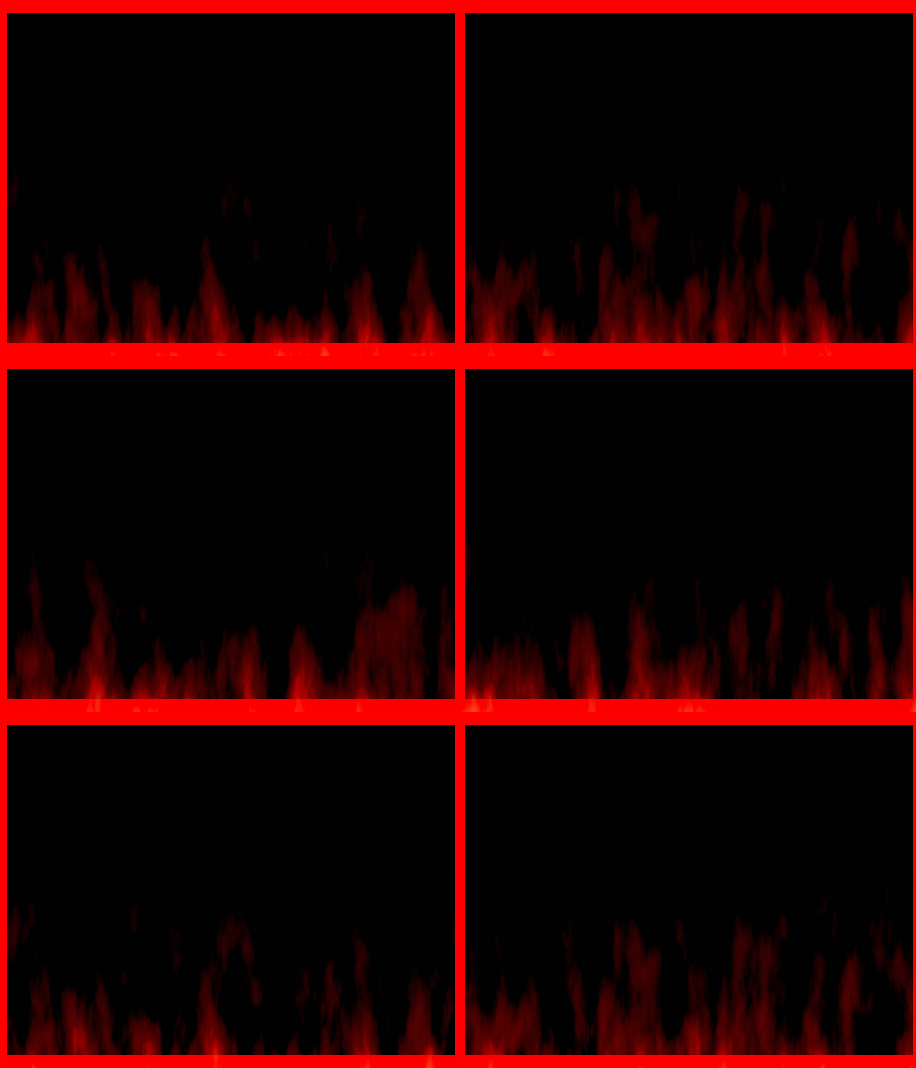
发表在 pygame, python | 标签为 , , , | 留下评论

pygame生死存亡_ 双人算术小游戏


以下是部分代码预览:

"""pygame生死存亡,两只老鼠掉进熊熊燃烧的大火炉,只有用键盘操作它们碰到正确的算术式子才能挽救它们性命。   
   这是一个双人小游戏,按上下左右,或wasd操作两只老鼠去碰撞正确的算术式子即可。   
   结束逻辑一:设定游戏时间 game_time 为 100秒,超过则游戏结束,通过判断得分高低判定输赢。
   结束逻辑二:不小心被烧死了,则没烧死的为赢,和得分无关。
   通过一个事件,每隔一秒进行一次判断。

"""
__author__ = "李兴球"
__date__ = "2018年12月左右"
import os
import time
import pygame
from pygame.locals import *
from random import randint,choice

class Flame(pygame.sprite.Sprite):
    """火焰类"""
    def __init__(self,images,rat,screen):
        pygame.sprite.Sprite.__init__(self)
        self.images = images                 # 这是已经用pygame.image.load转换成surface后的列表
        self.index = 0                       # 造型的初始索引号
        pass
        
 
class DynamicBackground(pygame.sprite.Sprite):
    """动态背景类,它是一个角色,画在最下面的,本质就是不断地切换帧图"""
    def __init__(self,images,screen):
        pygame.sprite.Sprite.__init__(self)
        # 帧图列表
        self.images = [pygame.image.load(image).convert_alpha() for image in images]
        self.index = 0
        self.amounts = len(images)
        self.screen = screen
        pass

class Arithmetic(pygame.sprite.Sprite):
    """算术题类,每隔一定的时候,会生成一个算术题"""
    def __init__(self,font,group,screen,rat_group):
        pygame.sprite.Sprite.__init__(self)
        self.font = font
        self.group = group
        self.group.add(self)
        self.screen = screen
        self.srceen_width = screen.get_width()
        self.screen_height = screen.get_height()
        self.survival_time = 10            #  生存时间,秒
        self.expression_type = ["+","-","*","//"]
        pass
        
    def render_question(self):
        self.font_image = self.font.render(self.expression,True,(120,10,15))
        self.rect = self.font_image.get_rect()
        self.width = self.rect.w
        self.height = self.rect.h
        "把字渲染到self.image上,只是为了有个背景,也可以不用这一步"
        self.image = pygame.Surface((self.width + 20,self.height+20))
        self.image.set_colorkey((0,0,0))
        
        rect = self.image.get_rect()
        pygame.draw.ellipse(self.image,(0,128,128),rect)  # 在image上画个椭圆      
        self.image.blit(self.font_image,(10,10))          # 在image上再把算术题画上去
         
        "移到随机位置"
        x = randint(self.width,self.srceen_width - self.width)
        y = randint(self.height,self.screen_height - self.height)
        self.rect.center = (x,y)

    def update(self):
        """超过生存时间,则从组中移动,这样就不会被渲染了"""
        if time.time() - self.begin_time > self.survival_time: self.die()
        self.bump_rats_check()
        
    def bump_rats_check(self):
        """碰鼠检测,遍历所有老鼠"""
        for rat in self.rat_group:
            if rat.dead : continue
            if self.rect.colliderect(rat.rect) and self in self.group:
                
                if  self.good : rat.score += 10
                if not self.good : rat.score -= 10
                self.die()
    def die(self):
        self.group.remove(self)
                  
class Rat(pygame.sprite.Sprite):
    def __init__(self,images,keys,screen,initheading,name,background,flame_images):
        pygame.sprite.Sprite.__init__(self)
        "原始图,是向右的"
        self.flame_images = flame_images                                  # 鼠死后要生成火焰对象,这个是传递给此对象的
        self.background = background                                      # 能访问背景
        self.name = name                                                  # 给他们取个名字
        self.keys = keys                                                  # 右,上,左,下
        self.screen = screen        
        self.screen_width = self.screen.get_width()
        self.screen_height = self.screen.get_height()

        self.raw_images = [pygame.image.load(image).convert_alpha() for image in images]
        
        self.right_images = self.raw_images
        self.up_images = [pygame.transform.rotate(image,90) for image in self.raw_images]
        self.left_images = [pygame.transform.rotate(image,180) for image in self.raw_images]
        self.down_images = [pygame.transform.rotate(image,-90) for image in self.raw_images]
        "images列表,右,上,左,下,每个images包括两个造型"
        self.images_list = [self.right_images,self.up_images,self.left_images,self.down_images]                                                         

        self.right_rects = [image.get_rect() for image in self.right_images]  # 向右方向的2个矩形对象
        self.up_rects = [image.get_rect() for image in self.up_images]        # 向上方向的2个矩形对象
        self.left_rects = [image.get_rect() for image in self.left_images]    # 向左方向的2个矩形对象
        self.down_rects = [image.get_rect() for image in self.down_images]    # 向下方向的2个矩形对象
        self.rects_list = [self.right_rects,self.up_rects,self.left_rects,self.down_rects]

        self.heading_index = initheading                               # 朝向索引号,初始朝向, 
        self.costume_index = 0                                         # 造型索引,0为第一个造型,1为第二个造型
        self.costume = self.images_list[self.heading_index][self.costume_index]   # 初始image对象,向右的第一个造型
        self.rect = self.rects_list[self.heading_index][self.costume_index]       # 初始矩形对象        
        self.rect.center = self.screen_width//2,50

        self.xspeed = 0
        self.yspeed = 0

        self.begin_time = time.time()     # 起始时间,用于造型切换

        self.score = 0                    # 接到一个正确的题目就加分,否则减分

        self.dead = False               # 增加 dead属性
        self.aspeed = 0                   # 往下掉的加速度
        self.flame = None                 # 火焰对象
        
    def keys_check(self,allkeys):
        if self.dead : return           # 碰到火苗后死亡,按键失效
        
        if allkeys[self.keys[0]] :         # 右
            self.xspeed = 5
            self.yspeed = 0
            self.heading_index = 0
            
        if allkeys[self.keys[1]] :         # 上
            self.xspeed = 0
            self.yspeed = -5
            self.heading_index  = 1
            
        if allkeys[self.keys[2]] :         # 左  
            self.xspeed = -5
            self.yspeed = 0
            self.heading_index = 2
            
        if allkeys[self.keys[3]] :         # 下
            self.xspeed = 0
            self.yspeed = 5
            self.heading_index = 3

    def update(self):
        self.rect.move_ip(self.xspeed,self.yspeed)
        self.yspeed = self.yspeed + self.aspeed
        self.bump_edge_check()             # 碰到边缘检测
        self.bump_background_check()       # 碰到火苗检测
        if self.flame : self.flame.update()

    def bump_background_check(self):
        if self.rect.y - self.background.y >=0 and not self.dead:
            self.die()
            
    def die(self):
        self.dead = True
        self.xspeed = 0
        self.aspeed = 0.5
        "死后要有一个火焰在它上面燃烧"
        self.flame = Flame(flame_images,self,self.screen)

    def bump_edge_check(self):
        
        if self.rect.right >= self.screen_width : # 到了最右边,要反过来向左移动
            self.xspeed = -5
            self.yspeed = 0
            self.heading_index = 2            
        if self.rect.left <= 0 :                  # 到了最左边,要反过来向右移动
            self.xspeed = 5
            self.yspeed = 0
            self.heading_index = 0        
        if self.rect.top <= 0  :                  # 到了最顶上,要向下移动
            self.xspeed = 0
            self.yspeed =  5
            self.heading_index = 3            
        if self.rect.bottom >= self.screen_height :
            self.xspeed = 0
            self.yspeed = -5
            self.heading_index = 1                # 到了最下,要向上移动       

    def draw(self):
        if time.time() - self.begin_time > 0.1:   # 超过0.1秒,换造型
            oldrect = self.rect
            self.costume_index = 1 -  self.costume_index                                         
            self.costume = self.images_list[self.heading_index][self.costume_index]    
            self.rect = self.rects_list[self.heading_index][self.costume_index]
            self.rect.center = oldrect.center
            self.begin_time = time.time()
        self.screen.blit(self.costume,self.rect)
        if self.flame : self.flame.draw()
      
def check_end_condition(past_time):
    global game_end
    string = None
    if past_time<=0 :
        if not game_end:
           game_end = True
           
           if rat1.score > rat2.score :
              string ="舒克赢了!"
           elif rat1.score < rat2.score:
              string = "贝塔赢了!"
           else:
              string = "平局!"           
    else:
        
        if rat1.dead == True:
            string = "贝塔赢了!"
            game_end == True
        elif rat2.dead == True:                    
            string = "舒克赢了!"
            game_end == True
    #print(string)
    return string

if __name__ == "__main__":

    msyh_font =  "msyh.ttf"
    
    width,height = 960,720
    # 加载素材图像
    flames_list = [os.getcwd() + os.sep + "flames" + os.sep + "0"*(4-len(str(i))) + str(i) + ".png" for i in range(1,13)]
    bg_list = [os.getcwd() + os.sep + "bgframes" + os.sep + str(i) + ".png" for i in  range(13,38)]
    rat_images = ['mouse_right_a.png','mouse_right_b.png']
    rat_images = [os.getcwd() + os.sep + "images" + os.sep + image for image in rat_images]
    rat1_keys = [K_RIGHT,K_UP,K_LEFT,K_DOWN]    # 玩家一按键表  
    rat2_keys = [K_d,K_w,K_a,K_s]               # 玩家二按键表

    pygame.init()
    screen = pygame.display.set_mode((width,height))
    pygame.display.set_caption("生死存亡_双人算术小游戏_作者李兴球,风火轮少儿编程 www.scratch8.net")
    msyh_font = pygame.font.Font(msyh_font,32)
    flame_images = [ pygame.image.load(image).convert_alpha() for image in flames_list]  # 小老鼠死后身上的火焰
    
    expressionEVENT  = USEREVENT + 1
    pygame.time.set_timer(expressionEVENT,5000) #  设定时任务(生成算术表达式)

    endEVENT = USEREVENT + 2
    pygame.time.set_timer(endEVENT,1000)
    
    expression_group = pygame.sprite.Group()
    
    clock = pygame.time.Clock()
    running = True
    
    background = DynamicBackground(bg_list,screen)               # 创建动态背景实例
    rat_group = pygame.sprite.Group()
    rat1 = Rat(rat_images,rat1_keys,screen,0,"舒克",background,flame_images)  # 生成老鼠1,参数为图形列表,按键列表,屏幕,初始方向右
    rat2 = Rat(rat_images,rat2_keys,screen,2,"贝塔",background,flame_images)  # 初始方向左
    rat_group.add(rat1)
    rat_group.add(rat2)

    ret_string = None
    end_image = msyh_font.render(ret_string,True,(255,0,0))
    end_image_rect = end_image.get_rect()
    end_image_rect.center = width//2 , height//2
        
    game_end = False            # 游戏结束的逻辑变量
    game_time = 100             # 游戏时间为100秒
    begin_time = time.time()    # 游戏起始时间
    
while running:
        past_time = game_time - time.time() + begin_time
        for event in pygame.event.get():
            if event.type == QUIT:
                running = False
                break
            if event.type == endEVENT:               # 每隔一定的时间检测
                ret_string = check_end_condition(past_time)
                if ret_string :
                   end_image = msyh_font.render(ret_string,True,(255,0,0))
                   end_image_rect = end_image.get_rect()
                   end_image_rect.center = width//2 , height//2                   
                   pygame.time.set_timer(endEVENT,100000000)       # 删除此事件,先用这个方法                   
                
            if event.type == expressionEVENT:       # 产生一道算术题
                Arithmetic(msyh_font,expression_group,screen,rat_group)  # 把老鼠组加进去,碰撞检测封装到这个类

        background.update()                              # 背景y坐标不断更新 
        if  ret_string == None:            
            all_keys = pygame.key.get_pressed()          # 所有的按键检测
            rat1.keys_check(all_keys)                    # 对老鼠1进行按键检测
            rat1.update()                                # 更新老鼠1坐标
            rat2.keys_check(all_keys)                    # 对老鼠2进行按键检测
            rat2.update()                                # 更新老鼠2坐标

            expression_group.update()                    # 算术表达式更新,碰撞检测在每个update后
           
        screen.fill((20,20,0))                      # 背景颜色
        background.draw()                           # 动态背景渲染
        if  ret_string == None:
            expression_group.draw(screen)           # 算术题组渲染

        for rat in rat_group:
            rat.draw()                              # 老鼠渲染,不使用rat_group.draw         

        if  ret_string != None: screen.blit(end_image,end_image_rect)
        info = str(rat2.name) + "得分:" + str(rat2.score) + "," + str(rat1.name) + "得分:" + str(rat1.score)
        info = info + " ,游戏剩余时间:" + str(round(past_time))
        pygame.display.set_caption(info)
        pygame.display.update()
        clock.tick(60)
    pygame.quit()


下载完整源代码与素材,请

成为会员后,登陆才能继续浏览!联系微信scratch8即可办理会员。
(会员专属:能浏览所有文章,下载所有带链接的Python资源。)

发表在 pygame, python | 标签为 , | 留下评论

pygame像素级生命游戏模拟game of life animation

以下是部分代码预览:

"""pygame像素级生命游戏模拟.py
Conway's Game of Life),又称康威生命棋,是英国数学家约翰·何顿·康威在1970年发明的细胞自动机。
本程序用pygame模拟这种现象,作者:李兴球,风火轮少儿编程 www.scratch8.net
"""
import pygame
from pygame.locals import *
from random import randint

pygame.init()
life_color = (222,211,0,255)          # 有颜色的代表活的,黑色代表死的
width,height = 200,200
screen = pygame.display.set_mode((width,height))
pygame.display.set_caption("生命游戏模拟_风火轮编程李兴球")

lives = {}
life_image = pygame.Surface((width,height))

# 初始化状态
for  x in range(width):
    for y in range(height):
        if randint(1,10) == 1:
             lives[(x,y)] = 1
        else:
            lives[(x,y)]=0

def get_numbers(pos):
    """得到周围活的数量"""
    pass

running = True
while running:
    for cell in lives:
        pygame.event.poll()
        f = lives[cell]            # 生命状态     cell 就是x,y   
        cell_number = get_numbers(cell)   # 得到周围活的细胞数量
        
        pass
                
    screen.fill((0,0,0))
    life_image.fill((0,0,0))
    [life_image.set_at(cell,life_color) for cell in lives if lives[cell] ]
    
    screen.blit(life_image,(0,0))  # 把life_image渲染到screen上.
    pygame.display.update()        # 更新屏幕显示
         

"""
1、规则

生命游戏中,对于任意细胞,规则如下。每个细胞有两种状态:存活或死亡,每个细胞与以自身为中心的周围八格细胞产生互动。

当前细胞为存活状态时,当周围低于2个(不包含2个)存活细胞时, 该细胞变成死亡状态。(模拟生命数量稀少)
当前细胞为存活状态时,当周围有2个或3个存活细胞时, 该细胞保持原样。
当前细胞为存活状态时,当周围有3个以上的存活细胞时,该细胞变成死亡状态。(模拟生命数量过多)
当前细胞为死亡状态时,当周围有3个存活细胞时,该细胞变成存活状态。 (模拟繁殖)
--------------------- 
"""          
          
pygame.image.save(life_image,"te.png")


如需要查看完整代码,请

成为会员后,登陆才能继续浏览!联系微信scratch8即可办理会员。
(会员专属:能浏览所有文章,下载所有带链接的Python资源。)

发表在 pygame, python | 标签为 | 留下评论

pygame泡泡坦克大战_射击游戏源码

画面,配音效果非常不错的一个pygame射击小游戏,以下是部分代码预览:

""" pygame泡泡坦克大战.py 在游戏中用鼠标操作我方坦克射击彩色泡泡,打击敌方坦克,有三叉泡泡道具,连发道具,生命道具。
NPC坦克会时不时的瞄准我方坦克进行攻击,游戏可是有一定的难度哦,不过有了三叉和连发道具后就能所向披靡了。
本程序相对于前一个本版主要改动的内容为NPCTank增加了Shell属性,Tank的发射方法增加了Shell参数。各个类已经单独列为模块。
本程序的前身是李兴球先生用scratch2.0制作的泡泡坦克大战。

"""
__author__ = "李兴球"
__date__ = "2018年12月左右"

import os,math
import pygame
from pygame.locals import *
from random import randint,choice
from prop import Prop              # 从道具模块导入道具类
from explosion import Explosion    # 从爆炸模块导入爆炸类          
from shell import Shell            # 从炮弹模块导入炮弹类
from npctank import NPCTank        # 从npctank导入NPCTank类,敌方AI坦克
from tank import Tank              # 坦克模块导入Tank类,这是我方坦克
        
def collision_check():
    global npc_dead_amounts
    "玩家炮弹组和npc的碰撞检测"
    sprite_dict = pygame.sprite.groupcollide(group_player_shell,group_npc,True,True) # 返回的是一个字典
    if sprite_dict:  # 返回的可能是这样:{<Shell sprite(in 0 groups)>: [<NPCTank sprite(in 0 groups)>, <NPCTank sprite(in 0 groups)>]}                                                               #  有可能一次击中多个npc
        #print(sprite_dict)
        npc_dead_amounts += len(sprite_dict.values())                               # 统计阵亡的坦克数量
        hitted_tank = list(sprite_dict.values())[0]            
        position = hitted_tank[0].rect.center
        Explosion(explosion_images,position,group_explosion,screen,explosion_sound)                 # 生成爆炸效果实例对象
        
    "玩家和npc的碰撞检测"
    collided_npc_tank = pygame.sprite.spritecollideany(player,group_npc)            # 返回被撞到的npc
    if collided_npc_tank and not player.died():                                     # 注意防止连续碰撞
        player.die()
        collided_npc_tank.die()
        npc_dead_amounts += 1                                                       # 统计阵亡的坦克数量
        group_npc.remove(collided_npc_tank)
        position_npc = collided_npc_tank.rect.center
        Explosion(explosion_images,position_npc,group_explosion,screen,explosion_sound)
        
        position_player = player.rect.center
        Explosion(explosion_images,position_player,group_explosion,screen,explosion_sound)
        
    "玩家炮弹和npc炮弹碰撞检测,即我方炮弹可以抵销敌方炮弹"
    sprite_dict2 = pygame.sprite.groupcollide(group_player_shell,group_npc_shell,True,True) # 返回的是一个字典
    if sprite_dict2:                                              #字典的key是炮弹,只是利用它取个坐标
        shell = list(sprite_dict2.keys())[0]
        Explosion(explosion_images,shell.rect.center,group_explosion,screen,explosion_sound)
        
     
    "玩家和npc炮弹的碰撞检测"
    hit_shell = pygame.sprite.spritecollideany(player,group_npc_shell)            # 返回敌方的炮弹
    if hit_shell and not player.died():
         player.die()
         hit_shell.die()                                                          # 使用die方法                                                      
         position_shell = hit_shell.rect.center
         Explosion(explosion_images,position_shell,group_explosion,screen,explosion_sound)
        
         position_player = player.rect.center
         Explosion(explosion_images,position_player,group_explosion,screen,explosion_sound)

def playmusic(music):
    pygame.mixer.music.load(music)
    pygame.mixer.music.play(-1,0)
    
def display_cover(cover_image):
    """显示封面的函数"""
    clock = pygame.time.Clock()
    continue_game = True
    running = True
    while running:
        for event in pygame.event.get():
            if event.type == QUIT:
                continue_game = False
                running = False
                break
            if event.type == KEYDOWN:
                if event.key == K_SPACE:
                    running = False
                    break
        screen.blit(cover_image,(0,0))
        pygame.display.update()
        clock.tick(30)
            
    return continue_game

def main():
    running = True
    while running:
        for event in pygame.event.get():
            if event.type == QUIT:running = False
            if event.type == npc_produce_EVENT :
                # 定时产生NPC,把Shell类也传进去了,做为npc的一个属性,在它的shoot方法中生成炮弹会使用到
                NPCTank(npc_image,npc_shell_image,player,screen,group_npc,group_npc_shell,Shell)
            if event.type == prop_produce_EVENT:
                Prop(prop_images,group_prop,player,screen) # 定时产生道具
            if event.type == MOUSEBUTTONUP:
                if event.button == 1:
                    player.shoot(Shell)    # 发射炮弹
                    if player.three_fire > 0: player.three_fire -= 1
                    if player.three_fire == 0 and player.shell_image != shell_image:
                        player.shell_image =  shell_image                    
                
        if player.continue_fire > 0 :
            player.shoot(Shell)
            player.continue_fire -= 1
            if player.three_fire > 0: player.three_fire -= 1
            
        if player.three_fire > 0  and player.shell_image != three_shell_image: # 更换为三叉泡泡弹
            player.shell_image = three_shell_image        
             
        mousexy = pygame.mouse.get_pos()
        player.forward(mousexy)
        player.update() 
        group_player_shell.update()         # 玩家发射的炮弹组
        group_npc.update()                  # npc组
        group_npc_shell.update()            # npc炮弹组
        group_prop.update()                 # 道具组更新
        
        if player.invincible_time > 0:      # 这个值大于0,说明玩家坦克已阵亡,让它减小直到为0
            player.invincible_time -=1
            
        if player.invincible_time == 0:     # 等于0的时候才做碰撞检测
           collision_check()                # 碰撞检测         
            
        screen.fill((150,0,0))              # 重画背景色
        player.draw()                       # 重画玩家的坦克
        group_player_shell.draw(screen)     # 重画所有玩家发射的炮弹
        group_npc.draw(screen)              # 重画所有npc
        group_npc_shell.draw(screen)        # 重画所有npc发射的炮弹
        group_prop.draw(screen)             # 重画所有道具

        for bomb in  group_explosion:       # 这里不用group的draw方法,因为它要切换造型
            bomb.draw()        
        
        pygame.display.set_caption("生命数:" + str(player.lives) + ",敌方坦克阵亡数:" + str(npc_dead_amounts))
        pygame.display.update()        
        clock.tick(30)
        if npc_dead_amounts > 100:
            running = False         

    if npc_dead_amounts > 100:
        finish(pygame.image.load(fisnish_image))
    else:
        pygame.quit()

def finish(image):
    """显示结尾图形"""    
    clock = pygame.time.Clock()    
    running = True
    while running:
        for event in pygame.event.get():
            if event.type == QUIT or event.type == MOUSEBUTTONDOWN:                
                running = False
                break 
        screen.blit(image,(0,0))
        pygame.display.update()
        clock.tick(30)            
    pygame.quit()
    
    
if __name__ == "__main__":

    npc_dead_amounts = 0                                                         # 敌方坦克阵亡数量
    cover_image  = os.getcwd() + os.sep + "images" + os.sep  + "封面.png"
    fisnish_image  = os.getcwd() + os.sep + "images" + os.sep  + "finish.png"
    prop_images = [ "life.png","continuous_fire.png","three_fire.png"]           # 道具图片表
    prop_images = [ os.getcwd() + os.sep + "images" + os.sep + image for image in prop_images] 
    explosion_images = [ "explosion" + str(i) + ".png" for i in range(1,6)]
    explosion_images = [ os.getcwd() + os.sep + "explosion" + os.sep + image for image in explosion_images]
     
    npc_image = os.getcwd() + os.sep + "images" + os.sep + "绿坦克.png"
    shell_image = os.getcwd() + os.sep + "images" + os.sep + "ball-c.png"
    three_shell_image = os.getcwd() + os.sep + "images" + os.sep + "three_shell.png"
    npc_shell_image = os.getcwd() + os.sep + "images" + os.sep + "ball-a.png" 
    player_image = os.getcwd() + os.sep + "images" + os.sep + "蓝坦克.png"
    width,height = 960,720
    game_title = "泡泡坦克大战"
    
    pygame.init()
    screen = pygame.display.set_mode((width,height))
    pygame.display.set_caption(game_title)
    shell_image = pygame.image.load(shell_image).convert_alpha()                    # 泡泡弹
    three_shell_image = pygame.image.load(three_shell_image).convert_alpha()        # 三叉泡泡弹
    npc_shell_image = pygame.image.load(npc_shell_image).convert_alpha()
    explosion_images = [pygame.image.load(image).convert_alpha() for image in explosion_images]
    s = [ pygame.image.load(image).convert_alpha() for image in prop_images]        # 道具图层表
    prop_images = {}.fromkeys(['life','continue','three'])                          # 道具字典
    prop_images['life'] = s[0]
    prop_images['continue'] = s[1]
    prop_images['three'] = s[2]    

    group_player_shell = pygame.sprite.Group()          # 玩家炮弹组
    group_npc_shell = pygame.sprite.Group()             # NPC炮弹组
    group_npc = pygame.sprite.Group()                   # NPC组
    group_explosion = pygame.sprite.Group()             # 爆炸效果组
    group_prop = pygame.sprite.Group()                  # 道具组
    
    player = Tank(player_image,shell_image,screen,group_player_shell)
    clock = pygame.time.Clock()    
    
    npc_produce_EVENT = USEREVENT + 1                   # npc自动产生事件
    pygame.time.set_timer(npc_produce_EVENT,400)        # 每隔400毫秒产生一个npc

    prop_produce_EVENT = USEREVENT + 2                  # 道具自动产生事件
    pygame.time.set_timer(prop_produce_EVENT,10000)     # 每秒生成一个,到了屏幕最下面会自动消失

    explosion_sound = os.getcwd() + os.sep + "sound" + os.sep + "BOMB2.wav"
    explosion_sound = pygame.mixer.Sound(explosion_sound)
    "播放背景音乐"
    bgmusic = os.getcwd() + os.sep + "sound" + os.sep + "Protozoa.wav"
    playmusic(bgmusic)
    "准备增加显示封面的函数"
    if display_cover(pygame.image.load(cover_image)):
        main()
    else:
        pygame.quit()

如需要下载完整源代码,请

成为会员后,登陆才能继续浏览!联系微信scratch8即可办理会员。
(会员专属:能浏览所有文章,下载所有带链接的Python资源。)
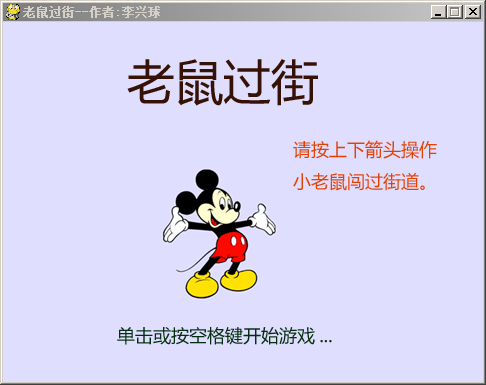
发表在 pygame, python | 标签为 , , , | 留下评论

pygame老鼠过街-配音与封面版本


马路上车来车往,请操作可怜的小老鼠过街去找妈妈吧。

"""pygame老鼠过街-配音与封面版本,在川流不息的车流中,你需要操作一只小老鼠成功过街."""

import pygame
from pygame.locals import *
from random import randint
import time,sys

class Rat():
    def __init__(self,images,x,y,w,h):
        self.framesList = images        # 造型列表
        self.造型切换间隔时长=0.4       # 以秒为单位
        self.过关=False
        self.rect = pygame.Rect(x,y,w,h)
        self.造型编号=0
        self.begintime = time.time()
        pass       

class GameObject():
    def __init__(self,framesRight,framesLeft,x,y,w,h):
        self.frames_right = framesRight
        self.frames_left = framesLeft
        self.造型数量 = len(self.frames_left)
        self.造型编号=0
        self.造型切换间隔时长=0.1    # 以秒为单位
        self.移动间隔时长=0.03       # 以秒为单位 
        self.rect = pygame.Rect(x,y,w,h)
        self.xspeed=randint(1,5)
        self.yspeed=0
        self.begintime = time.time()
        self.begintime2 = time.time()
        
    pass
            
    def collide(self,rat):
        if self.rect.colliderect(rat.rect):
            return True
        else:
            return False        

pygame.init()
screen_width,screen_height=480,360
screen = pygame.display.set_mode((screen_width,screen_height))
pygame.display.set_caption("pygame老鼠过街--作者:李兴球")
背景 = pygame.image.load("街道.png")
 
BellToll  = pygame.mixer.Sound("BellToll.wav")
Cricket  = pygame.mixer.Sound("Cricket.wav")
Cricket.play()
Laugh_male1 = pygame.mixer.Sound("Laugh-male1.wav")
pygame.mixer.music.load("欢快女唱电.wav")
pygame.mixer.music.play(-1,0)

rat0 = pygame.image.load("mouse1-a.png")
rat1 = pygame.image.load("mouse1-b.png")
rats = [rat0,rat1]
rat = Rat(rats,screen_width//2,screen_height-30,20,30)
frame0 = pygame.image.load("小汽车.png") 
framesRight = [frame0]
framesLeft = [pygame.transform.flip(f,True,False) for f in framesRight]

font = pygame.font.Font("c:/windows/fonts/msyh.ttf",30)
textstring = " "
textImage =font.render(textstring,True,(0,255,255))
(tx,ty,tw,th) = textImage.get_rect()
textpos=(screen_width//2 - tw //2,screen_height//2 - th/2 -100)
#新建一些小汽车
car1 = GameObject(framesRight,framesLeft,100,30,70,30)
car2 = GameObject(framesRight,framesLeft,200,160,70,30)
car3 = GameObject(framesRight,framesLeft,300,260,70,30)
car4 = GameObject(framesRight,framesLeft,400,200,70,30)
car5 = GameObject(framesRight,framesLeft,230,90,70,30)
cars = [ car1,car2,car3,car4,car5]

封面  = pygame.image.load("封面设计.png")
running = True
game_over = False
while running:
    for event in pygame.event.get():
        if event.type==QUIT:
            running=False
            game_over = True
        if event.type==KEYDOWN or event.type==MOUSEBUTTONDOWN:
            running=False
    screen.blit(封面,(0,0))
    pygame.display.update()

if game_over == True: pygame.quit();sys.exit()

# 进入游戏循环
pass
# 退出游戏循环显示结果

# 根据不同的游戏结果显示不同的字符            
textImage =font.render(textstring,True,(0,255,255))
(tx,ty,tw,th) = textImage.get_rect()
textpos=(screen_width//2 - tw //2,screen_height//2 - th/2 -100)
screen.blit(textImage,textpos)
pygame.display.update()
while True:
    event = pygame.event.wait()
    if event.type == QUIT:break
pygame.quit()


如需要下载完整源代码及素材, 请

成为会员后,登陆才能继续浏览!联系微信scratch8即可办理会员。
(会员专属:能浏览所有文章,下载所有带链接的Python资源。)

发表在 pygame, python | 标签为 | 留下评论

pygame鼠标控制的拦球小游戏python ping pong game

精心配音,有封面及结尾的一个完整的拦球小游戏。英文名一般为ping pong game。
以下是部分代码预览:

"""鼠标控制的拦球小游戏,有封面有配音版本,这是用pygame制作的一个小游戏,图中的小球和拦板都是直接画在screen上的."""

import pygame
from pygame.locals import *
from random import randint

class board():
    def __init__(self ):
        self.x = 200
        self.y = 300
        self.w = 120
        self.h = 20
         
    def move(self):
        mpos = pygame.mouse.get_pos()
        self.x = mpos[0] - self.w/2
        
    def draw(self):
        pygame.draw.rect(screen,(0,255,255),(self.x,self.y,self.w,self.h))       


class Ball():
    def __init__(self,board):
        self.isalive=True          # 描述弹球状态的逻辑变量
        self.board = board
        # 直接在屏幕上画,返回矩形对象
        self.shape = pygame.draw.circle(screen,(255,255,0),(screen_width//2,screen_height//2),10,10)          
        self.speed=[randint(-10,10),randint(-10,10)]
        
    def collideboard(self):
        """碰到拦板检测""" 
        pass                      # 此处是小球碰撞到拦板的代码,请自行编写,亦可联系作者索要
    
    def lostcheck(self):
        """小球丢失检测"""
        pass                      # 请自行编写,亦可向作者索要            
            
    def move(self):
        self.speed[0]=self.speed[0]*1.001   # 这样做是为了让小球移动得越来越快     
        self.speed[1]=self.speed[1]*1.001
        
        self.shape.move_ip(self.speed[0],self.speed[1])
        pass
            
        self.lostcheck()       # 每次移动后对坐标进行检测,赶过屏幕最底y坐标则标为"死亡"        
            
    def draw(self):
        pygame.draw.circle(screen,(255,255,0),(self.shape.centerx,self.shape.centery),10,10)    

pygame.init()
screen_width=480
screen_height=360
screen = pygame.display.set_mode((screen_width,screen_height))

pygame.display.set_caption("pygame制作的拦弹球小游戏_作者:李兴球 ")

pygame.mixer.init()
碰撞声 = pygame.mixer.Sound("碰撞.wav")
click = pygame.mixer.Sound("click.wav")
delete = pygame.mixer.Sound("delete.wav")
碰拦板 = pygame.mixer.Sound("碰好.wav")
失败声 = pygame.mixer.Sound("失败.wav")

bgmusic = pygame.mixer.music.load("背景音乐.wav")
pygame.mixer.music.play(-1,0)


拦板 = board()
篮子 = [ Ball(拦板),Ball(拦板)] 

封面 = pygame.image.load("封面.png")
没单击=True
while 没单击:
     for event in pygame.event.get():
         if event.type==MOUSEBUTTONDOWN:
             click.play()
             没单击=False
     screen.blit(封面,(0,0))
     pygame.display.update()
     

font = pygame.font.Font("C:/windows/fonts/msyh.ttf",28)    # 微软雅黑字体对象
gameover= font.render("拦球小游戏结束了, 作者:李兴球",True,(255,0,0))
(fx,fy,fw,fh)  = gameover.get_rect()

clock = pygame.time.Clock()
running = True                    #  下面是游戏循环
while running and  not 篮子==[]:
    # 事件检测
    for event in pygame.event.get():
        if event.type==QUIT:running = False
        
    # 游戏逻辑
    拦板.move()
    [ball.move() for ball in 篮子]
    
    # 图形渲染 
    screen.fill((0,0,0))
    拦板.draw()
    [ball.draw()  for ball in 篮子]    
 
    # 屏幕更新显示
    pygame.display.update()

    # 检测篮子中有没有"死亡"的小球
    for ball in 篮子:
        if ball.isalive==False:
            篮子.remove(ball)
    clock.tick(30)
    
if 篮子==[]:               # 如果小球都丢失了,游戏失败
    screen.blit(gameover,(screen_width//2 - fw//2,screen_height//2 - fh//2))
    pygame.display.update()
    失败声.play()
else:
    pygame.quit() 


如需要下载完整源代码及素材,请

成为会员后,登陆才能继续浏览!联系微信scratch8即可办理会员。
(会员专属:能浏览所有文章,下载所有带链接的Python资源。)
发表在 pygame, python | 标签为 , , | 留下评论

海龟画图移动方式的箭头类

以下是部分代码预览:

"""海龟画图移动方式的箭头类,这个程序设计了一个箭头类,实例化它会不断地朝向鼠标指针的方向,并且按前进或后退方向箭头会移动。
这是制作游戏的一个基本例程。"""

import pygame
from pygame.locals import *
import math

class Arrow():
    """箭头类,移动方式为朝向自己的方向移动"""

    def __init__(self, position,heading ):        
         
        self.raw_image=pygame.Surface((36,24))  # 新建原始图形       
        self.raw_image.set_colorkey((0,0,0))    # 设置不渲染颜色
        pointlist=[(0,7),(20,7),(20,0),(36,12),(20,24),(20,17),(0,17)]
        pygame.draw.polygon(self.raw_image,(255,255,255),pointlist)        
        self.image = self.raw_image        # 这个属性的初值和raw_image一样
        self.rect = self.raw_image.get_rect()       
        self.rect.center= position         # 初始坐标
        self.heading = heading             # 朝向

    def forward(self,distance):
        pass    
        
    def turn(self,angle):
        pass

    def setheading(self,heading):
        pass       
    
    def draw(self):
        """在screen上绘制箭头"""                
        screen.blit(self.image,self.rect)        


    def headingpoint(self,x,y):
        """朝向某点,算出新方向"""
        pass

def main(screensize):
    clock = pygame.time.Clock()
    arrow = Arrow((screensize.centerx,screensize.centery),0)
    running = True
    while running:
        for event in pygame.event.get():
            if event.type == QUIT:running= False                 
            pass

        mx,my = pygame.mouse.get_pos() 
        arrow.headingpoint(mx,my)
        
        screen.fill((112,0,23))        
        arrow.draw()
        pygame.display.update()
        clock.tick(30)
        
    pygame.quit()

    
if __name__=="__main__":
    
    pygame.init()
    screen = pygame.display.set_mode((480,360))
     
    screenrect = screen.get_rect()
    pygame.display.set_caption("pygame箭头类_朝向鼠标指针_作者:李兴球")

    main(screenrect)


如需要下载完整源代码及素材,请

成为会员后,登陆才能继续浏览!联系微信scratch8即可办理会员。
(会员专属:能浏览所有文章,下载所有带链接的Python资源。)
发表在 pygame, python | 标签为 , , | 留下评论

pygame基本多关卡迷宫游戏核心代码

pygame multilevel maze game多关卡

pygame multilevel maze game多关卡

以下是部分代码预览:

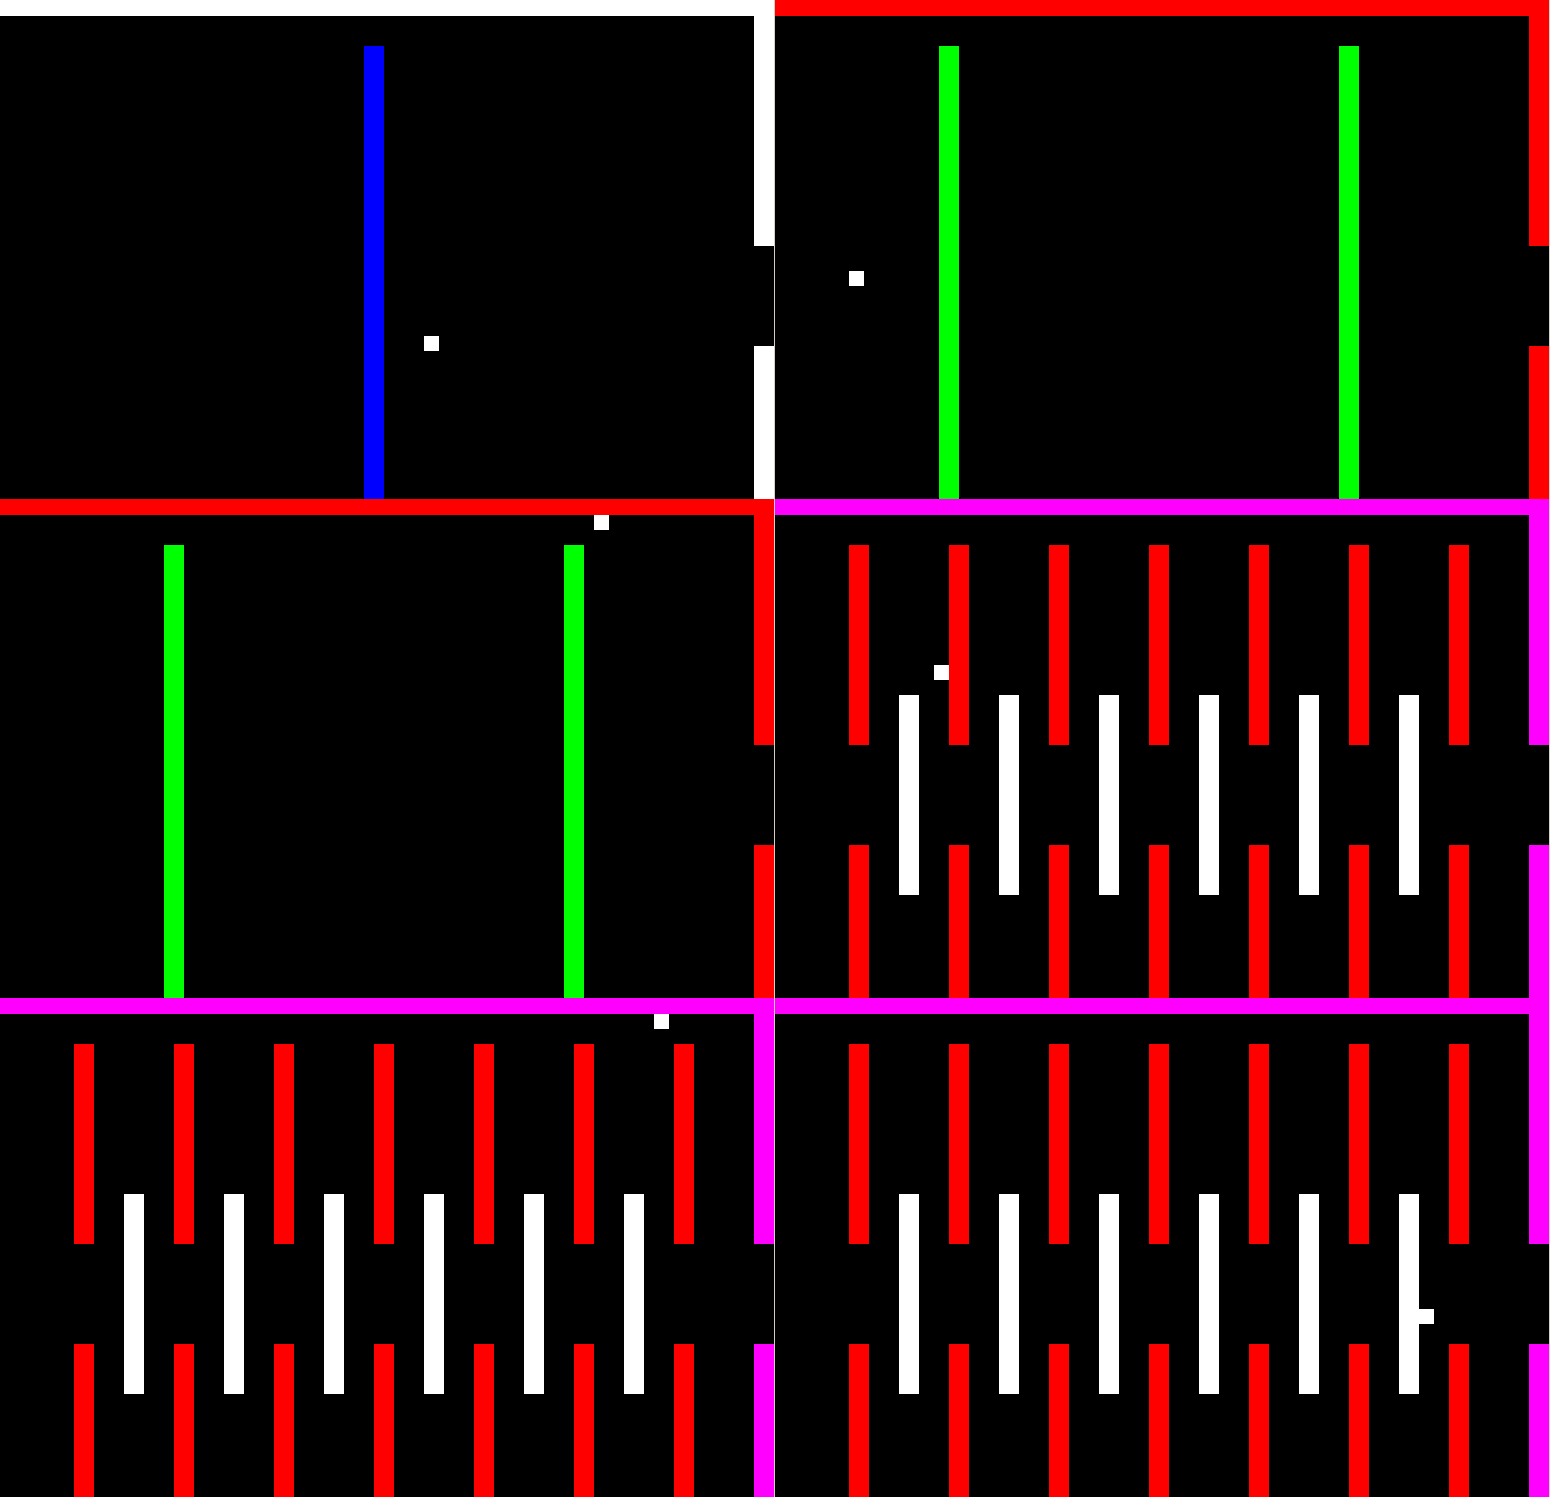
"""pygame基本多关卡迷宫游戏核心代码.py,运行本程序可以操作一个小方块从一个房间移到另一个房间,碰到了“墙壁”就不能前进。"""

import pygame
 
BLACK = (0, 0, 0)
WHITE = (255, 255, 255)
BLUE = (0, 0, 255)
GREEN = (0, 255, 0)
RED = (255, 0, 0)
PURPLE = (255, 0, 255) 
 
class Wall(pygame.sprite.Sprite):
    """墙类,代表方块障碍物"""
 
    def __init__(self, x, y, width, height, color): 
 
        # 调用父类的初始方法
        super().__init__() 
        # 根据指定的宽高参数新建图层
        self.image = pygame.Surface([width, height])
        self.image.fill(color) 
        # 新建矩形对象,以左上角为它的坐标
        self.rect = self.image.get_rect()
        self.rect.y = y
        self.rect.x = x 
 
class Player(pygame.sprite.Sprite):
    """ 玩家通过方向箭头控制的角色 """ 
 
    def __init__(self, x, y):
        super().__init__()
 
        # 玩家控制的角色是个白色的小方块
        self.image = pygame.Surface([15, 15])
        self.image.fill(WHITE)
 
        pass

    def changespeed(self, x, y):
        """ 通过按键改变速度的值 """
        self.change_x += x
        self.change_y += y
 
    def move(self, walls):
        """ 改变角色的x,y坐标 """ 
        # 左右移动
        self.rect.x += self.change_x
 
        # 碰到墙的检测
        pass
 
 
class Room(object):
    """ 所有房间的基类"""  
    def __init__(self):
        """ 所有房间共同的属性 """
        self.wall_list = pygame.sprite.Group()
        self.enemy_sprites = pygame.sprite.Group()
 
 
class Room1(Room):
    """房间1的类"""
    def __init__(self):
        super().__init__()
        # 生成一些墙,参数为x坐标,y坐标,宽,高
        walls = [[0, 0, 20, 250, WHITE],
                 [0, 350, 20, 250, WHITE],
                 [780, 0, 20, 250, WHITE],
                 [780, 350, 20, 250, WHITE],
                 [20, 0, 760, 20, WHITE],
                 [20, 580, 760, 20, WHITE],
                 [390, 50, 20, 500, BLUE]
                ] 
        # 遍历列表生成这些墙,加到墙表中。
        for item in walls:
            wall = Wall(item[0], item[1], item[2], item[3], item[4])
            self.wall_list.add(wall)
 
 
class Room2(Room):
    """房间2的类"""
    def __init__(self):
        super().__init__()
 
        walls = [[0, 0, 20, 250, RED],
                 [0, 350, 20, 250, RED],
                 [780, 0, 20, 250, RED],
                 [780, 350, 20, 250, RED],
                 [20, 0, 760, 20, RED],
                 [20, 580, 760, 20, RED],
                 [190, 50, 20, 500, GREEN],
                 [590, 50, 20, 500, GREEN]
                ]
 
        for item in walls:
            wall = Wall(item[0], item[1], item[2], item[3], item[4])
            self.wall_list.add(wall)
 
 
class Room3(Room):
    """房间3的类"""
    def __init__(self):
        super().__init__()
 
        walls = [[0, 0, 20, 250, PURPLE],
                 [0, 350, 20, 250, PURPLE],
                 [780, 0, 20, 250, PURPLE],
                 [780, 350, 20, 250, PURPLE],
                 [20, 0, 760, 20, PURPLE],
                 [20, 580, 760, 20, PURPLE] ]
 
        for item in walls:
            wall = Wall(item[0], item[1], item[2], item[3], item[4])
            self.wall_list.add(wall)
 
        for x in range(100, 800, 100):
            for y in range(50, 451, 300):
                wall = Wall(x, y, 20, 200, RED)
                self.wall_list.add(wall)
 
        for x in range(150, 700, 100):
            wall = Wall(x, 200, 20, 200, WHITE)
            self.wall_list.add(wall)
 
 
def main():
    """ 主要函数代码"""
 
    # 初始化pygame
    pygame.init()
 
    # 创建800X600的屏幕对象,它也是一个surface
    screen = pygame.display.set_mode([800, 600])
 
    # 设置窗口标题
    pygame.display.set_caption('基本多关卡迷宫游戏核心代码')
 
    # 创建玩家控制的小方块
    player = Player(50, 50)
    movingsprites = pygame.sprite.Group() # 玩家角色组
    movingsprites.add(player)
 
    rooms = [Room1(),Room2(),Room3()]     # 房间列表
 
    current_room_index = 0
    current_room = rooms[current_room_index]
 
    clock = pygame.time.Clock()
 
    done = False
 
    while not done:
 
        # 事件处理 
        pass
        pygame.display.flip()
 
        clock.tick(60)
 
    pygame.quit()
 
if __name__ == "__main__":
    main()


如需要下载完整源代码及素材,请

成为会员后,登陆才能继续浏览!联系微信scratch8即可办理会员。
(会员专属:能浏览所有文章,下载所有带链接的Python资源。)

发表在 pygame, python | 标签为 | 留下评论

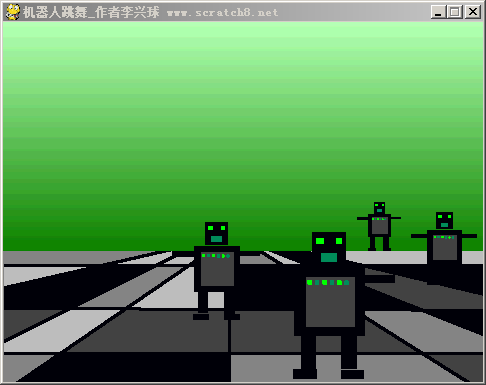
pygame机器人跳舞动画演示程序

pygame robot dance animation机器人跳舞

pygame robot dance animation机器人跳舞

"""pygame机器人跳舞动画演示程序,这个程序用到了图像变形功能,让几个机器人的大小和移动速度不一样。"""

import pygame
from pygame.locals import *
from random import randint

class Robot():
    def __init__(self,image,scale,x,y):
        rect = image.get_rect()        
        self.image = pygame.transform.scale(image,(rect.width*scale//100,rect.height*scale//100))
        pass

    def move(self):
        self.rect.x = self.rect.x + self.水平速度
        pass      
            
    def draw(self):
        screen.blit(self.image,self.rect)

pygame.init()
screen_width,screen_height=480,360
screen = pygame.display.set_mode((screen_width,screen_height))
pygame.display.set_caption("pygame机器人跳舞_作者:李兴球")
背景图片 = pygame.image.load("舞台背景.gif")
robotimage = pygame.image.load("robot1.gif")

allrobots=[]
r1 = Robot(robotimage,20,randint(50,screen_width-150),screen_height-180)
allrobots.append(r1)
r2 = Robot(robotimage,30,randint(50,screen_width-150),screen_height-170)
allrobots.append(r2)
r3 = Robot(robotimage,40,randint(50,screen_width-150),screen_height-160)
allrobots.append(r3)
r4 = Robot(robotimage,60,randint(50,screen_width-150),screen_height-150)
allrobots.append(r4)

# 以下三句话能让程序循环播放背景音乐
pygame.mixer.init()
pygame.mixer.music.load("firecracker-ymo.wav")
pygame.mixer.music.play(-1,0)

t = pygame.time.Clock()

以下代码省略......
    
pygame.quit()


如需要下载完整源代码及素材,请

成为会员后,登陆才能继续浏览!联系微信scratch8即可办理会员。
(会员专属:能浏览所有文章,下载所有带链接的Python资源。)

发表在 pygame, python | 标签为 , , | 留下评论

pygame行走的小猫多帧动画演示程序


美国麻省理工的小猫咪来了。它跑到了pygame窗口中。

以下是部分代码预览:

"""行走的小猫多帧动画演示程序.py。一只步态优雅的小猫在海面上行走。用的是MIT scratch小猫。
这个程序中新建了一个叫Sprite的类。它有两个帧图序列,当它的x速度大于0的时候,就用右边的帧序列,反之用左边的帧序列."""

import pygame
import time,glob
from random import randint
from pygame.locals import *

class Sprite():
    def __init__(self,framesRight,framesLeft,x,y,w,h):
        self.frames_right = framesRight
        self.frames_left = framesLeft
        pass

    def move(self):
        if (time.time()-self.begintime2) >= self.移动间隔时长:

            self.rect.move_ip(self.xspeed,self.yspeed)
            if self.rect.left<0 or self.rect.right>screen_width:
                self.xspeed = - self.xspeed
            self.begintime2 = time.time()
        
    def draw(self):
        if self.xspeed>0:
            screen.blit(self.frames_right[self.造型编号],self.rect)
        else:            
            screen.blit(self.frames_left[self.造型编号],self.rect)
pass


#新建一个小猫测试
cat = Sprite(framesRight,framesLeft,100,200,80,90)
running = True
while running:
    for event in pygame.event.get():
        if event.type==QUIT:running = False        
    cat.move()
    cat.nextcostume()                     # 下一个造型    
    screen.blit(背景,(0,0))
    cat.draw()
    screen.blit(textImage,textpos)
    pygame.display.update()
pygame.quit()


如需要下载完整源代码及素材,请

成为会员后,登陆才能继续浏览!联系微信scratch8即可办理会员。
(会员专属:能浏览所有文章,下载所有带链接的Python资源。)

发表在 pygame, python | 标签为 , , | 留下评论

pygame过河搭桥画笔小游戏

pygame pen game

pygame pen game

用pygame制作的创意画笔小游戏。
以下是部分代码预览:

"""pygame过河搭桥画笔小游戏,这是pygame多关卡创意画笔类小游戏,这个程序增加Pen类,当鼠标按下移动时,画一条线给小球搭桥.
   画的时间长短有限制,每关画的次数限制为3次,
   并且按左键画绿色,按右键画黑色。
   操作方法:按左右方向箭头操作小球,碰到红色死亡。
   下一个版本是增加各种道具,藏在红色之中,通过画黑线可以进入等等。
"""
__author__ = "李兴球"
__date__ = "2019年1月"
import math
import pygame
from glob import glob
from pygame.locals import *

def insert_point(a,b,step):
    """在两点之间线性插入坐标点,a:起点坐标,b:终点坐标,step:步长"""
    points = []
    x1,y1 = a       # 起点
    x2,y2 = b       # 终点
    dy = y2 - y1
    dx = x2 - x1
    angle = math.atan2(dy,dx)
    distance = int(math.sqrt(dx*dx+dy*dy))
    pass

class Pen():
    def __init__(self,ball):
        self.ball = ball                     # 笔可以访问球,以便访问球的属性方法等。
        self.screen = ball.screen 
        self.color = GREEN                   # 初始颜色为绿色
        self.thickness = 30                  # 笔触大小,实际上是画圆时的半径
        self.draw_times  = [ 3 for i in range(len(self.ball.backgrounds))] # 每关画的次数为3
        
    def alt_color(self,color):         
        self.color = color
        
    def paint(self,previous_point,mouse_pos,):
        """在ball.background上画圆点"""  
        
        pass          
            
           
class Ball:
    def __init__(self,radius,color,position,screen,backgrounds):
        self.radius = radius
        self.screen = screen
        self.backgrounds = backgrounds                     # 所有的关卡对象
        self.level = 0                                     # 开始关卡
        self.background = self.backgrounds[self.level]     # 当前背景(关卡)
        self.level_amounts = len(backgrounds)              # 关卡数量
        self.screen_width = self.screen.get_width()        # 屏幕宽度 
        self.screen_height = self.screen.get_height()      # 屏幕高度
        self.image = pygame.Surface((radius*2,radius*2))   # 新建正方形面对象
        self.image.set_colorkey(BLACK)                     # 不渲染颜色为黑色
        pass
     
    def keypressed_check(self):
        keys = pygame.key.get_pressed()# 得到按键布尔值表
        
        if keys[K_DOWN] and not self.bumped_green:
            self.dy += 1
        if keys[K_LEFT] and  self.bumped_green:
            self.dx = -2
            self.dy = -2       
            
        if keys[K_RIGHT] and  self.bumped_green:
            self.dx = 2
            self.dy = -2
             
    def update(self):
        self.rect.move_ip(self.dx,self.dy)
        self.mission_check()                 # 过关检测
        self.get_outer_ring_point_list()
        self.check_bumped_pixel()            # 像素检测


    def get_outer_ring_point_list(self):
        """得到圆形边缘坐标点,用于像素检测"""
        xo,yo = self.rect.center 
        self.outer_ring_points = []
        pass
            
    def draw(self):
        self.screen.blit(self.image,self.rect)

if __name__ == "__main__":

    RED = (255,0,0,255)
    GREEN = (0,255,0,255)
    BLUE = (0,0,255,255)
    BLACK = (0,0,0,255)    
    MAGENTA  = (255,0,255,255)
    
    game_title = "过河搭桥_作者:李兴球_www.scratch8.net"
    width,height = 800,600
    
    pygame.init()
    screen = pygame.display.set_mode((width,height))
    pygame.display.set_caption(game_title)
    backgrounds = [pygame.image.load(image) for image in glob("backgrounds/*.png")]

    start_position =  (50,height//2-250)
    ball = Ball(10,MAGENTA,start_position,screen,backgrounds)
    clock = pygame.time.Clock()
    running = True
    
    start_draw = 0                            # 鼠标左键按下标志
    pen = Pen(ball)                           # 新建画笔
    while running:
        if start_draw > 0: start_draw -= 1
        for event  in pygame.event.get():
            if event.type ==  QUIT:
                running = False
                pass
        clock.tick(30)
    pygame.quit()


如需要下载完整源代码及素材,请

成为会员后,登陆才能继续浏览!联系微信scratch8即可办理会员。
(会员专属:能浏览所有文章,下载所有带链接的Python资源。)

发表在 pygame, python | 标签为 , | 留下评论

pygame刮刮乐趣味小游戏源码

pygame scratch fun game刮刮乐趣味小游戏

pygame scratch fun game刮刮乐趣味小游戏

以下是部分代码预览:

"""刮刮乐趣味小游戏,这是一个有趣的小游戏,把别人的相片给刮出来,单击左键刮图,右键换下一张图片"""

__author__ = "李兴球"
__date__  = "2018/11/26"

import os
import pygame
from pygame.locals import *
from random import choice

def isimage(image):
    """通过判断扩展名来略微判断一个文件是否是图像,只支持列表中的图像"""
    ext = os.path.splitext(image)[-1] 
    if ext.lower() in [".gif",".jpg",".png",".jpeg",".bmp"]:
        return True
    else:
        return False
    
running = True
size = width,height= 800,600                 # 宽和高度
WHITE = (255,255,255,27)                     # 半透明白色
pygame.init()                                # 初始化pygame模块
screen = pygame.display.set_mode(size)       # 建立显示屏幕
pygame.display.set_caption("刮刮乐刮图趣味小游戏_作者:李兴球_风火轮少儿编程")  

path = os.getcwd() + os.sep + "图片"
photos = [ pygame.image.load(path + os.sep + image) for image in os.listdir(path) if isimage(image)]  
amounts = len(photos)
index = 0

sur = pygame.Surface(size).convert_alpha()   # 全是0,表现为黑色,(0, 0, 0, 255)

pass

pygame.quit()


如需要下载完整源代码及素材,请

成为会员后,登陆才能继续浏览!联系微信scratch8即可办理会员。
(会员专属:能浏览所有文章,下载所有带链接的Python资源。)
发表在 pygame, python | 标签为 , , | 留下评论

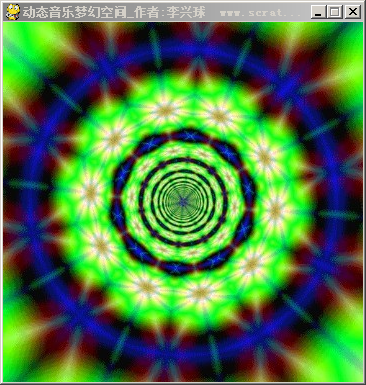
pygame动态音乐梦幻空间动画

梦幻音乐效果的动画。以下是部分代码预览:

"""pygame动态音乐梦幻空间动画.py,这是动画切换和音乐播放演示小程序,音乐劲爆,动画色彩炫丽哦."""

import os
import pygame
from pygame.locals import *

screen = pygame.display.set_mode((360,360))
pygame.display.set_caption("动态音乐梦幻空间_作者:李兴球")

# 以下三句让程序循环播放背景音乐
pygame.mixer.init()
pygame.mixer.music.load("背景音乐.wav")
pygame.mixer.music.play(-1,0)

背景列表 = []

pass
    
# 按了关闭窗口按钮后退出pygame
pygame.quit()


如需要下载完整源代码及素材,请

成为会员后,登陆才能继续浏览!联系微信scratch8即可办理会员。
(会员专属:能浏览所有文章,下载所有带链接的Python资源。)
发表在 pygame, python | 标签为 | 留下评论

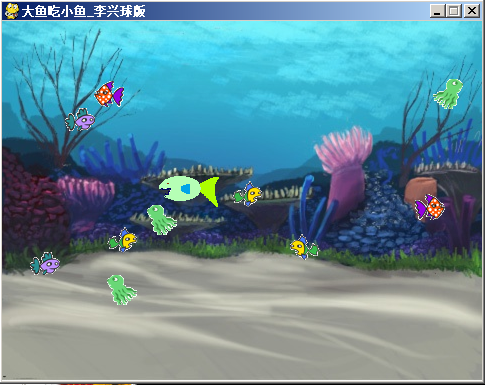
pygame大鱼吃小鱼源代码

pygame big fish eat small fish大鱼吃小鱼游戏界面

pygame big fish eat small fish大鱼吃小鱼游戏界面

以下是部分代码预览:

"""pygame大鱼吃小鱼,这是本人曾经制作的一个小练习,现在翻出来以飨读者,以前为了方便学生理解程序,用了些中文变量。"""

import pygame
from pygame.locals import *
import math
from random import randint

pygame.init()
screen = pygame.display.set_mode((480,360))
pygame.display.set_caption("pygame大鱼吃小鱼_作者:李兴球")
    
class Bigfish():
    def __init__(self,rightImageList,leftImageList,x,y):
        self.imageindex = 0        # 相当于造型编号
        self.direction=0           # 0表示右,1左
        self.imageList = [rightImageList,leftImageList]
        self.image = self.imageList[self.direction][self.imageindex]        
        pass
        
    def move(self,mx,my):                    # mx是鼠标指针的x坐标
        dx = self.rect.centerx - mx          # dx大于0,表示鱼在鼠标指针右边,这时它的方向为左.        
        if dx!=0: self.direction= (dx//abs(dx) + 1)//2
        self.rect.centerx = mx
        self.rect.centery = my
        pass 
         
    def draw(self):
        self.image = self.imageList[self.direction][self.imageindex]
        screen.blit(self.image,self.rect)
        
class smallfish():
    def __init__(self,imageRight,imageLeft,x,y):
        self.imageList = [imageLeft,imageRight]        
        self.imageIndex = randint(0,1)
        self.image = self.imageList[self.imageIndex]
        self.xspeed = ( 2 * self.imageIndex ) - 1
        self.rect = self.image.get_rect()
        self.rect.x = x
        self.rect.y = y        
        self.delete= 0            # 删除标志
        
    def move(self):
        self.rect.x = self.rect.x + self.xspeed
        if self.rect.x<=0 or self.rect.right>=480   or randint(0,1000)==0:
            self.xspeed = -self.xspeed
            self.imageIndex = 1 - self.imageIndex
            self.image = self.imageList[self.imageIndex]
            
    def 碰到(self,rect):
        return self.rect.colliderect(rect)
    def draw(self):
        screen.blit(self.image,self.rect)        
  
def main():
    
    clock = pygame.time.Clock()
    大鱼右开图 = pygame.image.load("鱼开.gif")
    大鱼右合图 = pygame.image.load("鱼合.gif")
    大鱼右开图.set_colorkey((0,0,0))
    大鱼右合图.set_colorkey((0,0,0))

    大鱼右图表 = [大鱼右开图,大鱼右合图]

    大鱼左开图 = pygame.transform.flip(大鱼右开图,True,False)
    大鱼左合图 = pygame.transform.flip(大鱼右合图,True,False)

    大鱼左图表 = [大鱼左开图,大鱼左合图]

    小鱼右图像表 = []
    for i in range(5):
        小鱼右图像表.append(pygame.image.load("小鱼" + str(i) + ".png"))        
    小鱼左图像表 = []
    for i in range(5):
        小鱼左图像表.append(pygame.image.load("小鱼" + str(i) + "_左.png"))
    
    背景图 = pygame.image.load("underwater2.png")
    
    x,y = pygame.mouse.get_pos()
    大鱼 = Bigfish(大鱼右图表,大鱼左图表,x,y)
    pygame.mouse.set_visible(False)              # 隐藏鼠标指针

    # 产生几条小鱼
    小鱼们 = []
    for i in range(10):
        r = randint(0,4)
        小鱼们.append(smallfish(小鱼右图像表[r],小鱼左图像表[r],randint(50,430),randint(50,300)))

    pygame.mixer.init()
    吃的音效 = pygame.mixer.Sound("吃的声音.wav")    
     
    pass           

       
    pygame.quit()

if __name__ == "__main__":
    main()


如需要下载完整源代码及素材,请

成为会员后,登陆才能继续浏览!联系微信scratch8即可办理会员。
(会员专属:能浏览所有文章,下载所有带链接的Python资源。)
发表在 pygame, python | 标签为 , | 留下评论

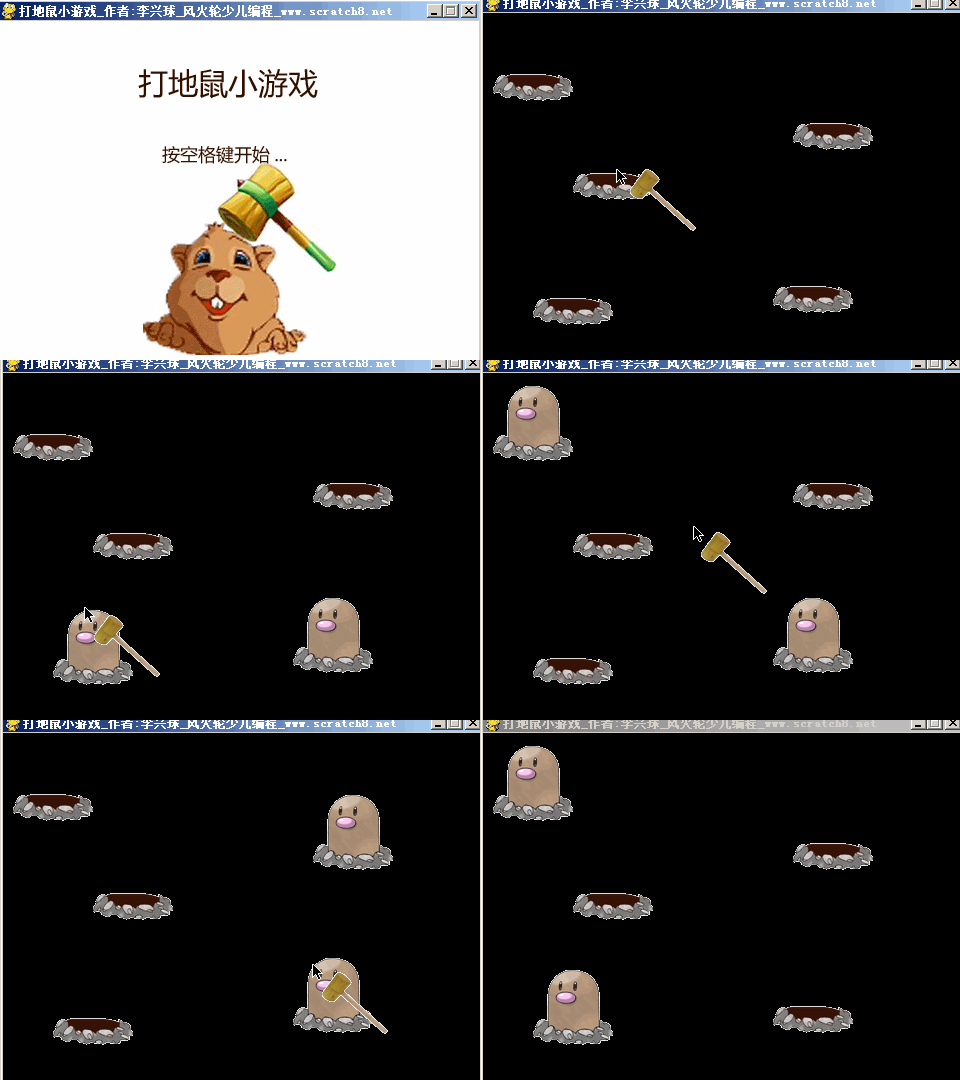
pygame打地鼠小游戏源码

以下是部分代码预览:

"""pygame打地鼠小游戏,这是有游戏封面与配音的一个版本,作者:李兴球,风火轮少儿编程 ,www.scratch8.net。在游戏中新建了锤子类和地鼠类。在游戏中用了少许中文变量,方便初学者理解程序。"""

import pygame
from pygame.locals import *
from random import randint

class Hamster():
    def __init__(self,x,y,w,h,image0,image1):
        self.images = [image0,image1]
        self.x = x
        self.y = y
        self.w = w
        self.h = h
        pass

    def show(self):
        self.status = 1
        
    def hide(self):
        self.status= 0
        
    def draw(self):
        screen.blit(self.images[self.status],(self.x,self.y))
        
    def collide(self,hammer):
        """地鼠和锤子的矩形重叠"""
        return self.rect.colliderect(hammer.rect) and self.status == 1

class Hammer():
    def __init__(self,x,y,w,h,image0,image1):
        self.images = [image0,image1]
        self.x = x
        self.y = y
        self.w = w
        self.h = h
        self.status = 0                 # 表示没敲下的状态
         
    def setpos(self,x,y):
        self.x = x
        self.y = y
        self.rect = pygame.Rect(self.x,self.y,self.w,self.h)# 由于锤子跟着鼠标移动,所以它的rect属性要不断重设
        
   def draw(self):
        screen.blit(self.images[self.status],(self.x,self.y))

print("主程序开始...")        
pygame.init()
屏幕宽度=480
屏幕高度=360
screen = pygame.display.set_mode((屏幕宽度,屏幕高度))
pygame.display.set_caption("打地鼠小游戏_作者:李兴球_风火轮少儿编程_www.scratch8.net")

pygame.mixer.init()
HandClap = pygame.mixer.Sound("HandClap.wav")    # 实例化击打音效
pygame.mixer.music.load("My Musicfmusic1.wav")   # 播放动听的背景音乐
pygame.mixer.music.play(-1,0)

hamster0 = pygame.image.load("地鼠隐藏.png")      
hamster1 = pygame.image.load("地鼠显示.png") 
hammer0 = pygame.image.load("锤子-没敲.png")
hammer1 = pygame.image.load("锤子-敲下.png")

锤子  = Hammer(0,0,80,80,hammer0,hammer1)            
篮子=[Hamster(10,10,80,80,hamster0,hamster1),Hamster(90,109,80,80,hamster0,hamster1),Hamster(290,222,80,80,hamster0,hamster1)]
篮子.append(Hamster(310,59,80,80,hamster0,hamster1))
篮子.append(Hamster(50,234,80,80,hamster0,hamster1))

print("显示封面",KEYDOWN)

pass


如需要下载完整源代码及素材,请

成为会员后,登陆才能继续浏览!联系微信scratch8即可办理会员。
(会员专属:能浏览所有文章,下载所有带链接的Python资源。)

发表在 pygame, python | 留下评论

pygame城市之战横版射击游戏源码

pygame city war shoot game城市之战飞机大战

pygame city war shoot game城市之战飞机大战

以下是部分代码预览:

"""pygame城市之战横版射击游戏,按上下左右方向箭头操作飞机。这是一个横板射击小游戏,在黑夜的城市上空,你将要操作一架飞机去射击敌机,爆炸效果还不错。
在游戏中定义了滚动的背景类,定义了飞机类Plane,定义了子弹类,敌机类,爆炸类等,是学习Pygame和面向对象编程的好例子。"""

import math
import time
import pygame
from pygame.locals import *
from random import choice,randint
from scrolledbackground import *   # 导入滚动背景类
from plane import *                # 导入Plane类 
from bullet import *               # 导入Bullet类
from explosion import *            # 导入爆炸类 
             
def split_images(image,rows,cols):
    """image是一张图片,把它切分为若干图,返回列表"""
    global explosion_images_list
    image = pygame.image.load(image)
    step_width = image.get_width()//cols
    step_height = image.get_height()//rows
    
    for r in range(rows):
        for c in range(cols):
            x = c * step_width
            y = r * step_height
            rect = pygame.Rect(x,y,step_width,step_height)
            explosion_images_list.append(image.subsurface(rect))            
 
                
class Enemy(pygame.sprite.Sprite):
    def __init__(self,images,group,screen):
        """images是surface列表"""
        pygame.sprite.Sprite.__init__(self)
        self.screen = screen
        self.screen_width = self.screen.get_width()     # 获取屏幕宽度
        self.screen_height = self.screen.get_height()   # 获取屏幕高度
        self.image = choice(images)                     # 随机选择一个surface
        self.rect = self.image.get_rect()
        self.rect.left = self.screen_width + randint(10,self.screen_width)
        self.rect.centery = randint(0,self.screen_height)
        self.group = group
        self.group.add(self)                            # 加入到自己的组
    def update(self):
        self.rect.move_ip(-5,0)
        if self.rect.right <= 0 :
            self.group.remove(self)
        
class Eullet(pygame.sprite.Sprite):
    """敌方子弹类"""
    def __init__(self,image,selfgroup,enemy_group,plane,screen):
        """参数列表:image,已转换成surface的对象
                     selfgroup,所在的组
                     enemy_group,敌人组.
                     plane,我方飞机
                     screen,屏幕对象
        """
        pygame.sprite.Sprite.__init__(self)
        self.group = selfgroup                    # 自己所在的组
        self.group.add(self)
        self.image = image
        e = choice(list(enemy_group))             # 随机选择一架敌机
        self.rect = self.image.get_rect()         # 矩形对象
        self.rect.center = e.rect.center          # 放在这架敌机的坐标
        self.plane = plane                        # 我方飞机对象
        self.screen = screen
        self.screen_width = screen.get_width()
        self.screen_height = screen.get_height()        
        self.dx = self.rect.centerx - self.plane.rect.centerx
        self.dy = self.rect.centery - self.plane.rect.centery
        
    def update(self):
        self.rect.move_ip(-self.dx//30,-self.dy//30)
        if self.beyond_edge() :
            self.group.remove(self)
    def beyond_edge(self):
        b1 = self.rect.left > self.screen_width
        b2 = self.rect.right < 0
        b3 = self.rect.bottom < 0
        b4 = self.rect.top > self.screen_height
        return b1 or b2 or b3 or b4

def collision_check():
    """对游戏中的对象进行碰撞检测,碰撞检测有以下几种:
       1、我方飞机碰到敌方飞机,都爆炸。给我方飞机增加dead属性。
       2、我方飞机碰到敌方子弹,我方飞机爆炸,游戏结束。
       3、敌方飞机碰到我方子弹,敌方飞机爆炸。
       以下引用的是全局变量
    """
    pass 


if __name__ == "__main__":

    width,height = 480,360
    enemy_bullet = "images/bullet2.png"
    enemy_images = ["images/enemy0.png","images/enemy1.png","images/enemy2.png","images/enemy3.png"]
    explosion_images =  "images/explosion.png"
    image = "images/night city with street.png"
    plane_image1 = "images/plane.png"
    bullet_image1 = "images/bullet.png"

    pygame.init()
    screen = pygame.display.set_mode((width,height))
    pygame.display.set_caption("城市之战_作者:李兴球,按上下左右操作飞机。风火轮少儿编程_www.scratch8.net")

    enemy_bullet = pygame.image.load(enemy_bullet)
    enemy_images = [pygame.image.load(img) for img in enemy_images]   # 形成敌机的surface列表
    explosion_images_list = []                              # 爆炸效果surface列表
    explosion_images = split_images(explosion_images,2,13)  # 按2行13列切分图形,返回surface列表
 
    
    keys1 = [K_UP,K_DOWN,K_LEFT,K_RIGHT]
    plane1 = Plane(plane_image1,keys1,screen)
    bg = ScrolledBackground(image,screen)
    running = True
    clock = pygame.time.Clock()

    bullet1_shoot_EVENT = USEREVENT + 1
    pygame.time.set_timer(bullet1_shoot_EVENT,500)

    "敌机定时生成事件"
    enemy_EVENT = USEREVENT + 2
    pygame.time.set_timer(enemy_EVENT,1000)
    
    "敌机定时发射子弹事件"
    enemy_shoot_EVENT = USEREVENT + 3
    pygame.time.set_timer(enemy_shoot_EVENT,50)
    
    group_explosion  = pygame.sprite.Group()
    group_bullet1 = pygame.sprite.Group()
    group_enemy = pygame.sprite.Group()
    group_enemy_bullet = pygame.sprite.Group()
    enemy_amounts = 100                         # 大于这个数量则游戏成功结束
    enemy_counter = 0
    pass


如需要下载完整源代码及素材,请

成为会员后,登陆才能继续浏览!联系微信scratch8即可办理会员。
(会员专属:能浏览所有文章,下载所有带链接的Python资源。)

发表在 pygame, python | 留下评论

Pygame画一个彩色圆盘(颜色渐变与仿海龟画图)


以下是部分代码预览:

"""用Pygame画一个彩色圆盘,这是本人曾经学习Pygame的一个练习程序。
   本程序定义一个笔类,它有forward方法,能朝自己的方向前进,但是有误差! 减小这个误差需要全部用浮点数表示数据.
本程序实例化这支笔画了一个彩色的圆盘.笔的x,y坐标是数学坐标系(scratch类的舞台坐标系),非计算机屏幕的左上角为原点的坐标素(x朝右为正,y朝下为正这个坐标系)。
"""
import math
import pygame
import colorsys
from pygame.locals import *

class Pen:
      pass
    
def main():
        
    pen  = Pen((255,0,0),4)
    pen.drawaxis()
    pen.hide()
    pen.setxy(0,0)
    pen.setHeading(-90)
    pen.down() 

    for i in range(360):
        pen.forward(100)
        pen.setxy(0,0)
        pen.turn(1)
        pen.coloradd()        
        
    pen.up()
    clock = pygame.time.Clock()
    
    running = True 
    while running:        
        for event in pygame.event.get():
            if event.type==QUIT:running=False            
        pen.draw()        
        pygame.display.update()
        clock.tick(10)
    pygame.quit()
 

if __name__=="__main__":
    
    pygame.init()
    screenWidth,screenHeight=480,360
    screenCenterx,screenCentery = screenWidth//2 -1 ,screenHeight//2 - 1
    screen = pygame.display.set_mode((screenWidth,screenHeight))
    pygame.display.set_caption("pygame笔类画的彩色圆盘_作者:李兴球_风火轮编程_www.scratch8.net")    
    main()


如需要下载完整源代码及素材,请

成为会员后,登陆才能继续浏览!联系微信scratch8即可办理会员。
(会员专属:能浏览所有文章,下载所有带链接的Python资源。)

发表在 pygame, python | 标签为 | 一条评论

用pygame制作的我的世界2D版_2D_Minecraft源代码


包括9个步骤分步制作而成的2D版本我的世界。
两块木片和2块岩石合成一把火 , 两块岩石合成石头。 两块石头和一团火合成砖块 , 两块石头合成沙 。 一团火,2沙合成玻璃 。 2木,3炭,2玻璃合成钻石。按空格键捡东西,按数字键放东西,按数字键同时单击鼠标左键满足要求时合成物质。游戏目标可以是合成钻石,请先看教程。”
以下是部分代码预览:

"""用pygame制作的我的世界2D版,作者李兴球,游戏操作:按空格键捡东西,按数字键放东西,按数字键同时单击鼠标左键合成物质,合成规则见下面代码。"""

import time
import random
import pygame,sys
from pygame.locals import *

class Role(pygame.sprite.Sprite):
    def __init__(self,images):
        pygame.sprite.Sprite.__init__(self)
        self.images = [pygame.image.load(image) for image in images]                
        self.index = 0
        self.image = self.images[self.index]   # 初始造型为上       
        self.playerPos = [0,0]
    def set_costume(self,index):
        self.image = self.images[index]        # 初始造型为上    
        
class Effect(pygame.sprite.Sprite):
    def __init__(self,images,position,group):
        """参数说明:
           images:转换成surface的列表
           position:坐标双元组,效果生成的坐标
           group:自己所在的组(效果组)
        """
        pygame.sprite.Sprite.__init__(self)
        self.images = images
        self.index = 0                         # 起始造型索引      
        self.amounts = len(self.images)        # 总共造型数量
        self.interval = 0.1                    # 造型切换间隔时间(秒)
        self.begin_time = time.time()          # 造型切换起始时间
        self.image = self.images[0]            # 起始造型
        self.rect = self.image.get_rect()      # 矩形对象(用来表示坐标和图形宽高)
        self.rect.center = position            # 矩形对象的中心点坐标
        self.group = group                     # 可引用自己所在的组
        self.group.add(self)                   # 添加进自己所在的组中
        
    def update(self):
        """切换造型"""
        self.rect.move_ip(0,-12)                # 向上移动
        if self.rect.bottom >=0 :
            self.image = self.images[self.index]
            if time.time() - self.begin_time >=0 : # 超时则索引加1,
               self.index = self.index + 1
               self.index = self.index % self.amounts 
               self.begin_time = time.time()       # 起始时间要重设
        else:
            self.group.remove(self)
    
pass

textures = {
           DIRT : pygame.image.load('dirt.png'),
           GRASS: pygame.image.load('grass.png'),
           WATER: pygame.image.load('water.png'),
           COAL : pygame.image.load('coal.png'),
           CLOUD: pygame.image.load('cloud.png'),
           WOOD : pygame.image.load('wood.png'),
           FIRE : pygame.image.load('fire.png'),
           SAND : pygame.image.load('sand.png'),
           GLASS: pygame.image.load('glass.png'),
           ROCK : pygame.image.load('rock.png'),
           STONE: pygame.image.load('stone.png'),
           BRICK: pygame.image.load('brick.png'),
           DIAMOND:pygame.image.load('diamond.png')
          }


res_names = {
               DIRT : "地面",
               GRASS: "草皮",
               WATER: "水面",
               COAL : "碳黑",
               WOOD : "木片",
               FIRE : "火把",
               SAND : "沙粒",
               GLASS: "玻璃",
               ROCK : "岩石",
               STONE: "石头",
               BRICK: "砖块",
               DIAMOND:"钻石"
            }

TILESIZE = 20
MAPWIDTH = 50
MAPHEIGHT = 20
 
play_images = ['player_up.png','player_down.png','player_left.png','player_right.png'] # 上下左右图

PLAYER = Role(play_images)   # 它有属性playerPos和images,用于坐标定位和图像渲染

resource = [DIRT,GRASS,WATER,COAL,WOOD,FIRE,SAND,GLASS,ROCK,STONE,BRICK,DIAMOND]  # 显示在下栏的资源种类

tilemap = [ [DIRT for w in range(MAPWIDTH)] for h in range(MAPHEIGHT) ]           # 初始化方块地图,都是DIRT


"合成表里合成规则"

rules = "# 两块木片和2块岩石合成一把火  # 两块岩石合成石头    # 两块石头和一团火合成砖块  # 两块石头合成沙   # 一团火,2沙合成玻璃   # 2木,3炭,2玻璃合成钻石"
operate_method_string = "按空格键捡东西,按数字键放东西,按数字键同时单击鼠标左键满足要求时合成物质。游戏目标可以是合成钻石,请先看教程。"

craft = {
           FIRE : { WOOD :2,ROCK : 2 }, # 两块木片和2块岩石合成一把火         
           STONE: { ROCK :2},           # 两块岩石合成石头
           BRICK : { STONE:2,FIRE : 1}, # 两块石头和一团火合成砖块
           SAND : { STONE : 2 },        # 两块石头合成沙
           GLASS: { FIRE :1,SAND : 2 }, # 一团火,2沙合成玻璃
           DIAMOND:{ WOOD:2,COAL : 3,GLASS:2 }  # 2木,3炭,2玻璃合成钻石
         }
    
pygame.init()
DISPLAYSURF = pygame.display.set_mode((MAPWIDTH*TILESIZE,MAPHEIGHT*TILESIZE + 120 )) # 渲染面
pygame.display.set_caption("2D Minecraft,我的世界2D版,作者:李兴球_风火轮编程_www.scratch8.net")

INVFONT = pygame.font.Font('FreeSansBold.ttf',18)                                   # 新建字体对象
MSYHFONT = pygame.font.Font('msyh.ttf',12)                                          # 新建微软雅黑字体
operate_method_surface = MSYHFONT.render(operate_method_string,True,WHITE,BLACK)    # 渲染成surface
rules_surface = MSYHFONT.render(rules,True,WHITE,BLACK)                             # 渲染成surface

"效果造型表,换效果只要直接更换effect文件夹下面的图形即可,文件名为0001,0002,0003...."
effect_costumes = [ "effect/" + '0'* (4-len(str(i))) + str(i) + ".png" for i in range(1,6)] # 补零加序号形成图形文件表
effect_costumes = [pygame.image.load(image) for image in effect_costumes]   # 转换成surface
[image.set_alpha(150) for image in effect_costumes]   

pass


如需要下载完整源代码及素材,请

成为会员后,登陆才能继续浏览!联系微信scratch8即可办理会员。
(会员专属:能浏览所有文章,下载所有带链接的Python资源。)
发表在 pygame, python | 标签为 , , | 留下评论

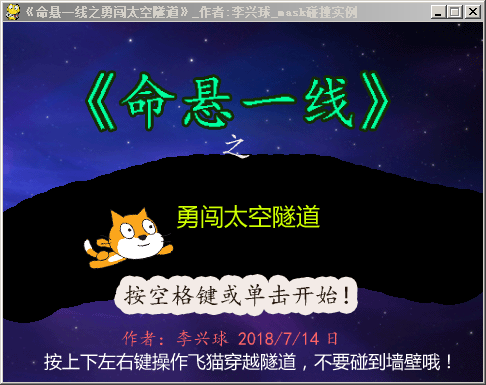
pygame闯关小游戏命悬一线之勇闯太空隧道.py

"""命悬一线之通闯太空隧道.py 这是用pygame制作一个小游戏,操作一个小猫闯关,碰撞检测用的是mask"""

import pygame
from pygame.locals import *

gamename = "《命悬一线之勇闯太空隧道》"
pygame.init()
pygame.mixer.init()
screenWidth ,screenHeight=480,360

screen = pygame.display.set_mode((screenWidth,screenHeight))
pygame.display.set_caption(gamename + "_作者:李兴球_mask碰撞实例_风火轮少儿编程")

failSound = pygame.mixer.Sound("Fail.wav")
hurtSound = pygame.mixer.Sound("hurt.wav")
succSound = pygame.mixer.Sound("小号胜利.wav")

def playmusic():
    pygame.mixer.music.load("TheAvengers.wav")
    pygame.mixer.music.play(-1,0)
    
def start_shell():
    """显示开始界面"""
    封面图= pygame.image.load("封面设计《命悬一线》.png")
    running = True
    while running:
        for event in pygame.event.get():
            if event.type==QUIT:pygame.quit()
            if event.type==KEYDOWN or event.type==MOUSEBUTTONDOWN:running = False
        screen.blit(封面图,(0,0))
        pygame.display.update()
    

class Ball():
    def __init__(self,imageRight,imageLeft,x,y):
         
        self.color = color
        self.imageRight = imageRight           # 向右造型
        self.imageLeft = imageLeft             # 向左造型     
        self.image = imageRight                # 初始为向右的图        
        self.rect = self.image.get_rect()
        self.rect.x = x
        self.rect.y = y
        self.xspeed = 0
        self.yspeed = 0
        self.delete = 0
        self.mask = pygame.mask.from_surface(self.image) # 用于遮罩碰撞检测
        self.lifes = 1                                   # 生命个数
    def move(self,direction):
        if self.lifes>0:
            self.rect.move_ip(self.xspeed*direction,self.yspeed*direction)
 
    def draw(self):
        screen.blit(self.image,self.rect)

def main():
    # 以下字典用来描述每个关卡的出口,四元组分别表示上,下,左,右,值为0时,表时没有出口,值为1时,表示有出口.
    # 由于关卡号刚好从0,开始,所以用列表也可以.
    ed = {0:(0,0,0,1),1:(1,0,1,0),2:(0,1,0,1),3:(0,1,1,0),4:(1,0,0,0)}      # 表示每关出口标志,上下左右
    关卡号  = 0
    
    背景1 = pygame.image.load("背景1.png").convert_alpha()
    背景2 = pygame.image.load("背景2.png").convert_alpha()
    背景3 = pygame.image.load("背景3.png").convert_alpha()
    背景4 = pygame.image.load("背景4.png").convert_alpha()
    背景5 = pygame.image.load("背景5.png").convert_alpha()
    背景列表= [背景1,背景2,背景3,背景4,背景5]    
    背景mask = [pygame.mask.from_surface(背景) for 背景 in 背景列表]

    小飞猫 = pygame.image.load("飞猫.png").convert_alpha()
    小飞猫右 =pygame.transform.scale(小飞猫,(30,20))
    小飞猫左 =pygame.transform.flip(小飞猫右,True,False)
    
    ball = Ball(小飞猫右,小飞猫左,30,280)
    
    clock = pygame.time.Clock()
    running = True
    while running:
        for event in pygame.event.get():
            if event.type == QUIT:pygame.quit()
        keys = pygame.key.get_pressed()
        if keys[K_RIGHT]:ball.xspeed = ball.xspeed + 0.1;ball.image = ball.imageRight
        if keys[K_LEFT]:ball.xspeed = ball.xspeed - 0.1;ball.image  = ball.imageLeft
        if keys[K_DOWN]:ball.yspeed = ball.yspeed + 0.1
        if keys[K_UP]:ball.yspeed = ball.yspeed - 0.1
        
        pass       
        
        ball.draw()
        pygame.display.update()
        clock.tick(60)

     # 停止背景音乐
    pygame.mixer.music.stop()
    笑脸图=pygame.image.load("笑脸.png")
    哭脸图=pygame.image.load("哭脸.png")
    f = pygame.font.Font("C:/windows/fonts/msyh.ttf",20)
    if ball.lifes==0 :       
        fontimage = f.render("游戏结束,你失败了!",True,(255,0,0))
        failSound.play()                                         # 播放失败音效
    else:
        fontimage = f.render("游戏结束,你成功了!",True,(255,255,125))
        succSound.play()                                         # 播放胜利音效
    running = True
    while running:
        for event in pygame.event.get():
            if event.type == QUIT:running=False
            if event.type ==MOUSEBUTTONDOWN:running=False
        screen.fill((0,0,0))
        if ball.lifes==0:
            screen.blit(哭脸图,(screenWidth//2-100,50))
        else:
            screen.blit(笑脸图,(screenWidth//2-80,50))
        screen.blit(fontimage,(screenWidth//2-100,80+screenHeight/2))
        pygame.display.update()
        
    pygame.quit()
    

if __name__ == "__main__":
    
    playmusic()
    start_shell()
    main()


如需要下载完整源代码及素材,请

成为会员后,登陆才能继续浏览!联系微信scratch8即可办理会员。
(会员专属:能浏览所有文章,下载所有带链接的Python资源。)

发表在 pygame, python | 标签为 | 留下评论

arcade街机游戏模块和Pygame模块对比

街机(Arcadegame),是置于公共娱乐场所的经营性专用游戏机。也可称为大型电玩(在台湾又有俗称作“大台”),起源于美国酒吧、餐馆、娱乐场所中流行的商业投币式娱乐机械。这篇翻译说的是arcade模块和pygame模块之间的对比。

The Python Arcade Library has the same target audience as the well-known Pygame library. So how do they differ?
arcade模块和pygame游戏都是为设计游戏而生的,它们有什么不同之处?

Features that the Arcade Library has that Pygame does not:
Pygame不支持而arcade模块支持的一些功能:

  • Supports Python 3 type hinting. 支持Python3的输入提示
  • Thick ellipses, arcs, and circles do not have a moiré pattern. 椭圆/圆弧/圆形不再有云纹图案?(求更好的翻译)
  • Ellipses, arcs, and other shapes can be easily rotated.椭圆/圆弧等其它形状支持旋转。
  • Supports installation via standard Python package manager, using ‘pip install’ 支持通过标准的包管理命令pip install安装。(Pygame不是也支持吗?)
  • Uses standard coordinate system you learned about in math. (0, 0) is in the lower left, and not upper left. Y-coordinates are not reversed.
  • Has built-in physics engine for platformers. 已经为平台类型的游戏内置了物理引擎。
  • Supports animated sprites.支持动画角色
  • API documentation for the commands is better. Many commands include unit tests right in the documentation.命令的API文档更加友好,说明档中的许多命令包括单元测试。
  • Command names are consistent. For example, to add to a sprite list you use the <span class="pre">append()</span>method, like any other list in Python. Pygame uses <span class="pre">add()</span>.命令的命名方式和它的函意一致,如append方法,是添加,而在Pygame中用的是add增加命令。
  • Parameter and command names are clearer. For example, open_window instead of set_mode.参数与命名更加清晰,如 新建窗口屏幕用的是open_window而不是set_mode。
  • Less boiler-plate code than Pygame.更少杂扰代码。
  • Basic drawing does not require knowledge on how to define functions or classes or how to do loops.基本的绘画不需要有如何设计游戏循环或如何定义函数与类的知识。
  • Encourages separation of logic and display code. Pygame tends to put both into the same game loop.游戏的运行逻辑和显示逻辑代码被设计为鼓励分离,而在Pygame中它们放在同一个循环中。
  • Runs on top of OpenGL and Pyglet, rather than the old SDL1 library. 基于OpenGL和Pyglet模块,Pygame基于老的SDL1库。
  • With the use of sprite lists, uses the acceleration of the graphics card to improve performance.当使用角色列表的时候,使用了图形卡加速来改善性能。
  • Easily scale and rotate sprites and graphics. 角色与形状能容易的改变大小和比例。
  • Images with transparency are transparent by default. No extra code needed.角色天然就支持透明。
  • Lots of Example Code. 有许多例子。

源网址:http://arcade.academy/pygame_comparison.html

发表在 arcade, python | 标签为 , | 留下评论

批量调整图像大小程序.py

"""批量调整图像大小程序.py,本程序会把文件夹下面所有的图片缩小一半"""

import os
from PIL import Image

path = "F:\\www.scratch8.net\Python教程"
os.chdir(path)

scale = 0.5
counter = 0
for filename in os.listdir():
    print("开始处理图像文件:",filename)
    im = Image.open(  filename)
    width,height = im.size
    width,height = int(width * scale) ,int(height * scale)
    im = im.resize((width,height))
    im.save(filename)
    im.close()
    counter += 1   # 统计

print("批处理图像完毕,共处理了:",counter,"个文件")
print("请自行对本程序进行完善,脚本简单旨在抛砖引玉.")


发表在 pillow, python | 标签为 | 留下评论

pygame结合pillow滤镜对图像进行淡入淡出显示.py _pygame显示pillow美女

附:林素婉300.jpg (化名)

以下是部分代码预览:

"""pygame结合pillow滤镜对图像进行淡入淡出显示.py
本程序用pillow的增强器对图形进行处理,然后用pygame显示出来"""

import pygame
from pygame.locals import *
from PIL import Image,ImageEnhance


pygame.init()
w,h = 300,300
screen = pygame.display.set_mode((w,h))
pygame.display.set_caption("慢慢显示出来的美女,淡入淡出的图形编程技巧_PIL与pygame显示图形_作者:李兴球")

class Picture():
    def __init__(self,filepath):
        self.im  = Image.open(filepath)
        self.mode = self.im.mode
        self.size = self.im.size
        self.constract_enhancer = ImageEnhance.Contrast(self.im)
        self.color_enhancer = ImageEnhance.Color(self.im)
        self.brightness_enhancer = ImageEnhance.Brightness(self.im)
        self.sharpness_enhancer = ImageEnhance.Sharpness(self.im)
    def contract(self,factor):
        """factor应该在0和1之间的浮点数"""
        self.im = self.constract_enhancer.enhance(factor)
    def color(self,factor):
        """factor在0.0和1.0之间"""
        self.im = self.color_enhancer.enhance(factor)
    def brightness(self,factor):
        """factor在0.0和1.0之间"""
        self.im = self.brightness_enhancer.enhance(factor)
    def sharpness(self,factor):
        """factor在1.0和2.0之间, 异常处理略,上同"""
        self.im = self.sharpness_enhancer.enhance(factor)
    def update(self):
        self.data  = self.im.tobytes()
        self.image = pygame.image.fromstring(self.data,self.size,self.mode)
        screen.blit(self.image,(0,0))
        pygame.display.update()
    
      
clock = pygame.time.Clock()

picture1  = Picture("林素婉300.jpg")   #请自己设置一张像素为300x300照片即可.
factor = 0.0

如需要下载完整源代码及素材,请

成为会员后,登陆才能继续浏览!联系微信scratch8即可办理会员。
(会员专属:能浏览所有文章,下载所有带链接的Python资源。)

发表在 pillow, pygame, python | 标签为 , | 留下评论

快刀图像均分器源代码.py

"""快刀图像均分器源代码.py,本程序会把文件夹下面所有图像进行切割,利用pillow做的图像分割,加上tkinter的可视化界面,输入行数和列数就能把大量的图像快速平均切分并保存好。"""

from tkinter import *
from tkinter import filedialog,messagebox
import os,time
from splitimage import *                # 图像切割模块,需要请和李兴球联系

def isimage(image):
    """通过判断扩展名来略微判断一个文件是否是图像,只支持列表中的图像"""
    ext = os.path.splitext(image)[-1] 
    if ext.lower() in [".gif",".jpg",".png",".jpeg",".bmp"]:
        return True
    else:
        return False
    
def checkfolder(*folder):
    for fd in folder:
        if not os.path.exists(fd): os.mkdir(fd)
    
game_name = "快刀图像均分器"
input_folder = os.getcwd() + os.sep + "images"    # 默认的输入文件夹 
output_folder = os.getcwd() + os.sep  + "output"  # 默认的输出文件夹 
ziti = ('',12,'normal')

window = Tk()
window.resizable(width = False,height = False)# 设置窗口不能变化大小
window.geometry("800x360")                    # 设置窗口的几何尺寸 
window.title(game_name)                       # 设置窗口的标题

label0 = Label(window,text=game_name,font=('',22,'bold'),fg='red')
label0.place(x=230,y=30) 

"输入文件夹代码段"
label_input = Label(window,text='输入文件夹:',font=ziti)
label_input.place(x=10,y=110)
text_input=Entry(window,width=60,font=ziti)
text_input.place(x=120,y=110)
text_input.insert(0,input_folder)

def select_input_folder():
    dirname = filedialog.askdirectory(parent=window,initialdir="/",title='请选择输入文件夹。')
    text_input.delete(0,END)      #删除所有内容
    text_input.insert(0,dirname)
button_input=Button(window,width=18,text='选择',font=ziti,command = select_input_folder)
button_input.place(x=620,y=110)


"输出文件夹代码段"
label_output = Label(window,text='输出文件夹:',font=ziti)
label_output.place(x=10,y=160)
text_output=Entry(window,width=60,font=ziti)
text_output.place(x=120,y=160)
text_output.insert(0,output_folder)

def select_output_folder():
    dirname = filedialog.askdirectory(parent=window,initialdir="/",title='请选择输出文件夹。')
    text_output.delete(0,END)      #删除所有内容
    text_output.insert(0,dirname)
def open_output_folder():
    os.system("explorer " + text_output.get())
    
button_output=Button(window,width=8,text='选择',font=ziti,command = select_output_folder)
button_output.place(x=620,y=160)
button_open_output = Button(window,width = 8 ,text = '打开',font = ziti,command = open_output_folder)
button_open_output.place(x=700,y=160)

"行数选择"
label_rows = Label(window,text = '行数:',font = ziti)
label_rows.place(x = 10 ,y = 210)
text_rows = Entry(window,width=6,font=ziti)
text_rows.place(x=120,y=210)
text_rows.insert(0,"2")
"列数选择"
label_cols = Label(window,text = '列数:',font = ziti)
label_cols.place(x = 10 ,y = 260)
text_cols = Entry(window,width=6,font=ziti)
text_cols.place(x=120,y=260)
text_cols.insert(0,"2")
    
def process_images():
    loginfo = ""
    button_split.config(state='disabled')  # 按钮有三种状态,'normal','active','disabled'
    label_status.config(text = '处理中')
    rows = int(text_rows.get())
    cols = int(text_cols.get())
    amounts = rows * cols
    input_path = text_input.get()
    output_path = text_output.get()
    checkfolder(input_path,output_path)    # 检查文件夹是否存在,如果不存在,则创建
    photos = [input_path  + os.sep + image  for image in os.listdir(input_path) if isimage(image)] # 加载图像
    error_amounts = 0
    for photo in photos:
        label_status.config(text = photo)
        a,b,c = split_image(photo,rows,cols,output_path)
        if len(a) != amounts :
            info = str(time.ctime()) + ",处理'" + photo + "'出错!"
            loginfo = loginfo + info + "\n\n"
            error_amounts = error_amounts + 1
        window.update()
    label_status.config(text = "处理完毕,共发生 " + str(error_amounts) + " 个错误。详情见‘错误记录.txt’文件。")
    button_split.config(state='normal')    
    f = open("错误记录.txt",mode='w')
    f.write(loginfo)
    f.close()

button_split = Button(window,width=8,text='开始处理',font=('',28,'normal'),command = process_images)
button_split.place(x=200,y=210)

explain_info = "本程序会把文件夹中每一个图像文件进行切分\n\n请在'行数'和'列数'文本框里输入数值。\n\n作者:李兴球 , www.scratch8.net"
button_explain = Button(window,width=8,text='使用说明',font=('',28,'normal'),command = lambda:messagebox.showinfo(game_name,explain_info))
button_explain.place(x=400,y=210)

label_status = Label(window,text = "",font = ziti)
label_status.place( x = 10,y = 300)

window.mainloop()


发表在 pillow, python, tkinter | 留下评论

PyQt5练习_按钮与提示文本.py

"""PyQt5练习_按钮与提示文本.py"""

import sys
from PyQt5.QtWidgets import  QWidget, QToolTip,QPushButton, QApplication 
from PyQt5.QtGui import QFont   
 
 
class Window(QWidget):
     
    def __init__(self):
        super().__init__()
         
        self.initUI()
         
         
    def initUI(self):
         
        QToolTip.setFont(QFont('SansSerif', 10))
         
        self.setToolTip('这是一个 <b>QWidget</b> widget')
         
        btn = QPushButton('Button', self)
        btn.setToolTip("这是一个 <b>QPushButton</b> 组件</h1>")
        btn.resize(btn.sizeHint())
        btn.move(50, 50)      
         
        self.setGeometry(300, 300, 300, 200)
        self.setWindowTitle('提示测试窗口')   
        self.show()
         
         
if __name__ == '__main__':
     
    app = QApplication(sys.argv)
    ex = Window()
    sys.exit(app.exec_())


发表在 python | 留下评论

sb3extract.py scratch3.0的sb3项目文件素材提取器

""" sb3extract.py scratch3.0的sb3项目文件素材提取器
    本程序用来提取scratch3.0版本的项目文件里的资源。sb3文件是zip档,用winrar等工具解压后的资源以MD5值为文件名。
不方便区分造型先后顺序,对形成序列帧不友好。本程序首先解压sb3文件,再读取project.json文件,根据文件名,索引号,造型名称,文件格式,形成新的文件名。
程序设计为命令行的方式,可以用各种编程语言设计GUI程序方便地调用。
最简单的用法就是把本程序放在需要提取的sb3文件们同一个文件夹,双击它即可。"""

__author__ = '李兴球'
__date__ = '2019/1/13'
__company__ = '风火轮少儿编程'

import os
import re
import sys
import json
import shutil
import zipfile

def pure_string(filename):
    table = ("\\","/","*","?","<",">","|",".")
    for char in table:
        filename = filename.replace(char,'')
    return filename

def extractzip(filename):
    """试图解压缩filename,成功则返回True"""
    projectfile = ""  
    folder = os.path.splitext(filename)[0]
    folder = folder.replace(".","")
    folder = folder.strip()
    try:
       fp = zipfile.ZipFile(filename)    
       fp.extractall(path=folder)
       fp.close()
       projectfile = folder + os.sep + "project.json"
       return folder,os.path.exists(projectfile)
    except:
       return  folder,False

def process_name(sb3file):
    pass  

def bat_process_name(sb3filelist):
    """遍历所有sb3文件"""
    amounts = len(sb3filelist)
    counter = 0
    for sb3file in sb3filelist:
        try:            
            counter += process_name(sb3file)
        except:
            pass
    print("共有:",amounts,"个文件,成功处理了:",counter,"个。")
    input("done!                         作者:" + __author__ + "@" + __date__)
     
def analyse(parameters):
    """分析命令行参数列表"""
    sb3files = []
    if not ("-sb3" in parameters or "-path" in parameters): # sb3extract sb3file1 sb3file2 ...
        #print("在参数中没有-sb3也没有-path")
        return parameters
        
    if "-sb3" in parameters:
        pass

        pathindex = parameters.index("-path")
        path = parameters[pathindex+1]             # 在-path后没写目录名可能会让程序崩溃
        for file in os.listdir(path):
            if os.path.splitext(file)[-1] == '.sb3':
               sb3files.append(path + os.sep  + file)
        sb3files.extend(parameters[1:pathindex])   # 把-path前面的sb3filename加到列表(如果有的话)
        try:
            sb3files.extend(parameters[pathindex+2:])   # 把-path后面的sb3filename加到列表(如果有的话)
        except:
            pass
    return sb3files
         

if __name__ == "__main__":   

    p = sys.argv
    
    if len(p) == 1:
        print("本程序提取scratch3项目素材,以可读性好的文件名呈现出来。\n")        
        print("用法如下:")
        print("sb3extract                             # 处理当前目录下sb3文件们(双击本程序)")    
        print("sb3extract file1 file2 ..              # 指定文件们处理")
        print("sb3extract file1 file2 ..-path dir     # 指定文件们与文件夹" )
        print("sb3extract -sb3 file1 file2 ..         # 指定文件们")
        print("sb3extract -sb3 file1 file2 ..-path dir # 指定文件们与文件夹")
        print("sb3extract -path dir                    # 只指定文件夹")
        print("sb3extract -path dir file1 file2..      # 指定文件夹和文件们")
        print("sb3extract -path dir -sb3 file1 file2.. # 指定文件夹与文件们\n")
        print("说明:-sb3参数后面是以空格隔开的sb3文件名,-path参数后面是路径名,不输入-sb3和-path,则认为都是sb3文件。")
        print("程序会把指定目录下的sb3文件和指定的sb3文件们合并到一个列表,然后逐个处理。开始处理:\n")
        sb3files = [filename for filename in os.listdir() if os.path.splitext(filename)[-1] == '.sb3']
    else:
        parameters = p[1:]
        sb3files = analyse(parameters)
    #print(sb3files)
    bat_process_name(sb3files)
 
    """打包方式:pyinstaller -F sb3extract.py"""


如需要下载完整源代码及素材,请

成为会员后,登陆才能继续浏览!联系微信scratch8即可办理会员。
(会员专属:能浏览所有文章,下载所有带链接的Python资源。)

发表在 python, scratch | 留下评论

用zipfile模块压缩打包文件夹

"""用zipfile模块压缩打包文件夹"""
import zipfile
import os

压缩包 = "本文件夹压缩包.zip"
待打包的文件夹 = "C:/www.scratch8.net/"

zipfile_obj = zipfile.ZipFile(压缩包, 'w',zipfile.ZIP_DEFLATED)

                              
for root, dirs, files in os.walk(待打包的文件夹):
    for file in files:
        print("准备添加文件:",root + os.sep + file)
        zipfile_obj.write(root + os.sep + file)
zipfile_obj.close


发表在 python | 留下评论

风火轮少儿编程zip密码暴力破解教学程序

"""风火轮少儿编程zip密码暴力破解教学程序,请预先准备扩展名为zip并加了密码的压缩档案。"""

import zipfile  
import time 
 
def extract(password, file):
    """试图用password解压缩file"""
    try:
        password = str(password)
        file.extractall(path='.', pwd=password.encode('utf-8'))
        print("成功破解,它的密码是{}".format(password))
        return True
    except:
        pass
 
def load_pass_dict(filename):
    """加载密码字典,把所有字符串放在pass_list里"""
    pass_list = []
    f = open(filename)
    for line in f:
        if line.strip()!="":
          pass_list.append(line.strip())
    f.close()
    return pass_list


if __name__ == '__main__':

   print("欢迎来到风火轮少儿编程zip密码暴力破解教学程序.")
   
   filename = "test.zip"                # 待破解密码的zip文件

   if filename.endswith('.zip'):        # 如果是zip文件,则加载密码字典

      fp = zipfile.ZipFile(filename)

      pass_list = load_pass_dict("dict.txt")

      for password in pass_list:
                    
          if extract(password,fp) :break

      input()


发表在 python | 留下评论

猜数小游戏_纯文字核心代码版.py

"""猜数小游戏_纯文字核心代码版.py"""

from random import randint

print("Hello,我是计算机,欢迎来到猜数小游戏。")
print("我会生成一个从1到100以内的整数,你猜猜它是多少吧。\n")
number = randint(1,100)

while True:
    answer = input("请输入整数:")
    if int(answer) == number :
        print("恭喜,恭喜,你猜对了!")
        break
    if int(answer) < number:
        print("小了。")
    if int(answer) > number:
        print("大了。")

print("猜数小游戏结束了。再见!")
input()                         #输入回车结束程序


"""        
1、导入randint命令
2、产生1到100范围内的随机数,假设为number
3、进入while循环。
4、在while循环中,如果输入的数据和number相等,游戏结束,否则提示更小或更大。
5、游戏结束,打印相关字符串。
"""


发表在 python | 留下评论

猜数小游戏-wxPython可视化版本

"""猜数小游戏-wxPython可视化版本.py"""

import wx
from random import randint

game_title = "猜数小游戏"
random_number = randint(1,100)

def guess_number(event):     # 定义打开文件事件
    try:
        answer = int(answer_text.GetValue())       
        if answer == random_number:
            tip_text.SetValue("猜对了!") 
        if answer < random_number:
            tip_text.SetValue("小了!") 
        if answer > random_number:
            tip_text.SetValue("大了!") 
    except:
        
        tip_text.SetValue("非法输入!")         
         
def explain_game(event):
    tip_text.SetValue("请在上面文本框中输入,然后按'猜猜'按钮猜一下。") 

def reset(event):
    global random_number
    random_number = randint(1,100)
    tip_text.SetValue("请在上面文本框中输入,然后按'猜猜'按钮猜一下。")
    answer_text.SetValue("")     
    
app = wx.App()                                                              
frame = wx.Frame(None,title = game_title ,pos = ( 1000,200),size = (300,240)) # 相对于屏幕左上角坐标

title_text = wx.StaticText(frame,-1,game_title,(80,30))
title_text.SetForegroundColour('blue')
title_text.SetBackgroundColour('gray')
font = wx.Font(16,wx.DECORATIVE, wx.ITALIC, wx.NORMAL)
title_text.SetFont(font)

answer_text = wx.TextCtrl(frame,pos = (30,90),size = (60,24))                 # 创建文本框,文件路径要自己输入

guess_button = wx.Button(frame,label = "猜猜",pos = (110,90),size = (50,24))  # 猜猜按钮
guess_button.Bind(wx.EVT_BUTTON,guess_number)                                 # 猜猜按钮绑定guess_number函数
 
explain_button = wx.Button(frame,label = "说明",pos = (170,90),size = (50,24))# 说明按钮
explain_button.Bind(wx.EVT_BUTTON,explain_game)                               # 说明按钮绑定explain_game函数
 
reset_button = wx.Button(frame,label = "重来",pos = (230,90),size = (50,24))  # 重来按钮
reset_button.Bind(wx.EVT_BUTTON,reset )                                       # 重来按钮绑定explain_game函数

tip_text= wx.TextCtrl(frame,pos = (30,140),size = (240,50),style=wx.TE_MULTILINE )
tip_text.SetValue("由计算机随机出一个1到100以内的数,猜猜它是多少?")
 
frame.Show()
app.MainLoop()


发表在 python | 留下评论

猜数小游戏_turtle可视化版本.py

"""猜数小游戏_turtle可视化版本.py,这是用Python海龟画图制作的界面."""

from random import randint
from turtle import *
from tkinter import messagebox

game_title = "猜数小游戏"
max_number = 100
min_number = 1 
number = randint(min_number,max_number)

screen = Screen()
screen.setup(800,533)
screen.bgpic("th.png")
screen.title(game_title)

messagebox.showinfo(game_title, "Hello,我是计算机,欢迎来到风火轮少儿编程的猜数小游戏。")
messagebox.showinfo(game_title, "我会生成一个从1到100以内的整数,你猜猜它是多少吧。")

while True:
    answer = screen.numinput(game_title,"请输入整数:",minval =min_number,maxval = max_number)
    if answer == None : continue 
    if int(answer) == number :
        messagebox.showinfo(game_title, "恭喜,你猜对了!这个数就是:" + str(number))         
        break
    if int(answer) < number:
        messagebox.showinfo(game_title, "小了!") 
        
    if int(answer) > number:
         messagebox.showinfo(game_title, "大了!") 

messagebox.showinfo(game_title, "游戏结束了。再见!!")
screen.bye()
        

运行效果如下所示:

发表在 python | 留下评论

猜数小游戏-UI-tkinter.py 这是带tkinter可视化界面的版本

"""猜数小游戏-UI-tkinter.py 这是带tkinter可视化界面的版本
   背景图片  背景.png 400x200
   猜猜按钮图片 button_guess.png  100x44
   说明按钮图片 button_explain.png  100x44
   
"""
from tkinter import  messagebox
from tkinter import *
from PIL import ImageTk,Image
from random import randint

def check():
    """单击‘猜猜’按钮运行这个函数。它会获取文本框的字符串,尝试把它转换成数字,再与random_number进行比较"""
    try:        
       answer = int( answer_text.get().strip() )    # 获取输入框数字       
    except:
       canvas.itemconfig(tip,text='输入错误!',anchor='w')
       answer_text.delete(0, END)                    # 清空所有文本
       return
    if random_number == answer:
        canvas.itemconfig(tip,text='恭喜你,猜对了。',anchor='w') 
    else:
        if answer < random_number :
           canvas.itemconfig(tip,text='小了。',anchor='w') 
        else:
           canvas.itemconfig(tip,text='大了。',anchor='w')
    answer_text.delete(0, END)                       # 清空所有文本
 
        
def explain():
    """单击‘说明’按钮弹出相关字符串。"""
    messagebox.showinfo(game_title, "Hello,我是计算机,欢迎来到猜数小游戏。\n\n我会生成一个从1到100以内的整数,你猜猜它是多少吧。")

def clear_explain(event):
    """文本框的单击鼠标事件会运行这个函数"""
    answer_text.delete(0, END)                         # 清空所有文本
    
    
game_title = "风火轮少儿编程_猜数小游戏_tkinter版"

window = Tk()                                          # 新建窗口
window.resizable(width=False,height=False)             # 设置窗口不能变化大小
window.geometry("400x200")                             # 设置窗口的几何尺寸
window.title(game_title)                               # 设置窗口的标题
 
canvas = Canvas(window,width=400,height=200,bg="white")# 创建画布
canvas.pack(expand=True)                               # 放置画布,expand为真

"加载三张图片作为背景图与按钮图"
im1 = Image.open("背景.png")                           # 作为背景图的
background = ImageTk.PhotoImage(im1)                   # 转换为tkinter能识别的图形对象:取名为 background
im_button = Image.open("button_guess.png")             # 猜猜按钮图
button_image_guess = ImageTk.PhotoImage(im_button)     # 转换为tk能识别的图
im_button = Image.open("button_explain.png")           # 说明按钮图
button_image_explain = ImageTk.PhotoImage(im_button)   # 转换为tk能识别的图   

canvas.create_image(0,0,anchor=NW,image=background)    # 贴背景图,以左上为0,0
canvas.create_text(200,60,text = game_title,fill='black',font=("Arial", 22, "normal")) # 创建文字,写标题 
canvas.create_text(100,100,text = "请在文本框中输入数字:",fill='white',font=("Arial", 12, "bold"),justify = 'left') # 提示文字,不要也可以 

"这是输入数字的文本框"
answer_text = Entry(window,width=12,font=('',13,'normal'),relief=RIDGE,bg= 'orange',fg='black') # 输入数字的文本框
answer_text.insert(0, "在此输入数字")
answer_text.place(x=30,y=120)                                      # 放置
answer_text.bind('<Button-1>', clear_explain)
 
tip = canvas.create_text(30,175,text = " ",fill='cyan',font=("Arial", 13, "normal")) # 创建画布上的提示文字

random_number = randint(1,100)                                     # 产生随机数         

button_guess = Button(window,width=100 ,command=check,image = button_image_guess)     # 在window上新建 猜猜 按钮,命令为check,图形为button_image_guess
button_guess.place(x=160,y=110)                                                       # 放置

button_explain = Button(window,width=100,command=explain,image = button_image_explain) # 新建说明按钮
button_explain.place(x=280,y=110)

window.mainloop()


以下是运行效果:

发表在 python, tkinter | 标签为 | 留下评论

Python纯文字核心版rsa加密解密器.py

"""Python纯文字核心版rsa加密解密器.py"""
import rsa                               # 通过 pip install rsa 安装rsa模块

(pubkey, privkey) = rsa.newkeys(1024)    # 生成密钥,包括公钥和私钥,

f = open("public.pem",mode='w')
 
f.write(pubkey.save_pkcs1().decode())    # 保存公钥到文件中,谁都可以用它加密
f.close()

f = open('private.pem',mode= 'w')
f.write(privkey.save_pkcs1().decode())  # 保存私钥到文件中,有私钥的人才能打开加密的文本
f.close()
 
#message = '风火轮少儿编程是江西萍乡市教授编程的机构,需要教他们什么语言?'
message  = input("请输入需要加密的文本:\n")

print("原始文本为:",message)

crypto_text = rsa.encrypt(message.encode(), pubkey) # 用公钥加密

print()
print("以下是加密后的文本:")
print(crypto_text)

f = open("rsa加密后文本.dat",mode = 'wb')
f.write(crypto_text)
f.close() 

message = rsa.decrypt(crypto_text, privkey).decode()

print()

print("解密后的文本为:",message)

"""
公钥(Public Key)与私钥(Private Key)是通过一种算法得到的一个密钥对(即一个公钥和一个私钥),
公钥是密钥对中公开的部分,私钥则是非公开的部分。公钥通常用于加密会话密钥、验证数字签名,或加密可以用相应的私钥解密的数据。
通过这种算法得到的密钥对能保证在世界范围内是唯一的。使用这个密钥对的时候,如果用其中一个密钥加密一段数据,必须用另一个密钥解密。
比如用公钥加密数据就必须用私钥解密,如果用私钥加密也必须用公钥解密,否则解密将不会成功。

"""
input()


发表在 python | 留下评论

rsa_加密_采用tkinter做为可视化界面版.py

"""rsa_加密_采用tkinter做为可视化界面版.py"""

from tkinter import *
from tkinter import messagebox
from PIL import ImageTk,Image
import rsa                               # 通过 pip install rsa 安装rsa模块

def encrypt():
    """加密函数"""
    filename = "rsa加密码后文本.dat"
    message = txt_editor.get(1.0, END)
    #print("message = ",len(message))
    if message.strip() != "":
        crypto_text = rsa.encrypt(message.encode(), pubkey)  # 用公钥加密
        f = open(filename,mode = 'wb')
        f.write(crypto_text)
        f.close()
        messagebox.showinfo(project_title,"加密成功,加密后的文本存储在以下文件:\n" + filename  + "\n只有拥有私钥的人才能解密!")
    else:
        messagebox.showinfo(project_title,"没有输入文本。")
        

project_title = "风火轮少儿编程_rsa加密器_tkinter版"
screen_width ,screen_height = 600,600    # canvas长和高
screen_size = str(screen_width) + "x" + str(screen_height)

(pubkey, privkey) = rsa.newkeys(1024)    # 生成密钥,包括公钥和私钥,

f = open("public.pem",mode='w')
f.write(pubkey.save_pkcs1().decode())    # 保存公钥到文件中,谁都可以用它加密
f.close()

f = open('private.pem',mode= 'w')
f.write(privkey.save_pkcs1().decode())   # 保存私钥到文件中,有私钥的人才能打开加密的文本
f.close()

window = Tk()
window.resizable(width=False,height=False)
window.geometry(screen_size)             # 窗口大小 
window.title(project_title)              # 窗口标题

canvas = Canvas(window,width = 600,height= 600,bg='white')    
canvas.pack(expand = True)


im1 = Image.open("背景.png")             # 作为背景图的
background = ImageTk.PhotoImage(im1)    # 转换为tkinter能识别的图形对象:取名为 background
canvas.create_image(0,0,anchor=NW,image=background)     #贴背景图,以左上为0,0
 
canvas.create_text(screen_width//2,50,text = project_title,font = ("黑体",32,"normal"),anchor = "center")
canvas.create_text(50,150,text = "请在下列文本框输入待加密码文本:",font = ("宋体",12,"normal"),fill='blue',anchor = "nw")

txt_editor = Text(window,width = 50,height=20,bg='gray80')
txt_editor.place(x=50,y=180)


im1 = Image.open("加密按钮.png")             #作为背景图的
button_image_encrypt = ImageTk.PhotoImage(im1 )     # 转换为tkinter能识别的图形对象:取名为 background
button_encrypt = Button(window,width=100 ,command=encrypt,image = button_image_encrypt)     # 在window上新建 猜猜 按钮,命令为check,图形为button_image_guess
button_encrypt.place(x=50,y=510)                                                            # 放置

window.mainloop()


"""
公钥(Public Key)与私钥(Private Key)是通过一种算法得到的一个密钥对(即一个公钥和一个私钥),
公钥是密钥对中公开的部分,私钥则是非公开的部分。公钥通常用于加密会话密钥、验证数字签名,或加密可以用相应的私钥解密的数据。
通过这种算法得到的密钥对能保证在世界范围内是唯一的。使用这个密钥对的时候,如果用其中一个密钥加密一段数据,必须用另一个密钥解密。
比如用公钥加密数据就必须用私钥解密,如果用私钥加密也必须用公钥解密,否则解密将不会成功。

"""

下面是运行效果:

发表在 pillow, python, tkinter | 标签为 | 留下评论

rsa_加密_采用海龟画图做为UI版.py

"""rsa_加密_采用海龟画图做为UI版.py"""

from turtle import *
from tkinter import messagebox
import rsa                               # 通过 pip install rsa 安装rsa模块

title = "rsa加密"

(pubkey, privkey) = rsa.newkeys(1024)    # 生成密钥,包括公钥和私钥,

f = open("public.pem",mode='w')
f.write(pubkey.save_pkcs1().decode())    # 保存公钥到文件中,谁都可以用它加密
f.close()

f = open('private.pem',mode= 'w')
f.write(privkey.save_pkcs1().decode())   # 保存私钥到文件中,有私钥的人才能打开加密的文本
f.close()

screen = Screen()
screen.bgcolor("black")
screen.title(title)
message = screen.textinput(title,"请输入一段文字")

if message:
    crypto_text = rsa.encrypt(message.encode(), pubkey) #用公钥加密

    messagebox.showinfo(title,"以下是加密后的文本:")
    print(crypto_text)

    f = open("rsa加密码后文本.dat",mode = 'wb')
    f.write(crypto_text)
    f.close()
else:
    messagebox.showinfo(title,"你没有输入文字。")

screen.exitonclick()
screen.mainloop()
     

"""
公钥(Public Key)与私钥(Private Key)是通过一种算法得到的一个密钥对(即一个公钥和一个私钥),
公钥是密钥对中公开的部分,私钥则是非公开的部分。公钥通常用于加密会话密钥、验证数字签名,或加密可以用相应的私钥解密的数据。
通过这种算法得到的密钥对能保证在世界范围内是唯一的。使用这个密钥对的时候,如果用其中一个密钥加密一段数据,必须用另一个密钥解密。
比如用公钥加密数据就必须用私钥解密,如果用私钥加密也必须用公钥解密,否则解密将不会成功。

"""


发表在 python | 留下评论

Python简易加密与解密程序

"""加密程序.py"""
plain_text = "This is a test. ABC abc"

encrypted_text = ""          # 加密后的文本
for c in plain_text:
    x = ord(c)               # 求它的ASCII码
    x = x + 1
    c2 = chr(x)              # 取ASCII码对应的字符
    encrypted_text = encrypted_text + c2
print(encrypted_text)

###############################################

"""解密程序.py"""
encrypted_text = "Uijt!jt!b!uftu/!BCD!bcd"

plain_text = ""
for c in encrypted_text:
    x = ord(c)
    x = x - 1
    c2 = chr(x)
    plain_text = plain_text + c2
    
print(plain_text)


发表在 python | 留下评论

RSA加密算法教程

一、rsa加密码过程

rsa加密是一种非对称加密算法,其主要过程如下:

1、乙方生成两把密钥(公钥和私钥)。公钥是公开的,任何人都可以获得,私钥则是保密的。

2、甲方获取乙方的公钥,然后用它对信息加密,把密文传给乙方。

3、乙方得到加密后的信息,用私钥解密。


二、算法过程 

  1. 随意选择两个大的质数p和q,p不等于q,计算 n = p * q 。n的二进制长度就是密钥的长度。
  2. 根据欧拉函数,不大于n且与n互质的整数的个数为:

φ(n)  =  (p-1) × (q-1) 。

( 欧拉函数φ(n),解决的问题是:小于n的正整数中与n互质整数的数目。

例如φ(8)=4,因为1,3,5,7均和8互质。)

  1. 选择一个整数e与φ(n) 互质,并且e小于 φ(n)。
  2. 用以下这个公式计算d:d × e ≡ 1 (mod  φ(n) )。

上面公式表示的意思为 d×e对φ(n) 的余数与 1对φ(n)的余数相同。由于 1 对φ(n)的余数为1。所以上面的公式可以理解为d×e对φ(n) 的余数为1。公式可化为:  (d×e)  mod  φ(n)  = 1 。 即d×e 对φ(n) 的余数为1。假设φ(n) 的值为20,那么d×e 的值为 21 , 41 , 61 , 81 ,…。即d×e的值为k * φ(n) + 1。k为1, 2,3 ,4 , 5 , 6 , 7…。

  1. 以上内容中,(n ,e) 就是公钥,(n , d) 就是私钥。

总结:生成公钥和私钥就是求n,e,d的过程。


三、加密与解密过程

加密公式为:C ≡ Mmod  n     (C和Me 对 n的求余结果相同)

M为待加密的整数。实际情况是加密文本的,所以先要先把文本转换成整数。如,可以把它先转换成它的ASCII码。C就是加密后的数据。

解密公式为:M ≡ Cmod  n

C是密文,M是解密后的明文。

四、实例描述:


 在这里通过一个简单的例子来理解RSA的工作原理。为了便于计算。在以下实例中只选取小数值的质数p,q,以及e,假设用户A需要将明文“fed”通过RSA加密后传递给用户B,过程如下:
(1)设计公私密钥(e,n)和(d,n)。
令p=3,q=11,得出n=p×q=3×11=33;

φ(n)=(p-1)(q-1)=2×10=20;

取e=3,(3与20互质);

e×d≡1 mod φ(n),即3×d≡1 mod 20。

由于3xd的值对20的余数为1,所以它最小的值为21,可以算出d为7。从而我们可以设计出一对公私密钥,加密密钥(公钥)为:KU =(n,e)=(33,3),解密密钥(私钥)为:KR =(n,d)=(33,7)。

(2)英文数字化。
将明文信息数字化,可以自己设一个字母与数字的对应表。在这里为了简化,让它们和数字一一对应,即a对应1,b对应2,c对应3,d应4,e对应5,f对应6。下面对字符串fed加密,那么对应的明文为:6,5,4。
(3)明文加密 
用户A有公钥 (33,3) 将数字化明文分组信息加密成密文。由C ≡ Me  mod  n公式得:


C1 ≡ (M1) mod n  =>  6 3  mod 33   = 18

C2 ≡ (M2) mod n  =>  5 3  mod 33   = 26

C3 ≡ (M3) mod n  =>  4 3  mod 33   = 31


因此,得到相应的密文信息为:18,26,31。
4)密文解密。
用户B有私钥(33,7),他收到密文,若将其解密,只需要根据解密公式算出来即可,

即:M ≡ Cd  mod  n。计算过程如下:


M1 = (C1) mod n  =>  18 7  mod 33   = 6

M2 = (C1) mod n  =>  26 7  mod 33   = 5

M3 = (C1) mod n  =>  31 7  mod 33   = 4

6,5,4分别对应的就是fed,这样就解密了。 你看,它的原理就可以这么简单地解释!
当然,实际运用要比这复杂得多,由于RSA算法的公钥私钥的长度(模长度)要到1024位甚至2048位才能保证安全,因此,p、q、e的选取、公钥私钥的生成,加密解密模指数运算都有一定的计算程序,需要仰仗计算机高速完成。


相关数学知识:

一、 什么是素数
素数是这样的整数,它除了能表示为它自己和1的乘积以外,不能表示为任何其它两个整数的乘积。例如,15=3*5,所以15不是素数;又如,12=6*2=4*3,所以12也不是素数。另一方面,13除了等于13*1以外,不能表示为其它任何两个整数的乘积,所以13是一个素数。素数也称为“质数”。

二、什么是互质数(或互素数)?
小学数学教材对互质数是这样定义的:“公约数只有1的两个数,叫做互质数。”这里所说的“两个数”是指自然数。
判别方法主要有以下几种(不限于此):
(1)两个质数一定是互质数。例如,2与7、13与19。
(2)一个质数如果不能整除另一个合数,这两个数为互质数。例如,3与10、5与 26。
(3)1不是质数也不是合数,它和任何一个自然数在一起都是互质数。如1和9908。
(4)相邻的两个自然数是互质数。如 15与 16。
(5)相邻的两个奇数是互质数。如 49与 51。
(6)大数是质数的两个数是互质数。如97与88。
(7)小数是质数,大数不是小数的倍数的两个数是互质数。如 7和 16。
(8)两个数都是合数(二数差又较大),小数所有的质因数,都不是大数的约数,这两个数是互质数。如357与715,357=3×7×17,而3、7和17都不是715的约数,这两个数为互质数。等等。

三、什么是模指数运算? 
指数运算谁都懂,不必说了,先说说模运算。模运算是整数运算,有一个整数m,以n为模做模运算,即m mod n。怎样做呢?让m去被n整除,只取所得的余数作为结果,就叫做模运算。例如,10 mod 3=1;26 mod 6=2;28 mod 2 =0等等。
模指数运算就是先做指数运算,取其结果再做模运算。

发表在 Uncategorized | 一条评论

Python图像转字符画源代码支持gif.py

"""Python图像转字符画.py, 本程序把图片转换成字符画,支持gif图片,即输入gif图,输出动态的gif字符画,作者:李兴球,风火轮少儿编程出品"""

from tkinter.filedialog import *
import os,sys
from image2char import *                                 # 需要此模块请联系本人

srcfolder = os.getcwd() + os.sep + "frames" + os.sep     # 帧存放文件夹
txtoutput = os.getcwd() + os.sep + "txtoutput" + os.sep  # 转为文本存放目录 
dstoutput = os.getcwd() + os.sep + "dstoutput" + os.sep  # 文本转图存放目录
if not os.path.exists(srcfolder): os.mkdir(srcfolder)
if not os.path.exists(txtoutput): os.mkdir(txtoutput)
if not os.path.exists(dstoutput): os.mkdir(dstoutput)

"出现文件选择对话框"
imagefile = askopenfilename(filetypes=[("gif files", "*.gif"),("all files", "*.*")])
if imagefile == "": sys.exit()
print(imagefile)
im = Image.open(imagefile)
size = im.size
print("图像大小:",size)

basename = os.path.basename(imagefile)
basename = os.path.splitext(basename)[0]

srcframes = splitframe(imagefile,srcfolder)        # 返回图像序列帧到srcfolder文件夹
framescount = len(srcframes)

print("帧数:",framescount)
txtfiles = [ txtoutput + (4 - len(str(i))) * "0" + str(i) + ".txt" for i in range(framescount)]
dstframes = [ dstoutput + (4 - len(str(i))) * "0" + str(i) + "_dst.png" for i in range(framescount)]
 
for i in range(framescount):
    image2char(srcframes[i],txtfiles[i],0.4)      # 源文件缩放比例
    print(imagefile + ":第",str(i+1),"帧转换完毕。")
    char2image(txtfiles[i],dstframes[i],(4*size[0],4*size[1]),"#0000ff")
    #print("字符转帧完毕。")
print()
print("开始生成字符gif图...")
mergeframe(dstframes,basename + "_字符动画.gif")

print("生成的文件名为:",basename + "_字符动画.gif")
input("按回车键结束。本程序作者:李兴球,风火轮少儿编程 www.scratch8.net")


图像转字符画效果如下:

发表在 pillow, python | 标签为 , | 留下评论

Python单词记忆小程序纯文字版.py

"""单词记忆小程序纯文字版.py"""

"一、导入命令"
from random import choice
from time import sleep

"二、全局变量定义"
amounts = 0                             # 用来存储单词数量
score = 0                               # 得分情况
words = []                              # 定义英语单词表
translate = []                          # 定义翻译表

"三、导入数据"
f = open("words.txt")                   # 打开单词表文件
for line in f:
    if  ":" in line:                    # 如果:号在line中
        line = line.strip()             # 剥去line的空白字符 \n,\t
        s = line.split(":")             # 用:辟开line
        words.append(s[0])              # 索引为0的字符串为英文单词
        translate.append(s[1])          # 索引为1的字符串为翻译
f.close()                               # 关闭文件
amounts = len(words)                    # 得出单词的数量

"四、提示信息"
print("\n" * 3)                         # 打印3个换行符
print("-------------------------单词记忆小程序-------------------------\n")
print("--------------------欢迎来到风火轮少儿编程培训中心----------------\n")
print("以下是英语单词与其对应的翻译:请加紧时间记忆,只有10秒记忆时间。\n")
for i in range(amounts):
    print(words[i],":",translate[i])
sleep(10)
print("\n记住了吗?练习马上就要开始。\n")
sleep(6)
print("\n" * 50)                        # 打印50个换行符

"五、主循环"
print("-----输入 quit或exit退出程序----\n\n")
while True:
    word  = choice(words)                                  #出题,随机选择一个单词
    index = words.index(word)                              # 取这个单词的索引号,以便对应
    answer = input("请写出'" + word + "'的汉语翻译:")        # 提示输入答案
    
    if answer =="exit" or answer == "quit":                # 输exit或quit退出循环   
        break
        
    if answer == translate[index]:                         # 如果答案和translate表中同样索引的字符串相等
        score = score + 10
        print("回答正确,加10分!当前得分:" ,score,"\n")  # 打印‘回答正确......
         
    if answer=="":                                         # 没有输入,表示忽略
        print("你选择了忽略...\n")
        continue
        
    if answer != translate[index]:  
        score = score - 10
        print("回答错误,减10分!当前得分:" ,score,"\n")  # 否则就是输入错误了


"六、显示结果"
print("你的得分是:",score)
input()                                                    # 处于等待输入状态


发表在 python | 留下评论

Python单词记忆小程序海龟画图版.py

"""单词记忆小程序海龟画图版.py"""

from time import sleep
from turtle import *
from tkinter import messagebox
from random import choice

game_title = "单词记忆小程序"

words = []                              #定义英语单词表
translate = []                          #定义翻译表
f = open("words.txt")
for line in f:
    if  ":" in line:
        s = line.split(":")             #用:辟开line
        words.append(s[0])              #索引为0的字符串为英文单词
        translate.append(s[1])          #索引为1的字符串为翻译

amounts = len(words)
score = 0
fontstyle1 = ("宋体",20,"normal")        #字体风格1
fontstyle2 = ("黑体",50,"bold")          #字体风格2

screen = Screen()                       #新建屏幕
screen.title(game_title)                #屏幕标题
screen.setup(800,600)                   #设定屏幕长和高
screen.bgpic("背景.png")                #设定背景
screen.delay(0)                         #设定绘画延时为0

t = Turtle(visible = False)       #用于写字的海龟对象
t.penup()
t.color("yellow")                 #画笔颜色为黄
t.goto(-200,300)                  #坐标定位

messagebox.showinfo(game_title, "Hello,我是计算机,欢迎来到风火轮少儿编程。")
messagebox.showinfo(game_title, "接下来显示英语单词与其对应翻译,请尽快记忆。")

for  i in range(amounts):
    info = words[i] + ":"  +  translate[i]
    t.write(info,font = fontstyle1)
    t.sety(t.ycor() - 50)

counter = Turtle(visible = False)  #用于倒计时的海龟对象
counter.penup()
counter.color("cyan")              #倒计时的颜色为青色
counter.goto(100,0)                #坐标定位
for i in range(11,0,-1):
    counter.clear()
    counter.write(str(i),font = fontstyle2)
    sleep(1)

counter.clear()
messagebox.showinfo(game_title, "记住了吗?练习马上就要开始了。")
t.clear()
 
while True:
    word  = choice(words)                                  #出题,随机选择一个单词
    index = words.index(word)                              #取这个单词的索引号,以便对应
    answer = screen.textinput(game_title,"请写出'" + word + "'的汉语翻译:")     #提示输入答案

    if answer =="exit" or answer == "quit":                 #输eixt或quit退出循环
        break
    
    if answer == translate[index]:                         #如果答案和translate表中同样索引的字符串相等
        score = score + 10
        messagebox.showinfo(game_title,"回答正确,加10分!当前得分:"  + str(score))  #打印‘回答正确......
        
    if answer=="" or answer == None:                       #没有输入或取消,表示忽略         
        #messagebox.showinfo(game_title,"你选择了忽略...")
        continue
        
    if answer != translate[index]:  
        score = score - 10
        messagebox.showinfo(game_title,"回答错误,减10分!当前得分:" + str(score))  #否则就是输入错误了


messagebox.showinfo(game_title,"你的总得分:" + str(score))
screen.bye()


发表在 python | 标签为 | 留下评论

Python通过关键词下载百度图片(风火轮编程内部简易爬虫教学程序)

"""Python通过关键词下载百度图片.py 双击本程序,输入关键词,会下载一些图片,这些图片存放在以关键词为文件夹名称的目录中。"""

import requests
from tools import * 

def dump(filecontent,filename):
    """写入到文件里"""
    f = open(filename,mode='wb') 
    f.write(filecontent)         
    f.close()     

def download(keyword,link):
    """下载链接保存为图片,保存到名为keywords的文件夹中"""
    try: 
       resp = requests.get(link,timeout=5, verify=True)          
       img = resp.content        
       dump(img, random_file_name(keyword))
    except:
       pass     

if __name__ == "__main__":
    
    baidu_image_search = "http://image.baidu.com/search/index?tn=baiduimage&ie=utf-8&word="

    keyword = input("请输入关键词:\n")

    search_url = baidu_image_search + keyword

    links = get_all_links(search_url)

    for link in links:
        print("当前下载:",link,"\n")
        download(keyword,link)
#
#风火轮少儿编程内部简易爬虫教学程序初稿
#下面是tools模块的代码,此模块不做教学,转载请注明出处。
import requests,re
from random import choice
from time import time 
import os

def random_file_name(keywords):
    """以关键词为文件夹名,生成随机文件名"""
    folder = os.getcwd() + os.sep + keywords
    if not os.path.exists(folder) : os.mkdir(folder)
    字符集 = 'abcdefghijklmnopqrstuvwxyz01234567890'
    filename="".join([ choice(字符集) for _ in range(3)]) 
    s=str(time())
    s=s.split(".")[-1]
    return folder + os.sep + s + filename + ".jpg"


def get_all_links(link):
    """收集一个url页面的所有链接,返回到列表"""
                             
    urls = set()
    headers = {'Accept': 'text/html, application/xhtml+xml, image/jxr, */*',
               'Accept - Encoding':'gzip, deflate',
               'Accept-Language':'zh-Hans-CN, zh-Hans; q=0.5',
               'Connection':'Keep-Alive',               
               'User-Agent':'Mozilla/5.0 (Windows NT 6.1; Win64; x64) AppleWebKit/537.36 (KHTML, like Gecko) Chrome/64.0.3282.186 Safari/537.36'}
   
    resp = requests.get(link,headers = headers,timeout=5, verify=True)
    html = resp.text
    for i in range(5):
        html = html.replace("http://img" + str(i) + ".imgtn.bdimg.com","https://ss1.bdstatic.com/70cFuXSh_Q1YnxGkpoWK1HF6hhy")     
    regex = re.compile("https://ss[0-3].bdstatic.com/\w+/it/u=\d+,\d+&fm=\d+&gp=0\.jpg")
    links = re.findall(regex,html)
   
    return set(links)


if __name__ == "__main__":

    keywords = "风火轮少儿编程"
    print(random_file_name(keywords))


发表在 python | 标签为 , , , | 留下评论

Python播放MIDI用Beep命令_一闪一闪亮晶晶.py

"""一闪一闪亮晶晶.py
   C大调,2/4                     四分音符为一拍,每小节两拍。
   freqs列表保存低,中间,高音的频率
   notes列表保存的是freqs中一些频率的索引号
   duration列表保存时长
   简谱知识:
   全音符为1小节,写法x - - - ,为四拍
   二分音符写法:x - ,为二拍
   四分音符写法:x   ,为一拍
   八分音符写法:x加下划线,为半拍
   

"""

import winsound

 
"           低音                         中音                        高音 "
"            1   2   3   4   5   6    7  1   2   3   4   5   6   7    1     2     3      4     5    6     7"
freqs = [37,262,294,330,349,392,440,494,523,587,659,698,784,880,988, 1046, 1175, 1318, 1397, 1568, 1760,1967]
"                                        8   9   10  11  12  13  14 "
"                                        C   D    E   F   G            调"

notes = [8,8,12,12,13,13,12,11,11,10,10,9,9,8,12,12,11,11,10,10,9,12,12,11,11,10,10,9,8,8,12,12,13,13,12,11,11,10,10,9,9,8]  #保存的是freqs列表索引号
duration = [4,4,4,4,4,4,8,4,4,4,4,4,4,8,4,4,4,4,4,4,8,4,4,4,4,4,4,8,4,4,4,4,4,4,8,4,4,4,4,4,4,8]
duration = [ d * 125 for d in duration ]
 
 
for i in range(len(notes)):
    freq = freqs[notes[i]]
    rate = duration[i]  
    winsound.Beep(freq, rate)


《数鸭子》频率与延时表:

notes = [10,8,10,10,8,10,10,12,13,12,0,13,13,13,12,11,11,11,9,10,9,8,9,0,10,8,0,10,8,0,10,10,12,13,13,0,15,12,12,13,10,9,8,9,10,12,15,12,12,13,10,9,8,9,10,8] #保存的是freqs列表索引号
duration = [4,4,2,2,4,2,2,2,2,4,4,2,2,2,2,2,2,4,2,2,2,2,4,4,4,2,2,4,2,2,2,2,2,2,4,4,4,2,2,4,4,2,2,2,2,8,4,2,2,4,4,2,2,2,2,8]
duration = [ d * 125 for d in duration ]


《我爱北京天安门》频率与延时表:

notes = [12,15,12,11,10,9,8,8,8,9,10,10,8,10,11,12,12,15,12,11,10,12,9,11,10,9,13,12,9,0,8] #保存的是freqs列表索引号
duration = [2,1,2,2,2,2,4,2,2,2,2,2,2,2,2,16,2,1,2,2,2,2,4,2,1,2,2,4,2,2,12]
duration = [ d * 125 for d in duration ]


发表在 python | 标签为 , , | 留下评论

Python的winsound模块Beep命令播放两只老虎附简谱说明.py

"""Python的winsond之Beep命令播放两只老虎.py
    这里用C调,4/4,表示以4分音符为一拍,每小节有4拍。
    本程序假设1拍为400毫秒。
   
   freqs列表保存低,中间,高音的频率
    
   duration列表保存时长
   简谱知识:
   全音符为1小节,写法x - - - ,为四拍
   二分音符写法:x - ,为二拍
   四分音符写法:x   ,为一拍
   八分音符写法:x加下划线,为半拍
   
唱名   Do   Re  Mi  Fa    So  La  Si

低音   262  294  330   349    392  440  494    
                       
中音   523  587  659  698    784  880  988  
                         
高音   1046 1175  318  1397  1568  1760  1967

"""

import winsound

freqs = [523,587,659,523,523,587,659,523,659,698,784,659,698,784,784,880,784,698,659,523,784,880,784,698,659,523,523,784,523,523,784,523]
duration= [400,400,400,400,400,400,400,400,400,400,800,400,400,800,300,100,300,100,400,400,300,100,300,100,400,400,400,400,800,400,400,800]
 
for i in range(len(freqs)):
    freq = freqs[i]
    time = duration[i] 
    print(freq,time)
    winsound.Beep(freq, time)


下面是《上学歌》频率与延时表

freqs = [523,587,659,523,784,880,880,1046,880,784,880,880,1046,784,880,659,880,784,659,784,659,523,587,659,523]
duration= [200,200,200,200,800,200,200,200,200,800,200,200,400,200,200,400,200,200,200,200,200,200,200,200,800]

发表在 python | 留下评论

给Python代码每一行加上按键精灵的SayString

"""给Python代码每一行加上按键精灵的SayString以便启动按键精灵时能自动发送Python代码到记事本,这是我录制抖音时的一个辅助脚本."""

from tkinter.filedialog import *
import os

filename = askopenfilename(filetypes=[("py源文件", "*.py"),("txt文件", "*.txt"),("所有文件", "*.*")])
fld = os.path.split(filename)[0] + os.sep
fn = os.path.split(filename)[-1]
basename = os.path.splitext(fn)[0]  #带扩展名的文件名称
    
f = open(filename,encoding = 'utf-8')
string = ""
for line in f:
    
    s = line.rstrip()
    string = string  + "SayString " + chr(34) + s  + chr(34)  + "\n"
    string = string + "SayString vblf \n"
    string = string +  "Delay 50  \n"  
    #string = string + "SayString vbcrlf\n"

f.close()
print(string)
 
f = open(fld + basename + "_SayString.txt",mode='w',encoding='utf-8')
f.write(string)
f.close()


发表在 python | 标签为 | 一条评论

用itertools生成7位数的所有排列组合

"""生成7位数的所有排列组合

"""

import itertools as its
words = "1234567890"

all_comb = []

for n in range(7):
    r = its.product(words,repeat=n)
    for i in r:
        all_comb.append("".join(i))


f = open("dict.txt",'w')
for s in all_comb:
    f.write(s + "\n")
f.close()


发表在 python | 留下评论

Python递归搜索文件夹中的每个文件,打开它们看有没有包含关键词,返回一个列表.

"""
递归搜索文件夹中的每个文件,打开它们看有没有包含关键词,返回一个列表.
"""
import os


def predict_encoding(file_path, n_lines=20):
    '''Predict a file's encoding using chardet'''
    import chardet

    # 用二进制只读方式打开文件,探测文件编码
    with open(file_path, 'rb') as f:
        # 连接指定的行数
        rawdata = b''.join([f.readline() for _ in range(n_lines)])

    return chardet.detect(rawdata)['encoding']

def searchinfile(keywords,filename):
    """在文件中搜索有没有包含关键词,有则返回True"""
    contain_flag=False
    try:
       e = predict_encoding(filename)
       f = open(filename, mode='r',encoding=e)
       for line in f:
          if  keywords in line:
              contain_flag=True
              break
       f.close()            
    except:
       pass

    return contain_flag

def searchinfolder(keywords,foldername):
    """在文件夹中搜索每个文件,打开它查找有没有关键词"""
    
    resultlist=[]
    if os.path.isdir(foldername):  
        for item in os.walk(foldername):        #返回的是三元组
            for eachfile in item[2]:
                afile=item[0] + "\\" + eachfile
                #print(afile)
                if searchinfile(keywords,afile):
                    resultlist.append(afile)
    return resultlist
                
if __name__=="__main__":
    
    目录 = "e:/www.scratch8.net/python"
    keywords="""nav-previous"""

    items = searchinfolder(keywords,目录)

    for file in items:
        print(file)   


发表在 python | 一条评论

仙女采红心.py 用鼠标操作一个仙女去收集红心的简易小游戏

"""仙女采红心.py 用鼠标操作一个仙女去收集红心的简易小游戏 """

import random
import arcade
import os

# --- Constants ---
SPRITE_SCALING_PLAYER = 0.5
SPRITE_SCALING_heart = 0.2
HEART_COUNT = 50

SCREEN_WIDTH = 800
SCREEN_HEIGHT = 600


class MyGame(arcade.Window):
    """ 继承自arcade窗口类"""

    def __init__(self):
        """ 初始化方法,先调用父类的初始化方法 """      
        super().__init__(SCREEN_WIDTH, SCREEN_HEIGHT, "仙女采红心")         
        self.player_list = None      # 定义玩家列表
        self.heart_list = None       # 定义红心列表        
        self.player_sprite = None    # 定义玩家角色
        self.score = 0        
        self.set_mouse_visible(False)# 隐藏鼠标指针
        arcade.set_background_color(arcade.color.AMAZON) # 设置背景颜色

    def setup(self):
        """ 设置游戏各个属性值 """
        self.player_list = arcade.SpriteList()     # 创建玩家列表
        self.heart_list = arcade.SpriteList()      # 创建红心列表

        # Score
        self.score = 0      
        self.player_sprite = arcade.Sprite("princess.png", SPRITE_SCALING_PLAYER) # 生成角色实例
        self.player_sprite.center_x = 50           # 设定角色x中心坐标       
        self.player_sprite.center_y = 50           # 设定角色y中心坐标
        self.player_list.append(self.player_sprite)# 添加到角色列表
       
        for i in range(HEART_COUNT):               # 生成一些红心
            heart = arcade.Sprite("heart red.png", SPRITE_SCALING_heart)
            heart.center_x = random.randrange(SCREEN_WIDTH) # 红心x坐标
            heart.center_y = random.randrange(SCREEN_HEIGHT)# 红心y坐标
            self.heart_list.append(heart)

    def on_draw(self):
        """ 画红心们和角色"""
        arcade.start_render()
        self.heart_list.draw()
        self.player_list.draw()        
        output = f"Score: {self.score}"   # 准备写文本
        arcade.draw_text(output, 10, 20, arcade.color.WHITE, 14)

    def on_mouse_motion(self, x, y, dx, dy):
        """ 处理鼠标移动事件x,y是鼠标的坐标 """
        self.player_sprite.center_x = x
        self.player_sprite.center_y = y

    def update(self, delta_time):
        """ 移动角色等游戏逻辑 """ 
        self.heart_list.update()
        # 玩家角色和红心们的碰撞检测,返回碰到的红心列表
        hearts_hit_list = arcade.check_for_collision_with_list(self.player_sprite, self.heart_list)
        # 把碰到的红心都杀掉,并加分
        for heart in hearts_hit_list:
            heart.kill()
            self.score += 1

def main():
    """ 主要的main方法"""
    window = MyGame()
    window.setup()
    arcade.run()


if __name__ == "__main__":
    main()


发表在 arcade, python | 标签为 | 仙女采红心.py 用鼠标操作一个仙女去收集红心的简易小游戏已关闭评论

神猫链接采集器测试文档代码_少儿python爬虫数据采集

神猫链接采集器测试文档代码

"""
    标题:神猫链接采集器,英文名 catLinkPicker
    描述:输入命令行参数为,域名 正则 初始链接列表文件名
    针对某些特征网站需要具体问题具体分析,再更改代码,或用selenium翻页采集链接,效果更好.
    特别是对于那些直接网址直接是以诸如 “aspx?id=xxxx”或 “php?id=yyyy”结尾的的网页就不必采集了,这种网页是直接查询数据库。
    找出最小的id和最大的id,做个列表导出到文件即可。
    如果需要中止while循环,新建一个文件名为'中止.txt'的空文件即可.
    作者:李兴球
    日期:2018/2/28

"""

from lxml import html
import requests
from time import ctime,time
from random import choice
import os
import re
import sys
from urllib.parse import urljoin        #用于转换url的相对路径与绝对路径

def loadInitUrl(fileName):
    """从文件中加载种子链接,返回集合"""
    print("\n加载初始网址...\n")
    oneSet=set()
    try:
        f = open(fileName)
        for link in f:
           oneSet.add(link.strip())
        f.close()
    except:
        pass
    
    return oneSet
    
def writeToFile(aset,regex,fileName):
    """把aset集合的符合正则表达式的链接写入fileName中,"""
    
    f = open(fileName,mode='w')
    counter = 0
    for link in aset:
        if re.match(regex,link):
            print("发现一个符合要求的链接:",link)
            f.write(link + "\n")
            counter = counter + 1
    f.close()
    print(" 本次共有",counter,"个符合正则表达式的链接写入",fileName,"中")
    
def smartRequest(url,encode):

    """下载网页源码的函数    
    请求头,也可以多用不同的浏览器抓一些,本程序暂不轮换header"""
    headers = {  
    "Accept": "text/html,application/xhtml+xml,application/xml;q=0.9,image/webp,image/apng,*/*;q=0.8",
    "Accept-Encoding": "gzip, deflate",
    "Accept-Language": "zh-CN,zh;q=0.9",
    "Connection": "keep-alive",
    "Cookie":"_ga=GA1.2.1707472291.1518440445; _gid=GA1.2.879678725.1518440445; aliyungf_tc=AQAAAG899EWo7QwAkfeqdbtP7US/hKO+; SERVER_ID=7a2a6789-c873f3e2; Hm_lvt_05d39f4d0b6d45b03bf3bb358aba968a=1518440459,1518485016; Hm_lvt_74489c025adf11db1de5f58194b93d62=1518440494,1518491019; Hm_lpvt_74489c025adf11db1de5f58194b93d62=1518492750; Hm_lpvt_05d39f4d0b6d45b03bf3bb358aba968a=1518570483",
    "Upgrade-Insecure-Requests":"1",
    "User-Agent": "Mozilla/5.0 (Windows NT 6.1; Win64; x64) AppleWebKit/537.36 (KHTML, like Gecko) Chrome/63.0.3239.132 Safari/537.36",
    }
    page = requests.models.Response()         #空的requests响应对象
    try:
        page = requests.get(url,headers=headers, timeout=10)
        page.encoding=encode
    except:
        print("@",ctime(),"访问",url,"发生错误")
        

    return page
    
def collectLinksFrom(configList):

    domain = configList['domain']
    regex = configList['regex']
    fileName = configList['filename']
    
    linkSet1 = loadInitUrl(fileName)      #从文件中加载初始URL
    if len(linkSet1)==0:
        try:
            requests.get("http://www." + domain)
            linkSet1.add("http://www." + domain)
        except:
            pass            
        try:
            requests.get("https://www." + domain,timeout=3)
            linkSet1.add("https://www." + domain)
        except:
            pass          

    计数器=0
    linkSet2 = set()
    allLinks = set() #linkSet1.copy()    #allLinks集合存所有的链接
    startTime = time()

    正则=re.compile(regex)
    selectedLinks=set()             #符合正则的链接集合
    运行 =True
    print("初始网址链接数:",len(linkSet1))
    while 运行:
        for oneurl in linkSet1:
            
            #中止条件成立即退出循环,要中止这个死循环,新建一个文件名为'中止.txt'的空文件.
            持续时间 = int(time() - startTime)
            if 持续时间 % 10 ==0 :        #每10秒检测一次
                if os.path.exists("中止.txt"):
                    运行= False
                    break
            #中止条件代码段结束.
                
            try:            
                page = requests.get(oneurl)   #请求.得到源代码
                #print(page.text)
                tree= html.fromstring(page.content)    #返回 lxml.html.HtmlElement ,生成html元素 树
            except:
                print(oneurl,"出错了")
                continue
            for link in tree.xpath("//a"): # //a[contains(@href,'" + domain + "')]有些网站很多相对链接, 这时大部分链接就获取不到了。
                if not ('href' in link.attrib.keys()):continue
                newUrl = link.attrib['href']                                 #获取链接
                newUrl = newUrl.strip()
                newUrl = urljoin(oneurl, newUrl)  #转换相对路径到绝对路径
                
                if (domain in newUrl ) and (not (newUrl in allLinks)):                              #发现新链接
                    print(newUrl)
                    linkSet2.add(newUrl)
                    allLinks.add(newUrl)
                    计数器= 计数器 + 1
                    if len(allLinks) % 20 ==0:
                       print(domain,"链接采集中," , len(allLinks),"个链接@",ctime()," #中止本程序请新建名为'中止.txt'的文件\n")
                        
                       writeToFile(allLinks,正则,fileName) #符合正则的则写入文件中
            
        
        linkSet1=linkSet2  #linkSet1指向linkSet2的内容
        linkSet2=set()    #对linkSet2进行清空
    print("\n发现中止条件,安全着陆")
    print(len(allLinks),"个链接@",ctime())
    writeToFile(allLinks,正则,fileName)
    

if __name__=="__main__":

    configList=dict()

    print("神猫链接采集器.\n")
    if len(sys.argv)<2:
        print("没有输入命令行参数,启用测试模式。")
        configList['domain']="nkjfrc.com"
        configList['regex']="http://www.nkjfrc.com/ResumeShow.aspx"
        configList['filename']="链接表.txt"
    else:
        if (len(sys.argv)==4):
            configList['domain'] = sys.argv[1]
            configList['regex'] = sys.argv[2]
            configList['filename'] = sys.argv[3]
        else:
            selfName = configList[0].split(".")[0]
            print("参数错误,形式为:")
            print(selfName," 域名 正则表达式 文件名")
        
    collectLinksFrom(configList)


发表在 python | 标签为 , , | 留下评论

java从字符串中提取手机号电话号码

import java.util.regex.Matcher;  
import java.util.regex.Pattern; 
import java.util.HashSet;
import java.io.IOException;
import java.io.BufferedReader;
import java.io.FileReader;


/** 从字符串中提取手机号的类
 *  本程序写正则从字符串中提取电话号码
 * 作者:李兴球
 * 日期:2018/1/10
 * QQ:406273900
 * 网址: www.scratch8.net
 * 关键词: java extract regex link 
 */

public class MobileOperation
{
    //这是一个测试,本程序从一些文本中提取网页链接.
    public static void main(String[] args) throws IOException
    {
        String someTxt = ReadTextFile("C:\\test.txt","utf-8");
        MobileOperation mb = new MobileOperation();
        //HashSet mbList = mb.extractMobile("abcd13012348321少儿编程你是人吗? 13784680991我们都是好朋友大润发张国荣刘德华");
        HashSet mbList = mb.extractMobile(someTxt);
        System.out.println(mbList);

        System.out.println(mb.containsMobile(someTxt));
          
    } 


    public HashSet extractMobile(String someTxt)
    {
        HashSet teleList=new HashSet();
        String oneMobileNumber = "";
        if (someTxt.length()>0)
        {
            //Pattern pattern = Pattern.compile("(0\\d{2}-\\d{8}(-\\d{1,4})?)|(0\\d{3}-\\d{7,8}(-\\d{1,4})?)");   //这是固定电话正则
            Pattern pattern = Pattern.compile("((13[0-9])|(14[5|7])|(15([0-3]|[5-9]))|(18[0|3|5|6|7|8|9]))\\d{8}");
            // 创建匹配给定输入与此模式的匹配器。
            Matcher matcher = pattern.matcher(someTxt); 
            //查找字符串中是否有符合的子字符串
            while (matcher.find())
            {   
                oneMobileNumber = matcher.group();
                if (oneMobileNumber.length()==11)
                   teleList.add(oneMobileNumber);
            }
          
        }
        return teleList;
       
    }

   public  boolean containsMobile(String someText)
   {
       HashSet teleList= extractMobile(someText);
       if (teleList.size()==0)
          return false;
       else
          return true;
   }

  public static String ReadTextFile(String filePath,String encodeStyle) throws IOException
  {
        //读文本文件,指定文件编码UTF-8,GB2312
        StringBuffer contents= new StringBuffer();
        String line;

        try (BufferedReader br = new BufferedReader(new FileReader(filePath)))
        {
           while ((line = br.readLine()) != null)
           {
                contents.append(line);
            }
         } catch (IOException e) {   e.printStackTrace();    }
        String result=new String(contents.toString().getBytes(),encodeStyle);
        return result;


  }


}

发表在 Uncategorized | 留下评论

java使用正则表达式从文本中提取链接

import java.util.regex.Matcher;
import java.util.regex.Pattern;
import java.util.ArrayList;

import java.io.BufferedReader;
import java.io.FileReader;
import java.io.IOException;

import java.io.FileOutputStream;
import java.io.OutputStreamWriter;

import java.io.PrintWriter;
import java.io.File;

  /**
   *  作者:李兴球
   *  从文本中提取链接,先读出文件内容,然后提取里面的链接
   *  日期:2018/1/17
   *  网址: http://www.scratch8.net/blog/
   */
public class RegexLink
{
 
   public static void main(String[] args) throws IOException
   {
     String html =  ReadTextFile("c:\\test.txt","utf-8");
      
      ArrayList urlList = new ArrayList();
     urlList = extractUrls(html);

     String allLinks = String.join("\r\n", urlList);
  
      WriteTextFile("C:\\links.txt",allLinks,"utf-8");

  }

  public static String ReadTextFile(String filePath,String encodeStyle) throws IOException
  {
        //读文本文件,指定文件编码UTF-8,GB2312
        StringBuffer contents= new StringBuffer();
        String line;

        try (BufferedReader br = new BufferedReader(new FileReader(filePath)))
        {
           while ((line = br.readLine()) != null)
           {
                contents.append(line);
            }
         } catch (IOException e) {   e.printStackTrace();    }
        String result=new String(contents.toString().getBytes(),encodeStyle);
        return result;


  }


  public static void WriteTextFile(String filePath,String fileContent,String encodeStyle) throws IOException
  {
        //写文本文件,指定文件编码UTF-8,GB2312,经测试一定要写入中文才会生成UTF-8的文件,否则都是ANSI文件!

        //方法一
        //StringBuffer buffer = new StringBuffer(fileContent);
        //FileOutputStream writerStream = new FileOutputStream(filePath);    
        //BufferedWriter bf = new BufferedWriter(new OutputStreamWriter(writerStream, encodeStyle)); 

         //方法二
        //OutputStreamWriter bf = new OutputStreamWriter(new FileOutputStream(filePath),encodeStyle);
        //bf.write(fileContent);
        //bf.close();

        //方法三
        PrintWriter out = new PrintWriter(new File(filePath), encodeStyle);
        out.print(fileContent);
        out.print("\n\n星空少儿编程测试代码\n");
        out.flush();
        out.close();


  }


  /**
   *  返回文中的链接列表
   */
  public static ArrayList extractUrls(String text)
  {
    ArrayList containedUrls = new ArrayList();
    String urlRegex = "((https?|ftp|gopher|telnet|file):((//)|(\\\\))+[\\w\\d:#@%/;$()~_?\\+-=\\\\\\.&]*)";
    Pattern pattern = Pattern.compile(urlRegex, Pattern.CASE_INSENSITIVE);
    Matcher urlMatcher = pattern.matcher(text);

    while (urlMatcher.find())
    {
        containedUrls.add(text.substring(urlMatcher.start(0),
                urlMatcher.end(0)));
    }

    return containedUrls;
  }

}

发表在 Uncategorized | 标签为 , , , , | 留下评论

为少儿进行java编程启蒙设计的Turtle类

import java.awt.*;

/**
* 这个类是用于少儿进行java编程启蒙的在,在类中定义了如下属性和方法.
* x,y对应x和y坐标
* angle对应和x轴的角度,
* pencolor为画笔颜色
* penwidth 为笔触大小
* penstatus 为笔的状态,为true表示落笔了,为false表示抬笔.
*/
public class Turtle {

private int x;
private int y;
private int angle;
private Color penColor;
private boolean penstatus;

static {
//设置直角坐标系
StdDraw.setXscale(-100,100);
StdDraw.setYscale(-100, 100);

}

public Turtle() {
x = 5;
y = 5;
angle = 45;
penColor = StdDraw.BLACK;

StdDraw.setPenRadius(0.01);
StdDraw.setPenColor(penColor);

}

/**
* Construct a new Turtle with the specified parameters. The
* new Turtle’s pen will be up.
*
* @param initX the x coordinate for the new Turtle.
* @param initY the y coordinate for the new Turtle.
* @param initAngle the angle for the new Turtle.
* @param initColor the color of the new Turtle’s pen.
*/
public Turtle(int initX, int initY, int initAngle, Color initColor) {
x=initX;
y=initY;
angle=initAngle;
penColor = initColor;
penPosition = PEN_UP;
}

/**
* Move this Turtle forward by the specified number of
* screen pixels.
*
* @param pixels the number of screen pixes by which
* to move this Turtle forward.
*/
public void moveForward(int pixels) {
double oldx = x;
double oldy = y;

double radAngle = Math.toRadians(angle);
x = x + (int)Math.round(Math.cos(radAngle) * pixels);
y = y – (int)Math.round(Math.sin(radAngle) * pixels);
System.out.println(oldx+ “,” + oldy);
System.out.println(x + “,” + y);
StdDraw.line(oldx, oldy, x, y);
}

/**
* Rotate this Turtle counter-clockwise by the specified
* number of degrees.
*
* @param degrees the number of degrees by which to rotate
* this Turtle.
*/
public void rotate(int degrees) {
int newAngle = angle + degrees;
angle = newAngle % 360;
}

/**
* Put this Turtle’s pen down. When this Turtle’s pen is
* down it will draw a line in its color as it moves
* forward.
*/
public void putPenDown() {
penPosition = PEN_DOWN;
}

/**
* Pick this Turtle’s pen up. When this Turtle’s pen is
* up it will not draw a line as it moves forward.
*/
public void pickPenUp() {
penPosition = PEN_UP;
}

/**
* Ask this Turtle if it’s pen is up or down. The value
* returned will be either PEN_UP or PEN_DOWN.
*
* @return PEN_DOWN if this Turtle’s pen is up or
* PEN_UP if this Turtle’s pen is up.
*/
public boolean getPenPosition() {
return penPosition;
}

/**
* Get the x coordinate of this Turtle.
*
* @return the x coordinate of this Turtle.
*/
public int getX() {
return x;
}

/**
* Get the y coordinate of this Turtle.
*
* @return the y coordinate of this Turtle.
*/
public int getY() {
return y;
}

/**
* Get the color of this Turtle’s pen. The color is
* returned as a reference to a Color object.
*
* @return a reference to a Color object representing
* the Color of this Turtle’s pen.
*/
public Color getColor() {
return penColor;
}

/**
* Get the the angle to which this Turtle is turned.
* The angle of the Turtle is measured counter-clockwise
* from horizontal.
*
* @return the angle to which this Turtle is turned.
*/
public int getAngle() {
return angle;
}

//only test
public static void main(String[] args){

Turtle t = new Turtle();
t.moveForward(10);

}
}

发表在 Uncategorized | 留下评论