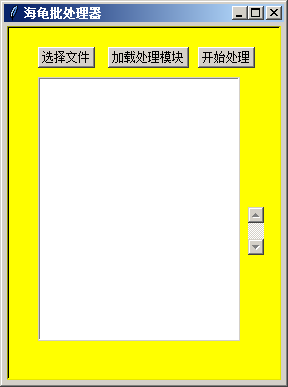
python turtle用海龟进行模糊处理图像

李兴球Python用海龟高斯模糊图像


以下是完整源代码

"""
   用海龟进行模糊处理图像.py
"""

from PIL import Image,ImageTk,ImageFilter
from turtle import Turtle,Screen,TK

def process(value):
    """对图像进行高斯模糊处理"""
    gf = ImageFilter.GaussianBlur(float(value))# 形成高斯模糊滤镜
    blurred_image = im.filter(gf)              # 进行高期模糊
    blurred_image = ImageTk.PhotoImage(blurred_image)# 包装成PhotoImage对象
    screen._shapes['blank']._data = blurred_image # 修改空白造型的_data值
    screen.update()                               # 更新屏幕显示

screen = Screen()
screen.setup(480,640)
root = screen._root

pic = Turtle(shape='blank')

TK.Scale(root, from_=0, to=100, length=400,tickinterval=5,
         orient=TK.HORIZONTAL, command=process).pack()

im = Image.open('notepad.jpg')
process(0)

screen.mainloop()


发表在 python, tkinter, turtle | 留下评论

在海龟画图窗口中剪裁图形

李兴球Python海龟模块剪裁图形


这个程序能在海龟画图窗口内剪裁图形,以下是绝大部分代码,希望对你有所帮助。

"""
   在海龟画图窗口中剪裁图形.py
   这个程序可以用鼠标指针在窗口中画矩形,
   然后被选中的图形部分会显示在图像的上边。
"""
import turtle                          # 导入海龟模块
from rectangle import *                # 从矩形模块导入所有命令
from PIL import Image,ImageTk

pass

turtle.RawTurtle.addx = lambda self,dx:self.setx(self.xcor() + dx)
turtle.RawTurtle.addy = lambda self,dy:self.sety(self.ycor() + dy)

left,top = None,None
currentrect = None
tom = turtle.Turtle(visible=False)
tom.speed(0)
def startdraw(x,y):
    global left,top                   # 声明全局变量
    left = x                          # 记录开始x坐标
    top = y                           # 记录开始y坐标
    
def drawing(x,y):
    tom.clear()
    tom.goto(left,top)                # 到达起始坐标
    tom.addx(x-left)                  # x坐标增加
    tom.addy(y-top)                   # y坐标增加 
    tom.addx(left-x)                  # x坐标增加
    tom.addy(top-y)                   # y坐标增加
    
def enddraw(x,y):
    global left,top,currentrect       # 声明全局变量
    w = x - left                      # 算出宽度
    if w < 0 :left = x                # 如果小于0说明向左移动了
    h = top - y                       # 算出高度 
    if h < 0 : top = y                # 如果小于0说明向上移动了
    currentrect = Rectangle(left,top,abs(w),abs(h))
    r = pic_rect.overlap(currentrect)
    if r :
        delta_x = r.left - pic_rect.left # 重叠区域相对于pic的水平距离
        delta_y = pic_rect.top - r.top   # 重叠区域相对于pic的垂直距离       
        box = delta_x,delta_y,delta_x + r.width,delta_y + r.height
        showim = im.crop(box)            # 剪裁区域
        showim = ImageTk.PhotoImage(showim)
        screen._shapes['blank']._data = showim
    else:
        screen._shapes['blank']._data = ''
    screen.update()
    screen.title(r)
    
screen = turtle.Screen()               # 新建屏幕对象
screen.delay(0)                        # 绘画延时为0 
screen.onclick(startdraw)              # 单击开始绘画
screen.onrelease(enddraw)              # 松开结束绘画
screen.onclickmotion(drawing)          # 按住时在画当中

img = 'epi.png'                        # 下一行是实例化造型
epi = turtle.Shape('image',screen._image(img))
screen.addshape('epi',epi)             # 添加到造型字典 

# 下面这个epi造型的海龟只是用来显示图形
pic = turtle.Turtle(shape='epi')      # 使用epi造型实例化海龟 
im = Image.open(img)                  # 打开img图形 
left,top = -im.width//2,im.height//2  # pic的左上角坐标
w,h = im.width,im.height              # pic的宽度和高度
pic_rect = Rectangle(left,top,w,h)    # pic的矩形对象

showhg = turtle.Turtle('blank')       # 将要显示剪裁图形的海龟
showhg.penup()                        # 抬笔  
showhg.goto(0,200)                    # 定位到(0,200)

screen.mainloop()                     # 进入主事件循环

需要完整源代码和素材请

成为会员后,登陆才能继续浏览!联系微信scratch8即可办理会员。
(会员专属:能浏览所有文章,下载所有带链接的Python资源。)

发表在 python, turtle | 标签为 , | 留下评论

给RawTurtle类新增矩形碰撞方法

李兴球Python给RawTurtle类新增矩形碰撞方法

李兴球Python给RawTurtle类新增矩形碰撞方法


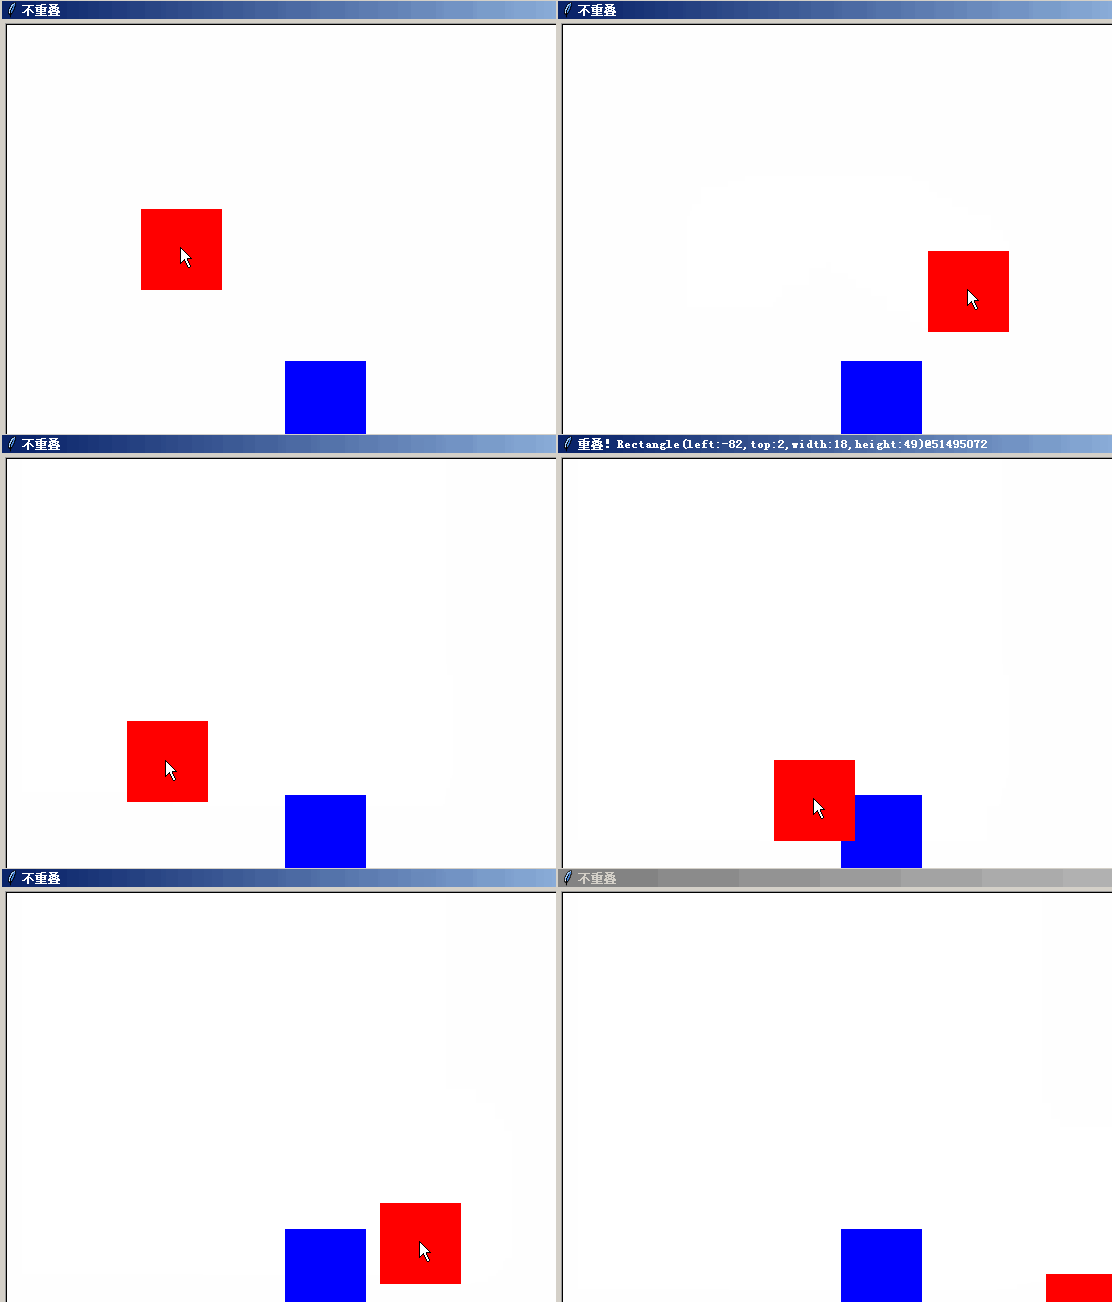
这个程序给Python海龟模块新增了一个叫collide的方法,这样海龟就有了碰撞检测方法了,名字叫collide。
如果要检测两个海龟有没有发生碰撞那么只要用下面的代码即可(t1,t2是海龟)
t1.collide(t2),这句代码会返回两个海龟的重叠区域,是一个矩形对象。

"""
   给RawTurtle类新增矩形碰撞方法.py
"""
import turtle                          # 导入海龟模块
from rectangle import *                # 从矩形模块导入所有命令

def mouse_position(screen):
    """获取鼠标指针的坐标"""    
    pass
    return x,y

def _collide(self,other):
    """以矩形碰撞的方式检测和另一个海龟对象有没有发生“碰撞”"""
    a,b,c,d = self.screen.cv.bbox(self.turtle._item) 
    w = c - a                                  # 算出宽度
    h = d - b                                  # 算出高度
    rect1 = Rectangle(a,-b,w,h)                # 矩形对象

    a,b,c,d = self.screen.cv.bbox(other.turtle._item) 
    w = c - a                                  # 算出宽度
    h = d - b                                  # 算出高度
    rect2 = Rectangle(a,-b,w,h)                # 矩形对象

    return rect1.overlap(rect2)

turtle.RawTurtle.collide = _collide       # 新增collide方法

screen = turtle.Screen()                  # 新建屏幕对象

blue = turtle.Turtle('square')            # 新建海龟对象
blue.shapesize(4)                         # 把海龟变大些
blue.color('blue')                        # 设为蓝色的
blue.goto(-40,-40)   

red = turtle.Turtle('square')              # 新建红色方块
red.speed(0)                               # 移动速度为最快
red.penup()                                # 抬笔
red.shapesize(4)                           # 放大
red.color('red')                           # 红色

while True:
    x,y = mouse_position(screen)    
    red.goto(x,y)                          # 红色方块跟着鼠标指针移动
    r = red.collide(blue) 
    if r:                                  # 如果发生了碰撞那么r不是空值,是一个矩形对象!
        screen.title('重叠!' + str(r))
    else:
        screen.title('不重叠')
    screen.update()                     # 刷新屏幕显示

本程序包括本人编写的rectangle类等三个py源代码文件,如果需要

成为会员后,登陆才能继续浏览!联系微信scratch8即可办理会员。
(会员专属:能浏览所有文章,下载所有带链接的Python资源。)

发表在 python, tkinter, turtle | 标签为 , , | 留下评论

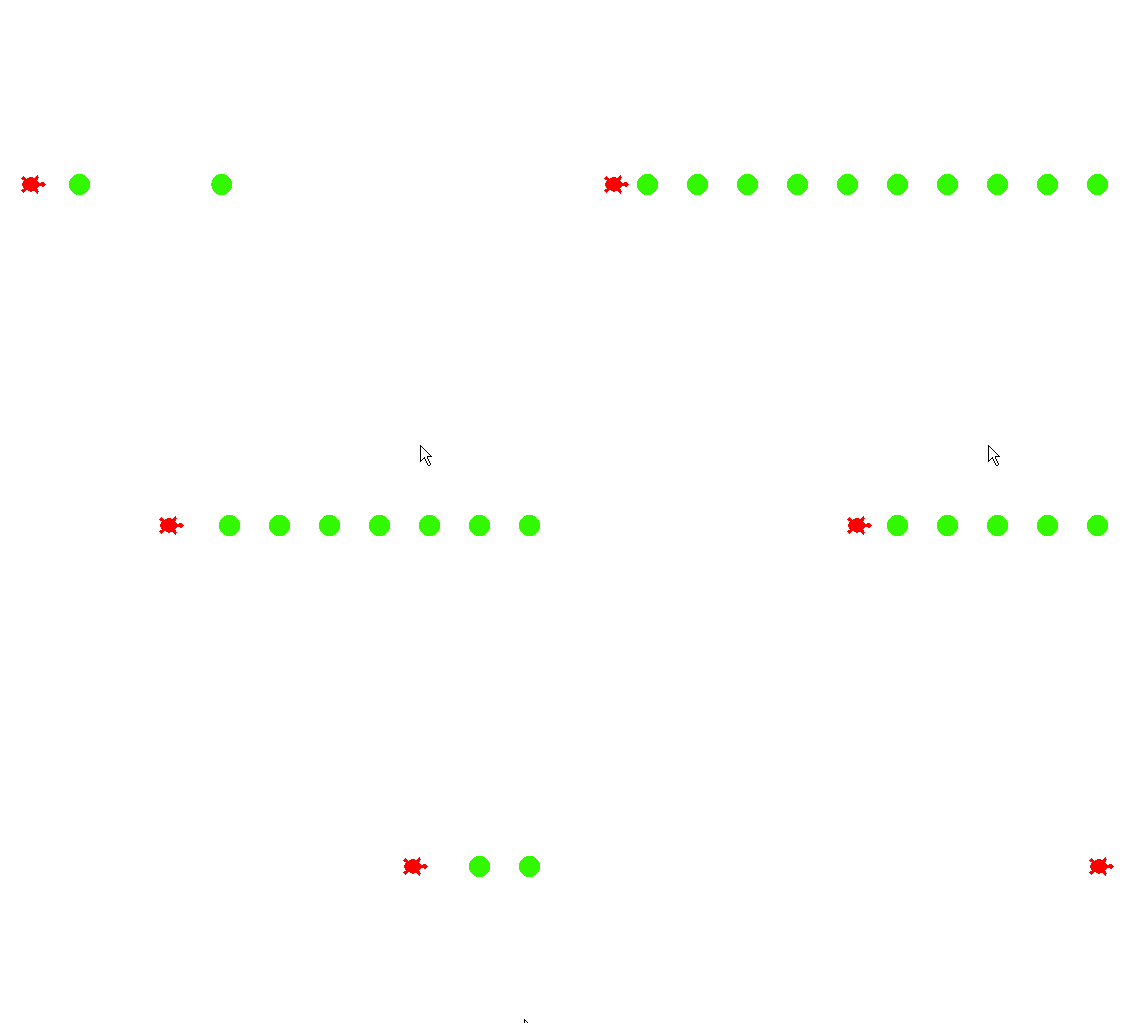
海龟吃绿豆动画_find_overlapping与绑定盒碰撞检测示例

李兴球Python海龟吃绿豆动画

李兴球Python海龟吃绿豆动画

"""
   海龟吃绿豆动画.py,来自李兴球撰写的《Python海龟宝典》的一个示例程序。
   这是应用find_overlapping查找重叠,结合标签制作的一个碰撞检测的示例程序。
"""
from turtle import Screen,Turtle

def find_overlapping(self,other):
    """查找重叠,用于和其它海龟对象的碰撞检测。       
       other是整数,那么代表一只海龟的item号
       other是海龟,那么取海龟的item号
       other是字符串,则认为它是某类海龟的标签
       标签是用来进行分组的一个字符串。
       返回所碰撞到的海龟列表。
    """
    pass

Turtle.find_overlapping = find_overlapping            # 新增查找重叠命令        

screen = Screen()                                     # 新建屏幕
canvas = screen.getcanvas()                           # 得到画布 

yixiu = Turtle('turtle')                              # 新建海龟
yixiu.penup()                                         # 海龟抬笔
yixiu.color('red')                                    # 设定画笔 
yixiu.bk(250)                                         # 倒退250

for i in range(10):
    b = Turtle('circle')
    b.penup()
    b.color('#33f900')
    canvas.itemconfig(b.turtle._item, tags='bean')     # 配置统一的标签
    b.fd(-200 + 50 * i)                                # 设定好位置 

for i in range(500):
    yixiu.fd(1)
    ts = yixiu.find_overlapping('bean')  # 查找有没有bean标签的海龟
    if ts : print(ts)
    for t in ts:t.ht()                   # 隐藏每个碰撞到的海龟

需要完整源代码,请

成为会员后,登陆才能继续浏览!联系微信scratch8即可办理会员。
(会员专属:能浏览所有文章,下载所有带链接的Python资源。)

发表在 python, tkinter, turtle | 标签为 , , , , | 留下评论

pillow修改透明度在tkinter画布上显示

李兴球Python之pillow修改透明度在tkinter画布上显示

以下是绝大部分代码:

"""
    pillow修改透明度在tkinter画布上显示.py
"""
import time
from tkinter import *
from PIL import Image,ImageTk

def setalpha(rawim,a):
    pass
    
root = Tk()
root.title('pillow修改透明度在tkinter画布上显示by李兴球')

cv = Canvas(root,width=480,height=360,bg='white')
cv.pack()

bg = ImageTk.PhotoImage(file='c:/电影院外面.png')
cv.create_image(240,180,image=bg)

im = Image.open("c:/cat.gif")
im = im.convert('RGBA')
img = ImageTk.PhotoImage(im) 
cat= cv.create_image(240,220,image=img)

while 1:
    b = time.time()
    for a in range(255,-1,-10):
        im1 = setalpha(im,a)
        img = ImageTk.PhotoImage(im1)
        cv.itemconfig(cat,image=img)
        cv.update()
        time.sleep(0.01)
    print(time.time() - b)

    b = time.time()
    for a in range(0,256,10):
        im1 = setalpha(im,a)
        img = ImageTk.PhotoImage(im1)
        cv.itemconfig(cat,image=img)
        cv.update()
        time.sleep(0.01)
    print(time.time() - b)

需要完整代码及素材请

成为会员后,登陆才能继续浏览!联系微信scratch8即可办理会员。
(会员专属:能浏览所有文章,下载所有带链接的Python资源。)

发表在 python, tkinter | 标签为 | 留下评论

国庆中秋双重喜庆

"""
   国庆中秋双重喜庆.py
"""
import time
import random
import turtle
from bitmapfont import *
from winsound import *

__author__ = '李兴球'
__date__ = '2020/9/28'

PlaySound('华语群星 - 浏阳河+回娘家+红彩妹妹 (平四版).wav',SND_LOOP|SND_ASYNC)

def steped_write(s):
    """逐字写"""
    for char in s:
        turtle.write(char,move=True,align='center',font=ft)
        turtle.fd(10)
        time.sleep(0.3)
   
alldots = []
def show_charactar(char,scale):
    fontSet = open("./HZK16", "rb")
    for i in getCharacterMatrixMode(fontSet, char):
        for k in i:
            if(int(k)):
                turtle.dot(5*scale)
                alldots.append(turtle.getturtle().items[-1])
                turtle.fd(5*scale)
            else:
                turtle.fd(5*scale)
        turtle.bk(16*5*scale)
        turtle.right(90)
        turtle.fd(5*scale)
        turtle.left(90)
        time.sleep(0.1)

turtle.delay(0)
turtle.speed(0)
turtle.penup()
turtle.setup(480,800)
turtle.bgcolor('black')
turtle.hideturtle()

turtle.color('white')
turtle.goto(-140,330)
show_charactar('祝',1)

turtle.goto(50,330)
show_charactar('您',1)

turtle.color('red')
turtle.goto(-170,190)
show_charactar('国',1.5)

turtle.color('orange')
turtle.goto(30,190)
show_charactar('庆',1.5)

turtle.color('yellow')
turtle.goto(-170,20)
show_charactar('中',1.5)

turtle.color('green')
turtle.goto(30,20)
show_charactar('秋',1.5)

turtle.color('cyan')
turtle.goto(-170,-180)
show_charactar('快',2)

turtle.color('blue')
turtle.goto(30,-180)
show_charactar('乐',2)

turtle.goto(-170,-140)
turtle.color('white')
ft = ('楷体',18,'underline')
steped_write('本程序由Python海龟画图模块制作')
#turtle.write('本程序由Python海龟画图模块制作',align='center',font=ft)

turtle.goto(0,-170)
turtle.color('white')
turtle.write('源码免费下载网址 www.lixingqiu.com',align='center',font=ft)
witem = turtle.getturtle().items[-1]

cs = ['red','orange','yellow','green',
      'cyan','blue','pink','white']

canvas = turtle.getcanvas()

c = 0
index = 0
j = 0
while True:
    dot = alldots[index]    
    canvas.itemconfig(dot,fill=cs[c%len(cs)])
    canvas.update()
    time.sleep(0.01)
    index = index + 1
    index = index % len(alldots)
    if index == 0 : c = c + 1        
    c = c + 1    
    time.sleep(0.1)
    j = j + 1
    if j % 8 == 0 : canvas.itemconfig(witem,fill=random.choice(cs))

本资源于2020年国庆期间是免费下载,现在国庆已过,需要下载请扫码付费:

[hide]

国庆中秋双重喜庆下载:
链接:https://pan.baidu.com/s/1U3Jh2J2H4Ax7w1_smjCNZQ

提取码:kx4a

[/hide]

发表在 python, tkinter, turtle | 标签为 , , | 留下评论

忽隐忽现的文字by李兴球

李兴球tkinter忽隐忽现的文字

李兴球tkinter忽隐忽现的文字

"""
   忽隐忽现的文字.py
"""
import time
from tkinter import *

root = Tk()
root.title('忽隐忽现的文字')

canvas = Canvas(root,width=480,height=360,bg='lime')
canvas.pack()

t = canvas.create_text(240,180,text='风火轮编程',angle=30,
            fill='blue',font=('楷体',32,'underline'))

while True:
    canvas.itemconfig(t,state=HIDDEN)
    canvas.update()
    time.sleep(0.5)    
    canvas.itemconfig(t,state=NORMAL)
    canvas.update()
    time.sleep(0.5)


发表在 python, tkinter | 标签为 , | 留下评论

Python的turtle复合造型测试程序

李兴球python_turtle_compound_shape

李兴球python_turtle_compound_shape

"""
   turtle复合造型测试程序
   本程序来自Python海龟宝典。
   关键词 python turtle compound shape
"""

from turtle import Shape,Screen,Turtle

s = Shape("compound")                          # 新建复合造型

poly = ((10,-5),(0,10),(-10,-5))
s.addcomponent(poly, "red", "blue")            # 坐标,填充颜色,和边框颜色

poly2 = ((10,-25), (10,-5), (-10,-5),(-10,-25))
s.addcomponent(poly2,'yellow','cyan')          # 添加部件

screen = Screen()                              # 新建屏幕
screen.addshape('fh',s)                        # 添加造型 

t = Turtle(shape='fh')                         # 新建海龟
t.shapesize(10)                                # 海龟变大
t.left(90)                                     # 左转90度
name = t.turtle.shapeIndex                     # 造型名字
shape = screen._shapes[name]                   # 取出造型
data = shape._data                             # 造型数据
print(data)                                    # 打印数据

发表在 python, turtle | 标签为 , | 留下评论

闪闪的正八边形.py

"""
   闪闪的正八边形.py
   来自Python海龟宝典的程序。
"""
from time import sleep
from turtle import Turtle,Screen

cs = ['red','orange','yellow','green',
      'cyan','blue','purple','pink']

screen = Screen()
screen.delay(0)

tom = Turtle(visible=False)
tom.speed(0)
tom.fillcolor('red')           # 设定填充颜色为红色

tom.begin_fill()               # 开始填充
for x in range(8):
    tom.fd(100)
    tom.left(45)
fillitem = tom._fillitem       # 保存填充区域项目编号
fillpath = tom._fillpath       # 保存填充区域各个坐标点
tom.end_fill()                 # 结束填充

while True:
    for color in cs:
        screen._drawpoly(fillitem, fillpath,fill=color)
        sleep(0.25)
        screen.update()


发表在 python, turtle | 留下评论

用海龟模块的Vec2D向量旋转线条

李兴球Python海龟Vec2D向量旋转线条

李兴球Python海龟Vec2D向量旋转线条

"""
   用海龟模块的Vec2D向量旋转线条.py
   本程序从海龟模块中导入了Vec2D向量,
   用Tk实例化了一个窗口,然后创建了一根线条。
   通过旋转向量,重新配置坐标,从而旋转了线条。
   本程序为《Python海龟宝典》示例程序。
"""
import time
from tkinter import *
from turtle import Vec2D

root = Tk()
root.title("用Vec2D向量旋转线条示例")

canvas = Canvas(root,width=480,height=360,bg='#FFFFFF')
canvas.pack()

v1 = Vec2D(240,180)               # 旋转中心点
v2 = Vec2D(340,180)               # 端点 
v = v2 - v1
line = canvas.create_line(240,180,340,180,fill='red',width=3)

while True:
    v = v.rotate(1)                # 向右旋转向量一度
    v2 = v1 + v                    # 重新计算端点
    canvas.coords(line,(240,180,v2[0],v2[1]))
    canvas.update()                # 更新画布显示
    time.sleep(0.01)               # 等待0.01秒

发表在 python, tkinter, turtle | 标签为 , | 留下评论

海龟所有可用颜色,tkinter颜色表,海龟颜色表

李兴球Python海龟所有可用颜色列表

李兴球Python海龟所有可用颜色列表

"""
   海龟所有可用颜色.py
"""
from turtle import *

width,height = 1300,700
all_colors = ['AntiqueWhite1', 'AntiqueWhite2', 'AntiqueWhite3', 'AntiqueWhite4', 'CadetBlue1', 'CadetBlue2', 'CadetBlue3', 'CadetBlue4', 'DarkGoldenrod1', 'DarkGoldenrod2', 'DarkGoldenrod3', 'DarkGoldenrod4', 'DarkOliveGreen1', 'DarkOliveGreen2', 'DarkOliveGreen3', 'DarkOliveGreen4', 'DarkOrange1', 'DarkOrange2', 'DarkOrange3', 'DarkOrange4', 'DarkOrchid1', 'DarkOrchid2', 'DarkOrchid3', 'DarkOrchid4', 'DarkSeaGreen1', 'DarkSeaGreen2', 'DarkSeaGreen3', 'DarkSeaGreen4', 'DarkSlateGray1', 'DarkSlateGray2', 'DarkSlateGray3', 'DarkSlateGray4', 'DeepPink2', 'DeepPink3', 'DeepPink4', 'DeepSkyBlue2', 'DeepSkyBlue3', 'DeepSkyBlue4', 'DodgerBlue2', 'DodgerBlue3', 'DodgerBlue4', 'HotPink1', 'HotPink2', 'HotPink3', 'HotPink4', 'IndianRed1', 'IndianRed2', 'IndianRed3', 'IndianRed4', 'LavenderBlush2', 'LavenderBlush3', 'LavenderBlush4', 'LemonChiffon2', 'LemonChiffon3', 'LemonChiffon4', 'LightBlue1', 'LightBlue2', 'LightBlue3', 'LightBlue4', 'LightCyan2', 'LightCyan3', 'LightCyan4', 'LightGoldenrod1', 'LightGoldenrod2', 'LightGoldenrod3', 'LightGoldenrod4', 'LightPink1', 'LightPink2', 'LightPink3', 'LightPink4', 'LightSalmon2', 'LightSalmon3', 'LightSalmon4', 'LightSkyBlue1', 'LightSkyBlue2', 'LightSkyBlue3', 'LightSkyBlue4', 'LightSteelBlue1', 'LightSteelBlue2', 'LightSteelBlue3', 'LightSteelBlue4', 'LightYellow2', 'LightYellow3', 'LightYellow4', 'MediumOrchid1', 'MediumOrchid2', 'MediumOrchid3', 'MediumOrchid4', 'MediumPurple1', 'MediumPurple2', 'MediumPurple3', 'MediumPurple4', 'MistyRose2', 'MistyRose3', 'MistyRose4', 'NavajoWhite2', 'NavajoWhite3', 'NavajoWhite4', 'OliveDrab1', 'OliveDrab2', 'OliveDrab4', 'OrangeRed2', 'OrangeRed3', 'OrangeRed4', 'PaleGreen1', 'PaleGreen2', 'PaleGreen3', 'PaleGreen4', 'PaleTurquoise1', 'PaleTurquoise2', 'PaleTurquoise3', 'PaleTurquoise4', 'PaleVioletRed1', 'PaleVioletRed2', 'PaleVioletRed3', 'PaleVioletRed4', 'PeachPuff2', 'PeachPuff3', 'PeachPuff4', 'RosyBrown1', 'RosyBrown2', 'RosyBrown3', 'RosyBrown4', 'RoyalBlue1', 'RoyalBlue2', 'RoyalBlue3', 'RoyalBlue4', 'SeaGreen1', 'SeaGreen2', 'SeaGreen3', 'SkyBlue1', 'SkyBlue2', 'SkyBlue3', 'SkyBlue4', 'SlateBlue1', 'SlateBlue2', 'SlateBlue3', 'SlateBlue4', 'SlateGray1', 'SlateGray2', 'SlateGray3', 'SlateGray4', 'SpringGreen2', 'SpringGreen3', 'SpringGreen4', 'SteelBlue1', 'SteelBlue2', 'SteelBlue3', 'SteelBlue4', 'VioletRed1', 'VioletRed2', 'VioletRed3', 'VioletRed4', 'alice blue', 'antique white', 'aquamarine', 'aquamarine2', 'aquamarine4', 'azure', 'azure2', 'azure3', 'azure4', 'bisque', 'bisque2', 'bisque3', 'bisque4', 'blanched almond', 'blue', 'blue violet', 'blue2', 'blue4', 'brown1', 'brown2', 'brown3', 'brown4', 'burlywood1', 'burlywood2', 'burlywood3', 'burlywood4', 'cadet blue', 'chartreuse2', 'chartreuse3', 'chartreuse4', 'chocolate1', 'chocolate2', 'chocolate3', 'coral', 'coral1', 'coral2', 'coral3', 'coral4', 'cornflower blue', 'cornsilk2', 'cornsilk3', 'cornsilk4', 'cyan', 'cyan2', 'cyan3', 'cyan4', 'dark goldenrod', 'dark green', 'dark khaki', 'dark olive green', 'dark orange', 'dark orchid', 'dark salmon', 'dark sea green', 'dark slate blue', 'dark slate gray', 'dark turquoise', 'dark violet', 'deep pink', 'deep sky blue', 'dim gray', 'dodger blue', 'firebrick1', 'firebrick2', 'firebrick3', 'firebrick4', 'floral white', 'forest green', 'gainsboro', 'ghost white', 'gold', 'gold2', 'gold3', 'gold4', 'goldenrod', 'goldenrod1', 'goldenrod2', 'goldenrod3', 'goldenrod4', 'gray', 'gray1', 'gray10', 'gray11', 'gray12', 'gray13', 'gray14', 'gray15', 'gray16', 'gray17', 'gray18', 'gray19', 'gray2', 'gray20', 'gray21', 'gray22', 'gray23', 'gray24', 'gray25', 'gray26', 'gray27', 'gray28', 'gray29', 'gray3', 'gray30', 'gray31', 'gray32', 'gray33', 'gray34', 'gray35', 'gray36', 'gray37', 'gray38', 'gray39', 'gray4', 'gray40', 'gray42', 'gray43', 'gray44', 'gray45', 'gray46', 'gray47', 'gray48', 'gray49', 'gray5', 'gray50', 'gray51', 'gray52', 'gray53', 'gray54', 'gray55', 'gray56', 'gray57', 'gray58', 'gray59', 'gray6', 'gray60', 'gray61', 'gray62', 'gray63', 'gray64', 'gray65', 'gray66', 'gray67', 'gray68', 'gray69', 'gray7', 'gray70', 'gray71', 'gray72', 'gray73', 'gray74', 'gray75', 'gray76', 'gray77', 'gray78', 'gray79', 'gray8', 'gray80', 'gray81', 'gray82', 'gray83', 'gray84', 'gray85', 'gray86', 'gray87', 'gray88', 'gray89', 'gray9', 'gray90', 'gray91', 'gray92', 'gray93', 'gray94', 'gray95', 'gray97', 'gray98', 'gray99', 'green yellow', 'green2', 'green3', 'green4', 'honeydew2', 'honeydew3', 'honeydew4', 'hot pink', 'indian red', 'ivory2', 'ivory3', 'ivory4', 'khaki', 'khaki1', 'khaki2', 'khaki3', 'khaki4', 'lavender', 'lavender blush', 'lawn green', 'lemon chiffon', 'light blue', 'light coral', 'light cyan', 'light goldenrod', 'light goldenrod yellow', 'light grey', 'light pink', 'light salmon', 'light sea green', 'light sky blue', 'light slate blue', 'light slate gray', 'light steel blue', 'light yellow', 'lime green', 'linen', 'magenta2', 'magenta3', 'magenta4', 'maroon', 'maroon1', 'maroon2', 'maroon3', 'maroon4', 'medium aquamarine', 'medium blue', 'medium orchid', 'medium purple', 'medium sea green', 'medium slate blue', 'medium spring green', 'medium turquoise', 'medium violet red', 'midnight blue', 'mint cream', 'misty rose', 'navajo white', 'navy', 'old lace', 'olive drab', 'orange', 'orange red', 'orange2', 'orange3', 'orange4', 'orchid1', 'orchid2', 'orchid3', 'orchid4', 'pale goldenrod', 'pale green', 'pale turquoise', 'pale violet red', 'papaya whip', 'peach puff', 'pink', 'pink1', 'pink2', 'pink3', 'pink4', 'plum1', 'plum2', 'plum3', 'plum4', 'powder blue', 'purple', 'purple1', 'purple2', 'purple3', 'purple4', 'red', 'red2', 'red3', 'red4', 'rosy brown', 'royal blue', 'saddle brown', 'salmon', 'salmon1', 'salmon2', 'salmon3', 'salmon4', 'sandy brown', 'sea green', 'seashell2', 'seashell3', 'seashell4', 'sienna1', 'sienna2', 'sienna3', 'sienna4', 'sky blue', 'slate blue', 'slate gray', 'snow', 'snow2', 'snow3', 'snow4', 'spring green', 'steel blue', 'tan1', 'tan2', 'tan4', 'thistle', 'thistle1', 'thistle2', 'thistle3', 'thistle4', 'tomato', 'tomato2', 'tomato3', 'tomato4', 'turquoise', 'turquoise1', 'turquoise2', 'turquoise3', 'turquoise4', 'violet red', 'wheat1', 'wheat2', 'wheat3', 'wheat4', 'white smoke', 'yellow', 'yellow green', 'yellow2', 'yellow3', 'yellow4']
print(len(all_colors))

screen = Screen()
screen.delay(0)
screen.title('海龟所有可用颜色,tkinter颜色表,海龟颜色表')
screen.setup(width,height)

startx = -width//2 + 50
starty = height//2 - 18
pen = Turtle(shape='square')
pen.up()
pen.speed(0)
pen.shapesize(0.8,5)
pen.goto(startx,starty)

i = 0
ft = ('',9,'normal')
for c in all_colors:
    pen.color(c)
    pen.stamp()
    pen.color('black')
    pen.sety(pen.ycor() - 5)
    pen.write(c,align='center',font=ft)
    pen.sety(pen.ycor() + 5)    
    pen.fd(100)
    i += 1
    if i >= 13:
        pen.bk(1300)
        pen.sety(pen.ycor() - 17)
        i = 0


发表在 python, turtle | 标签为 , , | 留下评论

支持旋转图像角色的海龟模块。

"""
   turtler.py
   支持旋转角色的海龟模块。
   本个模块重定义了原生海龟类的_rotate,__init__和shape方法
   使用pillow模块支持图形角色旋转,并且支持直接设定图片为角色的造型。
   本模块尚不支持用addshape或register_shape注册造型到型字典!
"""

__author__ = '李兴球'
__blog__ = 'www.lixingqiu.com'
__date__ = '2020/9/7'
__version__ = 0.1

import os
from PIL import Image,ImageTk
from turtle import Tbuffer,_Screen,_CFG,TNavigator,TPen,_TurtleImage,RawTurtle,Turtle,Screen,Shape

Sprite = Turtle

def _place_to_shapes(self,imagefilename):
    """用pillow模块打开图像文件,形成造型,放到造型字典中,返回在造型字典中的key"""
    self._imagename = imagefilename            # 保留原始图像文件名
    self._rawim = Image.open(imagefilename)    # 用pillow模块打开这个文件
    self._rawim = self._rawim.convert('RGBA')
    angle = self.heading()
    im = self._rawim.rotate(angle,expand=1)
    sp = Shape('image',ImageTk.PhotoImage(im))
    shapename = self._imagename + "_" + str(angle)
    self.screen.addshape(shapename,sp)
    return shapename

RawTurtle._place_to_shapes = _place_to_shapes

def __init__(self, canvas=None,shape=_CFG["shape"],
             undobuffersize=_CFG["undobuffersize"],
             visible=_CFG["visible"]):
    if isinstance(canvas, _Screen):
        self.screen = canvas
    elif isinstance(canvas, TurtleScreen):
        if canvas not in RawTurtle.screens:
            RawTurtle.screens.append(canvas)
        self.screen = canvas
    elif isinstance(canvas, (ScrolledCanvas, Canvas)):
        for screen in RawTurtle.screens:
            if screen.cv == canvas:
                self.screen = screen
                break
        else:
            self.screen = TurtleScreen(canvas)
            RawTurtle.screens.append(self.screen)
    else:
        raise TurtleGraphicsError("bad canvas argument %s" % canvas)

    screen = self.screen
    TNavigator.__init__(self, screen.mode())
    TPen.__init__(self)
    screen._turtles.append(self)
    self.drawingLineItem = screen._createline()

    if os.path.isfile(shape):                # 如果是文件
        shape = self._place_to_shapes(shape) # 第一次放到造型字典中       
    else:
        self._imagename = None              # 图片造型属性
        self._rawim = None
        
    self.turtle = _TurtleImage(screen, shape)
    self._poly = None
    self._creatingPoly = False
    self._fillitem = self._fillpath = None
    self._shown = visible
    self._hidden_from_screen = False
    self.currentLineItem = screen._createline()
    self.currentLine = [self._position]
    self.items = [self.currentLineItem]
    self.stampItems = []
    self._undobuffersize = undobuffersize
    self.undobuffer = Tbuffer(undobuffersize)
    self._update()
    
RawTurtle.__init__ = __init__

def _rotate(self, angle):
    """Turns pen clockwise by angle.
    """
    if self.undobuffer:
        self.undobuffer.push(("rot", angle, self._degreesPerAU))
    angle *= self._degreesPerAU
    neworient = self._orient.rotate(angle)
    tracing = self.screen._tracing
    if tracing == 1 and self._speed > 0:
        anglevel = 3.0 * self._speed
        steps = 1 + int(abs(angle)/anglevel)
        delta = 1.0*angle/steps
        for _ in range(steps):
            self._orient = self._orient.rotate(delta)
            self._update()
    self._orient = neworient
    
    angle = self.heading()
    shapename = self._imagename + "_" + str(angle)
    if shapename not in self.screen.getshapes():
        im = self._rawim.rotate(angle,expand=1)
        sp = Shape('image',ImageTk.PhotoImage(im))        
        self.screen.addshape(shapename,sp)
    self.shape(shapename)        
    self._update()
    
RawTurtle._rotate = _rotate

def _shape(self, name=None):
    """设定海龟的造型,用给定的文件名或造型名称"""
    if name is None:
        return self.turtle.shapeIndex
    if not name in self.screen.getshapes():
        shape = name
        if os.path.isfile(shape):           # 如果是文件        
            shapename = self._place_to_shapes(shape)                
            self.turtle._setshape(shapename)
        else:
            raise TurtleGraphicsError("There is no shape named %s" % name)
    else:
        self.turtle._setshape(name)
    self._update()
RawTurtle.shape = _shape

if __name__ == '__main__':
        
    from time import sleep
    images = [f"cats/{i}.png" for i in range(16)]

    cat = Sprite()
    cat2 = Sprite()
    i = 0
    while True:
        cat.shape(images[i])
        cat2.shape(images[i])
        i = i + 1
        i = i % 16
        sleep(0.1)
        cat.left(1)
        cat2.right(1)
发表在 python, turtle | 标签为 , | 留下评论

Python海龟画图中如何强行中止程序

"""
   Python海龟画图中如何强行中止程序
   下面的代码让你单击屏幕任何一个地方就能中止while循环。
"""

from turtle import *

def stop(x,y):
    TurtleScreen._RUNNING  = False
    
t = Turtle()
screen = t.screen
screen.onclick(stop)
while 1:
    t.fd(10)
    t.rt(10)
发表在 python, turtle | 留下评论

滚动画布与旋转文字示例程序.py

李兴球Python滚动画布与旋转文字示例

李兴球Python滚动画布与旋转文字示例

"""
   滚动画布与旋转文字示例程序.py
   下面的TK就是tkinter模块。
"""

from turtle import ScrolledCanvas,TK

root = TK.Tk()
root.title('滚动画布与旋转文字示例程序by李兴球')

canvas = ScrolledCanvas(root,width=800,height=600)
canvas.pack()

canvas.create_text(100, 50, text='风火轮编程',fill='red')

canvas.create_line(-400,0,400,0,fill='red')           # 画x轴

canvas.create_line(0,-300,0,300,fill='blue')          # 画y轴

# 创建将要旋转的文字
z = canvas.create_text(0, 0, text='风火轮编程',fill='red',angle=45,font=('',32,'normal'))

a = 0
while True:
    canvas.itemconfig(z,angle=a)
    a = a + 0.1
    canvas.update()
    

发表在 python, tkinter, turtle | 标签为 | 留下评论

学编程再也不是精英阶层的专利了

让每个人从小就学编程,这是一个美好的愿望,
但是以前实现不了,我们用2007年做为界,在那之前,
只有极少数学生能实现。这些极少数长大后都成了社会精英。
可喜的是自2007年后,理论上所有的小学生都有了这个机会。
这是为什么呢?2007年之前没有Scratch,
小学生学编程需要从比Scratch难的basic、logo、pascal、C
这些语言开始学习,最要命的是学这些都需要学会打字,
这就又阻力挡了一大部分学生学习编程。
Scratch是图形化编程儿童计算机语言的代名词。
像搭积木一样,用它能轻松地学习编程,
让儿童也能创造自己的作品。
自Scratch横空出世后,一个新的专有名词诞生了,
这个名字叫“少儿编程”。
本人自2010年开始接触Scratch,
算是中国很早就接触Scratch的那一批人了。
那么学生学了Scratch后应该学什么,最应该学的是Python。
这里就不多说了。本人是中国少儿编程行业的先锋之一。
在少儿编程这个领域探索了10年。已经编写了较多的学习编程的书籍。
让每个孩子都学习编程是我的愿意。孩子可以学钢琴,学画画,
学二胡,学跆拳道,为什么不可以试试编程。科技社会不断发展,
兴趣班也在不断地演变,哪个是最适合于时代的兴趣班呢?
国家层面已经在大力支持普及编程教育了。
我相信,你的眼睛是雪亮的。你会做自己最正确的选择。
如果你的孩子在我这里报了编程班,我就会花心思教好你的孩子编程。
还有一部分家长学过编程,认为编程就是C语言等很难的,
小孩子怎么能学会?这部分家长没有与时俱进地看问题。
小孩子的编程和大学生学的编程不一样,就像小学数学和大学数学不一样。
两者编程的共同点就是都包含编程思维。中小学生更倾向于兴趣培养。
为将来更深一层次的学习打下良好的基础,所谓一步先,就步步先。
什么都从小学就习,长大才更有可能成才。
道理大家都明白 ,我也不在赘述,关键是实践。

学编程再也不是精英阶层的专利了,完!

发表在 杂谈 | 留下评论

coloradd 正弦渐变示例图

李兴球python正弦渐变示例

李兴球python正弦渐变示例

"""
   正弦渐变示例.py
   本程序需要coloradd模块支持,没有安装者请在命令提示符里输入 pip install coloradd进行安装.
"""
import math                             # 导入数学模块
import turtle                           # 导入海龟模块
from coloradd import *                  # 从颜色增加模块导入所有命令

turtle.penup()                          # 抬笔
turtle.colormode(255)                   # 颜色模式设为255(coloradd需要)
turtle.bgcolor('white')                 # 背景颜色为黑色

c = (255,0,0)                           # 表示初始颜色(红色)
for a in range(-180,181):               # 在范围-180到181内更新a的值
    c = coloradd(c,0.01)                # 三元组变化 
    y = 100 * math.sin(math.radians(a)) # 设y坐标
    turtle.color(c)                     # 把颜色设为c
    turtle.goto(a,y)                    # 到达a,y 
    turtle.dot(50)                      # 打个点

turtle.done()                           # 做完了(进入事件循环)
发表在 python, turtle | 标签为 , | 留下评论

《Python神笔马良案例集》PDF电子版与素材及源码(含少量视频教程)

简 介:

《Python神笔马良绘画案例集合》是李兴球编写的一些主要由Python海龟画图模块制作的案例集。除了少数几个不是绘画或动画作品外,绝大多数都是用turtle模块制作的绘画或利用动画原理甚至3D原理制作的。后面的稍微难一点,最后几个用了pillow图像处理模块、pygame模块的Surface类、tkinter模块的画布直接画图。本书适合于少儿编程教师上练习课(9岁以上)或留作业。教师可自行编排课次。上课时,只要展示程序运行后的图形或动画,让学生们编写程序即可,也可以布置成作业及练习给学生,这样能让Python课堂最简化。对于编写得快的同学,老师需要指引增加难度。对于编不出来的同学,老师可以在旁边立即指引。当大多数同学编写完后,老师即可统一讲解关键点,根据具体课堂情况,还可以继续修改程序。例如,可以把单独的功能块挑出来,做成函数。例如,可以把黑白图形变成多种颜色的图形。例如,修改导入模块的方式,重新编程。例如,让所画的画儿旋转或移动起来甚至自由落体。例如,把程序里面的for循环修改成while循环,或者反过来。
本书也适于广大编程爱好者通过阅读案例来自学编程。 案例大体按照了从简到难的编排顺序,有超过100个案例。每个案例有整体上的介绍,有必要时还会有更仔细的说明。源代码大多数都有注释。每行代码经过仔细审核,以李兴球先生几十年编程经验的上帝视野进行编写。代码力求符合Python哲学,目前已经是风火轮编程的灵活教材之一。
Python的海龟模块位于Python安装目录的Lib文件夹。海龟模块是基于tkinter模块开发的。本人对海龟模块即turtle.py文件,多年来有较为深入的分析,所以可以编写出与众不同的原创程序。本书后面的案例可是隐藏了很多海龟编程的秘密哟。有钻研精神的计算机教师应该把turtle.py模块多读几遍,充份理解模块中类的关系与用途。本书也是继李兴球先生编写完《哪吒学编程启蒙篇》、《哪吒学编程初级篇》、《哪吒学编程进阶篇》、《Python创意编程之Pygame教程》之后的又一力作。值得一提的是,作者尽量让每本书的案例都不尽相同。后续作品,如《Python海龟宝典》(暂名)、《Python创意编程100例Pygame篇》(暂名),敬请期待。

资源目录:

001_椅子

……………………

9

002_简易旗子

……………………

11

003_田字格

……………………

13

004_等腰三角形

……………………

14

005_迷宫

……………………

16

006_正多边形

……………………

18

007_水滴

……………………

20

008_画绿树

……………………

22

009_九星连珠

……………………

24

010_台阶图

……………………

28

011_草帽

……………………

30

012_空心T字

……………………

32

013_水墨风格画

……………………

34

014_九角星

……………………

36

015_18角星

……………………

37

016_斜串正方形

……………………

39

017_画H图

……………………

41

018_彩色轮子

……………………

43

019_阴影丫字

……………………

45

020_米字图

……………………

47

021_绿叶

……………………

48

022_红太阳

……………………

50

023_一朵小花

……………………

52

024_八圆围正方

……………………

54

025_星光点点

……………………

56

026_三星连线

……………………

58

027_蝌蚪

……………………

60

028_大坝

……………………

62

029_打点法画圆球

……………………

64

030_打点之斜正方

……………………

66

031_器形图

……………………

68

032_螺旋扇子

……………………

70

033_爆炸图

……………………

72

034_彩色风车

……………………

74

035_五彩连珠

……………………

76

036_彩圆散射图

……………………

78

037_彩色格子台阶

……………………

80

038_齿形图

……………………

82

039_角徽章

……………………

83

040_五角星顶圆

……………………

85

041_正方形阶梯

……………………

87

042_空心十字架

……………………

89

043_篱笆

……………………

91

044_四米围方

……………………

93

045_渐变圆盘

……………………

95

046_小红伞

……………………

97

047_雪花

……………………

99

048_嵌套正方形

……………………

101

049_笑脸

……………………

103

050_天空之眼

……………………

105

051_赵爽弦图

……………………

107

052_彩色递归六边形

……………………

109

053_海龟螺旋图

……………………

111

054_流光溢彩动画

……………………

113

055_七彩浪花

……………………

115

056_蜘蛛

……………………

117

057_正方形金字塔

……………………

119

058_单击画酷炫彩盘

……………………

121

059_甩曲彩点动图

……………………

123

060_滚动彩球

……………………

125

061_万花筒

……………………

127

062_彩花之太阳花

……………………

130

063_彩花之花蝴蝶

……………………

133

064_彩花之旋转羽毛

……………………

136

065_海龟绘图艺术画

……………………

139

066_橙子

……………………

142

067_配乐七角星

……………………

145

068_漂亮米

……………………

147

069_调皮田彩格

……………………

149

070_通电棒棒

……………………

151

071_闪闪的红星

……………………

153

072_弹跳扇子

……………………

155

073_晃悠悠的海龟

……………………

158

074_轮子走了

……………………

160

075_趣味正方形

……………………

162

076_纯画笔弹球_类版

……………………

166

077_颜色饱和度测试

……………………

171

078_颜色渐变之coloradd

……………………

173

079_颜色渐变之colorset

……………………

175

080_颜色亮度测试

……………………

177

081_3D红球

……………………

179

082_3D漂亮螺

……………………

181

083_3D世界坐标轴

……………………

183

084_3D立方体

……………………

187

085_3D效果文字

……………………

191

086_多线程绘画

……………………

193

087_旋转的文字

……………………

195

088_滚动的汉字

……………………

197

089_三角圆图

……………………

199

090_菱正图案

……………………

203

091_椭圆的秘密

……………………

205

092_吃豆人图案

……………………

209

093_彩虹图

……………………

211

094_神奇彩条动画

……………………

213

095_鼠标画笔

……………………

216

096_彩色粒子克隆动画

……………………

219

097_旋转迷宫

……………………

223

098_摇一摇树

……………………

225

099_自动贪吃蛇

……………………

228

100_下雨效果

……………………

230

101_移动汉字贺卡

……………………

234

102_pillow分形彩树

……………………

241

103_pygame彩树

……………………

245

104_tkinter彩树

……………………

247

105_动画原理

……………………

250

106_反弹原理

……………………

252

部分图形预览:

文字内容预览:

文件夹预览:

封面预览:

需要下载所有源代码,素材,电子版,请

成为会员后,登陆才能继续浏览!联系微信scratch8即可办理会员。
(会员专属:能浏览所有文章,下载所有带链接的Python资源。)

发表在 python, turtle | 标签为 , , , | 留下评论

到底什么是编程思维

我们思考,用的是母语,即汉语。
学了英语,我们能用英语思考了,那就是真正的学会了英语。
人类的自然语言发展了成千上万年,其实已经非常复杂了,但本质上也是一套用于交流的规则。

那么编程思维是什么?编程,是用计算机语言进行编写程序,解决问题的一些步骤。
计算机语言是人造的,程式化的语言,是让计算机“思考”的一套规则。
我们只能用这些规则来编写程序。能灵活运用这些规则,也就是会编程思维了。

编程思维说白了也就是让人脑用计算机语言那一套规则来思考。
这样人和计算机就能互相沟通。你的编程思维越发达,越能和计算机进行沟通。
即编程能力越强,就越能适应现在这个飞速发展的高科技时代。

细化一下,举个例子,比如 x = x + 10,没学过编程的人就认为这是有问题的,因为x怎么可能和x+10相等呢?
而学过编程的,就知道这是赋值累加语句,它是把x+10的值先算出来,再赋值给x变量。
如果x的起始值是1,经过x = x + 10的运算,那么x就变成11了。
这就是编程思维里的一个细节。

再比如,汉语里面有大事化小,小事化了。对应编程就是模块化,逐步分解问题。
具体来讲,要学会面向对象编程。把单独的功能封装,把同类的对象分类。
学会了面向对象编程后,编程思维又上了一个新台阶。

人类社会纷繁复杂,人们不仅要学英语等,还要学习至少一门计算机语言。
能把问题分解成非常小的问题,各个击破,能用计算机语言熟练地编写出程序,思维严谨而又逻辑清晰,还能创造性的解决问题,那就说明这个人已经有不错的编程思维了。

发表在 杂谈 | 标签为 | 留下评论

1943中途岛海战2020年8月22日海龟画图版(源码教程PPT视频)

李兴球Python中途岛海战2020_8_22海龟画图版

李兴球Python中途岛海战2020_8_22海龟画图版

本程序包括几个模块,以下是主程序的所有源代码:

"""
   1943中途岛海战2020年8月22日.py
   这是重新编程的用纯粹的Python海龟模块制作的一个飞机大战游戏。
   老版本就叫雷电模拟。在游戏中用鼠标操作飞机,敌机会疯狂扑过来,
   并且会朝玩家飞机发射子弹。玩家飞机只有一条命令,被击中了就会坠毁。
   只要击毁了300架敌机,玩家就能过关!
"""
import time
from bullet import *                       # 从bullet模块导入所有命令
from glob import glob
from particle import *                     # 从particle导入所有命令
from enemy import Enemy                    # 从enemy导入Enemy类
from plane import Plane                    # 从plane导入Plane类
from random import choice                  # 从随机模块导入选择命令
from turtle import Screen                  # 从turtle导入Screen命令
from explosion import explode              # 从explosion导入explode命令
from winsound import PlaySound,SND_LOOP,SND_ASYNC

target= 300                                # 击毁目标数量则胜利
plane_image = "飞机.gif"
enemy_image = "敌机.gif"
bullet_image = "子弹.gif"
images = glob("explosion/*.gif")            # 爆炸序列帧图
project_name = '1943中途岛海战2020年8月22日海龟画图版'

screen = Screen()                          # 新建窗口和屏幕
screen.delay(0)                            # 延时为0毫秒
screen.bgcolor('blue')                     # 背景颜色为蓝色
screen.setup(448,512)                      # 宽度和高度
screen.title(project_name)                 # 在标题栏上显示项目名称 
screen.addshape(plane_image)               # 注册玩家飞机造型到形状字典
screen.addshape(enemy_image)               # 注册敌机造型到形状字典
screen.addshape(bullet_image)              # 注册子弹造型到形状字典
[screen.addshape(im) for im in images]     # 注册爆炸图到造型字典

PlaySound('重复.wav',SND_LOOP|SND_ASYNC)   # 重复播放背景音乐

# 封面显示程序段
display_cover = True
def end_display_cover():
    global display_cover
    display_cover = False
    screen.onkeypress(None,'space')
    
screen.onkeypress(end_display_cover,'space')
screen.listen()
# 不断地显示两张背景图片,所以能看到字在闪动
while display_cover:
    screen.bgpic('bg1.png')
    screen.update()
    time.sleep(0.2)
    screen.bgpic('bg2.png')
    screen.update()
    time.sleep(0.2)
screen.bgpic('nopic')                      # 不显示背景图

# 写上游戏目标文字
w = Turtle(visible=False)
w.penup()
w.sety(200)
w.color('gray')
ft = ('',14,'normal')                      # 字体风格三元组 
info = '目标!击毁' + str(target) + '敌机' # 要写的文字
w.write(info,align='center',font=ft)       # 写上文字  
info = 'writed by lixingqiu'
w.sety(175)
w.write(info,align='center',font=ft)  

# 生成10架敌机,放在es列表    
es = [Enemy(enemy_image) for i in range(10)]

# 玩家飞机
player = Plane(plane_image)   

bs = []                                    # 子弹列表
ps = []                                    # 敌机发出的粒子列表
frames = 0                                 # 类似帧计数器(这里统计循环次数)
running = 1                                
counter = 0                                # 统计被击中的敌机数量
while running:
    spawn_bullet(bs,frames,bullet_image,player.pos())
    spawn_particle(ps,frames,choice(es).pos(),player.pos())
    
    for p in ps:                              # 每一颗粒子
        if p.distance(player)<20:             # 粒子碰到玩家飞机
            player.hideturtle()               # 隐藏玩家飞机
            explode(player.pos(),images)      # 玩家飞机阵亡,产生爆炸效果
            running = 0                       # 结束循环,显示作战失败图 
            
    for e in es:                              # 每一架敌机                
        e.move()                              # 敌机移动
        if e.collide(player):                 # 如果敌机碰到玩家飞机
            e.ht()          
            explode(e.pos(),images)           # 产生爆炸效果
            e.goto_top()                      # 到最顶上去
            player.hideturtle()               # 隐藏玩家飞机
            explode(player.pos(),images)      # 玩家飞机阵亡,产生爆炸效果
            running = 0
        for b in bs:                          # 每一颗子弹
            if e.collide(b):                  # 如果敌机碰到子弹
               e.ht()                         # 隐藏
               counter +=1                    # 统计一下
               info = '当前已击毁 ' + str(counter) +  ' 架敌机'
               screen.title(info)             # 在标题栏里显示
               if counter == target:          # 达到了目标数量则胜利
                   running = 2                # 2表示成功结束
                   player.ht()                # 隐藏                   
               explode(e.pos(),images)        # 在敌机坐标产生爆炸效果
               e.goto_top()
            
    frames += 1
    time.sleep(0.001)
    if running == 2:break
    
w.clear()                                     # 擦掉所写的字
[p.kill() for p in ps]                        # 删除每一颗粒子
[ e.ht() for e in es]                         # 隐藏每一架敌机

成功图 = ['success1.png','success2.png']      # 成功的时候显示的图形表   
失败图 = ['失败1.png','失败2.png']            # 作战失败显示的图形列表

if running == 2:
    """作战成功"""
    images = 成功图
elif running == 0 :
    images = 失败图

# 不断地切换游戏结束时的两张背景图片
i = 0
while True:    
    screen.bgpic(images[i])                   # 切换到索引为i的背景图
    screen.update()                           # 更新屏幕显示
    time.sleep(0.2)                           # 等待0.2秒
    i = 1 - i                                 # 切换到下一个索引号


教程前言

用Python海龟画图能做什么?很多人可能会回答为绘图。这是正确的回答。但是如果想进一步学习Python海龟画图,那就不仅仅是绘图了。也可以用turtle模块制作各种各样的动画、游戏、课件、音乐艺术作品等等。作者本人就制作很多很多,大多数放在个人博客里。

Python海龟画图模块基于tkinter模块开发。而tkinter是一个GUI库。用tkinter模块可以创建画布,在画布上移动各种“项目”,让它们交互,从而制作动画和游戏。turtle的画布就是tkinter的画布,所以用turtle模块当然也可以做动画与游戏。

这个教程是作者用纯粹的Python海龟模块编写的叫《1943中途岛海战》射击游戏的详细教程。采用了模块化的设计方法,把作品分为了6个部分。每个模块都可以单独运行,通过主程序让模块中的角色交互,从而展现出最终的游戏场景。

本教程适合于学习了Python基础的人士阅读。推荐学到了Python类与继承。不过在本教材中,首先会复习一下Python的类与继承。在阅读之前,读者应该多多试玩这个游戏,增加“游戏感”。试玩以后,仔细阅读源代码,最后看教程与视频,以下是教程目录

教程目录

1 1943中途岛海战主要介绍
2 万物皆对象
3 Point类的移动方法
4 类的继承
5 测试Circle类
6 Turtle类的继承
7 Ball类源代码简版
8 Ball类初始化方法浅析
9 Ball类移动方法浅析一
10 Ball类移动方法浅析二
11 Ball类is_on_edge方法
12 进化版Ball类源代码
13 Ball类的茶炉夜话
14 如何做游戏的茶炉夜话
15 1942美日的约会
16 1943中途岛海战是街机游戏
17 1943中途岛海战文件夹预览
18 1943中途岛海战explosion文件夹预览
19 1943中途岛海战res文件夹预览
20 一览众山小
21 主程序框架
22 bullet模块介绍
23 bullet.py文件结构
24 Bullet类的框架
25 Bullet类初始化方法源码
26 Bullet类__init__方法介绍
27 Bullet类kill方法之谜
28 海龟诞生时究竟发生了什么?
29 海龟为什么要自杀?
30 Bullet类子弹移动方法
31 spawn_bullet函数说明
32 测试bullet模块
33 particle模块介绍
34 particle.py文件结构
35 Particle类的框架
36 Particle类的方法概述
37 spawn_particle函数
38 测试particle模块
39 enemy模块介绍
40 enemy.py文件结构
41 Enemy类的框架
42 测试enemy模块
43 plane模块介绍
44 plane.py文件整体结构
45 Plane类主要框架
46 测试plane模块
47 explosion模块介绍
48 explode函数主要代码
49 测试explosion模块
50 主程序整体流程图
51 主程序变量一览表
52 屏幕设置与注册造型
53 造型字典与造型列表
54 循环播放背景音乐
55 封面显示说明
56 封面显示程序段
57 游戏目标文字
58 角色准备阶段
59 游戏主循环三变量
60 生成子弹和粒子
61 碰撞检测简介
62 粒子和玩家飞机的碰撞检测
63 敌机移动与碰撞检测上
64 敌机移动与碰撞检测下
65 循环计数判断结束
66 游戏结束
67 动态背景画面
68 作者简介

编者的话

大家好,我是李兴球,也就是本教材的编写者。首先我是一名创造者,然后我也是一名校外培训机构的编程老师。这些年来,我用Python的海龟画图模块,还有些第三方模块编写了很多很多的程序。这个版本的飞机大战相对于本人曾经创造过的版本,反而简化及优化了很多代码。目的是为了方便教学及读者们对这个作品进行扩展,所以并没有设计太多内容。比如,在游戏中,滚动的纵版背景就去掉了,因为读者学习完这个作品后,完全可以自己加上去。例如,玩家飞机的子弹是自动发射的,读者也可以改为按j键发射子弹,按wsad或上下左右方向箭头发射子弹。我也没有给这个游戏设计道具。游戏的难易度也没有进行明显的可视化选择性的设计。因为作为教程,不能太复杂,这些读者学习完后都可以自行发挥。如,变成多关卡的,第一关敌机采用什么阵型,第二关敌机又是什么阵型,一直到最后一关是来个大BOSS。

这个作品其实不难,我相信,任何人都能看懂,大概浏览一下是学不会的,需要对本教材的每个字认认真真地看,不断地揣摩本人的写作意图,这样才能学得更好。

本人还会原创更多的作品,编写更多的教材,录制更多的视频,不断地在Python这条道路上越走越远,欢迎随时查看我的博客 www.lixingqiu.com。

《1943中途岛海战2020年8月22日版》是用纯粹的Python海龟画图模块制作的一个版本。
它的教程已经制作完毕,共包括:12个python源文件(含例程),8个视频教程,文字教程76页,音乐与图片素材若干。

成为会员后,登陆才能继续浏览!联系微信scratch8即可办理会员。
(会员专属:能浏览所有文章,下载所有带链接的Python资源。)

发表在 python, turtle | 标签为 | 留下评论

pygame国外留学生作业答案

李兴球python三角形碰撞代码pygame

李兴球python三角形碰撞代码pygame

以下是完整源代码:

"""
   pygame国外留学生作业答案
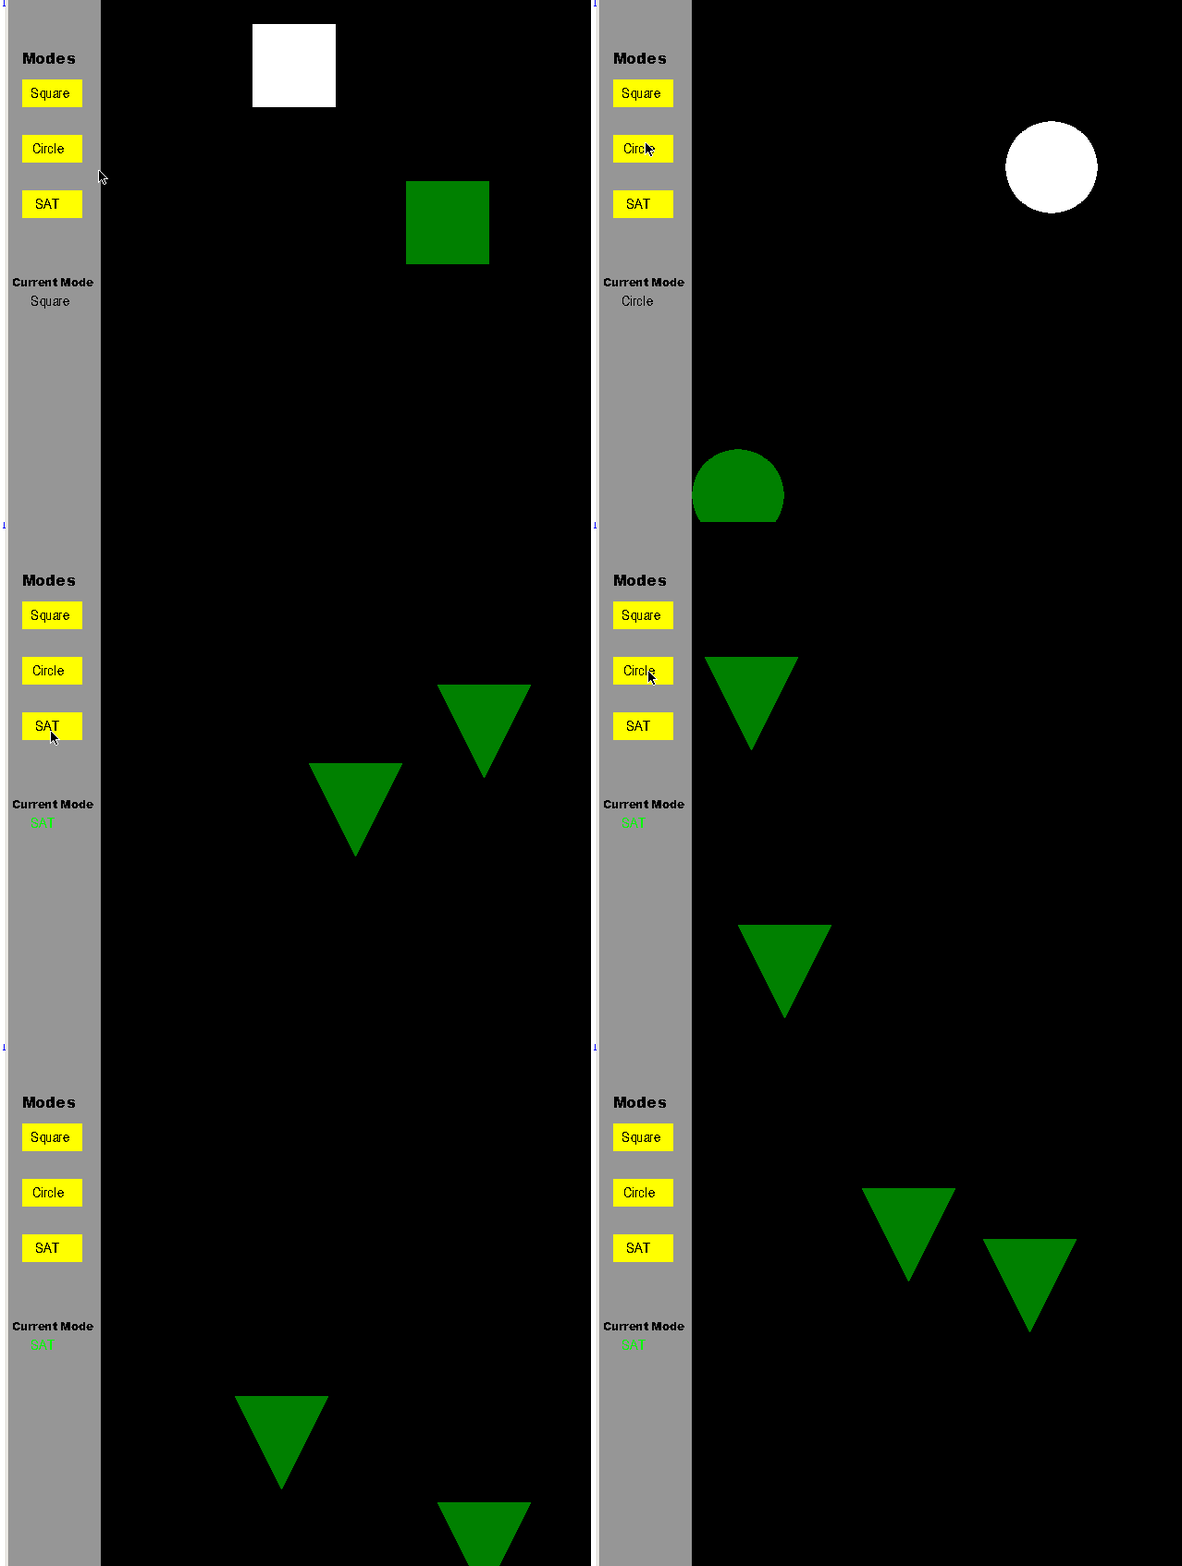
   一个国外留学生让我帮他完善一个pygame程序,
   就是让单击sat按钮,像单击其它两个按钮一样有用。
   本来一大早要去晨练的,醒来看到这个, 就帮他完成了一下。
   本程序有圆形碰撞代码,矩形碰撞代码,三角形碰撞代码(只适合于本程序,不旋转)
"""
import pygame, sys
pygame.init()

#variable of x and y coordinates to move the square
xPlus1 = 5
yPlus1 = 5
xPlus2 = 5
yPlus2 = 5

#coordinates for the circle x and y coordinates
x = 150
y = 0
a = 150
b = 0

#circle size
width = 90
radius = 50
radius2 = 50

#variables for the mouse events
bMouseDown = False
bMouseUp = False

def _isinside(x1, y1, x2, y2, x3, y3, x, y):
    def crossProduct(x1, y1, x2, y2):
        return x1 * y2 - x2 * y1

    if crossProduct(x3-x1, y3-y1, x2-x1, y2-y1) >= 0:
        x2, x3 = x3, x2
        y2, y3 = y3, y2
    if crossProduct(x2-x1, y2-y1, x-x1, y-y1) < 0:
        return False
    if crossProduct(x3-x2, y3-y2, x-x2, y-y2) < 0:
        return False
    if crossProduct(x1-x3, y1-y3, x-x3, y-y3) < 0:
        return False
    return True
def check_Tri_Collision(x1,y1,x2,y2,x3,y3,x4,y4,x5,y5,x6,y6):

    if _isinside(x4,y4,x5,y5,x6,y6,x1,y1):return True
    if _isinside(x4,y4,x5,y5,x6,y6,x2,y2):return True
    if _isinside(x4,y4,x5,y5,x6,y6,x3,y3):return True
    if _isinside(x1,y1,x2,y2,x3,y3,x4,y4):return True
    if _isinside(x1,y1,x2,y2,x3,y3,x5,y5):return True
    if _isinside(x1,y1,x2,y2,x3,y3,x6,y6):return True
    
    
# Calculates collision between the two squares
def check_Rect_Collision(x, y, a, b):
    if a >= x and a <= x + width and b >= y and b <= y + width:
        return True
    elif x >= a and x <= a + width and y >= b and y <= b + width:
        return True
    return False

# Calculates collision between the two circles
def check_Ball_collision(x, y, a, b, radius, radius2):
    e = x-a
    f = y-b
    c = ((e**2)+(f**2))**0.5
    c = c - radius
    c = c - radius2
    if c > 0:
        return False
    return True

# Animates the square shape inside the set area
# Restricts the movement of the shape so that they don't bounce beyond the set area
def bounceShape1InBox(screen, color, xLow, xHigh, yLow, yHigh, radius):

    global x, y, xPlus1, yPlus1, width

    x += xPlus1
    y += yPlus1

    if x < xLow:
        xPlus1 = xPlus1 * -1
    if x > xHigh:
        xPlus1 = xPlus1 * -1
    if y < yLow:
        yPlus1 = yPlus1 * -1
    if y > yHigh:
        yPlus1 = yPlus1 * -1

    if radius == "":
        pygame.draw.rect(screen, color, [x, y, width, width])
    else:
        pygame.draw.circle(screen, color, (x+50, y+50), radius)

# Animates the first shape inside the set area
def bounceShape2InBox(screen, color, xLow, xHigh, yLow, yHigh, radius2):
    global a, b, xPlus2, yPlus2, width

    a += xPlus2 * 2
    b += yPlus2 * 2

    if a < xLow:
        xPlus2 = xPlus2 * -1
    if a > xHigh:
        xPlus2 = xPlus2 * -1
    if b < yLow:
        yPlus2 = yPlus2 * -1
    if b > yHigh:
        yPlus2 = yPlus2 * -1

    if radius2 == "":
        pygame.draw.rect(screen, green, [a, b, width, width])
    else:
        pygame.draw.circle(screen, color, (a+50, b+50), radius2)
        
def bounceShape3InBox(screen, color, xLow, xHigh, yLow, yHigh):
    global x, y, xPlus2, yPlus2, width

    x += xPlus2 * 2
    y += yPlus2 * 2

    if x < xLow:
        xPlus2 = xPlus2 * -1
    if x > xHigh:
        xPlus2 = xPlus2 * -1
    if y < yLow:
        yPlus2 = yPlus2 * -1
    if y > yHigh:
        yPlus2 = yPlus2 * -1
    points1 = (x,y),(x+100,y),(x+50,y+100)   
    pygame.draw.polygon(screen, color, points1) 
          
def bounceShape4InBox(screen, color, xLow, xHigh, yLow, yHigh):
    global a, b, xPlus1, yPlus1, width

    a += xPlus1 
    b += yPlus1
    if a < xLow:
        xPlus1 = xPlus1 * -1
    if a > xHigh:
        xPlus1 = xPlus1 * -1
    if b < yLow:
        yPlus1 = yPlus1 * -1
    if b > yHigh:
        yPlus1 = yPlus1 * -1
    points1 = (a,b),(a+100,b),(a+50,b+100)   
    pygame.draw.polygon(screen, color, points1) 


# The measurements for the screen
window = (640, 600)

# Set colours
yellow = (255, 255, 0)
green = (0, 128, 0)
red = (255, 0, 0)
black = (0, 0, 0)
grey = (150, 150, 150)

white = pygame.Color(255, 255, 255)
green = pygame.Color(0, 128, 0)

clock = pygame.time.Clock()
screen = pygame.display.set_mode(window)

# Boolean values to indicate which mode to choose
bSquare = False
bCircle = False
bSAT = False

# Current mouse coordinates
posx = 0
posy = 0

# Boolean value for mouse event
bMouseDown = False

# Loops to reposition shapes
while True:

    screen.fill(black)
    for event in pygame.event.get():
        if event.type == pygame.QUIT:
            pygame.quit()
            sys.exit()
        if event.type == pygame.MOUSEBUTTONDOWN:
            # This gives a select area so that when user clicks a certain mode, the mode they choose shows up
            pos = pygame.mouse.get_pos()
            posx, posy = pos
            if posx >= 15 and posx <= 80 and posy >= 89 and posy <= 118:
                bSquare = True
                bCircle = False
                bSAT = False
            elif posx >= 15 and posx <= 80 and posy >= 150 and posy <= 180:
                bSquare = False
                bCircle = True
                bSAT = False
            elif posx >= 15 and posx <= 80 and posy >= 208 and posy <= 240:
                bSquare = False
                bCircle = False
                bSAT = True
            else:
                bMouseDown = True
        if event.type == pygame.MOUSEBUTTONUP:
            bMouseDown = False

    # This draws the selection menu
    pygame.draw.rect(screen, grey, [0, 0, 100, 600])

    # Modes label
    font = pygame.font.SysFont('Arial Black', 16)
    textsurface = font.render("Modes", False, (0, 0, 0))
    screen.blit(textsurface, (15, 55))

    # Square label
    pygame.draw.rect(screen, yellow, [15, 90, 65, 30])
    font = pygame.font.SysFont('Arial', 16)
    textsurface = font.render("Square", False, (0, 0, 0))
    screen.blit(textsurface, (25, 95))

    # Circle label
    pygame.draw.rect(screen, yellow, [15, 150, 65, 30])
    font = pygame.font.SysFont('Arial', 16)
    textsurface = font.render("Circle", False, (0, 0, 0))
    screen.blit(textsurface, (27, 155))

    # SAT label
    pygame.draw.rect(screen, yellow, [15, 210, 65, 30])
    font = pygame.font.SysFont('Arial', 16)
    textsurface = font.render("SAT", False, (0, 0, 0))
    screen.blit(textsurface, (30, 215))

    # Current Mode label
    font = pygame.font.SysFont('Arial Black', 12)
    textsurface = font.render("Current Mode", False, (0, 0, 0))
    screen.blit(textsurface, (5, 300))

    # If the user selects the square mode, it starts to run the square animation
    if bSquare == True:
        font = pygame.font.SysFont('Arial', 16)
        textsurface = font.render("Square", False, (0, 0, 0))
        screen.blit(textsurface, (25, 320))
        dt = clock.tick(20)
        bounceShape1InBox(screen, white, 100, 640 - width, 0, 600 - width, "")
        bounceShape2InBox(screen, green, 100, 640 - width, 0, 600 - width, "")

        # If the squares collide, it will turn red
        if check_Rect_Collision(x, y, a, b) == True:
            pygame.draw.rect(screen, red, [x, y, width, width])
            pygame.draw.rect(screen, red, [a, b, width, width])

    # If the user selects the circle mode, it starts to run the circle animation
    elif bCircle == True:
        font = pygame.font.SysFont('Arial', 16)
        textsurface = font.render("Circle", False, (0, 0, 0))
        screen.blit(textsurface, (25, 320))
        dt = clock.tick(20)
        bounceShape1InBox(screen, white, 100, 640 - width, 0, 600 - width, radius)
        bounceShape2InBox(screen, green, 100, 640 - width, 0, 600 - width, radius2)

        # If the circles collide, it will turn red
        if check_Ball_collision(x, y, a, b, radius, radius2) == True:
              pygame.draw.circle(screen, red, (x+50, y+50), radius)
              pygame.draw.circle(screen, red, (a+50, b+50), radius2)
    
    # If the user selects the SAT mode, it starts to run the SAT animation
    elif bSAT == True:
        font = pygame.font.SysFont('Arial', 16)
        textsurface = font.render("SAT", False, (0, 250, 0))
        screen.blit(textsurface, (25, 320))
        dt = clock.tick(20)
        
        bounceShape3InBox(screen, green, 110, 640 - 100, 0, 600 - 100)
        bounceShape4InBox(screen, green, 110, 640 - 100, 0, 600 - 100)

        # If  collide, it will turn red
        if check_Tri_Collision(x,y,x+100,y,x+50,y+100,a,b,a+100,b,a+50,b+100):
             points1 = (x,y),(x+100,y),(x+50,y+100)   
             pygame.draw.polygon(screen, red, points1) 
             points2 = (a,b),(a+100,b),(a+50,b+100)   
             pygame.draw.polygon(screen, red, points2) 
              

    # Moves the position of the shape to where you click
    if bMouseDown == True:
        x, y = pygame.mouse.get_pos()

    pygame.display.flip()

pygame.quit()


发表在 pygame, python | 标签为 , | 留下评论

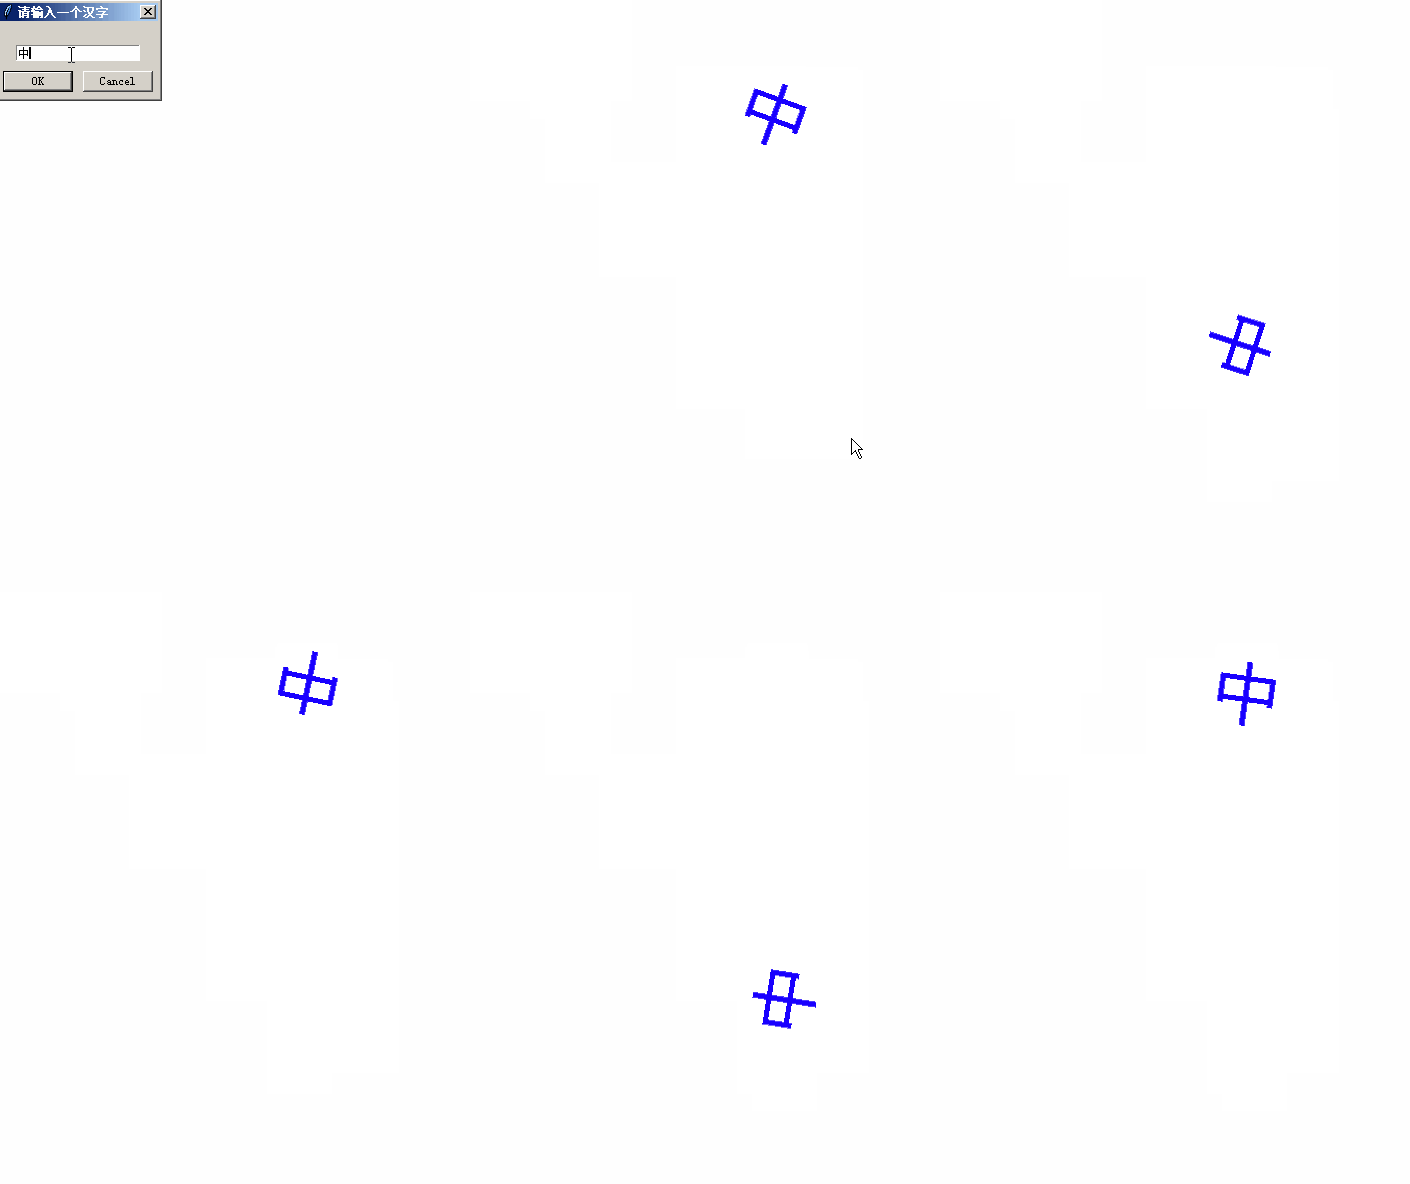
往下掉的汉字_Python精灵模块示例

李兴球Python精灵模块往下掉的汉字

李兴球Python精灵模块往下掉的汉字


本程序运行后会让你输入文字,然后文字会自由落体,还会反弹,并且会旋转。以下是完整版代码:

from sprites import Sprite,Screen,txt2image

screen = Screen()

c = screen.textinput('请输入一个汉字','')

# 把所输入的汉字转换成zi.png图片
txt2image(c,'zi.png',fontsize=66)

sp = Sprite('zi.png',pos=(0,200))  # 新建角色,使用zi.png图
sp.wait(1)                         # 等待1秒

dy = 0                             # 垂直速度
while True:
    sp.right(1)
    sp.move(0,dy)                  # 移动角色                    
    if sp.ycor() < -200:           # 小于-200则反弹
        dy = -dy
    else:                          # 否则dy减小
        dy = dy -0.1
    sp.wait(0.01)                  # 等待0.01秒

发表在 python, sprites, turtle | 标签为 , , , | 留下评论

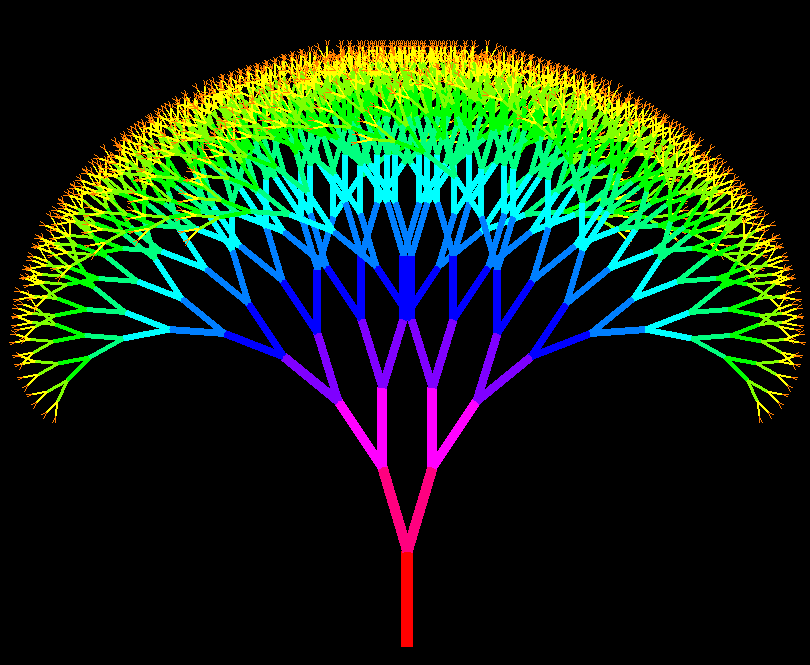
tkinter彩树

李兴球Python画tkinter彩树

李兴球Python画tkinter彩树


本人编写的用tkinter模块的画布制作的一颗彩树。

"""
    tkinter彩树.py
    由于画布是左上角为原点,所以y坐标轴向下为正。
    角度方面的话,90度就变成向下了,-90度就变成向上了。
"""
import math, colorsys
from tkinter import *

offset = 17                 # 角度偏移量
width, height = 1000, 800   # 图像分辨率
maxd = 12                   # 最大递归深度
length = 8.0                # 分支长度扩大因子

root = Tk()                 # 新建窗口  
root.title('tkinter彩树')   # 设定标题
canvas = Canvas(root,width=width,height=height,bg='black')  # 新建RGB画布
canvas.pack()
   
def draw_tree(x1, y1, angle, depth):
    if depth>= 0:
        # 计算分支的下一个顶点
        x2 = x1 + int(math.cos(math.radians(angle)) * depth * length)
        y2 = y1 + int(math.sin(math.radians(angle)) * depth * length)
 
        # 让分支的颜色和调用层次产生关联
        (r, g, b) = colorsys.hsv_to_rgb(float(depth) / maxd, 1.0, 1.0)
        r, g, b = int(255 * r), int(255 * g), int(255 * b)
        color = '#{:02x}{:02x}{:02x}'.format( r,g ,b)          # rgb2hex
       
        # 画树支        
        canvas.create_line(x1, y1, x2, y2,fill=color,width=depth)
 
        # 左右各务两个更短的分支
        draw_tree(x2, y2, angle - offset, depth - 1)
        draw_tree(x2, y2, angle + offset, depth - 1)
 
#  调用递归函数开始绘画
x = int(width/2)
y = int(height * 0.9)
draw_tree(x,y, -90, maxd)

root.mainloop()
 

发表在 python, tkinter | 标签为 | 留下评论

在Python海龟画图中动画原理

用Python的海龟画图是可以做动画的,当然也可以制作游戏。这里就要学习基本的动画原理,其实很简单,一句话。
非常非常快的擦除,重画,刷新显示,修改位置或方向等,不断地重复这个过程,动画就来了。
朋友,你懂了吗,如果还不懂,那么把下面的代码仔细敲一下,输入电脑中运行,慢慢体会吧。

"""
   动画原理.py
   本程序描述了在Python海龟画图中动画原理。
"""
import time                      # 导入时间模块
import turtle                    # 导入海龟模块

turtle.tracer(0,0)               # 关闭自动刷新,设定绘画延时为0毫秒
turtle.speed(0)                  # 让海龟的动作最快
turtle.hideturtle()              # 隐藏海龟
turtle.penup()                   # 抬笔
turtle.bk(200)                   # 倒退200 

turtle.pensize(2)                # 画笔粗细为2
turtle.pendown()                 # 落笔

成为会员后,登陆才能继续浏览!联系微信scratch8即可办理会员。
(会员专属:能浏览所有文章,下载所有带链接的Python资源。)

发表在 python, turtle | 标签为 , , , | 留下评论

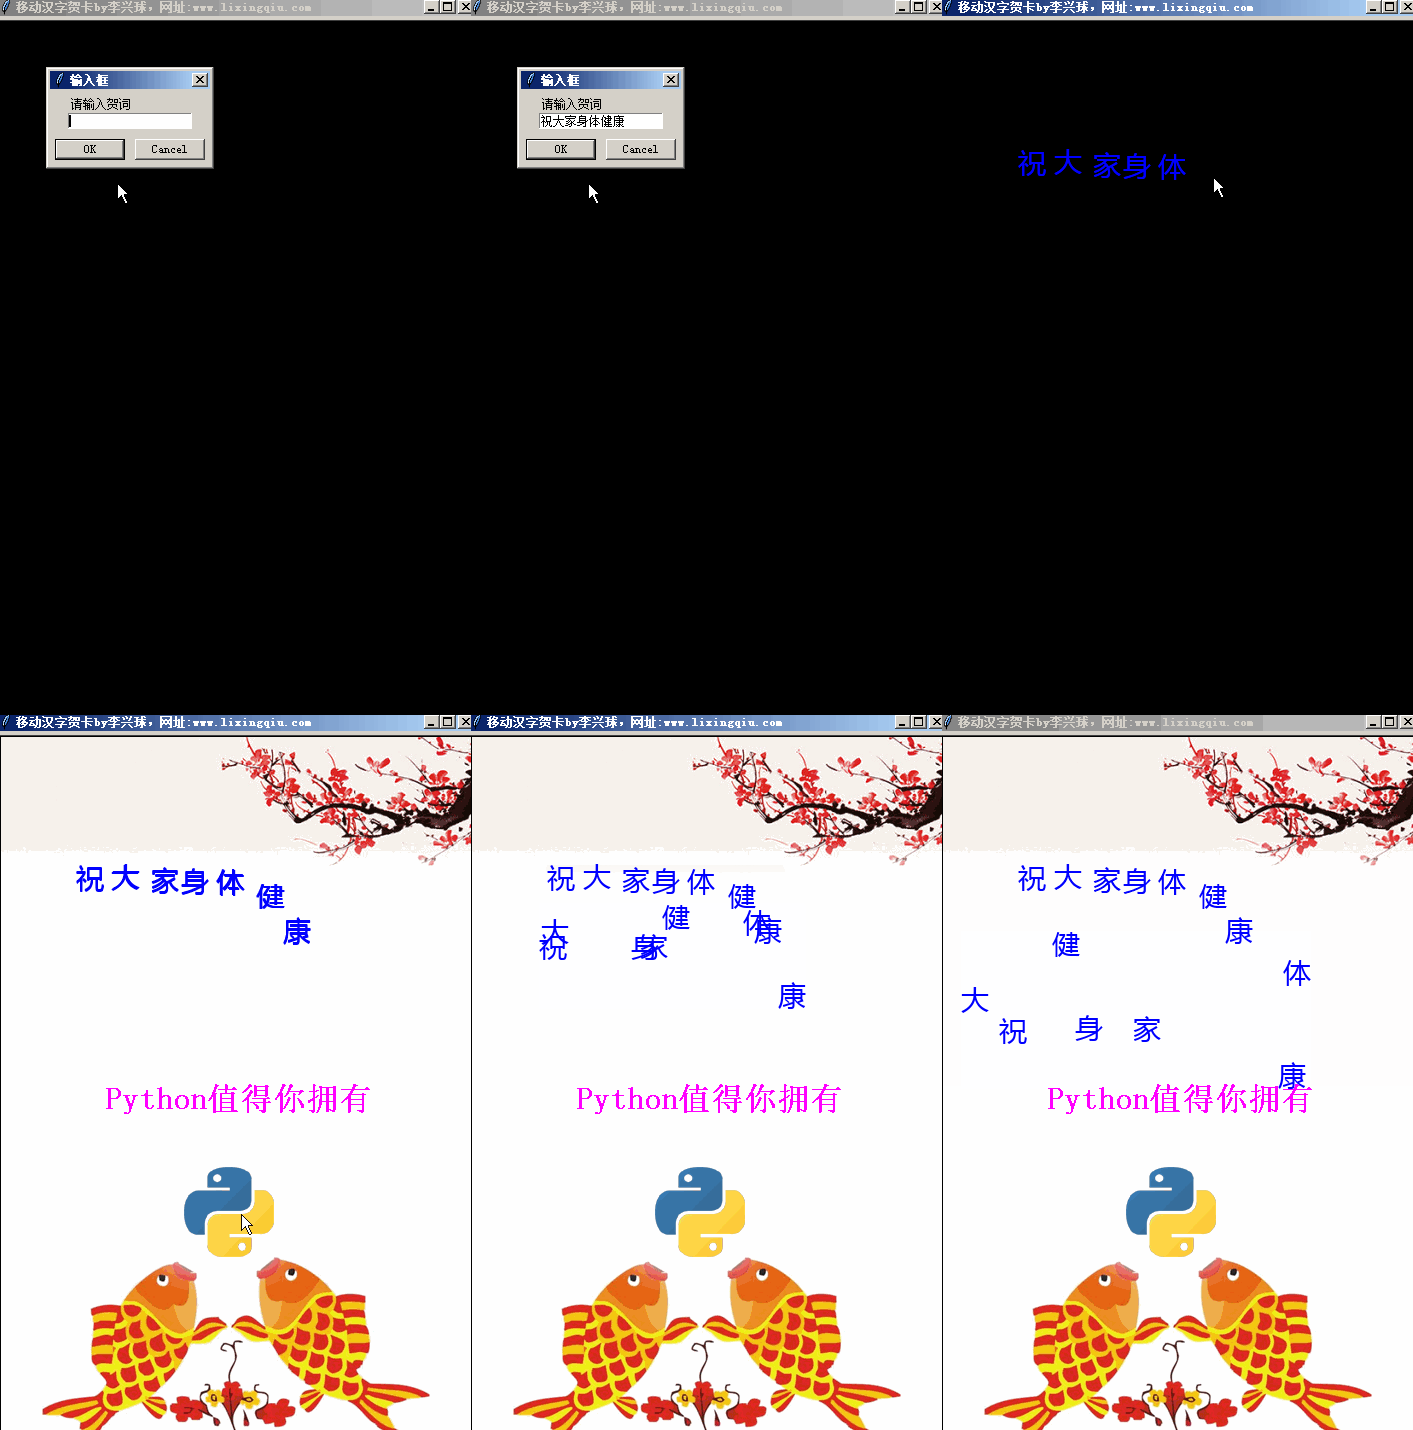
移动汉字贺卡

李兴球Python海龟移动汉字贺卡

李兴球Python海龟移动汉字贺卡

"""
   移动汉字贺卡.py
"""
import os
import time
from random import randint
from turtle import RawTurtle,Shape,Turtle,Screen
from winsound import PlaySound,SND_ASYNC,SND_LOOP
from PIL import Image,ImageFont,ImageDraw,ImageTk

def txt2image(txt,filename=None,fontfile="msyh.ttf",fontsize=18,color=(25,0,255,255)):
    """
        文本转图像实用小程序,只支持单行文本,默认为微软雅黑字体,
        txt:文本
        filename:要写入的文件名,如果为空则不写入,并且返回图形对象
        fontfile:ttf字体文件
        fontsize:字体大小
        color:颜色,通过写alpha值可支持半透明图形。        
    """    
    pass                                 # 这里省略一些代码
    
def bounce_on_edge(self):
    """碰到边缘就反弹的方法"""
    sw = self.screen.window_width()
    sh = self.screen.window_height()
    x = self.xcor()
    y = self.ycor()    
    if x > sw/2 or x < -sw/2:             # 到了最右边或最左边
        self.seth(180 - self.heading())   # 改变方向
    elif y  > sh/2 or y < -sh/2:          # 到了最上边或最下边 
        self.seth( -self.heading())

pass                                      # 这里省略一些代码

screen.title('移动汉字贺卡by李兴球,网址:www.lixingqiu.com')

zi = screen.textinput('输入框','请输入贺词')
if zi==None or zi=="": zi =  '风火轮编程祝本群所有人员身体健康'
shapes = [Photo(txt2image(z,fontsize=28,color='blue')) for z in zi]

def clickevent(x,y):
    if shapes:
        sp = shapes.pop(0)
        c = Shape('image',sp)         # 新建造型
        screen.addshape(str(c),c)     # 把造型添加到造型字典
        z = Turtle(shape=str(c),visible=False)        
        z.penup()
        z.speed(0)       
        z.seth(randint(180,360))
        z.goto(x,y)
        z.stamp()
        z.showturtle()
    else:
        PlaySound('卓依婷-迎春花.wav',SND_LOOP|SND_ASYNC)
        screen.onclick(None)
        screen.bgpic('鱼.png')
        g = Turtle(visible=False)
        g.penup()

        g.sety(-20)
        g.color('magenta')
        s = 'Python值得你拥有'
        g.write(s,align='center',font=('',24,'bold'))

        counter = 0
        while True:
            for z in screen.turtles():
                z.fd(0.1)
                z.bounce_on_edge()
            counter += 1
            if counter == 3000:
                g.clear()
                g.setx(0)
                g.sety(-20)
                g.color('red')
                s = '本程序由Python海龟模块制作'
                g.write(s,align='center',font=('',16,'bold'))
                
                g.sety(-55)
                g.color('gray')
                s = '需要本程序源码的请加微信scratch8'
                g.write(s,align='center',font=('',18,'underline'))                
    
screen.onclick(clickevent)
screen.mainloop()

另外一个版本:

成为会员后,登陆才能继续浏览!联系微信scratch8即可办理会员。
(会员专属:能浏览所有文章,下载所有带链接的Python资源。)

发表在 python, turtle | 标签为 , | 留下评论

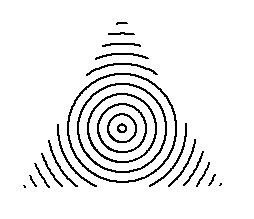
三角圆图

李兴球Python三角圆图

李兴球Python三角圆图


以下是画这个图形的部分源代码:

"""
   三角圆图.py
"""
import turtle

def draw_circle(pos,radius):
    """以pos为中心点为半径为radius的圆"""    
     pass
    
turtle.speed(0)
turtle.delay(0)
turtle.penup()
turtle.pensize(2)
# 画一个三角形,获取它们的顶点坐标
turtle.begin_poly() 
turtle.fd(200)
turtle.lt(120)
turtle.fd(200)
turtle.lt(120)
turtle.fd(200)
turtle.lt(120)
turtle.end_poly()
p = list(turtle.get_poly())                # 转换成列表
p.pop()
# 求出三角形中心点坐标,以这个为圆心画圆
centerx = (p[0][0] + p[1][0] + p[2][0])/3
centery = (p[0][1] + p[1][1] + p[2][1])/3
center = centerx,centery

s = turtle.getscreen()
s.onclick(inside)
for radius in range(4,120,10):           # 画一些圆,超出三角范围则不画
    draw_circle(center,radius)
turtle.ht()
turtle.done()

需要全部源代码,请

成为会员后,登陆才能继续浏览!联系微信scratch8即可办理会员。
(会员专属:能浏览所有文章,下载所有带链接的Python资源。)

发表在 python, turtle | 标签为 | 留下评论

文字单摆运动

李兴球文字单摆运动纯turtle模块开发

李兴球文字单摆运动纯turtle模块开发

主程序源代码

"""
   文字单摆运动.py
"""
import time                       # 导入时间模块
from turtle import *              # 从海龟模块导入所有命令
from write_patch import *         # 本补丁模块也是由turtle模块开发的
from threading import Thread      # 从线程模块导入Thread类

width,height = 480,360
screen = Screen()
screen.tracer(0,0)
screen.setup(width,height)
screen.bgcolor('yellow')
screen.title("Python Turtle Graphics 本程序由纯turtle模块制作")

def pendulum():

    cp = Turtle(visible=False)
    cp.penup()
    cp.speed(0)
    cp.goto(0,100)
    a = 0
    da = 1
    zt = ('',17,'normal')
    while True:
        cp.clear()
        cp.write('writed by lixingqiu',font=zt,angle=a)
        time.sleep(0.01)
        a = a - da
        if a > 0.8 and a<0.9 :
            print(a)
            time.sleep(1)
        if a < -90:
           da = da - 0.1
        else:
           da = da + 0.1 
        

Thread(target=pendulum).start()

def gundong():    
    info = '本程序由纯海龟模块实现'
    tom = Turtle(visible=False)
    tom.sety(-50)
    tom.penup()
    tom.speed(1)
    zt = ('黑体',32,'normal')
    a = 0
    da = 1                      # 每次转动的角度
    while True:
        for zi in info:
            tom.setx(-width/2-50)
            while tom.xcor() -50 < width/2:
                tom.clear()
                tom.dot(100,'cyan')
                tom.color('red')
                tom.pendown()
                tom.fd(50)
                tom.penup()
                tom.bk(50)
                tom.write(zi,align='center',font=zt,angle=a)
                tom.right(da)
                tom.setx(tom.xcor() + da * 2*3.14159*50/360)
                time.sleep(0.01)
                a = a - da
                a = a % 360

Thread(target=gundong).start()

w = Turtle(shape='blank')
w.penup()
w.sety(-140)
w.write('免费下载网址: www.lixingqiu.com',align='center',font=('',14,'normal'))
screen.mainloop()

write_patch.py源代码:

from turtle import RawTurtle,TurtleScreenBase,Turtle,Screen

__author__ = '李兴球'
__blog__ = 'www.lixingqiu.com'

def __write(self, pos, txt, align, font, pencolor,angle):
    """
       用指定的颜色和字体在画布上写文本。返回文本项目和其绑定盒的右x-1坐标。
    """
    x, y = pos
    x = x * self.xscale
    y = y * self.yscale
    anchor = {"left":"sw", "center":"s", "right":"se" }
    item = self.cv.create_text(x-1, -y, text=txt, anchor=anchor[align],
                               fill= pencolor, font=font,angle=angle)
    x0, y0, x1, y1 = self.cv.bbox(item)
    self.cv.update()
    return item, x1-1
TurtleScreenBase._write = __write

def _write(self,txt,align,font,angle=0):
    """海龟的write的预定义方法
    """
    item, end = self.screen._write(self._position, txt,
                                   align, font,self._pencolor,angle)
    self.items.append(item)
    if self.undobuffer:
        self.undobuffer.push(("wri", item))
    return item,end                 # 本来只返回end,这里增加了item

def _writea(self, arg, move=False, align="left", font=("黑体",12,"normal"),angle=0):
    """在海龟的当前坐标写文本。
    参数:
    arg -- 要写在海龟画图屏幕上的信息,
    move (可选) -- True/False,
    align (可选) -- 左,中,右( "left", "center" or right"),
    font (可选) -- 三元组 (字体名称, 字体大小,字体类型),
    angle (可选) -- 角度值,如90,180

    根据对齐方式和给定的字体样式在屏幕写文本。
    如果move为真,那么海龟(画笔)会移到文本的右下角,缺省为假。

    举例 (假设有一个海龟实例为turtle):
    >>> turtle.write('风火轮编程 ', True, align="center")
    >>> turtle.write((0,0), True)
    """
    if self.undobuffer:
        self.undobuffer.push(["seq"])
        self.undobuffer.cumulate = True
    item,end = self._write(str(arg), align.lower(), font,angle)
    if move:
        x, y = self.pos()
        self.setpos(end, y)
    if self.undobuffer:
        self.undobuffer.cumulate = False
    return item                   # 这里本来不返回item

RawTurtle._write = _write         # 重定义_write
RawTurtle.write = _writea         # 重定义write

if __name__ == "__main__":

    tom = Turtle(visible=False)
    tom.write('风火轮编程',angle=45)
    tom.screen.mainloop()

发表在 python, turtle | 标签为 , , , , | 留下评论

花蝴蝶

"""
  
李兴球Python海龟画图彩花之花蝴蝶

李兴球Python海龟画图彩花之花蝴蝶

本程序需要coloradd模块支持,安装方法: pip install coloradd 技术支持微信scartch8,QQ:406273900 www.lixingqiu.com """ import turtle from coloradd import colorset from winsound import PlaySound,SND_ASYNC,SND_LOOP turtle.pensize(2) turtle.colormode(255) # 设定颜色模式为RGB255 turtle.bgcolor('black') # 设定背景颜色为黑色 turtle.hideturtle() # 隐藏海龟 turtle.setheading(90) # 设置方向为90度 def changecolor(): """让海龟的颜色和到原点的距离产生关联""" x = turtle.xcor() y = turtle.ycor() c = colorset(abs(x)+abs(y)) turtle.color(c)

成为会员后,登陆才能继续浏览!联系微信scratch8即可办理会员。
(会员专属:能浏览所有文章,下载所有带链接的Python资源。)

发表在 python, turtle | 标签为 , | 留下评论

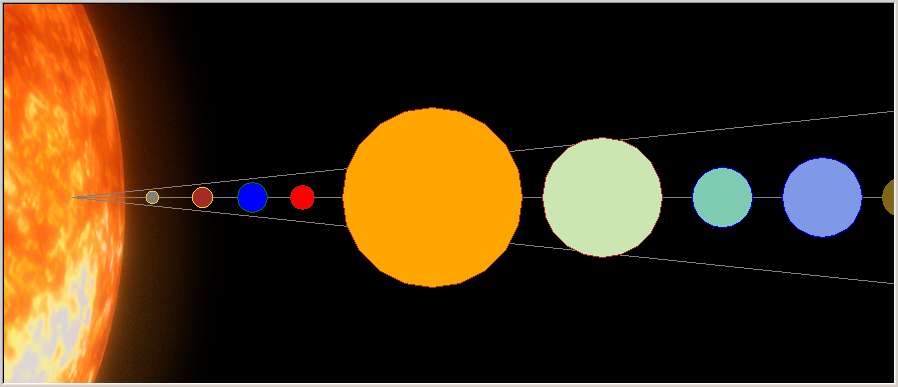
九星连珠

李兴球python简易绘画九星连珠

李兴球python简易绘画九星连珠


传说水星,金星,地球,火星,木星,土星,天王星,海王星,冥王星连成一根线就叫九星连珠。

"""
   九星连珠.py
"""
import turtle

turtle.shape('circle')         # 设定海龟造型为圆形
turtle.color('gray')           # 设定画笔和填充颜色为灰色
turtle.setup(900,389)          # 设定窗口宽度和高度
turtle.bgpic('sun.png')        # 设定背景图片
turtle.title('九星连珠')       # 设定窗口标题 
turtle.speed(0)                # 设定移动速度为最快
turtle.penup()                 # 抬笔

# 画中横线
turtle.setx(-380)              # 设置x坐标
turtle.pendown()               # 落笔
turtle.setx(450)               # 设置x坐标
turtle.penup()                 # 抬笔 

# 画上斜线
turtle.setx(-380)              # 设置x坐标
turtle.left(6)                 # 左转6度
turtle.pendown()               # 落笔 
turtle.fd(900)                 # 前进900个单位
turtle.penup()                 # 抬笔
turtle.goto(-380,0)            # 到达坐标

# 画下斜线
turtle.right(12)               # 右转12度
turtle.pendown()               # 落笔 
turtle.fd(900)                 # 前进900个单位
turtle.penup()                 # 抬笔
turtle.setheading(0)           # 设定方向为0度

# 水星
turtle.color('gold','gray')    # 设画笔和填充颜色
turtle.shapesize(0.6)          # 设定变形比例 
turtle.goto(-300,0)            # 到达坐标
turtle.stamp()

# 金星
turtle.color('gold','brown')   # 设画笔和填充颜色
turtle.shapesize(1)            # 设定变形比例 
turtle.fd(50)                  # 前进50个单位
turtle.stamp()                 # 盖图章

# 地球

turtle.color('green','blue')   # 设画笔和填充颜色
turtle.shapesize(1.5)          # 设定变形比例
turtle.fd(50)                  # 前进50个单位
turtle.stamp()                 # 盖图章

# 火星
turtle.color('brown','red')    # 设画笔和填充颜色
turtle.shapesize(1.2)          # 设定变形比例
turtle.fd(50)                  # 前进50个单位
turtle.stamp()                 # 盖图章

# 木星
turtle.color('brown','orange') # 设画笔和填充颜色
turtle.shapesize(9)            # 设定变形比例 
turtle.fd(130)                 # 前进130个单位
turtle.stamp()                 # 盖图章

# 土星(0.5,0.6,0.7))
turtle.color('brown',(0.8,0.9,0.7))
turtle.shapesize(6)
turtle.fd(170)
turtle.stamp()

# 天王星
turtle.color('blue',(0.5,0.8,0.7))
turtle.shapesize(3)
turtle.fd(120)
turtle.stamp()

# 海王星
turtle.shape('circle')
turtle.color('blue',(0.5,0.6,0.9))
turtle.shapesize(4)
turtle.fd(100)
turtle.stamp()

# 冥王星
turtle.color((0.5,0.4,0.1))
turtle.shapesize(2)
turtle.fd(80)
turtle.stamp()

turtle.done()                # 海龟做完了

发表在 python, turtle | 标签为 | 留下评论

水墨风格画

python海龟水墨风格画

python海龟水墨风格画

用python海龟画图制作的简易水墨风格画,速度不要画那么快,就有感觉了,是不?

"""
   水墨风格画.py
"""
import turtle              # 导入海龟模块

turtle.penup()             # 抬笔 
turtle.goto(-200,-200)     # 坐标定位

turtle.pendown()           # 落笔
for s in range(1,20):      # 在范围1,20内更新s
    turtle.pensize(s)
    turtle.fd(s/4)
    turtle.right(1)

for s in range(20,40):     # 在范围20,40内更新s
    turtle.pensize(s)
    turtle.fd(s/4)
    turtle.left(1)
    
for s in range(40,60):     # 在范围40,60内更新s
    turtle.pensize(s)
    turtle.fd(s/4)
    turtle.left(8)

for s in range(60,90):    # 在范围60,90内更新s
    turtle.pensize(s)
    turtle.fd(s/4)
    turtle.rt(8)

turtle.done()             # 进入事件循环

发表在 python, turtle | 标签为 | 留下评论

3D效果文字_自定义方法版

李兴球Python3D效果文字

李兴球Python3D效果文字

"""
   3D效果文字_自定义方法版.py
   本程序给Turtle类新增了addx和addy方法,
   还增加了write3D这个方法,用来写3D效果文字
"""
import turtle

turtle.Turtle.addx = lambda self,dx:self.setx(self.xcor() + dx)
turtle.Turtle.addy = lambda self,dy:self.sety(self.ycor() + dy)

def _writex(self,string,bg='black',fg='blue',
            align='center',move=False,font=('',16,'normal')):
    """写具有3D效果的文字"""
    # 保存
    oldpencolor = self.pencolor()
    oldpos = self.position()
    olddown = self.isdown()
    oldspeed = self.speed()
    olddelay = self.screen.delay(0)
    self.screen.delay(0)
    self.speed(0)
    self.pencolor(bg)
    self.penup()
    
    self.addx(-2)
    self.addy(2)
    self.write(string,align=align,font=font,move=move)    
    
    self.addx(-2)
    self.addy(2)
    self.write(string,align=align,font=font,move=move)
    
    self.pencolor(fg)
    self.write(string,align=align,font=font,move=move)
    # 恢复
    self.pencolor(oldpencolor)
    self.goto(oldpos)
    self.speed(oldspeed)
    self.screen.delay(olddelay)
    if olddown:self.pendown()

turtle.Turtle.write3D = _writex
    
zt = ('微软雅黑',42,'normal')
string = '3D效果文字\n风火轮编程'

tom = turtle.Turtle(visible=False)
tom.penup()
tom.screen.bgcolor('yellow')
tom.write3D(string,font=zt)
tom.screen.mainloop()


发表在 python, turtle | 标签为 , , | 留下评论

赵爽弦图

李兴球Python赵爽弦图勾股定理证明图

李兴球Python赵爽弦图勾股定理证明图

"""
   赵爽弦图.py
   本程序演录了如何自定义形状,如何把它添加到造型字典。
   
"""
from turtle import Turtle,Screen

a = 300/4                   # 三角形底边(勾)
b = 400/4                   # 三角形垂直边(股)
d = b - a                   # 移动的距离

screen = Screen()
screen.delay(20)            # 绘画延时设为20毫秒

tom = Turtle(shape='blank')
tom.speed(1)                # 移动速度为最慢 
tom.begin_poly()            # 开始记录顶点
tom.goto(-a,0)
tom.goto(0,b)
tom.goto(0,0)
tom.end_poly()              # 结束记录顶点 
p = tom.get_poly()          # 获取各顶点
screen.addshape('sj',p)     # 注册到造型字典

成为会员后,登陆才能继续浏览!联系微信scratch8即可办理会员。
(会员专属:能浏览所有文章,下载所有带链接的Python资源。)

发表在 python, turtle | 标签为 , , | 留下评论

给Python海龟画图模块的Turtle类增加自定义方法

"""
   给Python海龟画图模块的Turtle类增加自定义方法
"""
from turtle import Turtle

addx = lambda self,dx:self.setx(self.xcor()+dx)
Turtle.addx = addx

addy = lambda self,dy:self.sety(self.ycor()+dy)
Turtle.addy = addy

tom = Turtle(shape='turtle')

for _ in range(10):
    tom.addx(100)
    tom.addx(-100)
    tom.addy(-10)
tom.addx(100)
tom.addy(100)

tom.screen.mainloop()

发表在 python, turtle | 标签为 , | 留下评论

晃悠悠的海龟

李兴球Python晃悠悠的海龟

李兴球Python晃悠悠的海龟

"""
   晃悠悠的海龟.py
"""
import time
import math
import turtle

turtle.delay(0)
turtle.speed(0)
turtle.setup(480,360)
turtle.color('yellow')
turtle.bgcolor('black')
turtle.shape('turtle')
turtle.shapesize(5)
turtle.penup()
turtle.left(90)

成为会员后,登陆才能继续浏览!联系微信scratch8即可办理会员。
(会员专属:能浏览所有文章,下载所有带链接的Python资源。)

发表在 python, turtle | 标签为 , | 留下评论

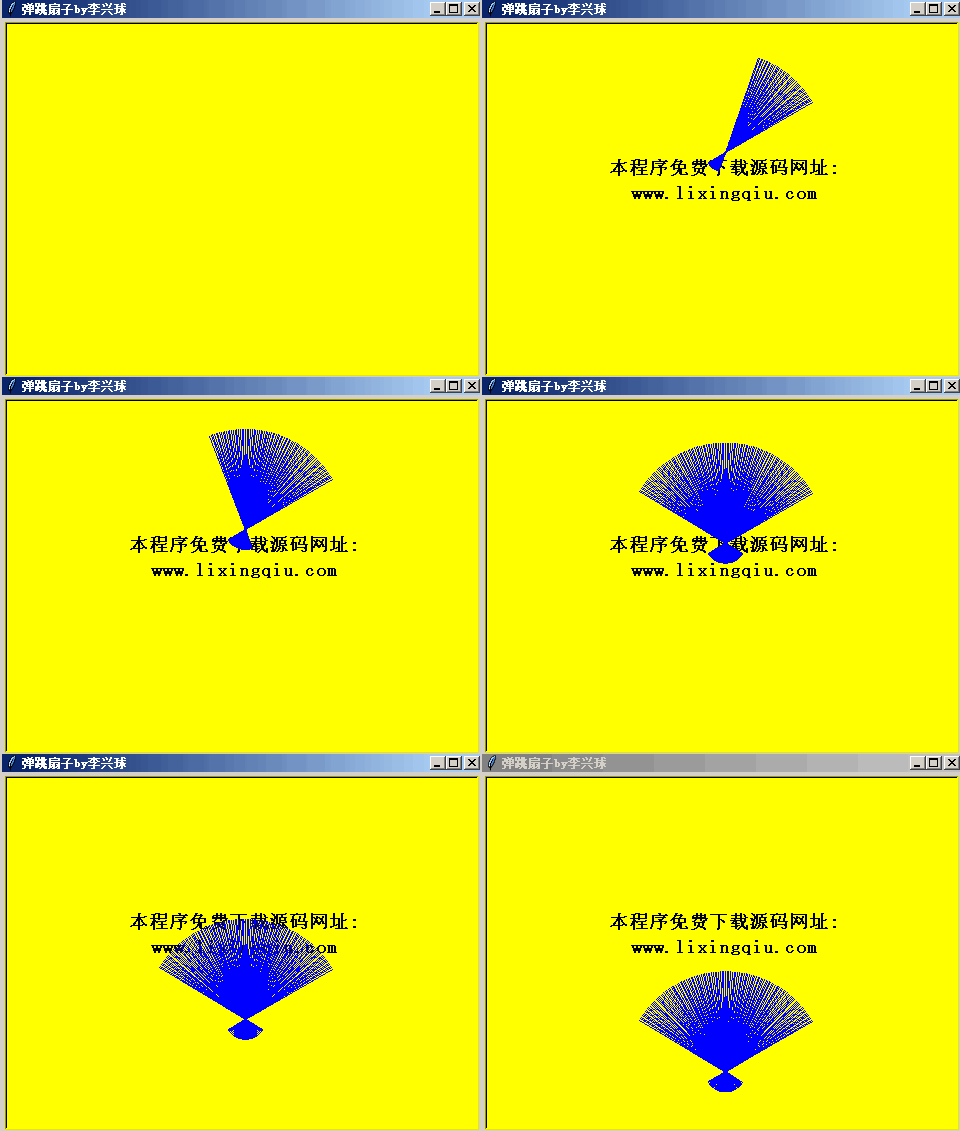
弹跳扇子.py(画个扇子受到重力)

"""
   
李兴球Python海龟画图弹跳扇子

李兴球Python海龟画图弹跳扇子

你好,如果你读懂了本程序,在其它地方运用了, 请注明创意或原理来自李兴球博客,谢谢。 """ import time import turtle turtle.speed(0) turtle.left(30) turtle.color('blue') turtle.bgcolor('yellow') turtle.setup(480,360) turtle.title('弹跳扇子by李兴球') turtle.hideturtle() turtle.penup() w = turtle.Turtle(visible=False) w.penup() zt = ('',14,'bold') w.write('www.lixingqiu.com',align='center',font=zt) w.sety(25) w.write('本程序免费下载源码网址:',align='center',font=zt) turtle.sety(50) turtle.pendown() for _ in range(120): turtle.fd(100) turtle.bk(120) turtle.fd(20) turtle.left(1) time.sleep(1) turtle.delay(0) dy = 0 t = turtle.getturtle() canvas = t.screen.cv

成为会员后,登陆才能继续浏览!联系微信scratch8即可办理会员。
(会员专属:能浏览所有文章,下载所有带链接的Python资源。)

发表在 python, turtle | 标签为 | 留下评论

python画橙子

python画橙子

python画橙子

"""
  橙子.py
  注意亮度为0.5的时候最鲜艳
  本程序需要coloradd模块支持,安装方法:
  pip install coloradd
  技术支持微信scartch8,QQ:406273900
  程序运行需要很长时间,请耐心等待。
  可以把窗口最小化,然后就能以更快的速度画完。
"""
import turtle
from coloradd import lightset

def draw8():
    for _ in range(10):
        turtle.fd(10)
        turtle.left(18)
    for _ in range(20):
        turtle.fd(10)
        turtle.right(18)
    for _ in range(10):
        turtle.fd(10)
        turtle.left(18)
        
def draw20_8():
    for _ in range(20):
        draw8()
        turtle.right(18)
        
turtle.colormode(255)
turtle.bgcolor('black')
turtle.hideturtle()
turtle.delay(0)
turtle.speed(0)

red = (195,150,0)
for r in range(50,0,-1):
    turtle.pensize(r)
    c = lightset(red,1-r/100)
    turtle.color(c)
    draw20_8()
    print(r)

    
print('完成')
turtle.done()

发表在 python, turtle | 标签为 , , | 留下评论

获取填充块的左右上下坐标

李兴球海龟绘图移动的正方形填充块移动

李兴球海龟绘图移动的正方形填充块移动


海龟画完红色的正方形后,再单击,在画布上的项目们都会移动.

"""
   获取填充块的左右上下坐标
   单击后移动字和海龟,填充块会移动并且碰到边缘会反弹
"""
import time
import turtle
from random import randint

turtle.shape('turtle')
turtle.penup()
turtle.speed(1)
turtle.fillcolor('red')
turtle.begin_fill()
for _ in range(4):
    turtle.fd(100)
    turtle.rt(90)
turtle.end_fill()

hg = turtle.getturtle()
sc = turtle.getscreen()
cv = turtle.getcanvas()
sw = sc.window_width()    # 屏宽
sh = sc.window_height()   # 屏高

def move(x,y):
    sc.onclick(None)
    dx = randint(-5,5)
    dy = randint(-5,5)
    while True:
        cv.move(text,1,0)
        turtle.setx(turtle.xcor()-1)
        cv.move(redsquare,dx,dy)
        cv.update()
        xy = cv.coords(redsquare)
        left = min([xy[i] for i in range(len(xy)) if i%2==0])
        right = max([xy[i] for i in range(len(xy)) if i%2==0])
        top = max([xy[i] for i in range(len(xy)) if i%2==1])
        bottom = min([xy[i] for i in range(len(xy)) if i%2==1])
        if left<= -sw//2 or right>= sw//2:dx = -dx
        if top>= sh//2 or bottom<= -sh//2:dy = -dy
        time.sleep(0.01)
        
redsquare = hg.items[-1]
zt = ('',32,'underline')
turtle.sety(turtle.ycor() + 100)
turtle.write('请单击',align='center',font=zt)
text = hg.items[-1]
sc.onclick(move)
sc.mainloop()
    

发表在 python, turtle | 标签为 | 留下评论

获取鼠标指针测试item之间的碰撞

python海龟画图碰撞动画演示

python海龟画图碰撞动画演示

"""
   获取鼠标指针测试item之间的碰撞
   这份源代码展示了如何实时获取鼠标指针坐标,
   如何进行碰撞检测,这样用海龟画图模块制作游戏方便多了.
"""
import time
from turtle import Turtle,Screen
from random import random,randint

def randomcolor():
    r = random()
    g = random()
    b = random()
    return r,g,b

def mouse_pos():
    """获取相对于海龟屏幕的鼠标指针坐标,和屏幕的缩放参数scale无关。"""    
    pass

def isoverlap(item1,item2):
    """判断画布上两个项目是否重叠"""
    pass

s = Screen()                # 新建屏幕对象
s.delay(0)
canvas = s.cv
t = Turtle(shape='square')
t.shapesize(1.4)
t.speed(0)
t.penup()
t.bk(280)
haigui = t.turtle._item

# 下面是印刷此方块,
# 把它们放在squares列表中
squares = []
for _ in range(6):
    t.fillcolor(randomcolor())
    t.begin_fill()
    for _ in range(4):
        t.fd(50)
        t.rt(90)
    t.end_fill()
    pass            # 此处省略了代码
    t.fd(100)
t.bk(600)
t.sety(t.ycor() - 100)
for _ in range(6):
    t.fillcolor(randomcolor())
    t.begin_fill()
    for _ in range(4):
        t.fd(50)
        t.rt(90)
    t.end_fill()
    pass            # 此处省略了代码
    t.fd(100)
    
w = Turtle(shape='blank')
w.penup()
w.sety(200)
zi = ('',32,'underline')
while True:
    x,y = mouse_pos()
    t.goto(x,y)
    for sq in squares:
        if isoverlap(haigui,sq):
            w.clear()
            w.write('碰到' + str(sq) ,align='center',font=zi)
    s.update()

需要完整源代码请

成为会员后,登陆才能继续浏览!联系微信scratch8即可办理会员。
(会员专属:能浏览所有文章,下载所有带链接的Python资源。)

发表在 python, turtle | 标签为 , , , | 留下评论

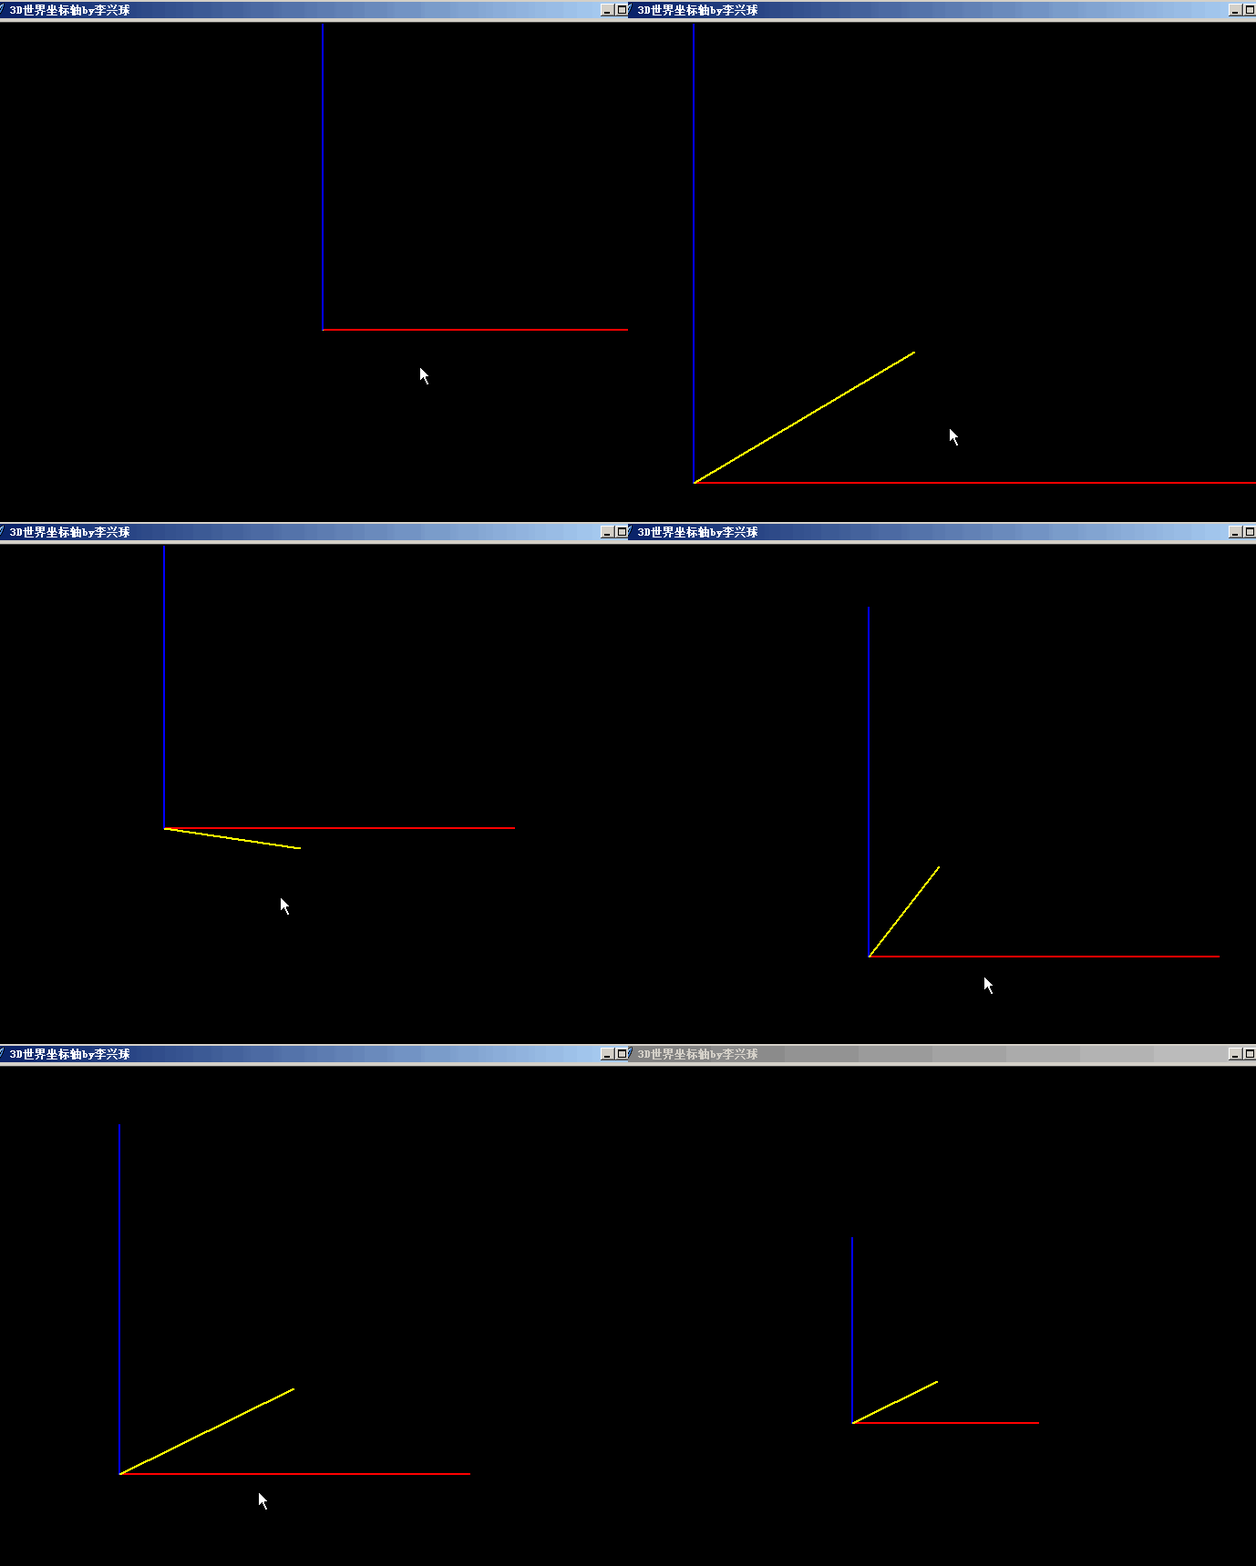
3D世界坐标轴

python海龟3D世界坐标轴

python海龟3D世界坐标轴

"""
   3D世界坐标轴.py
"""
__author__ = '李兴球'
__blog__ = 'www.lixingqiu.com'
import turtle
import time

viewfactor = 150
xshift = 0
yshift = 0
zshift = 50
def gotoxyz(x,y,z):
    global viewfactor,xshift,yshift,zshift
    if (z+zshift) == 0 : return     
    xcor = viewfactor * (x+xshift)/(z+zshift)
    ycor = viewfactor * (y+yshift)/(z+zshift)
    turtle.goto(xcor,ycor)
    
turtle.pensize(2)
turtle.speed(0)
turtle.delay(0)
turtle.penup()
turtle.ht()
turtle.title('3D世界坐标轴by李兴球')
turtle.tracer(0)
oldx = None
oldy = None
def shift(event):
    global oldx,oldy,xshift,yshift
    if oldx==None:oldx = event.x  # 第一次
    if oldy==None:oldy = event.y  # 第一次
    dx = event.x - oldx
    dy = event.y - oldy
    oldx = event.x
    oldy = event.y
    xshift += dx
    yshift -= dy

def fov(event):
    global viewfactor
    viewfactor +=  event.delta/60
    
canvas = turtle.getcanvas()
canvas.bind("",shift)
canvas.bind("",fov)

turtle.bgcolor('black')
while True:
    turtle.clear()
    gotoxyz(0,0,0)              # 到圆点
    turtle.pendown()
    turtle.color('red')
    gotoxyz(300,0,0)            # x轴
    turtle.penup()

    gotoxyz(0,0,0)              # 到圆点
    turtle.pendown()
    turtle.color('blue')
    gotoxyz(0,300,0)            # y轴
    turtle.penup()
    
    gotoxyz(0,0,0)              # 到圆点
    turtle.pendown()
    turtle.color('yellow')
    gotoxyz(0,0,300)            # z轴
    turtle.penup()    
    
    turtle.update()
    time.sleep(0.1)
    

发表在 python, turtle | 标签为 , , | 留下评论

python画图蝌蚪

python画图蝌蚪

import turtle

turtle.bgcolor('yellow')
turtle.pensize(2)
turtle.penup()
turtle.bk(250)
 
for _ in range(5):
    turtle.penup()
    turtle.setheading(90)
    turtle.sety(-200)
    turtle.setx(turtle.xcor() + 100)
    turtle.pendown()
    turtle.circle(630,10)
    turtle.circle(-630,10)
    turtle.dot(40)

turtle.done()
发表在 python, turtle | 标签为 | 留下评论

趣味正方形

李兴球Python趣味正方形

李兴球Python趣味正方形

"""
   趣味正方形.py
   画个正方形后,单击它会移动,并且碰到边缘就反弹。
   这个版本采用画布的move命令来当前线条项目实现的。
   也可以用纯动画原理实现,还能用自定义造型来实现。
"""
import time
import turtle

sw,sh = 480,360
turtle.shape('turtle')
turtle.bgcolor('black')
turtle.color('yellow')
turtle.pensize(2)
turtle.setup(sw,sh)
for _ in range(4):
    turtle.fd(50)
    turtle.lt(90)

square = turtle.getturtle().currentLineItem
canvas = turtle.getcanvas()
turtle.color('cyan')
turtle.write('请单击',align='center',font=('',16,'underline'))

成为会员后,登陆才能继续浏览!联系微信scratch8即可办理会员。
(会员专属:能浏览所有文章,下载所有带链接的Python资源。)

发表在 python, tkinter, turtle | 标签为 , | 留下评论

Python海龟画图3D立方体演示

李兴球Python海龟3D立方体演示

李兴球Python海龟3D立方体演示

"""
   Python海龟画图3D立方体演示.py
"""
__author__ = '李兴球'
__blog__ = 'www.lixingqiu.com'
import turtle
import time

viewfactor = 150
xshift = 0
yshift = 0
zshift = 50
def gotoxyz(x,y,z):
    global viewfactor,xshift,yshift,zshift
    if (z+zshift) == 0 : return     
    xcor = viewfactor * (x+xshift)/(z+zshift)
    ycor = viewfactor * (y+yshift)/(z+zshift)
    turtle.goto(xcor,ycor)
    
turtle.color('blue')
turtle.pensize(2)
turtle.speed(0)
turtle.delay(0)
turtle.penup()
turtle.ht()
turtle.title('Python海龟画图3D立方体演示by李兴球')
turtle.tracer(0)
oldx = None
oldy = None
def shift(event):
    global oldx,oldy,xshift,yshift
    if oldx==None:oldx = event.x  # 第一次
    if oldy==None:oldy = event.y  # 第一次
    dx = event.x - oldx
    dy = event.y - oldy
    oldx = event.x
    oldy = event.y
    xshift += dx
    yshift -= dy

def fov(event):
    global viewfactor
    viewfactor +=  event.delta/60
    
canvas = turtle.getcanvas()
canvas.bind("",shift)
canvas.bind("",fov)

while True:
    turtle.clear()
    gotoxyz(50,50,0)
    turtle.pendown()
    gotoxyz(50,-50,0)
    gotoxyz(-50,-50,0)
    gotoxyz(-50,50,0)
    gotoxyz(50,50,0)
    turtle.penup()
    gotoxyz(50,50,50)
    turtle.pendown()
    gotoxyz(50,-50,50)
    gotoxyz(-50,-50,50)
    gotoxyz(-50,50,50)
    gotoxyz(50,50,50)
    turtle.penup()
    gotoxyz(50,50,50)
    turtle.pendown()
    gotoxyz(50,50,0)
    turtle.penup()
    gotoxyz(50,-50,50)
    turtle.pendown()
    gotoxyz(50,-50,0)    
    turtle.penup()
    gotoxyz(-50,-50,50)    
    turtle.pendown()
    gotoxyz(-50,-50,0)    
    turtle.penup()
    gotoxyz(-50,50,50)
    turtle.pendown()
    gotoxyz(-50,50,0)
    turtle.penup()
    turtle.update()
    time.sleep(0.1)


发表在 python, turtle | 标签为 , | 留下评论

爆炸图

李兴球Python海龟画图爆炸图

李兴球Python海龟画图爆炸图

"""
  爆炸图.py
"""
import turtle
import random

cs = ['yellow','red','purple','blue']

turtle.bgcolor('black')
turtle.delay(0)
turtle.speed(0)
turtle.pensize(4)
index = 0
for index in range(3,-1,-1):
    c = cs[index]
    turtle.color(c)
    turtle.pensize(index+2)
    
    for _ in range(150):
        d = (index+1) * random.randint(50,120)
        f = random.randint(1,360)
        turtle.seth(f)
        turtle.fd(d)
        turtle.goto(0,0)

turtle.done()

发表在 python, turtle | 留下评论

3D漂亮螺

李兴球Python海龟画图3D漂亮螺

李兴球Python海龟画图3D漂亮螺

"""
  3D漂亮螺.py
  注意亮度为0.5的时候最鲜艳
  本程序需要coloradd模块支持,安装方法:
  pip install coloradd
  技术支持微信scartch8,QQ:406273900
  程序运行需要很长时间,请耐心等待。
  可以把窗口最小化,然后就能以更快的速度画完。
  网址: www.lixingqiu.com
"""
import turtle
from coloradd import lightset

def draw_sprial():
    length = 0
    turtle.home()
    turtle.pendown()
    for _ in range(100):
        turtle.fd(length)
        turtle.rt(10)
        length += 0.2
    turtle.penup()
   
turtle.colormode(255)
turtle.bgcolor('black')
turtle.hideturtle()
turtle.delay(0)
turtle.speed(0)
turtle.pensize(50)
turtle.penup()

成为会员后,登陆才能继续浏览!联系微信scratch8即可办理会员。
(会员专属:能浏览所有文章,下载所有带链接的Python资源。)

发表在 python, turtle | 标签为 , , , | 留下评论

海龟命令助记器

李兴球Python海龟命令助记器

李兴球Python海龟命令助记器

"""
  海龟命令助记器
"""
import os
from turtle import TurtleScreen,RawTurtle,TK
from tkinter import scrolledtext,messagebox

def cut(editor, event=None):
    editor.event_generate("<>")
def copy(editor, event=None):
    editor.event_generate("<>")
def paste(editor, event=None):
    editor.event_generate('<>')
def about():
    messagebox.showinfo('海龟命令助记器','本程序由李兴球开发\n\nwww.lixingqiu.com')
def rightKey(event, editor):
    menubar.delete(0,TK.END)
    menubar.add_command(label='剪切',command=lambda:cut(editor))
    menubar.add_command(label='复制',command=lambda:copy(editor))
    menubar.add_command(label='粘贴',command=lambda:paste(editor))
    menubar.add_command(label='关于',command=about)
    menubar.post(event.x_root,event.y_root)
    
def home_paste():
    tom.home()
    mt.insert(TK.INSERT, 'turtle.home()'+'\n')
    mt.see(TK.END)
    
def clear_paste():
    tom.clear()
    mt.insert(TK.INSERT, 'turtle.clear()'+'\n')
    mt.see(TK.END)
    
def forward_paste():
    tom.forward(50)
    mt.insert(TK.INSERT, 'turtle.fd(50)'+'\n')
    mt.see(TK.END)
    
def backward_paste():
    tom.backward(50)
    mt.insert(TK.INSERT, 'turtle.bk(50)'+'\n')
    mt.see(TK.END)
    
def right_paste():
    tom.right(90)
    mt.insert(TK.INSERT, 'turtle.right(90)'+'\n')
    mt.see(TK.END)
    
def left_paste():
    tom.left(90)
    mt.insert(TK.INSERT, 'turtle.left(90)'+'\n')
    mt.see(TK.END)
    
def pendown_paste():
    tom.pendown()
    mt.insert(TK.INSERT, 'turtle.pendown()'+'\n')
    mt.see(TK.END)

def penup_paste():
    tom.penup()
    mt.insert(TK.INSERT, 'turtle.penup()'+'\n')
    mt.see(TK.END)

def dot_paste():
    tom.dot(50)
    mt.insert(TK.INSERT, 'turtle.dot(50)'+'\n')
    mt.see(TK.END)
    
def circle_paste():
    tom.circle(50)
    mt.insert(TK.INSERT, 'turtle.circle(50)'+'\n')
    mt.see(TK.END)

def stamp_paste():
    tom.stamp()
    mt.insert(TK.INSERT, 'turtle.stamp()'+'\n')
    mt.see(TK.END)
    
def hideturtle_paste():
    tom.hideturtle()
    mt.insert(TK.INSERT, 'turtle.ht()'+'\n')
    mt.see(TK.END)
    
def showturtle_paste():
    tom.showturtle()
    mt.insert(TK.INSERT, 'turtle.st()'+'\n')
    mt.see(TK.END)
    
pass   #这里省略代码若干

TK.Button(left_frame,text='turtle.home()',command=home_paste).pack()
TK.Button(left_frame,text='turtle.fd(50)',command=forward_paste).pack()
TK.Button(left_frame,text='turtle.bk(50)',command=backward_paste).pack()
TK.Button(left_frame,text='turtle.right(90)',command=right_paste).pack()
TK.Button(left_frame,text='turtle.left(90)',command=left_paste).pack()
TK.Button(left_frame,text='turtle.pendown()',command=pendown_paste).pack()
TK.Button(left_frame,text='turtle.penup()',command=penup_paste).pack()
TK.Button(left_frame,text='turtle.clear()',command=clear_paste).pack()
TK.Button(left_frame,text='turtle.dot(50)',command=dot_paste).pack()
TK.Button(left_frame,text='turtle.circle(50)',command=circle_paste).pack()
TK.Button(left_frame,text='turtle.stamp()',command=stamp_paste).pack()
TK.Button(left_frame,text='turtle.ht()',command=hideturtle_paste).pack()
TK.Button(left_frame,text='turtle.st()',command=showturtle_paste).pack()

root.mainloop()

需要全部源代码和素材请

成为会员后,登陆才能继续浏览!联系微信scratch8即可办理会员。
(会员专属:能浏览所有文章,下载所有带链接的Python资源。)

发表在 python, tkinter, turtle | 标签为 , , | 留下评论

海龟绘图艺术画

Pythton海龟绘图艺术配音乐

Pythton海龟绘图艺术配音乐


"""
  海龟绘图艺术画.py
 
  本程序需要coloradd模块支持,安装方法:
  pip install coloradd
  技术支持微信scartch8,QQ:406273900
  www.lixingqiu.com
  把窗口最小化可加快绘图速度。
"""
import turtle
from coloradd import lightset
from winsound import PlaySound,SND_ASYNC,SND_LOOP

def  draw_pattern(d):
  for _ in range(16):
    for _ in range(4):
        for _ in range(18):            
            turtle.fd(d*2)
            turtle.left(5)
        turtle.right(180)
    turtle.right(360/16)

turtle.pensize(4)
turtle.speed(6)
turtle.delay(10)
turtle.colormode(255)
turtle.bgcolor('black')
turtle.setup(956,710)
turtle.bgpic('sparkling.png')
turtle.title('海龟绘图艺术www.lixingqiu.com')
turtle.hideturtle()

成为会员后,登陆才能继续浏览!联系微信scratch8即可办理会员。
(会员专属:能浏览所有文章,下载所有带链接的Python资源。)

发表在 python, turtle | 留下评论

甩曲彩点动图

python海龟画图甩曲彩点动图

python海龟画图甩曲彩点动图

"""
   甩曲彩点动图
"""
import time
import turtle

cs = ['red','orange','yellow','green',
      'cyan','gold','white','blue','purple',
      'pink','magenta','brown','gray','lime']

turtle.speed(0)
turtle.ht()
turtle.bgcolor('black')
turtle.tracer(0,0)
def draw_pattern():
    for c in cs:
        turtle.color(c)
        turtle.circle(50,130)
        turtle.dot(10)
        turtle.circle(50,-130)        
        turtle.rt(360/len(cs))

while True:
    turtle.clear()
    draw_pattern()
    turtle.rt(2)
    turtle.update()
    time.sleep(0.1)

发表在 python, turtle | 标签为 | 留下评论

按出现次数从多到少排序

"""
   按出现次数从多到少排序
"""
filepath = 'd:/Documents/抖音昵称列表.txt'

names = []
f = open(filepath)
for line in f:
    names.append(line.strip())
f.close()

set01 = set(names)         # 转换成集合
# 每个元素都数一下有多少个
dict01 = {item:names.count(item) for item in set01}

sorted_x = sorted(dict01.items(), key=lambda x: x[1], reverse=True)

for item in  sorted_x:
    print(item)

发表在 python | 标签为 | 留下评论

豌豆射手

李兴球Python植物大战僵尸里的豌豆射手动画演示


植物大战僵尸里的豌豆射手,可以用鼠标指针拖动它们。以下是部分源码。

"""
   豌豆射手.py
   本程序定义了一个Shooter类,它继承自Turtle类。
   实例化后,它会启动一个不断切换造型的线程。
   但是它的子弹是用屏幕的定时器功能实现不断地移动的。
"""
import time
from random import randint
from PIL import Image,ImageTk
from threading import Thread
from turtle import Turtle,Screen,Shape

def appendcostume(imagefile,screen):
    """添加图形到屏幕的造型字典"""
    pass                              # 这里省略部分代码 
    
class Shooter(Turtle):
    def __init__(self,frames,pos):
        Turtle.__init__(self,shape='blank')
        self.penup()
        self.speed(0)
        self.goto(pos)
        self.index = 0
        self.frames = frames
        self.amounts = len(frames)
        pass                              # 这里省略部分代码    
        self.sw = self.screen.window_width()
        self.sh = self.screen.window_height()
        
    def altcostume(self):
        """不断地切换造型,这在一个线程中"""
        while True:
            self.shape(self.frames[self.index])
            self.index += 1
            self.index %= self.amounts
            time.sleep(0.2)
            if randint(1,10)==1 and not self.bullet.isvisible():
                self.bullet.showturtle()
                self.begin_shoot()
                
    def begin_shoot(self):
        """开始准备发射"""
        if  self.bullet.isvisible():
            self.bullet.setx(self.xcor() + 10)
            self.bullet.sety(self.ycor() + 10)
            self.shooting()
            
    def shooting(self):
        """如果是可见的,则移动。
           在移动的过程中,如果超过边缘就隐藏
           否则不断地调用shooting,实现‘重复执行’。
        """
        if self.bullet.isvisible():
            self.bullet.fd(10)
            if self.bullet.xcor()>self.sw//2:
                self.bullet.ht()
            else:
                self.screen.ontimer(self.shooting,50)        

def main():
    screen = Screen()
    screen.delay(0)
    screen.bgpic('院子.png')
    screen.setup(960,720)
    frames = [f"wd/{i}.png" for i in range(22)]
    [appendcostume(frame,screen) for frame in frames]

    for y in range(150,-250,-80):
       Shooter(frames,(-200,y))
    screen.mainloop()

if __name__ == "__main__":
    main()

需要完整源代码和素材请

成为会员后,登陆才能继续浏览!联系微信scratch8即可办理会员。
(会员专属:能浏览所有文章,下载所有带链接的Python资源。)

发表在 pillow, python, turtle | 标签为 , , | 留下评论

海龟批处理器

由于海龟画图模块用tkinter模块开发,所以可以使用tkinter组件。下面的程序用它开发了一个“框架”程序。你需要自行编写相关模块和函数才能正确使用,自带的模块为rename.py。它能对列表框中的每一个文件重命名(会在文件名后加.lxq)。

李兴球Python海龟批处理器

李兴球Python海龟批处理器

"""
   海龟批处理器.py
   本程序演示了如何在海龟画图,也就是tkiner的画布上布局按钮等组件。
   还演示了,如何动态载入外部模块。
   
   这是一个需要加载外部模块再对一些文件进行相应处理的程序。
   外部模块一定要放在mods文件夹下。在这个文件夹下面有一个示例的rename.py文件。
   它里面有一个process函数。这个函数是对每一个项目进行处理。
   
"""
import os
import sys
import time
import importlib
from tkinter import filedialog
from turtle import Turtle,Screen,TK
from tkinter.messagebox import showinfo

outmodule = None                       # 载入的外部模块名称

def __import__(name):
    """动态加载模块的函数"""
    global outmodule
    name = os.path.basename(name).split('.')[0]
    screen.title('当前处理模块:' + name)
    # 载入mods文件夹下面的name模块
    outmodule = importlib.import_module('mods' + "." + name)
     
def askopenfilename():
    """打开一个文件"""
    文件类型列表 = [('py文件','*.py'),('txt文件', '*.txt'),
                    ('所有文件', '*')]
    modulename = filedialog.askopenfilename(title='从mods中选择处理模块',
                                            filetypes=文件类型列表)
    __import__(modulename)              # 动态导入模块

def askopenfilenames():
    """打开很多文件"""
    
    文件类型列表 = [('所有文件', '*'),('png文件', '*.png'),
                    ('gif动图文件','*.gif'),('jpg动图文件','*.jpg')]
    files = filedialog.askopenfilenames(filetypes=文件类型列表)
    if files:
        for file in files:
           filename = os.path.basename(file)
           listbox.insert(TK.END, filename)
           
def 处理():
    for index in range(listbox.size()):
        listbox.select_set(index)
        item = listbox.get(index)
        listbox.update()        
        outmodule.process(item)       
        listbox.select_clear(index)
    showinfo('信息','处理结束')
    
sw,sh = 280,360
screen = Screen()
screen.setup(sw,sh)
screen.screensize(1,1)
screen.bgcolor('yellow')
root = screen._root
screen.title('海龟批处理器')
pass                                # 这里省略一些代码
screen.mainloop()

需要完整源代码和素材请

成为会员后,登陆才能继续浏览!联系微信scratch8即可办理会员。
(会员专属:能浏览所有文章,下载所有带链接的Python资源。)

发表在 python, tkinter, turtle | 标签为 , | 留下评论

神算子一休哥心算创意程序

李兴球Python创意数学心算加法程序

李兴球Python创意数学心算加法程序

这个游戏是一个加法出题器,你需要单击数字弹球,让它们加到10的倍数,那么就会得到一颗心。得到了一定数量的心,那么游戏就成功结束了。以下是大部分源代码,相信你一定可以自行完善它。

"""
   神算子一休哥.py
   这个游戏是一个心算小游戏,需要你单击散开的小球。
   累加10分的倍数就会增加一颗心,当到达了22颗心,游戏成功结束!
"""
import time
from turtle import Turtle,Shape,Screen
from winsound import PlaySound,SND_ASYNC,SND_LOOP
from tkinter.messagebox import showinfo

def addcostume(image,screen):
    """增加图形造型到屏幕"""
    pass
    
class Ball(Turtle):
    hearts = 0                         # 心的计数器 
    score = 0                          # 初始得分
    leijia = 0
    clicks = 0                         # 单击计数
    w = Turtle(shape='blank')          # 在屏幕上写字的海龟
    w.penup()                          # 抬笔
    w.sety(100)                        # 设置y坐标
    _gameover = False                  # 游戏是否结束
    last_score = score                 # 上次得分
    heart = Turtle(shape='blank')
    heart.penup()
    heart.speed(0)
    heart.goto(-200,150)
    begin = time.time()                # 起始时间
    def __init__(self,heading,image,number):
        Turtle.__init__(self,shape='blank')
        self.penup()
        self.speed(0)
        self.shape(image)              # 造型
        self.number = number           # 表示的数字
        self.setheading(heading)       # 初始方向
        self.onclick(self.addscore)
        self.sw = self.screen.window_width()
        self.sh = self.screen.window_height()
        self.move()        
        self.htcounter = 0              # 隐藏秒数计数

    def checkht(self):
        """如果是隐藏的,并且没有开始计数,那么1秒后再次运行
           由于计数器增加1,所以下次运行就会显示角色
        """
        pass
            
    def move(self):
        if Ball._gameover :
            self.ht()
            return
        if self.isvisible():self.fd(1)
        if self.bounce_edge():self.ht()
        self.screen.ontimer(self.move,50)
        
    def bounce_edge(self):
        if self.xcor() + 25 > self.sw//2 or self.xcor() -25 < -self.sw//2:
            self.setheading(180 - self.heading())
        if self.ycor() + 25 > self.sh//2 or self.ycor() -25 < -self.sh//2:
            self.setheading(  - self.heading())        
        
    def addscore(self,x,y):
        if Ball._gameover: return
        pass
    @staticmethod
    def gameover():
        sj = round(time.time() - Ball.begin)
        t = Turtle(shape='blank')
        t.penup()
        t.sety(25)
        info = "你获得了22颗心,游戏成功结束"
        t.write(info,align='center',font=('',14,'normal'))
        t.sety(-35)
        info = "所用时间:" + str(sj) + "秒"
        t.write(info,align='center',font=('',20,'normal'))
        Ball._gameover = True

def main():
    PlaySound('聪明的一休.wav',SND_LOOP|SND_ASYNC)    
    costumes = [f"res/{i}.png" for i in range(1,21)]  # 1,2,3,...20
    screen = Screen()
    screen.setup(480,360)
    screen.delay(0)
    screen.bgpic('封面背景.png')
    screen.title('神算子一休哥海龟画图版by李兴球')
    showinfo('游戏规则','单击数字弹球,累加到10的倍数就得到一颗心!')
    screen.addshape('heart.gif')
    [addcostume(im,screen) for im in costumes]
    
    for index in range(len(costumes)):
        Ball(index*18,costumes[index],index+1)
        
    screen.mainloop()

if __name__== "__main__":

    main()   

需要完整源代码与素材请

成为会员后,登陆才能继续浏览!联系微信scratch8即可办理会员。
(会员专属:能浏览所有文章,下载所有带链接的Python资源。)

发表在 python, turtle | 标签为 , , | 留下评论