自制图像查看程序

这是一个非常简单的图像查看器,现在是不支持查看gif动画文件的。即使选择有多帧的gif图,它也不会播放。当然,这一切都可以解决,先拆帧,然后使用定时器不断地轮换播放即可解决这个问题。运行程序后,会在屏幕中央有提示,单击右键可打开文件对话框,这个时候应该选择一张图片。当确定后,这张图片就显示在屏幕中央了。其实,它是一个名叫tom的海龟的造型。在程序的开头,给海龟画图屏幕的造型字典添加了一个叫newshape的造型,它的值是空白的图像造型。单击右键,会调用change_shape函数。这个函数会使用所选择的图片,形成造型,然后把造型字典中键名为’newshape’造型的值给修改了,所以程序中tom这个海龟的外观就变化了。这个程序还让图像能拖动,这是给tom设定了ondrag事件。本程序还演示了如何使用tkinter模块中的filedialog子模块中的文件打开对话框。阅读这个程序,你将会学会Python海龟编程的又一个秘密!

"""
   自制图像查看程序.py
"""
from turtle import *
from tkinter import filedialog
from PIL import Image,ImageTk

filetypes = [('png图像','*.png'),
             ('jpg图像','*.jpg'),
             ('jpeg图像','*.jpeg'),
             ('gif图像','*.gif'),
             ('bmp图像','*.bmp'),
             ('所有文档','*.*')]

screen = Screen()
screen.delay(0)
sp = Shape('image',screen._blankimage())
screen.addshape('newshape',sp)

tom = Turtle(shape='newshape')
tom.speed(0)
tom.penup()
ft = ('楷体',22,'normal')
tom.write("请按鼠标右键单击,选择一张图片",align='center',font=ft)

def change_shape(x,y):
    pass                                      # 这里省略若干代码,这就当成一个作业吧

screen.onclick(change_shape,3)
tom.ondrag(tom.goto)
screen.mainloop()

需要所有源代码请

成为会员后,登陆才能继续浏览!联系微信scratch8即可办理会员。
(会员专属:能浏览所有文章,下载所有带链接的Python资源。)

发表在 pillow, python, tkinter, turtle | 标签为 , , , | 留下评论

python turtle蜈蚣动画_ 来自Python海龟宝典上册案例篇

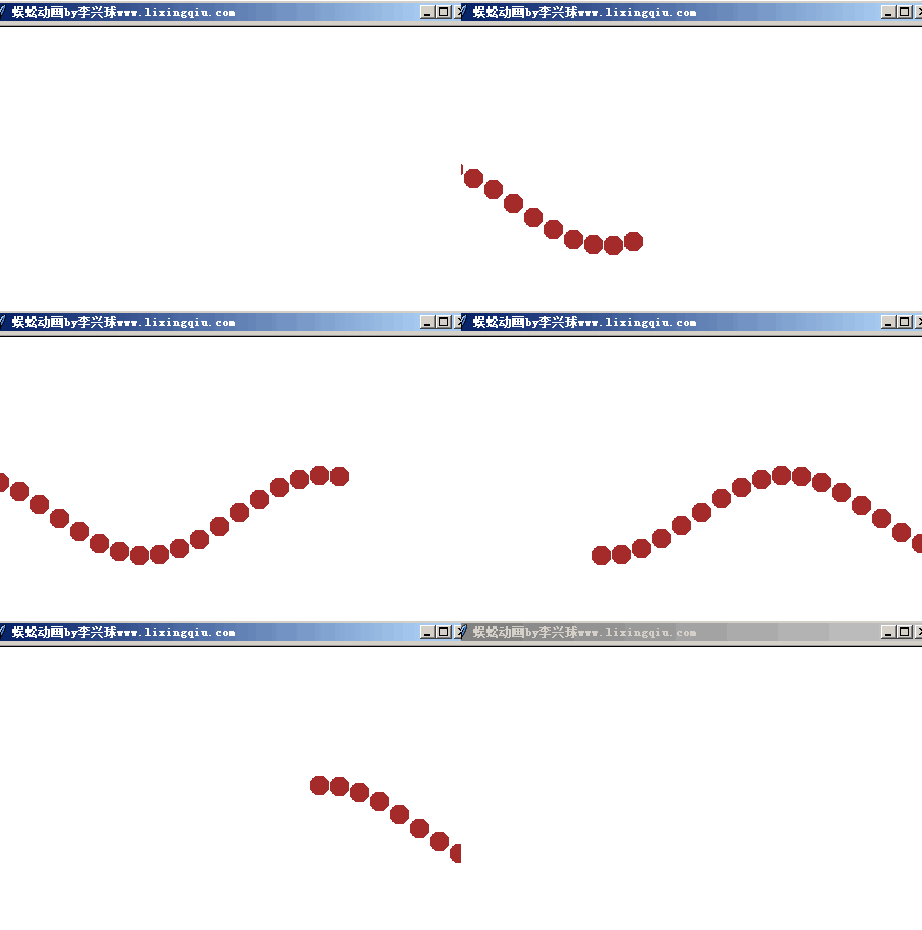
python海龟模块制作的蜈蚣动画


"""
   蜈蚣动画.py
   这个程序并不复杂,它只是在画正弦曲线。
   由于每根正弦曲线的起始角度不一样,通过不断地擦除以前所画,
   然后重新画上正弦曲线,所以就有了动画效果,像一只蜈蚣爬过一样,
   所以就把它叫蜈蚣动画吧。
"""
import math
import turtle
from coloradd import *

def draw_wave(start_angle):
    """画一根正弦曲线"""
    a = start_angle
    b = start_angle + 360
    for angle in range(a,b,20):        
        x = math.radians(angle)      # 弧度值
        y = 40 * math.sin(x)         # y坐标值        
        turtle.goto(angle,y)         # 定位坐标
        turtle.dot(20)

width,height = 480,360           
screen = turtle.Screen()             # 新建窗口
screen.setup(width,height)           # 设定宽高
screen.title("蜈蚣动画by李兴球www.lixingqiu.com")   # 设定标题
 
pass                             # 这里的代码是留给读者的练习,做完后就能看到蜈蚣动画了


如果读者做不出练习,或者直接需要上面所有的源代码,请

成为会员后,登陆才能继续浏览!联系微信scratch8即可办理会员。
(会员专属:能浏览所有文章,下载所有带链接的Python资源。)

发表在 python, turtle | 标签为 | 留下评论

冒泡排序彩柱图演示2021版2

李兴球Python冒泡排序动态演示图


本人以前做了一个版本,这个是最新版本,基本不会更新了,付费后提供3个版本下载,你可以学到很多很多。

"""
   冒泡排序彩柱图演示2021版2.py
"""
import turtle
from time import sleep
from random import randint

def randcolor():
    """产生随机RGB255三元组表示颜色"""
    r = randint(0,255)
    g = randint(0,255)
    b = randint(0,255)
    return r,g,b

def draw_rect(rect):
    """rect:矩形对象,
       本函数使用turtle画一个矩形
    """
    turtle.color(rect.color)
    turtle.goto(rect.pos)
    turtle.begin_fill()
    for _ in range(2):  
        turtle.fd(rect.width)
        turtle.left(90)
        turtle.fd(rect.height)
        turtle.left(90)
    turtle.end_fill()       
    
class Rect:
    def __init__(self,x,y,w,h,c):
        """x,y:左下角坐标
           w,h:宽高
           c:颜色三元组
        """
        self.pos = x,y
        self.width = w
        self.height = h
        self.color = c
        
def draw_all_rects(rects):
    # 下面是清除,然后重画所有矩形                            
    turtle.clear()                          # 擦除所有
    [draw_rect(r) for r in rects]           # 重新画所有矩形
    turtle.update()                         # 刷新屏幕显示
    sleep(0.4)                              # 等待0.4秒

def main():
    """主要执行函数"""
    width,height=800,800
    caption = '冒泡排序动态演示2021版,作者:李兴球 2021/1/4'
    turtle.penup()                           # 抬笔
    turtle.speed(0)                          # 海龟移动速度为最快
    turtle.hideturtle()                      # 隐藏海龟对象
    turtle.tracer(0,0)
    turtle.colormode(255)                    # 设定颜色模式
    turtle.setup(width,height)               # 设定窗口宽高
    turtle.title(caption)
    
    tom = turtle.Turtle(visible=False)       # 显示标题的
    tom.up()                                 # tom抬笔
    ft = ('黑体',22,'normal')                # 定义字体风格  
    tom.color('gray')                        # 灰色的
    tom.goto(0,280)                          # 坐标定位
    tom.write(caption,align='center',font=ft)# 写上汉字

    pass                                     # 从这里开始省略一些代码
        
if __name__=="__main__":

    main()         
        

需要所有源代码,请

成为会员后,登陆才能继续浏览!联系微信scratch8即可办理会员。
(会员专属:能浏览所有文章,下载所有带链接的Python资源。)

发表在 python, turtle | 标签为 | 留下评论

明天会更好_2021元旦贺卡_mv

python明天会更好2021元旦贺卡mv


用python海龟画图模块与pillow模块制作的一个贺卡,

[00:00.00]明天会更好 – 卓依婷
[00:09.18]词:罗大佑
[00:18.37]曲:罗大佑
[00:27.55]轻轻敲醒沉睡的心灵
[00:30.06]
[00:30.73]慢慢张开你的眼睛
[00:33.05]
[00:34.20]看看忙碌的世界
[00:36.29]是否依然孤独的转个不停
[00:40.39]
[00:41.42]春风不解风情
[00:44.16]
[00:44.78]吹动少年的心
[00:46.78]
[00:48.14]让昨日脸上的泪痕
[00:50.48]
[00:51.12]随记忆风干了
[00:53.65]
[00:56.21]抬头寻找天空的翅膀
[00:58.88]
[00:59.50]候鸟出现它的影迹
[01:02.00]
[01:02.89]带来远处的饥荒
[01:05.03]无情的战火依然存在的消息
[01:08.97]
[01:10.05]玉山白雪飘零
[01:12.61]
[01:13.40]燃烧少年的心
[01:15.45]
[01:16.73]使真情溶化成音符
[01:19.27]
[01:19.87]倾诉遥远的祝福
[01:22.34]
[01:25.42]唱出你的热情
[01:26.99]伸出你双手
[01:28.66]让我拥抱着你的梦
[01:30.91]
[01:32.01]让我拥有你真心的面孔
[01:35.80]
[01:38.82]让我们的笑容
[01:40.51]充满着青春的骄傲
[01:44.27]
[01:45.41]为明天献出虔诚的祈祷
[01:49.35]
[01:52.03]谁能不顾自己的家园
[01:54.61]
[01:55.35]抛开记忆中的童年
[01:57.85]
[01:58.68]谁能忍心看他昨日的忧愁
[02:02.48]带走我们的笑容
[02:04.78]
[02:05.86]青春不解红尘
[02:08.51]
[02:09.22]胭脂沾染了灰
[02:11.47]
[02:12.45]让久违不见的泪水
[02:15.00]
[02:15.73]滋润了你的面容
[02:18.13]
[02:21.10]唱出你的热情
[02:22.77]伸出你双手
[02:24.45]让我拥抱着你的梦
[02:26.57]
[02:27.89]让我拥有你真心的面孔
[02:31.70]
[02:34.66]让我们的笑容
[02:36.36]充满着青春的骄傲
[02:40.37]
[02:41.22]为明天献出虔诚的祈祷
[02:45.42]
[02:47.96]轻轻敲醒沉睡的心灵
[02:50.49]
[02:51.13]慢慢张开你的眼睛
[02:53.61]
[02:54.53]看那忙碌的世界
[02:56.63]是否依然孤独的转个不停
[03:00.63]
[03:01.75]日出唤醒清晨
[03:04.19]
[03:05.14]大地光彩重生
[03:07.57]
[03:08.34]让和风拂出的音响
[03:10.92]
[03:11.49]谱成生命的乐章
[03:14.09]
[03:16.95]唱出你的热情
[03:18.59]伸出你双手
[03:20.31]让我拥抱着你的梦
[03:22.58]
[03:23.69]让我拥有你真心的面孔
[03:27.57]
[03:30.42]让我们的笑容
[03:32.16]充满着青春的骄傲
[03:35.95]
[03:37.04]让我们期待明天会更好
[03:41.33]
[03:44.09]唱出你的热情
[03:45.70]伸出你双手
[03:47.33]让我拥抱着你的梦
[03:49.61]
[03:50.73]让我拥有你真心的面孔
[03:54.86]
[03:57.49]让我们的笑容
[03:59.15]充满着青春的骄傲
[04:03.19]
[04:04.07]让我们期待明天会更好
[04:08.14]
[04:11.11]唱出你的热情
[04:12.70]伸出你双手
[04:14.42]让我拥抱着你的梦
[04:16.62]
[04:17.84]让我拥有你真心的面孔
[04:21.76]
[04:24.55]让我们的笑容
[04:26.25]充满着青春的骄傲
[04:30.41]
[04:31.17]让我们期待明天会更好

需要所有源代码和素材请

成为会员后,登陆才能继续浏览!联系微信scratch8即可办理会员。
(会员专属:能浏览所有文章,下载所有带链接的Python资源。)

发表在 pillow, python, tkinter, turtle | 标签为 | 留下评论

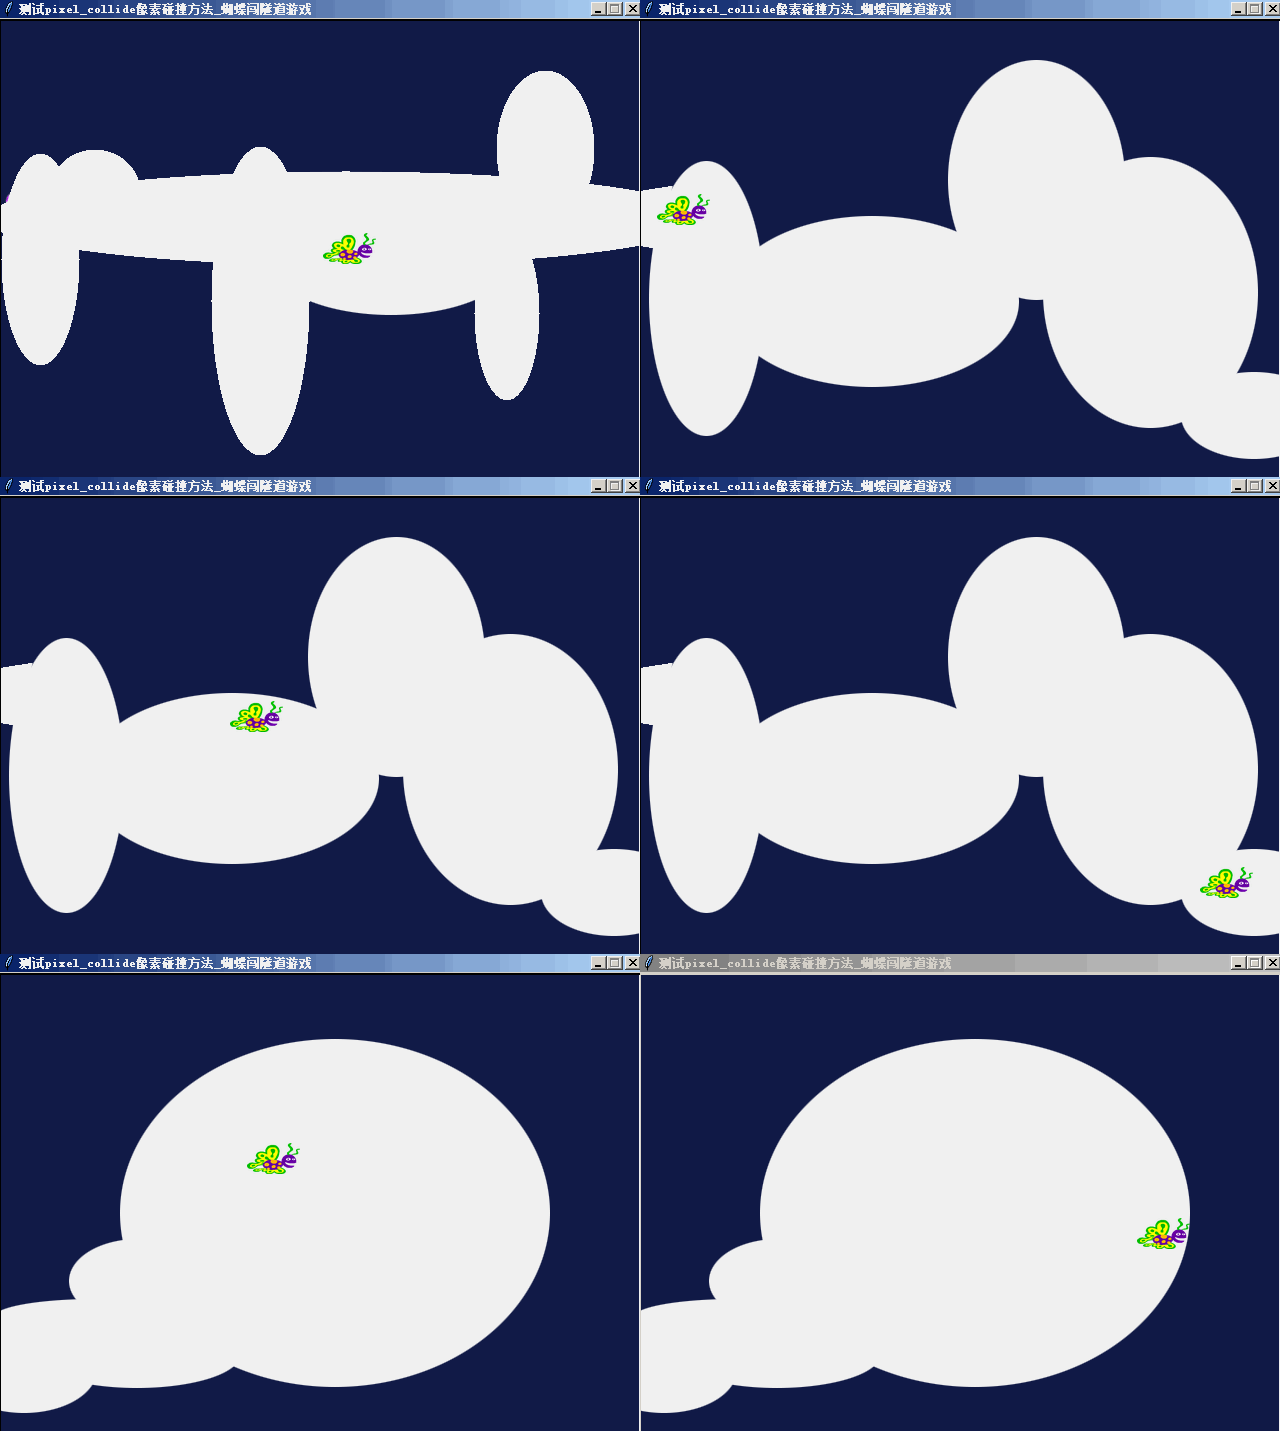
pygame碰撞器研究 pygame-colliders凹边形碰撞检测与凸边形碰撞检测

Pygame碰撞器提供了比Pygame模块标准的Rect矩形碰撞检测更复杂的功能。
虽然名字是Pygame碰撞器,但它并不和Pygame模块绑定,即不依赖于Pygame模块,
也和Pygame模块没啥关系。你尽管应用它于tkinter模块或其它地方。

安装这个模块的方法是在命令提示符下输入 pip install pygame-colliders 进行安装。

这个库提供了两种碰撞器,一个是convex即凸边形碰撞器,另一种是concave凹边形碰撞器。

下面是一个例子


collider_a_points = [(13, 10), (13, 3), (6, 3), (6, 10)]
collider_a = create_collider(collider_points)                # 创建碰撞器

collider_b_points = [(3, 3), (5, 3), (5, 4), (4, 4), (4, 5), (5, 5), (5, 6), (3, 6)]
collider_b = create_collider(collider_points)

if collider_a.collide(collider_b):
    print("Collision detected")

上面的程序没有指定是使用哪种碰撞器。下面的代码指定了凸碰撞器。


collider_points = [(13, 10), (13, 3), (6, 3), (6, 10)]
collider = ConvexCollider(collider_points)

凹边形是一个或者多个内角大于180度的多边形。它可以分解为多个凸边形。
如果实例化凹碰撞器,最终也是调用凸边形的碰撞检测。下面是创建一个凹碰撞器。

collider_points = [(3, 3), (5, 3), (5, 4), (4, 4), (4, 5), (5, 5), (5, 6), (3, 6)]
collider = ConcaveCollider(collider_points)

上面的代码会创建一像C形状的碰撞器。

下面是test程序:


from pygame_colliders import ConcaveCollider, ConvexCollider


def test_no_collision():
    poly_a_points = [(13, 10), (13, 3), (6, 3), (6, 10)]
    poly_b_points = [(14, 18), (15, 11), (10, 13)]

    poly_a = ConvexCollider(poly_a_points)
    poly_b = ConvexCollider(poly_b_points)

    assert poly_a.collide(poly_b) is False


def test_collision_2():
    collider_a_points = [(13, 20), (13, 13), (6, 13), (6, 20)]
    collider_b_points = [(13, 13), (8, 9), (7, 15)]

    collider_a = ConvexCollider(collider_a_points)
    collider_b = ConvexCollider(collider_b_points)

    assert collider_a.collide(collider_b) is True


def test_collision():
    poly_a = [(11, 10), (11, 3), (4, 3), (4, 10)]
    poly_b = [(13, 13), (8, 9), (7, 15)]

    p_a = ConvexCollider(poly_a)
    p_b = ConvexCollider(poly_b)

    assert p_a.collide(p_b) is True


def test_clockwise():
    poly = [(13, 13), (8, 9), (7, 15)]
    p = ConvexCollider(poly)

    assert p.is_clockwise is True


def test_counter_clockwise():
    poly = [(7, 15), (8, 9), (13, 13)]
    p = ConvexCollider(poly)

    assert p.is_clockwise is False


def test_point_collide():
    poly_points = [(7, 15), (8, 9), (13, 13)]
    point = (10, 12)
    poly = ConvexCollider(poly_points)

    assert poly.point_collide(point) is True


def test_point_not_collide():
    poly_points = [(7, 15), (8, 9), (13, 13)]
    point = (10, 7)
    poly = ConvexCollider(poly_points)

    assert poly.point_collide(point) is False


def test_concave_convex_collision():
    poly_a_points = [(3, 3), (5, 3), (5, 4), (4, 4), (4, 5), (5, 5), (5, 6), (3, 6)]
    poly_b_points = [(4.5, 3.5), (6, 2), (6, 4)]

    poly_a = ConcaveCollider(poly_a_points)
    poly_b = ConvexCollider(poly_b_points)

    assert poly_a.collide(poly_b) is True


def test_convex_concave_collision():
    poly_a_points = [(3, 3), (5, 3), (5, 4), (4, 4), (4, 5), (5, 5), (5, 6), (3, 6)]
    poly_b_points = [(4.5, 3.5), (6, 2), (6, 4)]

    poly_a = ConcaveCollider(poly_a_points)
    poly_b = ConvexCollider(poly_b_points)

    assert poly_b.collide(poly_a) is True


def test_concave_no_collision():
    poly_a_points = [(3, 3), (5, 3), (5, 4), (4, 4), (4, 5), (5, 5), (5, 6), (3, 6)]
    poly_b_points = [(6.5, 3.5), (8, 2), (8, 4)]

    poly_a = ConcaveCollider(poly_a_points)
    poly_b = ConvexCollider(poly_b_points)

    assert poly_a.collide(poly_b) is False


def test_concave_concave_collision():
    poly_a_points = [(3, 3), (5, 3), (5, 4), (4, 4), (4, 5), (5, 5), (5, 6), (3, 6)]
    poly_b_points = [(6.5, 5.5), (4.5, 5.5), (4.5, 6.5), (5.5, 6.5), (5.5, 7.5), (4.5, 7.5), (4.5, 8.5), (6.5, 8.5)]

    poly_a = ConcaveCollider(poly_a_points)
    poly_b = ConcaveCollider(poly_b_points)

    assert poly_a.collide(poly_b) is True

免费下载网址:
链接:https://pan.baidu.com/s/1Q5lek0W3Qqn7ehYVFcjbQw
提取码:px7m

发表在 pygame, python | 标签为 , | 留下评论

整合turtle和tkinter使用原生海龟对象单击按钮画正方形示例

"""
   整合turtle和tkinter使用原生海龟对象单击按钮画正方形示例
"""

__author__ = '李兴球'
__blog__ = 'www.lixingqiu.com'

import tkinter
import turtle
import tkinter.messagebox

window = tkinter.Tk()
window.title('整合turtle和tkinter使用原生海龟对象单击按钮画正方形示例')

canvas = tkinter.Canvas(master=window, width=480, height=360)
canvas.grid(padx=2, pady=2, row=0, column=0, rowspan=10, columnspan=10 , sticky='nsew')
pingxiang = turtle.RawTurtle(canvas)       # 这个海龟叫萍乡
pingxiang.shape('turtle')                  # 萍乡的形状是海龟

tkinter.messagebox.showinfo("你好,我是来自江西萍乡的李兴球", "请单击左边的按钮")

def pingxiang_square( ):
    """画正方形"""
    
    button1.config(state='disable')       # 禁用按钮
    for i in range (0, 4):
        pingxiang.forward(100)
        pingxiang.right(90)
  
# 实例化一个按钮
button1 = tkinter.Button(master=window, text ="画正方形", command =pingxiang_square)
button1.config(bg="lime",fg="black")
button1.grid(padx=2, pady=2, row=1, column=11, sticky='nsew')
 
window.mainloop()

发表在 python, tkinter, turtle | 标签为 , | 留下评论

简易海龟画图学习程序.py

"""
   简易海龟画图学习程序.py
   学习如何定义函数专用模块
"""

import math
import turtle

def square(t, length):
    """画正方形
       t , 海龟对象
       length,边长
    """
    for i in range(4):
        t.fd(length)
        t.lt(90)

def polyline(t, n, length, angle):
    """画线段,有n段。
    t: 海龟对象
    n: 线段的数量
    length: 线段的长度
    angle: 线段之间的补角
    """
    for i in range(n):
        t.fd(length)
        t.lt(angle)

def polygon(t, n, length):
    """画n正多边形。
    t: 海龟对象
    n: 边数
    length: 边长
    """
    angle = 360.0/n
    polyline(t, n, length, angle)

def arc(t, r, angle):
    """用给定的半径和角度画弧。
    t: 海龟对象
    r: 半径
    angle: 角度
    """
    arc_length = 2 * math.pi * r * abs(angle) / 360
    n = int(arc_length / 4) + 1
    step_length = arc_length / n           # 步长
    step_angle = float(angle) / n          # 步角 
    
    t.lt(step_angle/2)
    polyline(t, n, step_length, step_angle)
    t.rt(step_angle/2)

def circle(t, r):
    """画圆
    t: 海龟对象
    r: 半径
    """
    arc(t, r, 360)

def main():
    
    jack = turtle.Turtle()
    jack.speed(0)
    jack.screen.delay(0)
 
    radius = 100
    circle(jack, radius)

    # 进入事件循环
    turtle.mainloop()

if __name__ == '__main__':

     main()

发表在 python, turtle | 留下评论

跟随鼠标移动并旋转的五角星.py

李兴球Python跟随鼠标指针不断旋转的五角星

"""
   跟随鼠标移动并旋转的五角星.py
   本程序运行后会画一个五角星,可是奇怪的是,
   这个有五角星会不断地自转,
   并且它还会跟随鼠标指针不断地旋转。   
"""
import time
import turtle

def draw_star(x,y):
    """画五角星"""
    pass                               # 这里省略一些代码
        
def follow(event):
    """跟随鼠标指针"""
    pass                               # 此处省略一些代码 

def rotate():
    """向右旋转"""
    turtle.rt(1)
    draw_star(turtle.xcor(),turtle.ycor())
    turtle.update()

def main():
    """主要调用函数"""
    turtle.penup()                   # 抬笔
    turtle.speed(0)                  # 速度为最快 
    turtle.hideturtle()              # 隐藏海龟
    turtle.color('magenta')          # 颜色为品红
    turtle.bgcolor('yellow')         # 背景色为黄色
    turtle.screensize(1,1)           # 画布尺寸为1x1
    turtle.pensize(4)                # 画笔宽度为4 
    turtle.tracer(0,0)               # 关闭自动刷新,绘画延时为0毫秒 
    turtle.getcanvas().bind('',follow)
    w  = turtle.Turtle(visible=False)
    ft = ('楷体',15,'normal')
    w.penup()
    w.sety(150)
    info = '跟随鼠标移动并旋转的五角星by李兴球'
    w.write(info,align='center',font=ft)
    while 1:
        rotate()
        time.sleep(0.01)

if __name__ == '__main__':

    main()

需要完整源代码请

成为会员后,登陆才能继续浏览!联系微信scratch8即可办理会员。
(会员专属:能浏览所有文章,下载所有带链接的Python资源。)

发表在 python, tkinter, turtle | 标签为 , | 留下评论

音乐悬浮按钮,进入与离开事件by李兴球

李兴球Python tkinter海龟进入与离开事件


"""
   音乐悬浮按钮.py
   这是一个用海龟画图模块和pygame的混音模块制作的播放按钮。
   作者:李兴球,日期:2020/12/22
"""
import pygame
from PIL import Image,ImageTk
from turtle import Screen,Turtle,Shape

def init_screen(width,height):
    """初始化屏幕"""
    screen = Screen()
    screen.screensize(1,1)
    screen.bgcolor('yellow')
    screen.setup(width,height)
    screen.title('音乐悬浮按钮,进入与离开事件by李兴球')
    screen.delay(0)
    return screen

def playmusic(x,y):
    """播放音乐"""
    pygame.mixer.music.stop()        # 停止正在播放的音乐
    pygame.mixer.music.load('Yanni - With An Orchid.mp3')    
    pygame.mixer.music.play(-1,0)      
    
def make_button(screen):
    """加载资源,生成播放按钮"""

    pass                             # 此处省略若干代码

def main():    
    
    w,h = 350,200
    screen = init_screen(w,h)
    pygame.mixer.init()    
    make_button(screen)
    screen.mainloop()

if __name__ == "__main__":

    main()

需要全部源代码与素材请

成为会员后,登陆才能继续浏览!联系微信scratch8即可办理会员。
(会员专属:能浏览所有文章,下载所有带链接的Python资源。)

发表在 python, turtle | 标签为 , , , | 留下评论

哗啦啦的下雨啦_海龟显示gif动图原理程序

李兴球python海龟拆帧显示动图哗啦啦的下雨啦

在Python海龟画图的屏幕中可以显示gif动态图片吗?答案是可以的。我们可以用屏幕的addshape命令添加gif图到造型字典,然后把海龟的造型设为这张gif图即可。不过遗憾的是,它只会显示第一帧。如果要显示多帧动画,那么就要把gif图进行拆帧处理。所谓的拆帧,就是把gif图中的每一幅图给分离出来。在本例中使用提webp图形。读者把它当成gif图即可。拆帧使用的是pillow模块的ImageSequence子模块的迭代器命令。在下面的代码中,定义了一个叫getframes的函数。它会把gif图所有的帧都包装为PhotoImage对象,把它们放在一个列表中,并且返回,同时返回的还有图片的尺寸。下面是哗啦啦的下雨啦.py的源代码。

"""
   哗啦啦的下雨啦.py
   本程序演示如何在Python的海龟画图屏幕中显示动态图片。
   关键词:拆帧,造型字典,列表推导式,造型类。
"""
import time
import turtle
from PIL import Image,ImageTk,ImageSequence

def getframes(filename):
    """
       拆帧,返回PhotoImage对象列表。
    """
    frames = []                              # 新建列表
    
    im = Image.open(filename)                # 载入图片
            
    pass                                     # 这里省略若干行代码 
    
    return frames,im.size

screen = turtle.getscreen()                  # 获取屏幕    
screen.screensize(1,1)                       # 画布尺寸
frames,size = getframes('giphy.webp')        # 拆帧
screen.setup(*size)                          # 设定窗口大小
screen.title('哗啦啦的下雨啦by李兴球')       # 设定标题 

pass                                          # 这里省略若干行代码  

index = 0
while True:
    turtle.shape(f"gif_{index}")             # 设定造型   
    index = index + 1                        # 索引加1
    index = index % len(shapes)              # 对数量求余
    time.sleep(0.02)                         # 等待0.02秒    

需要所有源代码及素材,请

成为会员后,登陆才能继续浏览!联系微信scratch8即可办理会员。
(会员专属:能浏览所有文章,下载所有带链接的Python资源。)

发表在 pillow, python, turtle | 标签为 | 留下评论

海龟计算器_turtle打字游戏原理程序

李兴球Python海龟计算器动图


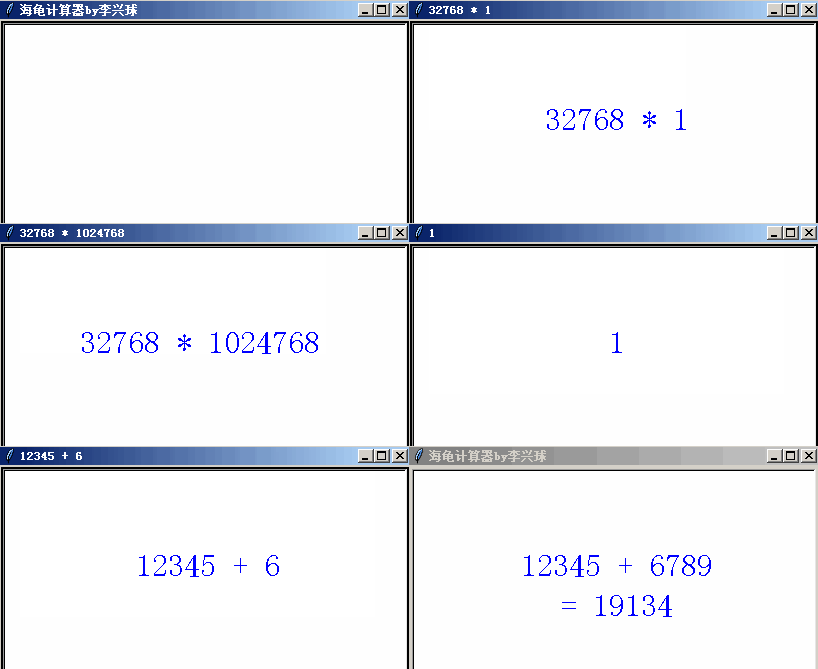
这个程序运行后可以输入表达式,然后按回车键,计算结果就会显示在表达式的下面。在tkinter的画布中,可以把画布绑定到键盘的任意按键事件。利用这一点,我们可以开发打字游戏,当然做一个简单的计数器更不在话下了。获取画布有几种方法,可以用海龟的getcanvas方法,也可以用屏幕的cv属性。为了避免画布由于窗口缩小而自动出现水平和垂直滚动末,在程序中通过screensize命令把画布的尺寸变为1×1。下面是海龟计算器.py的源代码:

"""
   海龟计算器.py
   这个程序使用tkinter画布的绑定任意键功能,
   让所输入的字符串在画布显示出来,
   按回车键会用eval试图计算表达式的值。
   读懂了代码原理,那么你就能用turtle开发一个打字游戏了。
   这就是本篇源代码的真正价值所在。
"""
import turtle

def display(event):
    global expr                           # 申明为全局变量 
    print(event)   
    pass                                  # 这里省略了一些代码
    
expr = ''                                # 表达式
turtle.penup()                           # 抬笔
turtle.hideturtle()                      # 隐藏
turtle.pencolor('blue')                  # 画笔颜色
turtle.title('海龟计算器by李兴球')       # 设定窗口标题
ft = ('',24,'normal')                    # 字体风格

s = turtle.getscreen()                   # 获取屏幕
s.screensize(1,1)                        # 画布尺寸
s.setup(400,100)                         # 窗口宽高

cv = turtle.getcanvas()                  # 获取画布
cv.bind("",display)                 # 绑定任意按键

s.listen()                               # 监听按键
s.mainloop()                             # 事件循环 

需要全部源代码请

成为会员后,登陆才能继续浏览!联系微信scratch8即可办理会员。
(会员专属:能浏览所有文章,下载所有带链接的Python资源。)

发表在 python, tkinter, turtle | 标签为 | 留下评论

一闪一闪亮晶晶(会变造型的图章)动态图章闪烁的星星图章

萍乡李兴球python一闪一闪亮晶晶

"""
   一闪一闪亮晶晶.py
   本程序采用海龟盖图章的方式,让100颗星星不断地闪烁。
   读者可能知道在Python海龟画图中可以让海龟盖图章,盖的图章不能动,也不能换造型。
   难道这一切都是真的,如果你熟知tkinter,那么一切迎刃而解。
   这个程序,只有一个隐藏的海龟,所有的星星都是动态的“图章”。

"""
from time import sleep
from PIL import Image,ImageTk
from turtle import Turtle,Screen
from random import randint,choice
from winsound import PlaySound,SND_LOOP,SND_ASYNC
 
screen = Screen()
screen.setup(800,600)
screen.title("一闪一闪亮晶晶by李兴球")
screen.delay(0)
screen.bgpic("bg2.png")

# 异步重复播放音乐
PlaySound('一闪一闪亮晶晶伴奏.wav',SND_LOOP|SND_ASYNC)

images = ["star1.gif","star2.gif"]
images = [Image.open(im) for im in images]        # 打开每张图到内存
images = [ImageTk.PhotoImage(im) for im in images]# 用PhotoImage包装每张图

star = Turtle(shape='blank')                      # 实例化空白图形的海龟
star.penup()                                      # 抬笔
star.speed(0)                                     # 速度为最快

for _ in range(100):                              # 重复100次
    x = randint(-400,400)                         # 设定x的值
    y = randint(-300,300)                         # 设定y的值
    star.goto(x,y)                                # 到达x,y坐标
    star.stamp()                                  # 盖图章 
print(star.stampItems)                            # 打印所有图章id

# 接下来的代码让每个图章不断地闪烁,即变换造型图片
pass                                              # 这里省略了部分代码


需要完整源代码请

成为会员后,登陆才能继续浏览!联系微信scratch8即可办理会员。
(会员专属:能浏览所有文章,下载所有带链接的Python资源。)

发表在 python, tkinter, turtle | 标签为 , | 留下评论

给海龟画图屏幕增加半透明造型

李兴球python海龟半透明造型演示

"""
   给海龟画图屏幕增加半透明造型.py。
   通过numpy和pillow模块把图像变成半透明,
   然后显示在Python海龟画图屏幕中。
"""
import numpy as np
from PIL import Image,ImageTk
from turtle import Turtle,Screen,Shape

def add_transparent_shape(pic,name=None):
    """给海龟画图屏幕增加半透明造型,
       pic:图像文件名
       name:造型名称
    """
    if name==None:name=pic              # 如果不写名字,则用文件名字
    pass                                # 这里省略部分代码......... 
    screen.register_shape(name,shape) # 注册到造型字典

screen = Screen()
screen.bgcolor('blue')
screen.bgpic('bg.png')
screen.setup(474,396)
screen.title('给海龟画图屏幕增加半透明造型by李兴球')

add_transparent_shape('maid.png')      # 调用添加半透明造型函数
woman = Turtle(shape='maid.png')
woman.penup()
woman.bk(50)

while 1:
    for x in range(100):
        woman.fd(1)
    for x in range(100):
        woman.fd(-1)   

需要完整源代码及素材,请

成为会员后,登陆才能继续浏览!联系微信scratch8即可办理会员。
(会员专属:能浏览所有文章,下载所有带链接的Python资源。)

发表在 numpy, pillow, python, turtle | 标签为 | 留下评论

Vector.py向量模块(帮国外留学生做的作业)

以下是题目:
CSE 20
Beginning Programming in Python Programming Assignment 8

The goal of this project is to write a Python module called Vector that provides functions for performing some standard vector operations, detailed below. Vectors in this project will be represented by tuples of numbers, either floats or ints. Your module will be stored in a file called Vector.py. Begin by copying the files VectorStub.py and VectorTest.py from the examples section of the class webpage. Rename the file VectorStub.py to Vector.py and begin filling in the 11 missing function definitions.
Five of these functions (add(), sub(), hadamard(), dot() and angle()) will take two vectors � and
� as input. If � and � are not of the same dimension, the function will raise a ValueError() containing
the message: ‘incompatible vectors: ‘+str(u)+’, ‘+str(v). Follow the example Matrix.py
on the class webpage to see how this might be done.

The word “length” could have two different meanings in this context. On the one hand we speak of the length of a tuple to mean its number of elements. On the other hand the length of a vector is commonly understood to be the geometric length of the directed line segment it represents. The number of components in a vector is more properly called its dimension. In the following descriptions of required vector operations we use length and dimension in this geometric sense.

add(u, v)
Returns the elementwise sum of the two vectors.
Example: add( (1, 3, -5), (2, -2, 1) ) = (3, 1, -4)

negate(u)
Returns the elementwise negation of a vector.
Example: negate( (2, -2, 1) ) = (-2, 2, -1)

sub(u, v)
Returns the elementwise difference of two vectors.
Example: sub( (1, 3, -5), (2, -2, 1) ) = (-1, 5, -6)

scalarMult(c, u)
Returns the elementwise product of a vector by the number �. Example: scalarMult( 2, (1, 3, -5) ) = (2, 6, -10)

hadamard(u, v)
Returns the elementwise product of two vectors, also called the Hadamard Product. Example: hadamard( (1, 3, -5), (2, -2, 1) ) = (2, -6, -5)

dot(u, v)
Returns the sum of the elements of the Hadamard product of two vectors, called the Dot Product.
Example: dot( (1, 3, -5), (2, -2, 1) ) = -9

length(u)
Returns the (geometric) length of a vector, i.e. the square root of dot(u, u).
Example: length( (2, -2, 1) ) = √4 + 4 + 1 = √9 = 3.0

dim(u)
Returns the dimension of a vector, i.e. its number of elements.
Example: dim( (1, 3, 5) ) = 3

unit(v)
Returns a unit vector (one whose geometric length is 1) in the direction of �. To compute this quantity, scalar multiply the vector by the reciprocal of its length.
Example: unit( (2, -2, 1) ) = (0.6666.., -0.6666.., 0.3333..)

angle(u, v)

Returns the angle between two vectors. To compute this function use the formula cos−1(�̂ ⋅ �̂), where cos−1() is the inverse cosine function (denoted by acos() in the math module), �̂ and �̂ are unit vectors in the direction of � and � respectively, and �̂ ⋅ �̂ is their dot product.
Example: angle( (1, 3, -5), (2, -2, 1) ) = 2.1026..

randVector(n, a, b)
Returns a vector of dimension n whose elements are random floats in the range [�, �). Use the function
uniform() in the random module to generate the random components returned by this function.

Each of the above functions should include a doc string describing its operation. This doc string should be composed in such a way that a call to help(Vector) in Python interactive mode, produces the following output.

>>> import Vector
>>> help(Vector)
Help on module Vector:

NAME

Vector

DESCRIPTION
This module provides functions to perform standard vector operations. Vectors are represented as tuples of numbers (floats or ints). Functions that take two vector arguments will raise a ValueError() exception if the two vectors are of different dimensions.

FUNCTIONS
add(u, v)
Return the vector sum u+v.

angle(u, v)
Return the angle (in radians) between vectors u and v.

dim(u)
Return the dimension of the vector u.

dot(u, v)
Return the dot product of u with v.

hadamard(u, v)
Return the Hadamard product of u with v.

length(u)
Return the (geometric) length of the vector u.

negate(u)
Return the negative of the vector u.

randVector(n, a, b)
Return a vector of dimension n whose components are random floats in the range [a, b).

scalarMult(c, u)
Return the scalar product cu of the number c by the vector u.

sub(u, v)
Return the vector difference u-v.

unit(v)
Return a unit (geometric length 1) vector in the direction of v.

FILE

c:\users\ptantalo\documents\code\cse20\fall20\solutions\pa8\vector.py

The only exception to this output will be the path quoted in the FILE section at the end. Otherwise the output from your module will match the above exactly.

Test your module by placing the files Vector.py and VectorTest.py in the same directory, then running VectorTest as a script. Other than the random vector at the end, its output should be identical to that given below.
$ python3 VectorTest.py dim( (-3, -4, 7) ) = 3
dim( (4, 4) ) = 2
(-3, -4, 7) + (6, -2, 2) = (3, -6, 9)
– (6, -2, 2) = (-6, 2, -2)
(-3, -4, 7) – (6, -2, 2) = (-9, -2, 5)
2.5 (-3, -4, 7) = (-7.5, -10.0, 17.5)
-3.5 (6, -2, 2) = (-21.0, 7.0, -7.0)
hadamard( (-3, -4, 7) , (6, -2, 2) ) = (-18, 8, 14)
dot( (-3, -4, 7) , (6, -2, 2) ) = 4
| (-3, -4, 7) | = 8.602325267042627
| (6, -2, 2) | = 6.6332495807108
unit( (4, 4) ) = (0.7071067811865475, 0.7071067811865475)
unit( (-2, 2) ) = (-0.7071067811865475, 0.7071067811865475)
angle( (4, 4) , (-2, 2) ) = 1.5707963267948966

random vector = (-0.5101713311427276, 0.04282108893167491)

$

What to turn in
Submit the file Vector.py to the assignment name pa8 on Gradescope. As always start early and ask questions if anything is not clear.

以下是我写的参考答案:

#------------------------------------------------------------------------------
# Vector.py
#------------------------------------------------------------------------------
"""
This module provides functions to perform standard vector operations.
Vectors are represented as tuples of numbers (floats or ints).
Functions that take two vector arguments will raise a ValueError() exception
if the two vectors are of different dimensions.  
"""
#------------------------------------------------------------------------------
# import library modules
#------------------------------------------------------------------------------
import math
import random
#------------------------------------------------------------------------------
# function definitions
#------------------------------------------------------------------------------
def _check(u,v):
    if len(u)!=len(v):
        raise ValueError()
    
# add() -----------------------------------------------------------------------
def add(u, v):
    """Return the vector sum u+v."""
    _check(u,v)    
    return tuple(x+y for x,y in zip(u,v))

# end add() -------------------------------------------------------------------


# negate() --------------------------------------------------------------------
def negate(u):
    """Return the negative of the vector u."""
    return tuple( -x for x in u)
# end negate() ----------------------------------------------------------------   


# sub() -----------------------------------------------------------------------
def sub(u, v):
    """Return the vector difference u-v."""
    _check(u,v)    
    return tuple(x-y for x,y in zip(u,v))
# end sub() -------------------------------------------------------------------


# scalarMult() ----------------------------------------------------------------
def scalarMult(c, u):
    """Return the scalar product cu of the number c by the vector u."""
    return tuple(c*x for x in u)
# end scalarMult() ------------------------------------------------------------


# hadamard() ------------------------------------------------------------------
def hadamard(u, v):
    """Return the Hadamard product of u with v."""
    _check(u,v)    
    return tuple(x*y for x,y in zip(u,v))
# end hadamard() --------------------------------------------------------------


# dot() -----------------------------------------------------------------------
def dot(u, v):
    """Return the dot product of u with v.
"""
    _check(u,v)    
    return sum((x*y for x,y in zip(u,v)))
# end dot() -------------------------------------------------------------------


# length() --------------------------------------------------------------------
def length(u):
    """Return the (geometric) length of the vector u."""
    r = sum(x*x for x in u)
    return r**0.5

# end length() ----------------------------------------------------------------


# dim() -----------------------------------------------------------------------
def dim(u):
    """Return the dimension of the vector u."""
    return len(u)
# end dim() -------------------------------------------------------------------


# unit() ----------------------------------------------------------------------
def unit(v):
    """Return a unit (geometric length 1) vector in the direction of v.
"""
    d = length(v)
    return tuple(x/d for x in v)
# end unit() ------------------------------------------------------------------


# angle() ---------------------------------------------------------------------
def angle(u, v):
    """Return the angle (in radians) between vectors u and v."""
    return math.acos(dot(unit(u),unit(v)))
# end angle() -----------------------------------------------------------------


# randVector() ----------------------------------------------------------------
def randVector(n, a, b):
    """Return a vector of dimension n
       whose components are random floats in the range [a, b).
    
"""
    return tuple(random.uniform(a,b) for x in range(n))
# end randomVector() ----------------------------------------------------------


if __name__ == '__main__':

    v1 = (2,3,4)           # 把元组当成向量
    v2 = (1,2,4)           # 把元组当成向量
    v = dot(v1,v2)         # 测试点积
    print(v)

    print( randVector(4, 1, 30))

以下是测试程序:

#------------------------------------------------------------------------------
#  VectorTest.py
#------------------------------------------------------------------------------

import Vector

A = (-3, -4, 7)
B = (6, -2, 2)
C = (4, 4)
D = (-2, 2)

print()
print('dim(', A, ') =', Vector.dim(A))
print('dim(', C, ') =', Vector.dim(C))
print(A, '+', B, '=', Vector.add(A,B))
print('-', B, '=', Vector.negate(B))
print(A, '-', B, '=', Vector.sub(A,B))
print(2.5, A, '=', Vector.scalarMult(2.5, A))
print(-3.5, B, '=', Vector.scalarMult(-3.5, B))
print('hadamard(', A, ',', B, ') =', Vector.hadamard(A,B))
print('dot(', A, ',', B, ') =', Vector.dot(A,B))
print('|', A, '| =', Vector.length(A))
print('|', B, '| =', Vector.length(B))
print('unit(', C, ') =', Vector.unit(C))
print('unit(', D, ') =', Vector.unit(D))
print('angle(', C, ',', D, ') =', Vector.angle(C, D))

print()
E = Vector.randVector(2,-3,3)
print('random vector = ', E)
print()

# uncomment one of the lines below to raise a ValueError()
#Vector.add(A, C) 
#Vector.sub(A, C)
#Vector.hadamard(A, C)
#Vector.dot(A, C)
#Vector.angle(A, C)


发表在 python | 标签为 | 留下评论

海龟的七子之歌

李兴球Python贺卡海龟的七子之歌


"""
   海龟的七子之歌.py
   一个多媒体小作品。使用纯粹的turtle模块制作。
"""
from time import sleep
from turtle import Turtle,Screen
from winsound import PlaySound,SND_ASYNC,SND_LOOP

screen = Screen()           # 新建屏幕
screen.delay(0)             # 屏幕延时为0毫秒
screen.setup(606,668)
screen.bgpic('bg.png')
screen.title('海龟的七子之歌by李兴球')
 
pass                        # 这里省略了一些代码
screen.mainloop()

需要全部源代码与素材请

成为会员后,登陆才能继续浏览!联系微信scratch8即可办理会员。
(会员专属:能浏览所有文章,下载所有带链接的Python资源。)

发表在 python, turtle | 标签为 | 留下评论

turtle飞机大战雏形游戏

李兴球Python turtle飞机大战雏形游戏

一个简单的用纯粹的turtle模块制作的射击游戏,方便初学者学习如何用python的海龟模块制作飞机大战游戏。


"""
   turtle飞机大战雏形游戏.py
   本程序实现了一个基本的飞机大战游戏,角色都用方块表示。
   在游戏中,bullet表示玩家飞机发出的子弹。
   player表示的就是玩家飞机。
   planes列表存储所有的敌机。
   敌机碰到子弹会消失,player碰到敌机也会消失。
   游戏通过左右方向箭头操作player,通过向上方向箭头发射子弹。
"""
from random import randint
from turtle import Turtle,Screen

screen = Screen()
screen.delay(0)
screen.setup(480,360)
screen.title('turtle飞机大战雏形游戏by李兴球')

bullet = Turtle(shape='square',visible=False)  # 新建子弹
bullet.speed(0)
bullet.color('red')
bullet.penup()

player = Turtle(shape='square',visible=False)  # 新建玩家
player.speed(0)
player.color('red')
player.penup()
player.sety(-130)
player.st()
bullet.goto(player.pos())                      # 子弹移到玩家坐标

planes = []
for _ in range(10):                            # 新建10架敌机 
    p = Turtle(shape='square',visible=False)
    p.speed(0)
    p.penup()
    p.color('blue')
    x = randint(-240,240)
    y = randint(180,360)
    p.goto(x,y)
    p.showturtle()
    planes.append(p)

pass                                          # 以下省略了部分源代码

需要完整源代码请

成为会员后,登陆才能继续浏览!联系微信scratch8即可办理会员。
(会员专属:能浏览所有文章,下载所有带链接的Python资源。)

发表在 python, turtle | 标签为 , , , | 留下评论

turtle与pillow生成半透明效果的图形

李兴球Pythonturtle与pillow生成半透明效果的图形


以下是完全源代码:

"""
   turtle与pillow生成半透明效果的图形
"""
import turtle
from PIL import Image,ImageDraw,ImageTk

def make_circle_image(diameter=200,color=(255,0,0,127)):
    """生成圆形图"""
    im = Image.new("RGBA",(diameter,diameter))
    draw = ImageDraw.Draw(im)
    draw.ellipse((0,0,diameter ,diameter),fill=color)
    return im

redim = make_circle_image()
greenim = make_circle_image(color=(0,127,0,127))
blueim = make_circle_image(color=(0,0,127,127))

turtle.penup()
screen = turtle.getscreen()
screen.setup(480,360)
screen.bgpic('c:/bgsnow.png')
screen.title('turtle与pillow生成半透明效果的图形by李兴球')

redcircle = turtle.Shape('image',ImageTk.PhotoImage(redim)) 
screen.register_shape('redcircle',redcircle)

greencircle = turtle.Shape('image',ImageTk.PhotoImage(greenim)) 
screen.register_shape('greencircle',greencircle)

bluecircle = turtle.Shape('image',ImageTk.PhotoImage(blueim))

screen.register_shape('bluecircle',bluecircle)
turtle.fd(-50)
turtle.shape('redcircle')
turtle.stamp()
turtle.fd(50)
turtle.shape('greencircle')
turtle.stamp()
turtle.fd(50)
turtle.shape('bluecircle')
turtle.stamp()
turtle.ht()


发表在 python, turtle | 标签为 , | 留下评论

四小星绕大红星旋转

李兴球Python4小星绕大红星

"""
   四小星绕大红星旋转.py 本程序的5颗小五角星是用一只海龟画出来的,演示动画原理等等。
"""
import time
import turtle

def draw_star(pos,length,filling=False):
    pass

turtle.tracer(0,0)
turtle.setup(480,360)
turtle.fillcolor('red')
turtle.width(4)
turtle.speed(0)
turtle.ht()

pos1 = (0,0)
pos2 = (100,100)
pos3 = (-100,-100)
pos4 = (100,-100)
pos5 = (-100,100)
while True:
    turtle.clear()
    draw_star(pos1,100,True)
    draw_star(pos2,50)
    draw_star(pos3,50)
    draw_star(pos4,50)
    draw_star(pos5,50)
    turtle.update()
    turtle.left(1)
    time.sleep(0.01)
    

需要查看完整源代码请

成为会员后,登陆才能继续浏览!联系微信scratch8即可办理会员。
(会员专属:能浏览所有文章,下载所有带链接的Python资源。)

发表在 python, turtle | 标签为 | 留下评论

画布项目跟随鼠标指针移动_mouse_position函数_tkinter.py

"""
   mouse_position函数_tkinter.py
"""
from tkinter import *                   # 从tkinter模块导入所有命令

def mouse_position(root):
    """获取鼠标指针的坐标"""   
    
    x = root.winfo_pointerx()          # 鼠标指针相对于计算机屏幕的x坐标
    y = root.winfo_pointery()          # 鼠标指针相对于计算机屏幕的y坐标

    rx = root.winfo_rootx()            # 窗口到计算机屏幕最左边距离
    ry = root.winfo_rooty()            # 窗口到计算机屏幕最上边距离 
    x = x - rx                        
    y = y - ry      
  
    return x,y

root = Tk()
root.title('获取鼠标指针坐标tkinter')
root.config(bg='black')

cv = Canvas(root,width=480,height=360,bg='cyan',bd=0)
cv.pack()

img1 = PhotoImage(file='red.png')      # 新建图形对象(需要保持对它的引用)
red = cv.create_image((50,50),image=img1)

img2 = PhotoImage(file='blue.png')
blue = cv.create_image((100,100),image=img2)

while True:
    x,y = mouse_position(root)
    root.title(str(x) + "," + str(y))
    cv.moveto(blue,x,y)
    root.update()

发表在 python, tkinter | 标签为 | 留下评论

牵引憨憨的小海龟

李兴球Python牵引憨憨的小海龟


"""
   牵引憨憨的小海龟.py
"""
import turtle                          # 导入海龟模块
def mouse_position(screen):
    """获取鼠标指针的坐标"""
    
    root = screen._root                # 获取根窗口对象
    cv = screen._canvas                # 获取画布
    
    x = root.winfo_pointerx()          # 鼠标指针相对于计算机屏幕的x坐标
    y = root.winfo_pointery()          # 鼠标指针相对于计算机屏幕的y坐标

    rx = cv.winfo_rootx()              # 画布到计算机屏幕最左边距离
    ry = cv.winfo_rooty()              # 画布到计算机屏幕最上边距离 
    x = x - rx - 2                     # 画布边框宽度是2,所以要减去2
    y = y - ry - 2
    
    x = x - screen.window_width() //2  # 转换成在海龟画图坐标系中x坐标
    y = screen.window_height() //2 - y # 转换成在海龟画图坐标系中y坐标

    return x,y

screen = turtle.Screen()               # 新建屏幕对象

t = turtle.Turtle('turtle')            # 新建海龟对象
t.shapesize(5)
t.speed(0)                             # 设定海龟速度为最大
t.penup()                              # 抬笔 
t.color('blue')                        # 设为蓝色的

while True:    
    x,y = mouse_position(screen)       # 获取鼠标指针
    if t.distance(x,y) > 50:           # 如果海龟到x,y距离大于50 
        angle = t.towards(x,y)         # 算出到x,y的朝向角度
        t.setheading(angle)            # 把angle设为海龟的方向
        t.fd(5)                        # 前进5个单位
    screen.update()                     # 刷新屏幕显示

发表在 python, turtle | 标签为 , , | 留下评论

海龟的x,y坐标和鼠标指针的x,y坐标一样.py

"""
   海龟的x,y坐标和鼠标指针的x,y坐标一样.py
"""
import turtle                          # 导入海龟模块

screen = turtle.Screen()               # 新建屏幕对象
root = screen._root                    # 获取根窗口对象
cv = screen._canvas                    # 获取画布对象

t = turtle.Turtle('circle')            # 新建海龟对象
t.speed(0)                             # 设定海龟速度为最大
t.shapesize(4)                         # 把海龟变大些
t.color('blue')                        # 设为蓝色的

while True: 
    x = root.winfo_pointerx()          # 鼠标指针相对于计算机屏幕的x坐标
    y = root.winfo_pointery()          # 鼠标指针相对于计算机屏幕的y坐标

    rx = cv.winfo_rootx()              # 画布到计算机屏幕最左边距离
    ry = cv.winfo_rooty()              # 画布到计算机屏幕最上边距离 
    x = x - rx - 2                     # 画布边框宽度是2,所以要减去2
    y = y - ry - 2
    
    x = x - screen.window_width() //2  # 转换成在海龟画图坐标系中x坐标
    y = screen.window_height() //2 - y # 转换成在海龟画图坐标系中y坐标

    t.goto(x,y)                        # 到达x,y坐标

    screen.title(str(x) + "," + str(y) )# 在标题栏里显示x,y坐标
    screen.update()                     # 刷新屏幕显示

发表在 python, turtle | 标签为 | 留下评论

1秒后变成半透明tkinter和pillow图形处理

李兴球Python tkinter和pillow图像处理1秒后变半透明

"""
    1秒后变成半透明.py
"""
__author__ = '李兴球'
__date__ = '2020/10/3'

import time
from tkinter import *
from PIL import Image,ImageTk

def setalpha(rawim,a):
    """
       设置图形对象的alpha通道值
    """     
    r, g, b, alpha = rawim.split()             # 分离r,g,b,a通道
    alpha = alpha.point(lambda i: i>0 and a)   # 把非透明点的alpha值换成a
    rawim.putalpha(alpha)                      # 替换im的alpha通道
    return rawim                                  
    
root = Tk()                                    # 新建窗口
cv = Canvas(root,width=480,height=360,bg='white')# 新建画布
cv.pack()                                        # 放置画布

bg = ImageTk.PhotoImage(file='电影院外面.png')   # 背景图
cv.create_image(240,180,image=bg)                # 创建背景

im = Image.open("cat.gif")                     # 打开图像
im = im.convert('RGBA')                        # 转换成RGBA模式
img = ImageTk.PhotoImage(im)                   # 包装成能在画布上显示的图
 
cat= cv.create_image(240,220,image=img)        # 创建小猫图
cv.update()                                    # 更新画布显示

time.sleep(1)                                  # 等待1秒钟

im = setalpha(im,128)                          # 修改im的alpha通道
img = ImageTk.PhotoImage(im)                   # 包装成能在画布上显示的 
cv.itemconfig(cat,image=img)                   # 重新配置下cat的图像
cv.update()                                    # 更新画布显示
root.mainloop()                                # 事件循环
        

发表在 pillow, python, tkinter | 标签为 , , , | 留下评论

反转序列练习程序

"""
  反转序列练习程序
  ReverseSequence.py
"""
def swap(T, i, j):
   """在列表中交换索引为i和j的数据"""
   temp = T[i]
   T[i] = T[j]
   T[j] = temp
 
def reverse_list(T):
   """ 反转列表T """
   i = 0
   j = len(T)-1
   while i
							
发表在 python | 标签为 , , | 留下评论

蒙特卡落法扔骰子概率游戏_帮国外留学生做的作业

"""
   蒙特卡落法扔骰子概率游戏_帮国外留学生做的作业
"""
import random

def throwDice(m, k, R):

    a = []
    for _ in range(m):
        a.append(R.randrange(1,k+1))
    return tuple(a)

def main(SEED=237):

   m = int(input('请输入骰子数量:'))
   while m<1:
       print('骰子数量最少要是1')
       m = int(input('请输入骰子数量: '))

   k = int(input('请输入每枚骰子的面数: '))
   while k<2:
       print('骰子面数最少要是2')
       k = int(input('请输入每枚骰子的面数:: '))

   numberOfTrials = int(input('请输入测试次数: '))
   while numberOfTrials<1:
       print('测试次数最少要是1')
       numberOfTrials = int(input('请再次输入测试次数: '))
    

   # m  骰子数
   # k 面数

   # 随机数产生器
   rng = random.Random(SEED) 

   # 记录投骰子后每面的和的列表,由于和最少是2,所以0和1这两个索引号用不到。
   frequency = ((m*k)+1)*[0]  #  [0,0,0,0,0,0,0,0,0,0,0,0,0]
   for i in range(numberOfTrials):
      t = throwDice(m,k,rng)
      frequency[sum(t)] += 1;

   print()

   # 计算概率等
   relativeFrequency = [0, 0]   
   Experimental = [0,0]
   for i in range(2, len(frequency)):
      relativeFrequency.append(frequency[i]/numberOfTrials)      
      Experimental.append(int(relativeFrequency[i] * 100))

   print()

   # 格式化打印结果
   f1 = "{0:<10}{1:<22}{2:<22}{3:<22}"
   f2 = 71*"-"
   f3 = "{0:>3}       {1:<22}{2:<22.6f}{3:<2d} %"
   print(f1.format("Sum","Frequency","Relative Frequency","Experimental"))
   print(f2)
   for i in range(2, len(frequency)):
      print(f3.format(i, frequency[i],relativeFrequency[i], Experimental[i]))

   print()

if __name__ == '__main__':

    main()
    

这里是作业原文

CSE 20

Beginning Programming in Python Programming Assignment 7

In this project you will write a Python program that simulates a dice game. The number of sides on each die, the number of dice, and the number of simulations to perform will all be taken from user input. After each simulation, your program will calculate the sum of the numbers on the dice. Then, after the specified number of simulations, your program will produce an estimate of the probability of each possible sum. This is a simple version of a well-known computational technique known as Monte Carlo. Begin by carefully studying the example DiceProbabilities.py posted on the class webpage under /Examples/pa7. Your program will be a direct generalization of that example, and will be called Probability.py.

The Monte Carlo method was invented by scientists working on the atomic bomb in the 1940s. They named their technique for the city in Monaco famed for its casinos. The core idea is to use randomly chosen inputs to explore the behavior of a complex dynamical system. These scientists faced difficult problems of mathematical physics, such as neutron diffusion, that were too complex for a direct analytical solution, and must therefore be evaluated numerically. They had access to one of the earliest computers (ENIAC), but their models involved so many dimensions that exhaustive numerical evaluation was prohibitively slow. Monte Carlo simulation proved to be surprisingly effective at finding solutions to these problems. Since that time, Monte Carlo methods have been applied to an incredibly diverse range of problems in science, engineering, and finance. In our case, a pure analytical solution is possible for the probabilities that we seek, but since this is not a class in probability theory, we will take the computational/experimental approach. You can find a very interesting history of early computing machines, the Monte Carlo Method, and the development of the atomic bomb in the book Turing's Cathedral by George Dyson. Follow the link

https://en.wikipedia.org/wiki/Monte_Carlo_method

for an article on Monte Carlo methods.

A normal six-sided die is a symmetrical cube that, when thrown, is equally likely to land with any of its six faces up (provided its mass distribution is uniform.) By labeling its faces with the numbers 1-6, we have a physical device capable generating random numbers in the set {1, 2, 3, 4, 5, 6}. It is possible to make perfectly symmetrical dice in the shape of any of the so-called Platonic Solids, whose number of sides are 4 (Tetrahedron), 6 (Cube), 8 (Octahedron), 12 (dodecahedron), and 20 (Icosahedron).

See https://www.mathsisfun.com/geometry/platonic-solids-why-five.html for a nice explanation as to why these are the only perfectly symmetrical shapes possible for dice. For purposes of this project however, we shall assume it is possible to make dice with any number of faces in such a way that each face is equally likely to land in the up position. To simulate a throw of a k-sided die in Python, use the randrange() function belonging to the random module, which will be discussed in class and illustrated in the example DiceProbability.py.

Your program will include a function called throwDice() with heading

def throwDice(m, k, R):

that uses a random number generator R to simulate a throw of independent, symmetrical k-sided dice, then returns the result as an m-tuple. Your program will also a program called main() with heading

def main(SEED=237):

The heading for main() indicates that it takes either one or zero arguments. If called with no arguments, the parameter SEED is assigned the default value 237. Otherwise SEED is assigned the value of the argument. The parameter SEED will be used to seed the random number generator. Function main() will prompt for, and read three quantities: the number of dice, the number of sides on each die, and the number of simulations (or throws) to perform. These prompts will be robust, in that, if the user enters an integer less than 1 for the number of dice, or an integer less than 2 for the number of sides on each die, or an integer less than 1 for the number of simulations, then your program will continue to prompt until adequate values are entered. Your program is not required to handle non-integer input like floats or general strings.

Once these values have been entered by the user, your program will perform the specified number of simulations, recording the frequency of each possible sum as it goes. To do this you must first calculate the range of possible sums, and create a list of appropriate length. If you call this list frequency[], for instance, then by the time the simulations are complete, frequency[i] will be the number of simulations in which the sum of the dice was i. Again, emulate the example DiceProbability.py to accomplish this. Calculate the relative frequency for each possible sum (the number of simulations resulting in that sum, divided by the total number of simulations). Also calculate the experimental probability for each sum (the relative frequency expressed as a percent.) Print out these quantities in a table formatted as in the sample runs below.

$ python Probability.py Enter the number of dice: 3

Enter the number of sides on each die: 6 Enter the number of trials to perform: 10000

Sum Frequency Relative Frequency Experimental Probability

----------------------------------------------------------------------

3

45

0.00450

0.45

%

4

126

0.01260

1.26

%

5

281

0.02810

2.81

%

6

494

0.04940

4.94

%

7

677

0.06770

6.77

%

8

968

0.09680

9.68

%

9

1191

0.11910

11.91

%

10

1257

0.12570

12.57

%

11

1257

0.12570

12.57

%

12

1164

0.11640

11.64

%

13

932

0.09320

9.32

%

14

683

0.06830

6.83

%

15

469

0.04690

4.69

%

16

282

0.02820

2.82

%

17

122

0.01220

1.22

%

18

52

0.00520

0.52

%

$

As usual, represents the command line prompt. The output table begins with the heading shown, then a line of 70 dashes "-". The body of the table presents the sum right justified in a field of width 4, the frequency right justified in a field of width 11, the relative frequency accurate to 5 decimal digits and right justified in field of width 18, and the experimental probability accurate to 2 decimal digits and right justified in a field of width 21. Note the blank lines before, after and within program output. The following sample run shows what happens when the user enters invalid parameters.

$ python Probability.py Enter the number of dice: -1

The number of dice must be at least 1 Please enter the number of dice: 4

Enter the number of sides on each die: 1

The number of sides on each die must be at least 2 Please enter the number of sides on each die: 7

Enter the number of trials to perform: -1 The number of trials must be at least 1

Please enter the number of trials to perform: 10000

Sum Frequency Relative Frequency Experimental Probability

----------------------------------------------------------------------

4

6

0.00060

0.06

%

5

18

0.00180

0.18

%

6

52

0.00520

0.52

%

7

83

0.00830

0.83

%

8

166

0.01660

1.66

%

9

273

0.02730

2.73

%

10

346

0.03460

3.46

%

11

469

0.04690

4.69

%

12

630

0.06300

6.30

%

13

738

0.07380

7.38

%

14

836

0.08360

8.36

%

15

930

0.09300

9.30

%

16

930

0.09300

9.30

%

17

985

0.09850

9.85

%

18

844

0.08440

8.44

%

19

737

0.07370

7.37

%

20

589

0.05890

5.89

%

21

526

0.05260

5.26

%

22

326

0.03260

3.26

%

23

238

0.02380

2.38

%

24

124

0.01240

1.24

%

25

86

0.00860

0.86

%

26

49

0.00490

0.49

%

27

13

0.00130

0.13

%

28

6

0.00060

0.06

%

$

To get full credit, your output must be formatted exactly as above. See the examples FormatNumbers1.py and FormatNumbers2.py on the webpage in /Examples/pa7 to see how this can be accomplished. If main() is called with no arguments, so the random number generator is seeded with the integer 237, then

your numbers should exactly match those above. Here is a rough skeleton of the logic of function main()

and the conditional that calls main()def main(SEED=237):

# get number of dice, number of sides on each die,

# and number of trials

# Create a random number generator rng = random.Random(SEED)

# perform simulation, record frequencies

# calculate relative frequencies

# tabulate results

# end main()

if name =='__main ': main()

# end if

You can experiment with other seeds by importing Probability in interactive mode, then running main() on a single integer argument. However, main() in the conditional if name =='__main ': must be called with no arguments so as to use the seed 237, which will facilitate automated grading of your project.

What to turn in

Submit Probability.py to the assignment pa7 on Gradescope before the due date. As always, start early and ask plenty of questions.

发表在 python | 标签为 , , , | 留下评论

十二届蓝桥杯资料3月份模拟考试题目Python中高级试卷与参考答案与视频解说

李兴球python蓝桥杯模拟试卷

需要全部资料请:

成为会员后,登陆才能继续浏览!联系微信scratch8即可办理会员。
(会员专属:能浏览所有文章,下载所有带链接的Python资源。)

发表在 python, turtle, 视频教程 | 标签为 , , | 留下评论

python奥特曼打怪兽gameturtle版

python奥特曼打怪兽gameturtle版

"""
  奥特曼打怪兽_按键.py
  本程序设计了Background类,
  还设计了继承自Sprite类的Actor类及Monster类。
  为了让奥特曼能发射子弹,增加了按f键发红色小方块的功能。  
"""
import glob
import time
from tkinter import *
from PIL import Image
from random import randint
from gameturtle import Sprite,group

class Background:
     def __init__(self,cv,image):
         """image是磁盘上的一张图片"""
         self.w = int(cv.cget('width'))
         self.h = int(cv.cget('height'))
         self.cv = cv
         image = Image.open(image)
         im = image.convert("RGBA")
         self.pic1 = Sprite(cv,im)
         self.pic2 = Sprite(cv,im,pos=(1.5*self.w,self.h/2))            
    
class Actor(Sprite):
    def __init__(self,canvas,frames,pos=None,
                 visible=True,heading=0,tag='sprite'):
        Sprite.__init__(self,canvas=canvas,frames=frames,pos=pos,
                        visible=visible,heading=heading,tag=tag)
        self.dx = 0                  # 水平速度
        self.dy = 0                  # 垂直速度
        self._canvas.bind("",self.moveback)
        self._canvas.bind("",self.moveup)
        self._canvas.bind("",self.movedown)
        self._canvas.bind("",self.movefd)
        self._canvas.bind("",self.movexstop)
        self._canvas.bind("",self.movexstop)        
        self._canvas.bind("",self.moveystop)
        self._canvas.bind("",self.moveystop)
       
    def movexstop(self,event):         
         self.dx = 0
         
    def moveystop(self,event):
         self.dy = 0
         
    def moveback(self,event):
          self.dx = -4
          
    def movefd(self,event):
          self.dx = 4
          
    def moveup(self,event):
          self.dy = -4
          
    def movedown(self,event):
          self.dy = 4          

         
class Monster(Sprite):     
    def __init__(self,canvas,frames,pos=None,
                 visible=False,heading=0,tag='monster'):
        Sprite.__init__(self,canvas=canvas,frames=frames,pos=pos,
                        visible=visible,heading=heading,tag=tag)
        y = randint(0,360)
        self.goto(self._cv_width+100,y)
        self.randomshape()               # 随机造型
        self.setrotmode(1)               # 旋转模式为左右翻转  
        self.right(180)                  # 向右转180度   
        self.show()                      # 显示
        
if __name__ == '__main__':
    
    root = Tk()
    root.title('奥特曼的诞生')

    cv = Canvas(width=480,height=360)
    cv.pack()                            # 放置画布
    cv.focus_force()                     # 设置画布焦点

    bg = Background(cv,'1.png')

    manpic = Image.open('奥特曼.png')    # 奥特曼的造型图
    sp = ultraman = Actor(cv,manpic)     # 实例化奥特曼

    monster_pics = glob.glob('res/*.png')# 怪兽造型图列表
    monster_pics = [Image.open(im) for im in monster_pics]
    c = 0
    zd_pic = Image.new("RGBA",(10,10),color='red')   # 子弹图
    cv.bind("",lambda event:Sprite(cv,zd_pic,pos=sp.pos(),tag='bullet'))
    while True:
        bg.pic1.addx(-10)             # 背景图片1的x坐标减小 
        if bg.pic1.xcor() <= -bg.w/2:
           bg.pic1.setx(1.5*bg.w) 
        bg.pic2.addx(-10)             # 背景图片2的x坐标减小  
        if bg.pic2.xcor() <= -bg.w/2:
           bg.pic2.setx(1.5*bg.w)
        c = c + 1
        if c%100==0:Monster(cv,monster_pics)             
        ms = group(cv,'monster')
        [m.fd(2) for m in ms]
        [m.kill() for m in ms if m.xcor()<0 or m.collide_tag('bullet')]

        ultraman.addx(sp.dx)
        ultraman.addy(sp.dy)         
        if ultraman.collide_tag('monster'):sp.dy=10

        bullets = group(cv,'bullet')       
        [b.fd(10) for b in bullets]
        [b.kill() for b in bullets if b.xcor()>480]
        
        cv.update()                   # 刷新画布显示
        time.sleep(0.01)              # 等待0.01秒


需要全部源代码和素材请

成为会员后,登陆才能继续浏览!联系微信scratch8即可办理会员。
(会员专属:能浏览所有文章,下载所有带链接的Python资源。)

发表在 gameturtle, python, tkinter, turtle | 标签为 , | 留下评论

python游戏编程必备_向后滚动的背景三版本

李兴球Python向后滚动的背景


在电子游戏开发中,我们可以看到角色向前移动,但是它的x坐标并没有改变,这都是由于相对运动所导致的。实际上是背景图片在向后移动。
下面是版本一,用纯粹的turtle模块制作的.

"""
   turtle版向后滚动的背景.py
   本程序把两个和屏幕大小一样的海龟对象,
   错开屏幕宽度的距离,以实现向后滚动效果。
"""
import time
from turtle import Turtle,Screen,TK,Shape

w,h = 480,360 
screen = Screen()
screen.tracer(0,0)
screen.setup(480,360)
screen.title('turtle版向后滚动的背景by李兴球')

bg = TK.PhotoImage(file='1.png')  
sp = Shape('image',bg)            # 新建造型
screen.addshape('bg',sp)          # 把造型注册到屏幕

bg1 = Turtle(shape='bg')          # 新建背景1  
bg1.penup()                       # 背景1抬笔 
bg1.speed(0)
bg2 = bg1.clone()                 # 克隆背景1为bg2 
bg2.setx(w)                       # 错位bg2

while 1:
    pass

下面是有tkinter制作的版本。

"""
tkinter版向后滚动的背景.py
本程序在画布上新建两张图片,
并且使它们错开画布的一个宽度距离,
通过画布的move方法移它们,从而实现滚动背景效果。
"""
import time
from tkinter import *
from PIL import Image,ImageTk

root = Tk()
root.title('kinter版向后滚动的背景by李兴球')

w,h = 480,360
cv = Canvas(width=w,height=h)                  # 新建画布
cv.pack()

bgpic = Image.open('1.png')
bgpic = ImageTk.PhotoImage(bgpic)

bg1 = cv.create_image((w/2,h/2),image=bgpic)   # 创建图像bg1
bg2 = cv.create_image((1.5*w,h/2),image=bgpic) # 创建图像bg2

while True:
    pass

下面是用gameturtle模块制作的版本,此版本制作的代码最简单,最好理解。

"""
   gameturtle版向后滚动的背景.py
   本程序新建两个角色,通过错开一个画布宽度的范围,
   从而实现向后滚动的背景效果。
"""
from gameturtle import *

root = Tk()
root.title('gameturtle版向后滚动的背景by李兴球')

w,h = 480,360
cv = Canvas(width=w,height=h)
cv.pack()

bgpic = Image.open('1.png')
bg1 = GameTurtle(cv,bgpic)                 # 新建背景1(默认在中间)
bg2 = GameTurtle(cv,bgpic,pos=(1.5*w,h/2)) # 新建背景2

while True:
    bg1.addx(-2)                           # 背景1的x坐标减小 
    if bg1.xcor() <= -w/2:bg1.setx(1.5*w) 
    bg2.addx(-2)
    if bg2.xcor() <= -w/2:bg2.setx(1.5*w)  # 背景2的x坐标减小
    cv.update()                            # 更新画布显示
    time.sleep(0.01)

需要以上三个程序完整源代码,及相关素材请

成为会员后,登陆才能继续浏览!联系微信scratch8即可办理会员。
(会员专属:能浏览所有文章,下载所有带链接的Python资源。)

发表在 gameturtle, python, tkinter, turtle | 标签为 | 留下评论

gameturtle模块旋转模式测试程序

李兴球Python海龟gameturtle模块旋转模式测试程序

"""
   gameturtle模块旋转模式测试程序。
   本程序需要gameturtle0.21版支持。
"""
from gameturtle import *

root = Tk()
root.title('gameturtle旋转模式测试程序')
cv = Canvas(width=480,height=360,bg='cyan')
cv.pack()

frames = [Image.open(f"res/{i}.png") for i in range(16)]

cat1 = Sprite(cv,frames,pos=(150,100))   # 默认为360度旋转
cat2 = Sprite(cv,frames,pos=(150,200))
cat2.setrotmode(1)                       # 设置为左右旋转
cat3 = Sprite(cv,frames,pos=(150,300))
cat3.setrotmode(2)                       # 设置为不旋转

ft = ('',18,'normal')
cv.create_text((300,100),text='360度旋转',font=ft)
cv.create_text((300,200),text='左右旋转',font=ft)
cv.create_text((300,300),text='不旋转',font=ft)

while 1:
    cat1.left(1);cat1.nextshape()        # 左转并换造型
    cat2.right(1);cat2.nextshape()       # 右转并换造型
    cat3.left(1);cat3.nextshape()        # 左转并换造型
    cv.update()                          # 更新画布显示
    time.sleep(0.01)                     # 等待0.01秒 

发表在 gameturtle, python, tkinter, turtle | 留下评论

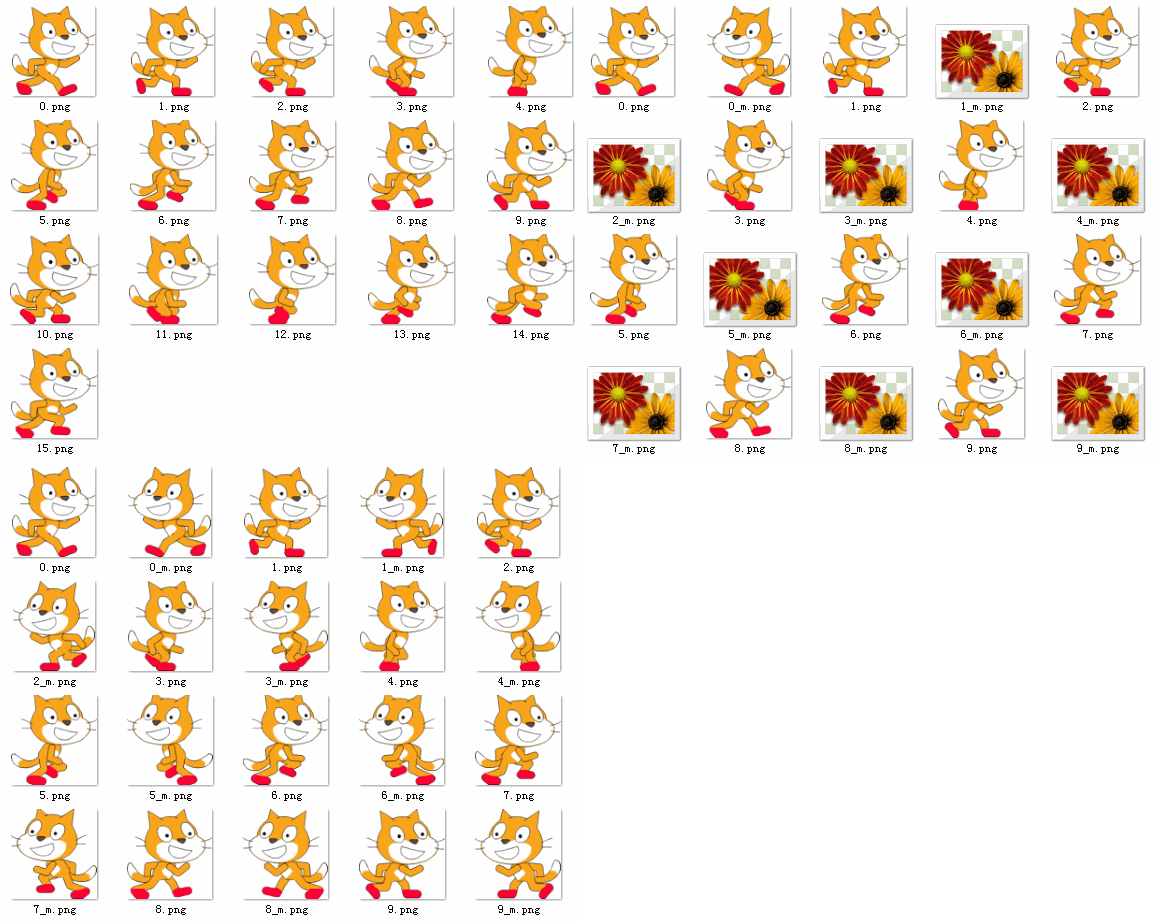
f字符串示例与成批镜像图及列表推导式例子_python pillow mirror image

李兴球Python左右翻转mirro图像r

李兴球Python左右翻转mirro图像r

"""
   f字符串示例与成批镜像图及列表推导式例子.py
"""
import os
from PIL import Image,ImageOps

path = 'E:\\Python\\GameTurtle游戏海龟模块\\0.21版GameTurtle\\res0'

# 打开path文件夹下面的16张png猫图
ims = [Image.open(f"{path}{os.sep}{i}.png") for i in range(16)]

# 对每张猫图进行镜像(水平翻转)
ims_mirror = [ImageOps.mirror(im) for im in ims]

# 在原文件夹保存每张镜像后的猫图
[ims_mirror[i].save(f"{path}{os.sep}{i}_m.png") for i in range(16)]

发表在 python | 标签为 , , | 留下评论

由电脑来猜数的游戏,非普通猜数小游戏。

李兴球Python由电脑来猜数的小游戏

""" 
   由电脑来猜数的游戏,非普通猜数小游戏。
   这个由于相对于通常的猜数游戏是返过来的。
   通常的猜数游戏是电脑随机出一定范围内的一个数,由人来猜。
   本游戏是人在心里面想一个数,由电脑来猜。
   难道电脑知道人心里想的是什么? 
"""
from random import randint

print('这是一个由电脑来猜数的小游戏,不同于普通的猜数游戏。')
print('这个游戏是电脑问操作者,根据操作者的信息输入,')
print('来最终确定操作者心里想的到底是什么数字。')
print('\n')
print('------hi--------')
print('我是人工智能小明,我能知道你心里想的是哪个数。')
print('请输入比你所想的数字的更小的一个数和更大的一个数。')

while True:
    low = int(input())
    high = int(input())
    if low > high:
        print('请按从小到大的顺序输入。')
    else:
        break

print('嗯,我知道你心里所想的数字在',low,'和',high,'之间了。')

counter = 0
running = 1
while running==1:
    guess = (low+high)//2
    print('\n你的数字比',guess,'更小,更大还是相等?')
    print('请输入L,表示更小,G表示更大,E表示相等。')
    g = input("L, G 或 E:")
    while True:
        pass                                       # 此处忽略一点点代码
        
if running == 0:
    print('\n猜出你心里所想的数字了,它是',guess)
else:
    print('\n你是不是在逗我,世界上不存在这样的数。')
input('按任意键结束')

需要全部源代码,请

成为会员后,登陆才能继续浏览!联系微信scratch8即可办理会员。
(会员专属:能浏览所有文章,下载所有带链接的Python资源。)

发表在 python | 标签为 , , , | 留下评论

tkinter简易迷宫游戏

李兴球Python tkinter颜色碰撞检测简易迷宫游戏

李兴球Python tkinter颜色碰撞检测简易迷宫游戏

"""
   简易迷宫游戏.py
   本程序需要gameturtle模块0.2版支持。下面的gameturtle模块由于导入了tkinter和pillow命令,所以可以直接使用它们.
"""
from gameturtle import *

class Key:
    def __init__(self,cv,key):
        self._canvas = cv
        self._key = key
        self._down = False
        self._canvas.bind("" % key,self._press)        
        self._canvas.bind("" % key,self._release)
        
    def _press(self,event):
        self._down = True

    def _release(self,event):
        self._down = False

    def isdown(self):
      return self._down

RED = (255,0,0)                         # 红色表示墙壁

root = Tk()
root.title('gameturtle简易迷宫游戏by李兴球')
cv = Canvas(width=640,height=648,bg='white')
cv.pack()

# 生成背景
maze_pic = Image.open('maze1.gif')     # 注意gif,jpg等都要转换成RGBA模式
maze_pic =  maze_pic.convert("RGBA")   # 转换成RGBA模式,这样有透明通道
maze = GameTurtle(cv,maze_pic)

# 生成蓝色方块
blue_pic = Image.new("RGBA",(12,12),color='blue')
square = GameTurtle(cv,blue_pic)
square.center()                        # 到画布中心点

up_key = Key(cv,"Up")                  # 实例化向上方向箭头
down_key = Key(cv,"Down")              # 实例化向下方向箭头
right_key = Key(cv,"Right")            # 实例化向右方向箭头
left_key = Key(cv,"Left")              # 实例化向下方向箭头
cv.focus_force()                       # 设置画布焦点

cors = []                              # 记录单击时的坐标点的列表
def savexy(event):
    s = ','.join(map(str,cors))        # 把坐标转换成字符串用逗号连接
    f = open('坐标表.txt',mode='w')    # 打开文件 
    f.write(s)                         # 写s 
    f.close()                          # 关闭文件

# 绑定鼠标左键单击事件
cv.bind("",lambda event:cors.append((event.x,event.y)))
cv.bind("",savexy)

while True: 
    if right_key.isdown():              # 如果按右箭头        
            square.addx(2)
            if square.collide_color(RED):
                square.addx(-2)
    if left_key.isdown():               # 如果按左箭头        
            square.addx(-2)
            if square.collide_color(RED):
                square.addx(2)
    if up_key.isdown():                 # 如果按上箭头        
            square.addy(-2)
            if square.collide_color(RED):
                square.addy(2)
    if down_key.isdown():               # 如果按下箭头        
            square.addy(2)
            if square.collide_color(RED):
                square.addy(-2)            
    cv.update()                         # 更新画布 
    time.sleep(0.01)

发表在 gameturtle, python, turtle | 标签为 , , | 留下评论

简易单击爆炸效果

李兴球python海龟turtle简易单击爆炸效果

"""
   简易单击爆炸效果.py
   本程序演示许多橙色的方块从上往下移,单击它们会爆炸!
   这是一个演示矩形碰撞的小游戏,rect模块是自己编写的。
   它里面有overlap、bounce_on_edge、collidepoint等方法。
   这个程序只有两个海龟对象,一个用于不断地重画所有的橙色矩形,
   另一个海龟对象用来显示延时效果,注意本程序用了ontimer模拟异步执行。
   本程序编写日期2020年11月6号,预备作为11月13号的课堂讲解程序。
"""
import rect
import time
import turtle
import random

def draw_rect(r,color):
    """
      画矩形函数
      r:一个矩形
      color:颜色
    """
    turtle.fillcolor(color)
    turtle.goto(r.left,r.top)
    turtle.pendown()
    turtle.begin_fill()
    for _ in range(2):
        turtle.fd(r.width)
        turtle.rt(90)
        turtle.fd(r.height)
        turtle.rt(90)
    turtle.end_fill()
    turtle.penup()

width = 800
height = 640
turtle.bgcolor('black')
turtle.setup(width,height)
turtle.title('简易单击爆炸效果by李兴球')
turtle.tracer(0,0)
turtle.speed(0)
turtle.penup()
turtle.ht()

es = []
for _ in range(40):
    x = random.randint(-width/2,width/2)
    y = random.randint(height/2,height*2)
    e = rect.Rect(x,y,40,40)
    e.dy = -5
    e.draw=True
    es.append(e)

def explode(x,y):
    boom.goto(x,y)
    boom.showturtle()
    t = 0
    def wait():
        nonlocal t
        t = t + 1
        if t<10:
            screen.ontimer(wait,10)
        else:
            boom.hideturtle()
    wait()
def hide(x,y):
    for e in es:
        if e.draw and e.collidepoint(x,y):
           e.draw=False
           explode(x,y)
           
screen = turtle.getscreen()
screen.addshape('boom.gif')
boom = turtle.Turtle(shape='boom.gif',visible=False)
boom.speed(0)
boom.penup()
screen.onclick(hide)
while True:
    for e in es:
        e.move()
        if e.top < -height/2:       # 到了最下面
            e.left = random.randint(-width/2,width/2)
            e.top=random.randint(height/2,height*2)
    turtle.clear()
    for e in es:
        if e.draw: draw_rect(e,'orange')

    turtle.update()
    time.sleep(0.01)


需要完整项目的源代码和素材,请

成为会员后,登陆才能继续浏览!联系微信scratch8即可办理会员。
(会员专属:能浏览所有文章,下载所有带链接的Python资源。)

发表在 python, turtle | 标签为 | 留下评论

color_collide_color命令测试程序

李兴球python颜色碰到颜色color_collide_color

"""
   color_collide_color命令测试程序
   本程序用一个十字架彩色图形去和彩色小方块进行重叠,
   会显示出重叠区域的颜色。本程序需要gameturtle0.2版支持。
"""
from gameturtle import *
from random import randint,choice
from PIL import ImageColor

w,h = 480,360                    # 定义画布宽高

cs = ['red','orange','yellow','green','cyan','lime',
      'blue','purple','pink','magenta','gray','gold']

cs = [ImageColor.getcolor(c,'RGB') for c in cs]

root = Tk()
root.title('color_collide_color颜色碰撞检测命令')

cv = Canvas(width=w,height=h,bg='black')
cv.pack()

# 生成12个彩色小方块
for c in cs:
    x = randint(0,w)
    y = randint(0,h)
    pic = Image.new("RGBA",(20,20),color=c)
    Sprite(cv,pic,pos=(x,y))

cross_cs = [(255,0,51),(0,255,0),(0,0,153),(255,204,51)]
cross_pic = Image.open('彩色十字架.png')
cross = GameTurtle(cv,cross_pic)

while True:
    mx,my = cv.mouse_pos()
    cross.goto(mx,my)

    for c1 in cross_cs:
        for c2 in cs:
            if cross.color_collide_color(c1,c2):
                root.title(str(c1) + "碰到了" + str(c2))
    
    cv.update()
    time.sleep(0.01)
    

发表在 gameturtle, python, turtle | 标签为 , , | 留下评论

turtle制作的打字游戏雏形程序by李兴球

李兴球Python打字机游戏雏形

"""
   turtle制作的打字游戏雏形程序
   读懂下面的代码,你就能自己制作一个打字练习程序了!
   到时候不要忘记了感谢我哦。
"""
import turtle

def keypress(char):
    pingxiang.clear()
    pingxiang.write(char,align='center',font=('',150,'normal'))
    screen.title(char)
    
def carriage_return():
    """回车
    """
    pingxiang.clear()
    pingxiang.write('回车',align='center',font=('',150,'normal'))
    screen.title('回车')    
    
def presser(char):
    """返回无参函数
    """
    def func():
        keypress(char)
    return func

pingxiang = turtle
pingxiang.color('blue')
screen = turtle.getscreen()
screen.setup(480,360)
screen.bgcolor('yellow')
screen.title('turtle制作的打字游戏雏形程序by李兴球')
turtle.ht()

# 注意每一个按键到屏幕的onkey事件。
for char in 'abcdefghijklmnopqrstuvwxyz':
    screen.onkey(presser(char), char)

screen.onkey(carriage_return, 'Return')
screen.listen()
screen.mainloop()

发表在 python, turtle | 标签为 | 留下评论

矩阵取回形数海龟旋转法

李兴球Python取回形数


一个数字矩形,从左上角开始向下逆时针不断取数,一直到取完所有数叫回形取数。网上有很多现成的方法,下面这种方法用的是“海龟”法。在程序中,创建了一个”虚拟”的海龟,让它沿着矩阵的边不断向左旋转即可。
以下是部分源代码。

"""
   gameturtle.py
   本程序纯粹定义一个抽象的海龟类
   坐标系为左上角为原点,y方向下为正,方向0为向右,90度为向下!
   这个tkinter画布坐标系及pygame坐标与计算机屏幕分辨率坐标系都是一致的!
   测试程序为回形取数算法。主要方法是先在最大矩阵左上角,逆时针旋转一周,
   再前进一个单位,这个时候到达了内层矩阵的左上角。
   由于内层矩阵比外层矩阵的行列数分别小2,所以下面的m和n都要减2!
   这个程序也是gameturtle的最原始版本。
"""
__author__ = '李兴球'
__date__ = '2020/10/31'
__blog__ = 'www.lixingqiu.com'
__version__ = 0.01

import time
import math

class GameTurtle:
    
    def __init__(self):
     
        self._heading = 0     # 初始朝向        
        self._pos = (0,0)     # 初始坐标
    pass

Sprite = GameTurtle           # 定义类的别名

if __name__ == "__main__":

    t = GameTurtle()
   
    m = 3                    # 行数
    n = 4                    # 列数
    data_list = []
    x = 1
    for r in range(m):
        nest = []
        for c in range(n):
            nest.append(x)
            x = x + 1
        data_list.append(nest)
    print(data_list)
                
    t.setheading(90)        # 注意这里是向下!
    points = [t.pos()]      # 第一个坐标点
   
    def forappend():        
        t.fd(1)
        if t.pos() not in points:
            points.append(t.pos())                        

    while True:
        # points中没有这个坐标点就加进去
        # 发现已经有点在points中,那么for循环可以提前结束,下面的并没有提前结束         
        [forappend() for r in range(m-1)]
        t.left(90)
        
        [forappend() for c in range(n-1)]        
        t.left(90)
        
        [forappend() for r in range(m-1,0,-1)]           
        t.left(90)

        if m==1:break 
        [forappend() for c in range(n-2,0,-1)]        
        t.left(90)

        # 继续向前移动一格到达内圈左上角,准备内层遍历。
        forappend()     
        # 
        m = m - 2
        n = n - 2     
        if m<1 or n <1:
            print('终止条件到达')
            break
    datas = [ data_list[y][x] for x ,y in points]
    print(datas)

需要完整代码,请

成为会员后,登陆才能继续浏览!联系微信scratch8即可办理会员。
(会员专属:能浏览所有文章,下载所有带链接的Python资源。)

发表在 gameturtle, python, turtle | 留下评论

工信部蓝桥杯Python取回形取数答案

"""
回形取数就是沿矩阵的边取数,若当前方向上无数可取或已经取过,则左转90度。
一开始位于矩阵左上角,方向向下。

"""
# 输入行数与列数,
# map对序列中的每个数据取整,返回map对象,再用list转换成列表
row,col=list(map(int,input().split(',')))

# 形成数据矩形,二维嵌套列表
data_list=[]
c = 1
for x in range(row):
    nest = []
    for y in range(col):
        nest.append(c)
        c  = c + 1
    data_list.append(nest)
    
begin_r = row                # 开始行
begin_c = col                # 开始列

rounds=0                     # 表示圈
answers=[]                   # 结果列表

def get_one_round(begin_r,begin_c,rounds):
    """递归函数,获取一圈数据,从左上往下逆时针旋转。"""
    for r in range(rounds,begin_r):  # 列固定,行变化      
        answers.append(data_list[r][0+rounds])
        
    for c in range(1+rounds,begin_c): # 行固定,列变化        
        answers.append(data_list[begin_r-1][c])
        
    for r in range(begin_r-2,rounds-1,-1):
        # 开始的列要大于rounds才添加到列表中,防止重复添加数据
        if begin_c > rounds:answers.append(data_list[r][begin_c-1])
        
    for c in range(begin_c-2,rounds,-1):
        if begin_r > rounds: answers.append(data_list[rounds][c])
        
    rounds+=1
    if(rounds>=begin_r-1 or rounds>=begin_c-1): return
    # 接下来获取更小的一圈的数据
    get_one_round(begin_r-1,begin_c-1,rounds)
    
get_one_round(begin_r,begin_c,rounds)

for i in range(len(answers)):
    print(answers[i], end=' ' if i != len(answers)-1 else '')


发表在 python | 标签为 , | 留下评论

tkinter多线程左右移动小猫测试程序

李兴球Pythontkinter多线程左右移动小猫测试程序

"""
   tkinter多线程左右移动小猫测试程序.py
   本程序需要gameturtle0.2版支持。
"""
from gameturtle import *
from threading import Thread

def cat_thread(color):
    cv1 = Canvas(width=280,height=110,bg=color)
    cv1.pack()
    cat1 = GameTurtle(cv1,Image.open('c1.png'))
    cat1.shapesize(0.5)
    while 1:
        for x in range(100):
            cat1.fd(1)
            cv1.update()
            time.sleep(0.01)
        for x in range(100):
            cat1.bk(1)
            cv1.update()
            time.sleep(0.01)
    
root = Tk()
root.title('tkinter多线程左右移动小猫测试程序by李兴球')

def begin():
    c = Thread(target=cat_thread,args=('cyan',))
    c.start()
    c = Thread(target=cat_thread,args=('green',))
    c.start()

button = Button(text='\n 启  动 \n',command=begin)
button.pack()

root.mainloop()

发表在 gameturtle, python, tkinter, turtle | 标签为 , | 留下评论

太阳地球月亮旋转曲线测试程序

李兴球Python太阳地球月亮太阳系旋转曲线程序

"""
太阳地球月亮旋转曲线测试程序
简单的利用三角函数制作的螺旋曲线。
本程序需要gameturtle0.2版支持。
"""
from gameturtle import *
from math import cos,sin,radians

# 新建窗口
root = Tk()
root.geometry('640x640+0+30')
root.title('太阳地球月亮by李兴球')

# 铺设画布
cv = Canvas(width=640,height=640,bg='black')
cv.pack()

# 新建太阳
sunpic = Image.new("RGBA",(30,30),color='red')
sun = GameTurtle(cv,sunpic)

# 新建地球
earthpic = Image.new("RGBA",(50,50),color='green')
earth = GameTurtle(cv,earthpic,pos=(520,320))
earth.radius = 200                # 自定义属性
earth.angle = 0                   # 自定义属性

# 新建月亮
moonpic = Image.new("RGBA",(10,10),color='white')
moon = GameTurtle(cv,moonpic)
moon.radius = 80                 # 自定义属性
moon.angle = 0                   # 自定义属性
moon.pencolor('cyan')
frames = 0
while True:
    sun.right(0.01)

    x = cv.center()[0] + earth.radius * cos(radians(earth.angle))
    y = cv.center()[1] + earth.radius * sin(radians(earth.angle))
    earth.goto(x,y)
    earth.angle += 0.01
    
    x = earth.position()[0] + moon.radius * cos(radians(moon.angle))
    y = earth.position()[1] + moon.radius * sin(radians(moon.angle))
    moon.goto(x,y)
    if frames % 120 == 0 : moon.dot()
    moon.angle += 0.05

    cv.update()
    frames += 1

发表在 gameturtle, python, tkinter, turtle | 标签为 , | 留下评论

是男人就下一百层测试程序(生成gif合成gif)

李兴球Python是男人就下一百层测试程序

"""
   是男人就下一百层测试程序(生成gif合成gif)
   本程序需要gameturtle0.2版支持,
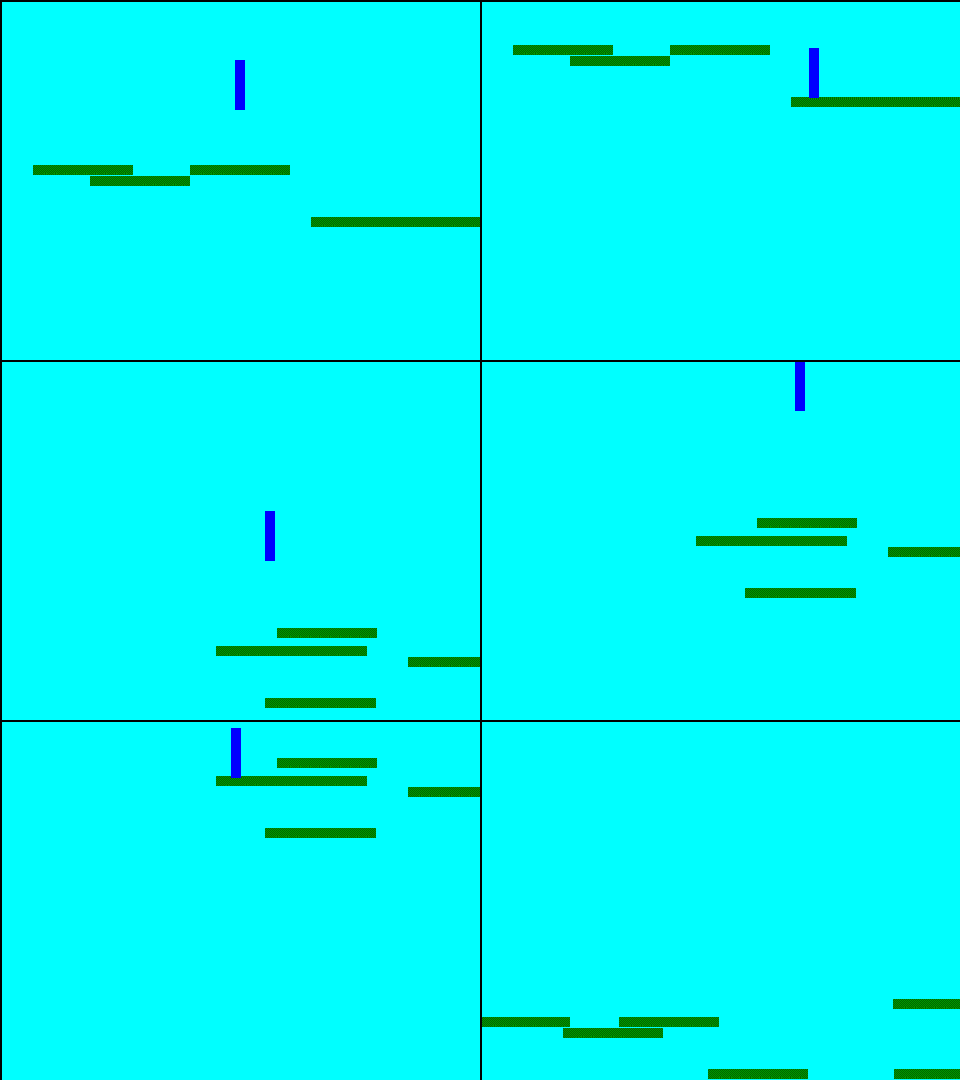
   操作方法:上左右键操作竖直的矩形不断下自动层递即可,
   本程序会自动截屏,所以运行速度较慢。
   最后会生成gif图片。
"""
from gameturtle import *
from random import randint

def gotobottom(r):
     x,y = randint(0,480),360
     r.goto(x,y)

class Key:
    def __init__(self,cv,key):
        self._canvas = cv
        self._key = key
        self._down = False
        self._canvas.bind("" % key,self._press)        
        self._canvas.bind("" % key,self._release)
        
    def _press(self,event):
        self._down = True

    def _release(self,event):
        self._down = False

    def isdown(self):
      return self._down
    
root = Tk()
root.title('是男人就下一百层测试程序')

cv = Canvas(width=480,height=360,bg='cyan')
cv.pack()

square = Image.new("RGBA",(100,10),color='green')

rects = []
for _ in range(6):
    x,y = randint(0,480),randint(180,660)
    rects.append( GameTurtle(cv,square,pos=(x,y),tag='ground'))
rects[0].home()

manpic1 = Image.new("RGBA",(10,50),color='blue')
manpic2 = Image.new("RGBA",(15,90),color='blue')
man = GameTurtle(cv,(manpic1,manpic2))
man.center()
man.addy(-100)

up_key = Key(cv,"Up")
right_key = Key(cv,"Right")
left_key = Key(cv,"Left")
cv.focus_force()

dy = 0
frames = []
for _ in range(600):
    [r.addy(-1) for r in rects]
    [gotobottom(r) for r in rects if r.ycor() < 0]     
    man.addy(dy)
    if man.bottom_collide((0,255,0)):
        dy = 0
        man.addy(-1)
        if up_key.isdown():dy = -6
    else:
        dy = dy + 0.1
    if right_key.isdown():man.addx(2)
    if left_key.isdown():man.addx(-2)
    cv.update()
    if c % 10 == 0 :    frames.append(cv.grab())
    time.sleep(0.01)
frames[0].save('demo.gif', save_all=True,quality=70,
               append_images=frames[1:], duration=0.1)

下面是程序截屏后自动生成的动图demo.gif,

李兴球Python tkinter截gif动态图片

发表在 gameturtle, python, tkinter, turtle | 标签为 , | 留下评论

矩形缩放测试程序.py

李兴球Python tkinter矩形缩放测试程序


本程序只是为了测试自己编写的rect模块里面的scale方法.。

"""
   矩形缩放测试程序.py
"""
import time
from rect import *
from tkinter import *
    
root = Tk()
root.title('矩形缩放测试程序www.lixingqiu.com')
cv = Canvas(width=480,height=360,bg='cyan')
cv.pack()

def demo(event):
    k = 5
    while k>0.1:
        r1.scale(k)
        cv.create_rectangle(r1.left,r1.top,
                            r1.right,r1.bottom)
        k = k - 0.2
        cv.update()
        time.sleep(0.1)   
    cv.create_rectangle(r1.raw_left,r1.raw_top,
                        r1.raw_right,r1.raw_bottom,fill='red')

# 实例化,左上角坐标(200,140),宽80,高40
r1 = Rect(200,140,80,40)         # 创建矩形对象
cv.bind("",demo)
root.mainloop()

发表在 python, tkinter | 标签为 | 留下评论

tkinter飞机大战测试程序

"""
   tkinter飞机大战测试程序
   本程序需要gameturtle模块0.2版支持。
   利用标签对敌机和子弹进行分组,也用了颜色对敌机进行了分组。
"""
from gameturtle import *
from random import randint

bimage = Image.new("RGBA",(10,10),color=(255,255,255)) # 用来做子弹的图像
eimage = Image.new("RGBA",(20,40),color=(255,123,0))   # 用来做敌机的图像

root = Tk()                                       # 建窗口
cv = Canvas(width=800,height=600,bg='blue')       # 织画布
cv.pack()                                         # 放画布

# 红色大方块代表玩家飞机
player = GameTurtle(cv,Image.new("RGBA",(100,50),color='red'))

bullets=[]
enemis=[]
counter = 0

while True:
    mx,my = cv.mouse_pos()                        # 鼠标指针
    
    if player.isalive():player.goto(mx,my)        # 没死则移到鼠标指针
    
    counter = counter + 1
    if counter % 10 == 0 and player.isalive() :   # 一定机率产生子弹
        GameTurtle(cv,bimage,pos=(mx,my),heading=-90,tag='zidan')
        x,y = randint(0,800),0
        GameTurtle(cv,eimage,pos=(x,y),heading=90,tag='diren') # 产生敌人
        
    bullets= group(cv,'zidan')                    # 所有的子弹
    [b.fd(10) for b in bullets]                   # 所有子弹移动
    [b.kill() for b in bullets if b.out_canvas()] # 超出画布自删

    enemis= group(cv,'diren')                     # 所有的敌人
    [e.fd(1) for e in enemis]                     # 所有敌人向下移动
    # 超出画布范围或者碰到子弹则删除
    [e.kill() for e in enemis if e.out_canvas() or e.collide_tag('zidan')]
    if  player.isalive():
        if player.collide_color((255,123,0)):player.kill()
    cv.update()
    time.sleep(0.01)

发表在 gameturtle, python, tkinter, turtle | 标签为 | 留下评论

tkinter超级玛丽颜色碰撞测试程序

python超级玛丽闯关gameturtle模块tkinter颜色碰撞检测试程序

"""
   超级玛丽颜色碰撞检测试程序.py
   本程序需要gameturtle模块0.2版支持。
"""
from gameturtle import *

class Key:
    def __init__(self,cv,key):
        self._canvas = cv
        self._key = key
        self._down = False
        self._canvas.bind("" % key,self._press)        
        self._canvas.bind("" % key,self._release)
        
    def _press(self,event):
        self._down = True

    def _release(self,event):
        self._down = False

    def isdown(self):
      return self._down
    
root = Tk()
cv = Canvas(width=480,height=360)
cv.pack()

# 加载资源
mario_pics = ['bgs/mariox.png','bgs/mario2x.png']
mario_pics = [Image.open(im) for im in mario_pics]

bg_pics = [f'bgs/背景{i}.png' for i in range(1,4)]
bg_pics = [Image.open(im) for im in bg_pics]

# 生成背景
bg = GameTurtle(cv,bg_pics)
# 生成玛丽奥
mario = GameTurtle(cv,mario_pics,pos=(40,40))
mario.dy = 0

up_key = Key(cv,"Up")
down_key = Key(cv,"Down")
right_key = Key(cv,"Right")
left_key = Key(cv,"Left")

cv.focus_force()
cleftright=''               # 描述碰左或碰右或没有碰的变量
while True:
    mario.addy(mario.dy)
    if not mario.collide_color((0,255,82)):
        mario.dy += 0.1
    else:
        mario.dy = 0        
        if up_key.isdown():mario.dy=-5
    if not mario.collide_color((153,89,0)):cleftright=''
    
    if right_key.isdown():
        if cleftright=='left' or cleftright=='':
            mario.addx(2)
            if mario.collide_color((153,89,0)):
                cleftright='right'
            
    if left_key.isdown():
        if cleftright=='right'or cleftright=='':
            mario.addx(-2)               
            if mario.collide_color((153,89,0)):
                cleftright='left'
    
    root.title(cleftright + str(left_key.isdown()) + str(right_key.isdown()))
    if mario.xcor()>480:
        mario.setx(0)
        mario.sety(100)
        bg.nextshape()
    cv.update()
    time.sleep(0.01)

发表在 gameturtle, python, tkinter, turtle | 标签为 | 留下评论

超级玛丽上下左右矩形碰撞测试程序

李兴球Python的游戏海龟gameturtle模块上下左右矩形碰撞检测

"""
   超级玛丽上下左右矩形碰撞检测程序.py
   本程序需要gameturtle模块0.2版支持。
"""
from gameturtle import *

class Key:
    def __init__(self,cv,key):
        self._canvas = cv
        self._key = key
        self._down = False
        self._canvas.bind("" % key,self._press)        
        self._canvas.bind("" % key,self._release)
        
    def _press(self,event):
        self._down = True

    def _release(self,event):
        self._down = False

    def isdown(self):
      return self._down
    
root = Tk()
cv = Canvas(width=480,height=360)
cv.pack()

# 加载资源
mario_pics = ['bgs/mariox.png','bgs/mario2x.png']
mario_pics = [Image.open(im) for im in mario_pics]

# 生成玛丽奥
mario = GameTurtle(cv,mario_pics,pos=(40,40))
mario.dy = 0

square1 = GameTurtle(cv,Image.new("RGBA",(240,120),color='red'))

up_key = Key(cv,"Up")
down_key = Key(cv,"Down")
right_key = Key(cv,"Right")
left_key = Key(cv,"Left")

cv.focus_force()

while True:
    if right_key.isdown() and not mario.right_collide(square1):mario.addx(2)
    if left_key.isdown() and not mario.left_collide(square1):mario.addx(-2)
    if up_key.isdown() and not mario.top_collide(square1):mario.addy(-2)
    if down_key.isdown() and not mario.bottom_collide(square1):mario.addy(2)
    if mario.left_collide(square1):root.title('左碰')
    if mario.right_collide(square1):root.title('右碰')
    if mario.top_collide(square1):root.title('上碰')
    if mario.bottom_collide(square1):root.title('下碰')    
   
    cv.update()
    time.sleep(0.01)

发表在 gameturtle, python, tkinter, turtle | 标签为 | 留下评论

Python教学试课与教学研究:函数第三次课教学知识点

Python教学试课与教学研究:函数第三次课教学知识点

1、abs 绝对值函数
2、pow命令
3、sqrt函数,
4、导入数学模块,讲一下什么是正弦函数,体验sin函数
5、定义画坐标轴的函数。
6、画abs函数,一次函数,二次函数,正弦函数,sqrt函数图形。

定义画坐标轴的函数,到底需要传递什么参数呢?
如果遵循输入与输出的“黑盒”原理。
那么函数需要知道屏幕的宽度和高度,
所以是不是要传入宽度和高度?
其实画坐标轴,就是画一个中心点在原点的十字架。
这个十字架是在一个矩形范围内,所以需要知道矩形的参数。
很显然,只要传递矩形的宽度和高度即可。
还有一个就是到底由谁来画的问题,可以用海龟来画。
在函数里实例化一只海龟,它只是一个局部变量。
函数调用完后,它就没必要存在了。也可以直接传入一海龟对象。
下面的函数没有传入,也没有实例化turtle对象,
而是直接使用turtle来画线条,是由于用的import turtle导入方式。

def draw_cross(w,h):   
    """
       w:屏幕宽度
       h:屏幕高度
    """
    left = -w/2,0
    right = w/2,0
    top = 0,h/2
    bottom = 0,-h/2
    turtle.penup()
    turtle.goto(left)
    turtle.pendown()
    turtle.goto(right)
    turtle.penup()
    turtle.goto(top)
    turtle.pendown()
    turtle.goto(bottom)

上完这次课,学生应该收获挺大的。

一次函数:

def f(x):
    return 2 * x

发表在 python, turtle, 杂谈 | 标签为 | 留下评论

像素查找器.py

"""
   像素查找器.py
   本程序在一幅图上根据像素值查找像素点的x,y坐标,也就是行列号。
   行号就当于y坐标,列号就相当于x坐标。
"""
__author__ = '李兴球'
__date__ = '2020/10/17'
__blog__ = 'www.lixingqiu.com'

import numpy as np
from PIL import Image

def _find_pixels(im,pixel):
    """im:Image图形对象,
       pixel:RGBA四元组或列表       
       返回生成器,它能生成所有找到的像素点的行列号。
    """
    ps = []
    pixel = np.array(list(pixel),dtype=np.uint8)
    array = np.array(im)
    # print(array==pixel)
    # print(np.all(array==pixel, axis=2))   
    # 轴为-1即倒数第一维,表示最里层中括号里的数据进行"and"操作。
    # 如果有一个为False,结果就为False。
    # 只有为全True,则表示这个像素的4个值都和此处像素的4个值相等。
    rows,cols = np.where(np.all(array==pixel, axis=-1))
    for r ,c in zip(rows,cols):
        #ps.append((r,c))
        yield (r,c)

def contain_pixel(im,pixel):
    """判断图像im是有pixel像素
       im:Image图形对象,
       pixel:RGBA四元组或列表
    """      
    p = _find_pixels(im,pixel)
    print('p=',p)
    try:
        next(p)        
        return True
    except StopIteration:
        return False
    except:
        return False
    
im = Image.open("c:/kuai.png")
p = contain_pixel(im,[51,255,0,255])

if p :
    print('有这个像素')
else:
    print('没有')

发表在 numpy, pillow, python | 留下评论

测试pixel_collide像素碰撞方法_蝴蝶闯隧道游戏

李兴球Python测试pixel_collide像素碰撞方法_蝴蝶闯隧道游戏

"""
   测试pixel_collide像素碰撞方法_蝴蝶闯隧道游戏.py。
   本程序需要gameturtle模块0.2版及以上支持。
   Image,tkinter,time模块等都在gameturtle模块中已导入 ,所以可以直接使用。
"""
__author__ = '李兴球'
__date__ = '2020/10/16'
__blog__ = 'www.lixingqiu.com'

from gameturtle import *

class Key:
    def __init__(self,cv,key):
        self._canvas = cv
        self._key = key
        self._down = False
        self._canvas.bind("" % key,self._press)        
        self._canvas.bind("" % key,self._release)
        
    def _press(self,event):
        self._down = True

    def _release(self,event):
        self._down = False

    def isdown(self):
      return self._down
    
# 加载蝴蝶图形资源
hudie = ['b1.png','b2.png']
hudie = [Image.open(im) for im in hudie]

# 加载背景图形资源
bgs = ['bg1.png','bg2.png','bg3.png']
bgs = [Image.open(im) for im in bgs]

root = Tk()
root.title('测试pixel_collide像素碰撞方法_蝴蝶闯隧道游戏')
root.resizable(False,False)                    # 窗口宽高不可调 

cv = Canvas(width=640,height=480,bg='#f0f0f0') # 带背景色的画布
cv.pack()

bg = Sprite(cv,bgs)                    # 实例化背景
h1 = Sprite(cv,hudie)                  # 实例化蝴蝶2 
h1.shapesize(0.2,0.2)

up_key = Key(cv,"Up")
down_key = Key(cv,"Down")
right_key = Key(cv,"Right")
left_key = Key(cv,"Left")

cv.focus_force() 
while True:
    h1.nextshape() 
    if up_key.isdown():
        #print('向上箭头按下')
        h1.addy(-1)
        if h1.collide(bg):h1.addy(1)
    if down_key.isdown():
        #print('向下箭头按下')
        h1.addy(1)
        if h1.collide(bg):h1.addy(-1)    
    if right_key.isdown():
        #print('向右箭头按下')
        h1.setheading(0)
        h1.addx(1)
        if h1.collide(bg):h1.addx(-1)
        if h1.xcor()> 640:
            bg.nextshape()
            h1.setx(0)
    if left_key.isdown():
        #print('向左箭头按下')
        h1.setheading(180)
        h1.addx(-1)
        if h1.collide(bg):h1.addx(1)    
    cv.update()                     # 更新画布显示
    time.sleep(0.01)


发表在 gameturtle, pillow, python, tkinter, turtle | 标签为 , | 留下评论

移动B图去碰撞A图并且画重叠区域_像素极碰撞的基本理论演示程序

李兴球Python像素级碰撞检测理论与实践图

"""
   移动B图去碰撞A图并且画重叠区域.py
   本程序演示了像素极碰撞的基本理论。   
"""
__author__ = '李兴球'
__date__ = '2020/10/15'
__blog__ = 'www.lixingqiu.com'

import numpy as np
from rect import Rect
from gameturtle import *

def make_croped_area(overlaped,rectangle):
    """返回将要剪裁的区域
       overlaped:Rect对象,相对于画布坐标系的
       rectangle:Rect对象,也是相对于画布坐标系的
       返回left,top,right,bottom,相对于rectangle的
    """
    left = overlaped.left - rectangle.left
    top = overlaped.top - rectangle.top
    right = left + overlaped.width
    bottom = top + overlaped.height
    return left,top,right,bottom

def make_mask(image,area):
    """
       image:pillow图形对象
       area:图形对象上的一个区域
    """
    im = image.crop(area)
    im_array = np.array(im)
    mask = im_array[:,:,3] > 127
    mask.dtype=np.uint8
    return mask,im
    
def draw_rect(r):
    if r:      # 如果重叠了
        v.clear()
        v.goto(r.left,r.top)
        v.pendown()
        for _ in range(2):
            v.fd(r.width)
            v.rt(90)
            v.fd(r.height)
            v.rt(90)
        v.penup()
    else:
        v.clear()
        
root = Tk()
root.title('像素级碰撞理论示意原理图')

cv = Canvas(width=480,height=480,bg='#98f9f9')
cv.pack()

dot = GameTurtle(cv,Image.new("RGBA",(5,5),color='red'))

v = GameTurtle(cv,Image.new("RGBA",(1,1)))
a_pic = GameTurtle(cv,Image.open('a.png'))
a_pic.rect = Rect(140,140,200,200)
b_pic = GameTurtle(cv,Image.open('b.png'))

cv.tag_raise(dot.item)               # 升起来

while True:
    mx,my = b_pic.mouse_pos()
   
    b_pic.goto(mx,my)
    b_pic.rect = Rect(mx-100,my-75,200,150)
    r = b_pic.rect.overlap(a_pic.rect)
    if r:       
       draw_rect(r)
       r_a = make_croped_area(r,a_pic.rect)    # 返回在a图上的待剪区域
       r_b = make_croped_area(r,b_pic.rect)    # 返回在b图上的待剪区域

       # mask_a是重叠区域的alpha通道0,1化后的描述透明与不透明区域的二维数组
       # im_a是在a图上剪下来的图形
       mask_a,im_a = make_mask(a_pic._current_shape,r_a)  # 剪后形成mask_a
       mask_b,im_b = make_mask(b_pic._current_shape,r_b)
       mask = mask_a  + mask_b
       array = np.argwhere(mask == 2)          # 所有碰撞点的行列号
       if array.size > 0:
          top,left = array[0]                  # 第一个点的行列号
          y,x = int(top) + r.top,int(left) + r.left # 相对于画布的坐标
          dot.goto(x,y)                   # 红点到此

          p1 = im_a.getpixel((int(left),int(top)))
          p2 = im_b.getpixel((int(left),int(top)))
          s = str(x) + ',' + str(y) + ', 在a图上的像素值' + str(p1)
          s = s + ', 在b图上的像素值' + str(p2)
          root.title(s)# 显示碰撞点坐标
    else:
        root.title("")
        v.clear()
          
    
    cv.update()

发表在 gameturtle, python, tkinter, turtle | 标签为 | 留下评论

gameturtle0.1版跟随鼠标指针的拖尾效果

李兴球Python游戏海龟模块gameturtle模块0.1版跟随鼠标指针的拖尾效果

"""

跟随鼠标指针的拖尾效果.py
这个程序采用的李兴球最新开发的游戏海龟模块gameturtle。
这是0.1版本。在程序中实例化了一个a,它表示一个箭头。
盖了10个图章,在不断地重复执行过程中,不断地盖新的图章,
然后又不断地擦除最新盖的章,鼠标指针牵引着箭头的移动。
"""
from gameturtle import *

root = Tk()
canvas = Canvas(width=800,height=600,bg='cyan')
canvas.pack()

im = Image.open('arrow.png')           # 新建图形对象
a = Sprite(canvas,im)                  # 实例化角色

for x in range(10):                    # 在范围10内迭代x
    a.stamp()                          # 盖图章
    a.fd(20)                           # 前进20个单位
    
while True:
    mx,my = a.mouse_pos()              # 获取在画布上的鼠标指针坐标
    a.towards(mx,my)                   # a朝向鼠标指针
    a.stamp()                          # 盖图章
    a.clearstamps(1)                   # 清除最早图章 
    if a.distance(mx,my)>20:           # 到坐标距离大于20则移动
        a.fd(5)
     

发表在 gameturtle, python, tkinter, turtle | 留下评论

gameturtle模块0.1版牵引蝴蝶移动

李兴球Python的gameturtle模块0.1版牵引蝴蝶移动

"""
   牵引蝴蝶移动.py
   
"""
from gameturtle import *

root = Tk()                                # 新建窗口
root.title('牵引蝴蝶移动.py')              # 窗口标题
canvas = Canvas(root,bg='pink')            # 新建画布
canvas.pack()                              # 放置画布

images = ['b1.png','b2.png']               # 两张图 
images = [Image.open(im) for im in images] # 加载到内存

t = GameTurtle(canvas,images)              # 实例化角色
t.shapesize(0.2,0.2)                       # 变小

while 1:
    t.nextshape()                          # 下一个造型
    t.towards(t.mouse_pos())               # 朝向鼠标指针
    if t.distance(t.mouse_pos())>50:       # 距离大于50
        t.fd(6)                            # 移动6个单位
    canvas.update()                        # 更新画布

发表在 gameturtle, python, tkinter, turtle | 留下评论

tkinter界面的pygame混音器程序

李兴球Python简易tkinter播放器

"""
   tkinter界面的pygame混音器程序.py
   这个程序用tkinter界面制作了一个有4个按钮的简易播放器。
   
"""
import pygame
from tkinter import *
 
def play():
    pygame.mixer.music.load('c:/华语群星 - 浏阳河+回娘家+红彩妹妹 (平四版).wav')
    pygame.mixer.music.play()
 
def pause():
    """暂停播放音乐"""
    pygame.mixer.music.pause()
 
def unpause():
    """取消暂停播放音乐"""
    pygame.mixer.music.unpause()
 
def sound():
    """播放声音效果"""
    pygame.mixer.Sound.play(sound_effect)        
                  
pygame.mixer.init()               # 混音器初始化
sound_effect = pygame.mixer.Sound('c:/卓依婷-迎春花.wav') 
 
root = Tk()
root.config(bg='yellow')
root.title('tkinter界面pygame混音器播放音乐程序')
root.geometry('180x160')
 
myframe = Frame(root)
myframe.config(bg='cyan')
myframe.pack()
 
mylabel = Label(myframe, text="Pygame混音器")
mylabel.pack()
 
button1 = Button(myframe, text=" 播 放 ", command=play, width=15)
button1.pack(pady = 5)
button2 = Button(myframe, text=" 音 效  ", command=sound, width=15)
button2.pack(pady = 5)
button3 = Button(myframe, text="继续..", command=unpause, width=15)
button3.pack(pady = 5)
button4 = Button(myframe, text=" 暂 停  ", command=pause, width=15)
button4.pack(pady = 5)
 
root.mainloop()

发表在 pygame, python, tkinter | 标签为 , | 留下评论