python萍乡游子吟之诗

"""
萍乡游子吟之诗,
学习Python的朋友请把本程序中的诗放在一个列表中,然后用for循环重新改写这个程序.
"""

import turtle
 
myfont = ("黑体",32,"normal")
myfont2 = ("黑体",22,"normal")

screen = turtle.getscreen()
screen.bgcolor("black")
screen.setup(600,600)
screen.title("萍乡游子吟之诗_Python海龟写诗")

turtle.ht()
turtle.penup()
turtle.color("cyan")
turtle.setheading(90)
turtle.goto(-20,150)

turtle.write(" 萍乡游子吟",font=myfont,align='center')
turtle.bk(100)
turtle.write("父母俱在不远游",font=myfont,align='center')
turtle.bk(60)
turtle.write("呼啸一日归昭萍",font=myfont,align='center')
turtle.bk(60)
turtle.write("猛虎归山震啸天",font=myfont,align='center')
turtle.bk(60)
turtle.write("铁身丹心泪满流",font=myfont,align='center')
turtle.bk(60)
turtle.write("2019年5月11日于萍乡",font=myfont2,align='center')

screen.exitonclick()


Python萍乡游子吟之诗


发表在 turtle | python萍乡游子吟之诗已关闭评论

10多个Pygame样本例子程序_More than 10 template pygame programe

"""the simplest pygame example program,最简pygame示例,生成红色的图像"""

import pygame

image = pygame.Surface((100,100)) # 实例化一个图像

image.fill((255,0,0))             # 给图像所有像素填充为红色

pygame.image.save(image,"red.png")# 保存此图像
"""the simplest pygame image process  program,add noise,给图像增加燥音
   本程序会在图像上印10X10的蓝色像素点,然后在一个窗口中显示出来。
"""

import pygame

width,height = 100,100

image = pygame.Surface((width,height)) # 实例化一个图像

image.fill((255,0,255))                # 给图像所有像素填充为品红色

for x in range(width):
    for y in range(height):
        if x % 10 ==0 and y % 10 == 0:   # or x == y ,etc
            image.set_at((x,y),(0,0,255))# 重写像素点值
       
screen = pygame.display.set_mode((width,height))
screen.blit(image,(0,0))
pygame.display.update()
 
"""the simplest pygame font render  program,word2image!
   本程序会在青色的背景上显示红色的Python Pygame Font这几个字。
   最后会把这个图像保存为文件。
"""

import pygame
 
pygame.init()
font_filename = pygame.font.get_default_font()  # 得到缺省的字体文件名
myfont = pygame.font.Font(font_filename,120)    # 新建字体对象
myword = myfont.render("Python Pygame Font",True,(255,0,0))   # 渲染一个字体图层
width,height =myword.get_size()                        # 得到字体面的宽度和高度
 
screen = pygame.display.set_mode((width,height))# 新建屏幕对象
screen.fill((0,255,255))                        # 填充screen为青色 
screen.blit(myword,(0,0))                       # 把myword渲染到screen上
pygame.image.save(screen,"lixingqiu.png")       # 保存图像
pygame.display.update()                         # 更新显示
 
"""the simplest pygame loop template code,basic game loop by lixingqiu
   pygame最基本的游戏循环样本代码。
   
"""

import pygame
from pygame.locals import *           # 导入常量

width,height = 480,360

pygame.init() 
screen = pygame.display.set_mode((width,height))# 新建屏幕对象
pygame.display.set_caption("pygame最基本的游戏循环样本代码")

running = True
clock = pygame.time.Clock()          # 时钟对象

while running:
    for event in pygame.event.get():
        if event.type == QUIT:running = False

    # 这里是游戏逻辑,如碰撞检测会改变个各图像的坐标


    # 渲染各个图像,一般首先渲染screen,它做为背景
    screen.fill((0,0,0))

    # 渲染完后更新窗体的显示
    pygame.display.update()          # 更新显示

    # 等待1/60份之一秒过后再次循环
    clock.tick(60)                   # set fps 60
 
pygame.quit()
"""the simple pygame program code,red square animation,move a object
   pygame实现最简单的图像缓慢移动代码。原理是不断填充背景,不断重画矩形。
   
"""

import pygame
from pygame.locals import *           # 导入常量

width,height = 480,360

pygame.init() 
screen = pygame.display.set_mode((width,height))# 新建屏幕对象
pygame.display.set_caption("pygame实现最简单的图像移动代码")

redsquare = pygame.Surface((50,50)) # 新建方块图
redsquare.fill((255,0,0))           # 填充为红色
x = 0

running = True
clock = pygame.time.Clock()         # 时钟对象

while running:
    for event in pygame.event.get():
        if event.type == QUIT:running = False

    # 这里是游戏逻辑,如碰撞检测会改变个各图像的坐标
    x = x + 1

    # 渲染各个图像,一般首先渲染screen,它做为背景
    screen.fill((0,0,0))
    screen.blit(redsquare,(x,0))
               

    # 渲染完后更新窗体的显示
    pygame.display.update()          # 更新显示

    # 等待1/10份之一秒过后再次循环
    clock.tick(10)                   # set fps 10
 
pygame.quit()
"""the simple pygame program code,red square animation,bounce on edge.
   pygame实现最简单的图像移动代码。原理是不断填充背景,不断重画矩形。它碰到边缘会反弹。
   
"""
import random
import pygame
from pygame.locals import *           # 导入常量

width,height = 480,360

pygame.init() 
screen = pygame.display.set_mode((width,height))# 新建屏幕对象
pygame.display.set_caption("pygame演示碰到边缘就反弹原理样本代码by李兴球")

redsquare = pygame.Surface((50,50)) # 新建方块图
redsquare.fill((255,0,0))           # 填充为红色
x = width//2
y = height//2
dx = random.randint(-5,5)           # 水平单位位移
dy = random.randint(-5,5)           # 垂直单位位移

running = True
clock = pygame.time.Clock()         # 时钟对象

while running:
    for event in pygame.event.get():
        if event.type == QUIT:running = False

    # 这里是游戏逻辑,如碰撞检测会改变个各图像的坐标
    if x <= 0 or x + 50 >= width: dx = -dx
    if y <= 0 or y + 50 >= height: dy = -dy
    
    x = x + dx
    y = y + dy

    # 渲染各个图像,一般首先渲染screen,它做为背景    
    screen.fill((0,0,0))
    screen.blit(redsquare,(x,y))               

    # 渲染完后更新窗体的显示
    pygame.display.update()          # 更新显示

    # 等待1/60份之一秒过后再次循环
    clock.tick(60)                   # set fps 60
 
pygame.quit()
"""the simple pygame program code,a square animation,bounce on edge.use rect object.
   pygame实现最简单的图像移动代码。原理是不断填充背景,不断重画矩形。它碰到边缘会反弹。
   使用矩形对象来代表方块的坐标与宽高,使用move_ip来移动矩形对象的位置。
   
"""
import random
import pygame
from pygame.locals import *           # 导入常量

width,height = 480,360

pygame.init() 
screen = pygame.display.set_mode((width,height))# 新建屏幕对象
pygame.display.set_caption("pygame演示矩形对象by李兴球")

w,h = random.randint(25,100),random.randint(25,100)
square = pygame.Surface((w,h))     # 新建方块图
square.fill((0,255,255))           # 填充为青色
rect = square.get_rect()           # 获取矩形对象
rect.centerx = width//2            # 矩形对象中心点x坐标
rect.centery = height//2           # 矩形对象中心点y坐标
dx = random.randint(-5,5)          # 水平单位位移
dy = random.randint(-5,5)          # 垂直单位位移

running = True
clock = pygame.time.Clock()        # 时钟对象

while running:
    for event in pygame.event.get():
        if event.type == QUIT:running = False

    # 这里是游戏逻辑,如碰撞检测会改变个各图像的坐标
    if rect.left <= 0 or rect.right >= width: dx = -dx
    if rect.top <= 0 or rect.bottom >= height: dy = -dy
    
    rect.move_ip(dx,dy)            # 移动矩形对象

    # 渲染各个图像,一般首先渲染screen,它做为背景    
    screen.fill((0,0,0))
    screen.blit(square,rect)               

    # 渲染完后更新窗体的显示
    pygame.display.update()          # 更新显示

    # 等待1/60份之一秒过后再次循环
    clock.tick(60)                   # set fps 60
 
pygame.quit()
"""demo class use method。the simple pygame program code,a square animation,bounce on edge.use rect object and class,by lixingqiu
   pygame实现新建方块类来实例化图。本程序会生成不同颜色与大小的长方形,它们会移动,注意while循环的条件判断表达式。
   使用的是pygame.event.poll()来从事件队列中取一个事件,如果它的类型为QUIT,则退出while循环。
   
"""
import random
import pygame
from pygame.locals import *           # 导入常量

class Square:
    """方块类"""
    def __init__(self):
        """初始化"""
        w,h = random.randint(25,100),random.randint(25,100) # temp vars
        self.image = pygame.Surface((w,h))       # 方块要渲染的图像
        r,g,b = random.randint(0,255),random.randint(0,255),random.randint(0,255)
        self.image.fill((r,g,b))               #  填充颜色
        self.rect = self.image.get_rect()      # 方块的矩形对象
        self.rect.centerx = width//2           # x坐标移到屏幕中央
        self.rect.centery = height//2          # y坐标移到屏幕中央
        self.dx = random.randint(-5,5)         # 水平单位位移
        self.dy = random.randint(-5,5)         # 垂直单位位移
        
    def move(self):
        """移动矩形"""
        self.rect.move_ip(self.dx,self.dy)
        self.bounce_on_edge()

    def bounce_on_edge(self):
        """碰到边缘就反弹"""
        if self.rect.left <= 0 or self.rect.right >= width: self.dx = -self.dx
        if self.rect.top <= 0 or self.rect.bottom >= height: self.dy = -self.dy
        

width,height = 480,360                         # define screen'width and height

pygame.init()                                  # pygame初始化
screen = pygame.display.set_mode((width,height))# 新建屏幕对象
pygame.display.set_caption("pygame演示类生成多个颜色方块by李兴球")
 
squares = [ Square() for i in range(10)]
 
clock = pygame.time.Clock()                    # 时钟对象

while pygame.event.poll().type != QUIT:        # 当事件类型不为退出时循环,否则退出     

    [ square.move()  for square in squares ]   # 移动每个方块
    
    # 渲染各个图像,一般首先渲染screen,它做为背景    
    screen.fill((0,0,0))
    [ screen.blit(square.image,square.rect)  for square in squares ]             

    # 渲染完后更新窗体的显示
    pygame.display.update()          # 更新显示

    # 等待1/60份之一秒过后再次循环
    clock.tick(60)                   # set fps 60
 
pygame.quit()
"""demo ontimer event use method。(Chinese english)
本程序演示pygame的定时器事件,在游戏循环中,会每隔1秒生成一个方块,方块进入屏幕后会自动从自己所在列表中移除。
   
"""
import random
import pygame
from pygame.locals import *           # 导入常量

class Square:
    """方块类"""
    def __init__(self,group):
        """初始化"""
        w,h = random.randint(25,100),random.randint(25,100) # temp vars
        self.image = pygame.Surface((w,h))       # 方块要渲染的图像
        r,g,b = random.randint(0,255),random.randint(0,255),random.randint(0,255)
        self.image.fill((r,g,b))               #  填充颜色
        self.rect = self.image.get_rect()      # 方块的矩形对象
        self.rect.centerx = width//2           # x坐标移到屏幕中央
        self.rect.centery = height//2          # y坐标移到屏幕中央
        self.dx = random.randint(-5,5)         # 水平单位位移
        self.dy = random.randint(-5,5)         # 垂直单位位移
        self.group = group
        self.group.append(self)                # 把自己添加到组中
        
    def move(self):
        """移动矩形"""
        self.rect.move_ip(self.dx,self.dy)
        self.vanish_on_edge()

    def vanish_on_edge(self):
        """到边缘消失"""
        if self.rect.right <= 0 or self.rect.left >= width or  \
           self.rect.bottom <= 0 or self.rect.top >= height: self.group.remove(self)
        

width,height = 480,360                         # define screen'width and height

pygame.init()                                  # pygame初始化
screen = pygame.display.set_mode((width,height))# 新建屏幕对象
pygame.display.set_caption("pygame演示定时器事件by李兴球")
 
squares = [ ]

# 以下设置定时器事件
spawn_event  = USEREVENT + 1
pygame.time.set_timer(spawn_event,1000)

running = True
clock = pygame.time.Clock()                    # 时钟对象

while running:
    for event in pygame.event.get():
        if event.type == spawn_event: Square(squares)
        if event.type == QUIT: running = False            

    [ square.move()  for square in squares ]   # 移动每个方块
    
    # 渲染各个图像,一般首先渲染screen,它做为背景    
    screen.fill((0,0,0))
    [ screen.blit(square.image,square.rect)  for square in squares ]             

    # 渲染完后更新窗体的显示
    pygame.display.update()          # 更新显示

    # 等待1/60份之一秒过后再次循环
    clock.tick(60)                   # set fps 60
 
pygame.quit()
"""demo rect object collison.
本程序演示pygame矩形的碰撞检测,本程序设定一个固定矩形,然后在屏幕中央生成一些随机速度的矩形。
它们碰到固定矩形会反向移动。
   
"""
import random
import pygame
from pygame.locals import *           # 导入常量

class Square:
    """方块类"""
    def __init__(self,group,position=(0,0)):
        """初始化"""
        w,h = random.randint(25,100),random.randint(25,100) # temp vars
        self.image = pygame.Surface((w,h))       # 方块要渲染的图像
        r,g,b = random.randint(0,255),random.randint(0,255),random.randint(0,255)
        self.image.fill((r,g,b))               #  填充颜色
        self.rect = self.image.get_rect()      # 方块的矩形对象
        self.rect.center = (width//2,height//2)       
        self.group = group
        self.group.append(self)                # 把自己添加到组中
        
    def move(self):
        """移动矩形"""
        self.rect.move_ip(self.dx,self.dy)
        self.vanish_on_edge()

    def vanish_on_edge(self):
        """到边缘消失"""
        if self.rect.right <= 0 or self.rect.left >= width or  \
           self.rect.bottom <= 0 or self.rect.top >= height: self.group.remove(self)
        

width,height = 480,360                         # define screen'width and height
speed = [-5,-4,-3,-2,-1,1,2,3,4,5]

pygame.init()                                  # pygame初始化
screen = pygame.display.set_mode((width,height))# 新建屏幕对象
pygame.display.set_caption("pygame演示矩形碰撞by李兴球")

squares = [ ]

fixed_square = Square(squares,(100,100))       # 固定不动的方块
fixed_square.dx = 0         # 水平单位位移
fixed_square.dy = 0         # 垂直单位位移
fixed_square.rect.center = (100,100)
    
# 以下设置定时器事件
spawn_event  = USEREVENT + 1
pygame.time.set_timer(spawn_event,1000)

running = True
clock = pygame.time.Clock()                    # 时钟对象

while running:
    for event in pygame.event.get():
        if event.type == spawn_event:
            q = Square(squares)
            q.dx = random.choice(speed)
            q.dy = random.choice(speed)
        if event.type == QUIT: running = False            

    [ square.move()  for square in squares ]   # 移动每个方块

    for square in squares:
        if square == fixed_square:continue
        if square.rect.colliderect(fixed_square.rect):   #  如果square碰到固定矩形          
            square.dy = -square.dy        
            square.dx = -square.dx
        
    
    # 渲染各个图像,一般首先渲染screen,它做为背景    
    screen.fill((0,0,0))
    [ screen.blit(square.image,square.rect)  for square in squares ]             

    # 渲染完后更新窗体的显示
    pygame.display.update()          # 更新显示

    # 等待1/60份之一秒过后再次循环
    clock.tick(60)                   # set fps 60
 
pygame.quit()
"""  demo pygame spriteclass。
本程序演示pygame的sprite类,新建了一个Square类,它继承自pygame.sprite.Sprite。
新建的squares不再是单纯的list了,而是一个 pygame.sprite.Group实例。这样可以对角色进行统一操作。
这前提是精灵要有image和rect属性。

   
"""
import random
import pygame
from pygame.locals import *           # 导入常量

class Square(pygame.sprite.Sprite):
    """方块类"""
    def __init__(self,group,position=(0,0)):
        """初始化"""
        pygame.sprite.Sprite.__init__(self)
        w,h = random.randint(25,100),random.randint(25,100) # temp vars
        self.image = pygame.Surface((w,h))       # 方块要渲染的图像
        r,g,b = random.randint(0,255),random.randint(0,255),random.randint(0,255)
        self.image.fill((r,g,b))                #  填充颜色
        self.rect = self.image.get_rect()       # 方块的矩形对象
        self.rect.center = (width//2,height//2)
        if group!=None:
            self.group = group
            self.group.add(self)                 # 把自己添加到组中

    def update(self):
        
        self.move()
        
    def move(self):
        """移动矩形"""
        self.rect.move_ip(self.dx,self.dy)
        self.vanish_on_edge()

    def vanish_on_edge(self):
        """到边缘消失"""
        if self.rect.right <= 0 or self.rect.left >= width or  \
           self.rect.bottom <= 0 or self.rect.top >= height: self.group.remove(self)
        

width,height = 480,360                         # define screen'width and height
speed = [-5,-4,-3,-2,-1,1,2,3,4,5]

pygame.init()                                  # pygame初始化
screen = pygame.display.set_mode((width,height))# 新建屏幕对象
pygame.display.set_caption("pygame演示继承继承类的矩形与组by李兴球")

squares = pygame.sprite.Group()                # 新建精灵组

fixed_square = Square(None,(100,100))          # 固定不动的方块,不添加到组中
fixed_square.dx = 0                            # 水平单位位移
fixed_square.dy = 0                            # 垂直单位位移
fixed_square.rect.center = (100,100)
    
# 以下设置定时器事件
spawn_event  = USEREVENT + 1
pygame.time.set_timer(spawn_event,1000)

running = True
clock = pygame.time.Clock()                    # 时钟对象

while running:
    for event in pygame.event.get():
        if event.type == spawn_event:
            q = Square(squares)
            q.dx = random.choice(speed)
            q.dy = random.choice(speed)
        if event.type == QUIT: running = False            

    squares.update()                           # 移动每个方块

    sprite = pygame.sprite.spritecollideany(fixed_square,squares)
    if sprite:
       sprite.dy = -sprite.dy        
       sprite.dx = -sprite.dx

    
    # 渲染各个图像,一般首先渲染screen,它做为背景    
    screen.fill((0,0,0))
    squares.draw(screen)             # 重画所有精灵
    screen.blit(fixed_square.image,fixed_square.rect) # 画固定方块

    # 渲染完后更新窗体的显示
    pygame.display.update()          # 更新显示

    # 等待1/60份之一秒过后再次循环
    clock.tick(60)                   # set fps 60
 
pygame.quit()
"""demo inherit sprite class example code.
本程序演示继承pygame的sprite类,这个类实例化后会不断地旋转。

   
"""
 
import pygame
from pygame.locals import *           # 导入常量

class Square(pygame.sprite.Sprite):
    """方块类"""
    def __init__(self,group,image,position=(0,0)):
        """初始化"""
        pygame.sprite.Sprite.__init__(self)
        self.position = position        
        self.raw_image = image                 # 记录原始图像,image是一个surface
        self.image = image        
        self.rect = self.image.get_rect()      # 方块的矩形对象
        self.rect.center = position
        self._angle = 0                        # 设定角度属性
        if group!=None:
            self.group = group
            self.group.add(self)               # 把自己添加到组中
            
    def update(self):
        
        self.rotate(1)
            
    def rotate(self,dangle):
        """旋转一定的角度"""
        self._angle += dangle
        self.image = pygame.transform.rotate(self.raw_image,self._angle)
        self.rect = self.image.get_rect()
        self.rect.center = self.position
 
def main():
    
    width,height = 800,600                         # define screen'width and height
    pygame.init()                                  # pygame初始化

    screen = pygame.display.set_mode((width,height))# 新建屏幕对象
    pygame.display.set_caption("pygame演示继承精灵类与角色旋转与缩放及by李兴球")

    image = pygame.image.load("lixingqiu.png").convert_alpha()
    image = pygame.transform.scale(image,(50,20))   # 缩放图像

    squares = pygame.sprite.Group()                # 新建精灵组

    for x in range(100,width,150):                 # 生成一些方块
        for y in range(50,height,150):
            Square(squares,image,(x,y))

    running = True
    clock = pygame.time.Clock()                    # 时钟对象

    while running:
        for event in pygame.event.get():        
            if event.type == QUIT: running = False            

        squares.update()                           # 移动每个方块
        
        # 渲染各个图像,一般首先渲染screen,它做为背景    
        screen.fill((0,0,0))
        squares.draw(screen)             # 重画所有方块 

        # 渲染完后更新窗体的显示
        pygame.display.update()          # 更新显示

        # 等待1/60份之一秒过后再次循环
        clock.tick(60)                   # set fps 60
     
    pygame.quit()

if __name__=="__main__":
    
    main()
    
"""demo onpress check,move a arrow like turtle in logo computer language
Pygame按键检测_实现简易海龟形式的移动

   
"""
import math
import pygame
from pygame.locals import *           # 导入常量

_turtle_point_list = [(0,25),(50,25),(40,15),(40,35),(50,25)]

class Turtle(pygame.sprite.Sprite):
    """方块类"""
    def __init__(self,position=(0,0)):
        """初始化"""
        pygame.sprite.Sprite.__init__(self)
        self.position = position        
        self.raw_image = pygame.Surface((50,50))
        pygame.draw.lines(self.raw_image,(0,255,255),False,_turtle_point_list)
        self.image = self.raw_image        
        self.rect = self.image.get_rect()      # 方块的矩形对象
        self.rect.center = position
        self._angle = 0                        # 设定角度属性(方向)
        
    def forward(self,distance):
        """朝自己的方向前进一定的距离"""
        dx = distance * math.cos(math.radians(self._angle)) 
        dy = -distance * math.sin(math.radians(self._angle))
        self.rect.centerx += dx
        self.rect.centery += dy        
  
            
    def rotate(self,dangle):
        """旋转一定的角度"""
        rotate_center = self.rect.center       # 记录旋转中心        
        self._angle += dangle
        pygame.display.set_caption(str(self._angle) + "_Pygame按键检测_实现简易海龟形式的移动by李兴球")
        self.image = pygame.transform.rotate(self.raw_image,self._angle)
        self.rect = self.image.get_rect()
        self.rect.center = rotate_center       # 定位到旋转中心 

        
def main():
    
    width,height = 800,600                         # define screen'width and height
    pygame.init()                                  # pygame初始化

    screen = pygame.display.set_mode((width,height))# 新建屏幕对象
    pygame.display.set_caption("Pygame按键检测_实现简易海龟形式的移动by李兴球")

    turtle = Turtle((width//2,height//2))
    running = True
    clock = pygame.time.Clock()                    # 时钟对象

    while running:
        for event in pygame.event.get():        
            if event.type == QUIT: running = False
##            if event.type == KEYDOWN:
##                if event.key == K_UP:turtle.forward(10)
##                if event.key == K_DOWN:turtle.forward(-10)
##                if event.key == K_LEFT:turtle.rotate(1)
##                if event.key == K_RIGHT:turtle.rotate(-1)               

        keys = pygame.key.get_pressed()            # 获取所有按键检测
        if keys[K_UP] : turtle.forward(10)
        if keys[K_DOWN] : turtle.forward(-10)
        if keys[K_LEFT] : turtle.rotate(2)
        if keys[K_RIGHT] : turtle.rotate(-2)        
        
        # 渲染各个图像,一般首先渲染screen,它做为背景    
        screen.fill((0,0,0))
        screen.blit(turtle.image,turtle.rect)
        
        # 渲染完后更新窗体的显示
        pygame.display.update()          # 更新显示

        # 等待1/60份之一秒过后再次循环
        clock.tick(60)                   # set fps 60
     
    pygame.quit()

if __name__=="__main__":
    
    main()


发表在 pygame, python | 10多个Pygame样本例子程序_More than 10 template pygame programe已关闭评论

Arcade外星飞船抓地球人到火星上

Arcade外星飞船抓地球人到火星第一画,观望的地球人
街机模块制作的交互小游戏,以下是部分代码预览:

"""火星上并非没有高级智慧生命,这是由于他们都生活在火星地表下面。并且火星的科技也很发达了,他们派出一艘UFL来地球抓人。
在这个程序中,你用鼠标指针牵引UFO,单击就能放出吸收通道,只要地球人碰到了,就能被吸入。然后再让它们碰到火星,这样地球人就能被挪动到火星上去了。
程序用Arcade街机模块编写,最新安装版本请在命令提示符里输入 pip install arcade。
"""

import math
import random
import arcade

# 常量定义
SCREEN_WIDTH = 768                # 定义屏幕宽度
SCREEN_HEIGHT = 1024              # 定义屏幕高度
SCREEN_TITLE = "Arcade外星飞船抓地球人到火星_作者:李兴球"
SPRITE_PIXEL_SIZE = 64
SPRITE_SCALING = 1

class MyGame(arcade.Window):
    """
    继承自窗口类的游戏类,在具体的游戏中,重写以下方法,删除不需要重写的方法。
    """

    def __init__(self, width, height, title):
        super().__init__(width, height, title)

        arcade.set_background_color(arcade.color.AMAZON)

        self.npc_list = None
        self.dummy_list = None

    def setup(self):
        """ 这个方法是在实例化Mygame后对游戏进行一些设置。 """
        self.npc_amounts = 10
        self.mouse_x = SCREEN_WIDTH//2
        self.mouse_y = SCREEN_WIDTH//2
        self.begin_catch = False
        self.catcher = arcade.Sprite("抓子.png",0.5)
        self.ufo = arcade.Sprite("ufo.png",0.3)
        self.ufo.center_x = SCREEN_WIDTH//2
        self.ufo.center_y = SCREEN_HEIGHT//2        


        # 火星对象
        self.mars = arcade.Sprite("mars.png",0.5)
        self.mars.center_x = SCREEN_WIDTH - 200
        self.mars.center_y = SCREEN_HEIGHT - 300
        

        # 下面是加载地图        
        my_map = arcade.read_tiled_map(f"level_0.tmx", SPRITE_SCALING)
         
          
        # 从墙生成地图列表
        self.wall_list = arcade.generate_sprites(my_map, 'ground', SPRITE_SCALING)
        self.wall_list.move(SPRITE_PIXEL_SIZE ,0)   # 水平方向和垂直方向移动


    def on_draw(self):
        """ 渲染屏幕  ,帧率为60左右,即每60份之一秒会自动调用此方法     """

        arcade.start_render()
        self.mars.draw()
        self.wall_list.draw()    
       
        self.npc_list.draw()
        for dummy in self.dummy_list:
            if dummy.visible : dummy.draw()

        self.ufo.draw()
        if self.begin_catch: self.catcher.draw()

        if len(self.npc_list)==0:
            x = SCREEN_WIDTH//2 -180
            y = SCREEN_HEIGHT//2 +100
            endstring  = "已经把所有地球人都抓到火星上去了"
            arcade.draw_text(endstring,x,y, arcade.color.BLUE,24,font_name="simhei")        

    def update(self, delta_time):
        """ 所有的角色移动等游戏逻辑都在这里编写代码   """        

        self.follow_mouse()
        
        self.ufo.update()
        self.npc_list.update()                            
               
    def follow_mouse(self):
        """让ufo跟随鼠标移动"""                   
            

    def on_mouse_motion(self, x, y, delta_x, delta_y):        
        """ 当鼠标移动时会自动地调用此方法,仅记录下鼠标指针坐标 """

        self.mouse_x = x    # 为了传递给follow_mouse
        self.mouse_y = y            
                
    def on_mouse_press(self, x, y, button, key_modifiers):
        """ 当按鼠标键时会自动地调用此方法     """

    def on_mouse_release(self, x, y, button, key_modifiers):
        """ 当松开鼠标键时会自动地调用此方法    """   

def main():
    """ 主要的方法"""
    game = MyGame(SCREEN_WIDTH, SCREEN_HEIGHT, SCREEN_TITLE)
    game.setup()
    arcade.run()


if __name__ == "__main__":
    main()

下载完整源代码与素材,请

成为会员后,登陆才能继续浏览!联系微信scratch8即可办理会员。
(会员专属:能浏览所有文章,下载所有带链接的Python资源。)

发表在 arcade, python | Arcade外星飞船抓地球人到火星上已关闭评论

python订制游戏_猴子射汽球_arcade实现塔防游戏_原形程序

python订制游戏猴子射汽球_arcade实现塔防游戏_原形程序by李兴球
以下是部分代码预览:

"""  本程序增加了半透明的圆形蔗罩mask,跟着拖曳的猴子移动。它的作用显示发射半径及提示不能在路径上放猴子。
发射原理是随机选择一只猴子,查找离它最近距离的泡泡。如果这个泡泡在发射半径,则计算方向向量,生成一枚子弹。
猴子是不能放在路径上的,如果靠得太近,则mask会切换造型进行提示,这时候松开鼠标指针是无法放置猴子。

操作方法:拖曳右上角的猴子,把它们放在离路径最近的地方。

本程序只是演示游戏基本原理,多关卡设计可以如下所示:
1、首先画好不同关卡的地图,画好后文件名为bg1.png,bg2.png,bg3.png.....
2、用程序“0_记录路径坐标.py”,加载不同的背景,自己拖曳鼠标指针,则会记录路径的坐标点,形成相应的path1.txt,path2.txt,path3.txt...
3、每关卡的泡泡数量不同,可以让泡泡数量随着关卡号的增加而增加,如建立self.pops_amount列表以记录每个关卡将会出现的泡泡数量。建立self.monkeys_amount列表存储每关可拖曳的猴子数量。
4、当有一个泡泡走完了整条路径,则表示防守失败。
5、当所有的泡泡被消灭,进入下一关,重新运行self.setup程序,加载新的path和背景等。


"""
import math
import random
import arcade

SCREEN_WIDTH = 1024                     # 常量定义,屏幕宽度
SCREEN_HEIGHT = 768                     # 常量定义,屏幕高度
SCREEN_TITLE = "猴子射汽球_arcade实现塔防游戏_原形程序by李兴球"# 常量定义,屏幕标题


class MyGame(arcade.Window):
    """    继承自窗口类的游戏类,在具体的游戏中,重写以下方法,删除不需要重写的方法。    """   

    def __init__(self, width, height, title):
        super().__init__(width, height, title)   #  调用父类的初始化方法新建一个窗口
        self.background = None
        self.path = []                           # 待读取的路径坐标表
        self.pops = None                         # 定义泡泡表
        self.frame_counter = 0                   # 帧计数器     
        
    def setup(self):
        """ 这个方法是在实例化Mygame后对游戏进行一些设置。 """
        self.pop_amounts = 50                  # 泡泡总数量
        self.pop_counter = self.pop_amounts    #
        self.hitedpop_amounts = 0              # 被击中的泡泡数量
        self.game_over = False
        self.success = False
        
        
    def spawn_pop(self):
        """产生泡泡"""
        if self.game_over:return
        if self.pop_counter == 0 : return        
        self.pops.append(pop)
        
    def on_draw(self):
        """ 渲染屏幕  ,帧率为60左右,即每60份之一秒会自动调用此方法  """        
        arcade.start_render()    # 此命令会用背景色填充屏幕,
        self.background.draw()         
            

    def update(self, delta_time):
        """ 所有的角色移动等游戏逻辑都在这里编写代码   """
        self.frame_counter +=1
        if self.frame_counter % 60 ==                     
        if self.clicked_show > 0: self.clicked_show += 1


        # 随机选择一只猴子,让它发射
        if self.monkey_list and random.randint(1,10) == 1:  #   这里修改发射击的几率
           monkey = random.choice(self.monkey_list)  

        # 子弹组和泡泡组的碰撞检测
        for bullet in self.bullet_list:
           bs = arcade.check_for_collision_with_list(bullet,self.pops)# 返回碰到的泡泡列表
           if bs: bullet.kill() ;  self.hitedpop_amounts += len([pop.kill() for pop in bs])
           if self.hitedpop_amounts == self.pop_amounts :            # 击中的泡泡和总数相等,胜利结束。
               self.game_over = True
               self.success = True
               break
        self.bullet_list.update()

    def on_mouse_press(self, x, y, button, key_modifiers):
        """ 当按鼠标键时会自动地调用此方法     """
        if self.game_over:return
   
    
    def on_mouse_motion(self, x, y, delta_x, delta_y):
        """ 当鼠标移动时会自动地调用此方法 """
        if  self.clicked_show > 10:
            self.clicked_monkey.center_x = x
            self.clicked_monkey.center_y = y
            self.mask.center_x = x

    def on_mouse_release(self, x, y, button, key_modifiers):
        """松开鼠标时调用此方法"""
        if self.mask.cur_texture_index == 1 : return     # 如果显示的是"此处不能放"造型,直接返回
        if self.clicked_show and self.clicked_show > 10: # 过了一定的帧数后才能生成一个猴子
            monkey = arcade.Sprite("images/monkey.png")
 

def point_in_rect(x,y,rect):
    """
       判断点是否rect矩形内。rect[0]:left,rect[1]:top,rect[2]:width,rect[3]:height
    """
    
 
def main():
    """主要的函数"""
    game = MyGame(SCREEN_WIDTH, SCREEN_HEIGHT, SCREEN_TITLE)  #  实例化一个游戏
    game.setup()                                      # 对游戏进行设置
    arcade.run()

    
if __name__ == "__main__":
    
      main()


下载完整源代码与素材,请

成为会员后,登陆才能继续浏览!联系微信scratch8即可办理会员。
(会员专属:能浏览所有文章,下载所有带链接的Python资源。)

发表在 arcade, python | python订制游戏_猴子射汽球_arcade实现塔防游戏_原形程序已关闭评论

Python海龟写诗与每个宝宝都是编程娃娃啊

"""海龟写诗"""

from turtle import *
from time import sleep

ziti = ("宋体",14,"bold")
t = Turtle()  
t.pensize(5)
t.pencolor("blue")
t.setheading(90)
t.penup()

t.write("    登鹳雀楼",font=ziti)   ; sleep(2)
t.bk(50)

t.write("    作者:王之涣",font=ziti) ; sleep(2)
t.bk(50)

t.write("白日依山尽,黄河入海流。",font=ziti) ; sleep(2)
t.bk(50)

t.write("欲穷千里目,更上一层楼。",font=ziti) ; sleep(2)

from turtle import *

t = Turtle(visible = False)
t.penup()
a = '每个宝宝都是编程娃娃啊'

t.setheading(90)
for c in a:
    t.write(c,font =("黑体",22,"normal"))
    t.fd(40)
    t.rt(20)  


发表在 python, turtle | Python海龟写诗与每个宝宝都是编程娃娃啊已关闭评论

python创意绘画蓝色的扫把

python创意绘画蓝色的扫把by李兴球
以下是部分代码预览:

"""蓝色的扫把"""

import turtle
from random import randint

screen = turtle.getscreen()
screen.title("python蓝色的扫把")
screen.setup(480,480)
screen.mode("logo")

turtle.ht()
turtle.bk(50)
turtle.pensize(1)
turtle.pencolor("blue")

turtle.goto(0,-50)
turtle.color("brown")
turtle.pensize(5)
turtle.setheading(0)
turtle.fd(200)
turtle.color("blue")
turtle.penup()
turtle.goto(0,180)
turtle.write("蓝色的扫把by李兴球",font=("",12,"italic"),align='center')


screen.mainloop()

如需要查看完整代码,请

成为会员后,登陆才能继续浏览!联系微信scratch8即可办理会员。
(会员专属:能浏览所有文章,下载所有带链接的Python资源。)

发表在 python, turtle | python创意绘画蓝色的扫把已关闭评论

python酷炫光盘颜色渐变示例程序

python酷炫光盘颜色渐变示例程序www.lixingqiu.com
以下是部分代码预览:


"""
酷炫光盘,本程序用到了coloradd模块,请在命令提示符下输入以下命令安装:pip install coloradd
"""

import turtle
from coloradd import *

screen = turtle.getscreen()       # 获取屏幕对象
screen.bgcolor("black")           # 设置屏幕背景
screen.delay(0)                   # 设置绘画延时 
screen.setup(480,480)             # 设置画布大小
screen.title("python酷炫光盘颜色渐变示例程序www.lixingqiu.com")

turtle.st()                       # 隐藏海龟
turtle.penup()                    # 抬起笔来
turtle.pensize(5)                 # 画笔宽度 
color=(1,0,0)                     # 初始颜色 
    
screen.mainloop()                 # 进入程序主循环 

如需要查看完整代码,请

成为会员后,登陆才能继续浏览!联系微信scratch8即可办理会员。
(会员专属:能浏览所有文章,下载所有带链接的Python资源。)

发表在 python, turtle | python酷炫光盘颜色渐变示例程序已关闭评论

Python漂亮的荷花类图形

Python漂亮的荷花类图形,本程序使用了tracer命令,不会演示绘画过程,所以绘画速度极快www.lixingqiu李兴球
以下是部分代码预览:

"""Python漂亮的荷花类图形,本程序使用了tracer命令,不会演示绘画过程,所以绘画速度极快
本程序用到了coloradd模块,可以从pip install coloradd安装
"""

import turtle
from coloradd import *

def drawlotus(d):
    color = (1,0,0)  
        
screen = turtle.getscreen()       # 获取屏幕对象
screen.bgcolor("black")           # 设置屏幕背景
screen.delay(0)                   # 设置绘画延时 
screen.setup(480,360)             # 设置画布大小
screen.title("Python漂亮的荷花类图形www.lixingqiu.com")

turtle.ht()                       # 隐藏海龟
turtle.speed(0)                   # 设置速度 
turtle.pencolor("blue")           # 画笔颜色 
turtle.setheading(180)            # 海龟方向
turtle.pensize(4)                 # 画笔大小
              
for i in range(20):
    drawlotus(i)
screen.update()

如需要查看完整代码,请

成为会员后,登陆才能继续浏览!联系微信scratch8即可办理会员。
(会员专属:能浏览所有文章,下载所有带链接的Python资源。)

发表在 python, turtle | Python漂亮的荷花类图形已关闭评论

Python基于中心点颜色对称的八字彩环图形

Python基于中心点颜色对称的八字彩环图形,本程序用到了coloradd模块的colorset命令,它的用途是把一个整数转换成RGB颜色三元组,可以从pip install coloradd安装

"""Python基于中心点颜色对称的八字彩环图形,本程序用到了coloradd模块的colorset命令,它的用途是把一个整数转换成RGB颜色三元组,可以从pip install coloradd安装"""

import turtle
from coloradd import *

screen = turtle.getscreen()       # 获取屏幕对象
screen.bgcolor("black")           # 设置屏幕背景
screen.delay(0)                   # 设置绘画延时 
screen.setup(480,360)             # 设置画布大小
screen.title("Python基于中心点颜色对称的八字彩环图形www.lixingqiu.com")
 
turtle.setheading(180)
turtle.pensize(6)
  

如需要查看完整代码,请

成为会员后,登陆才能继续浏览!联系微信scratch8即可办理会员。
(会员专属:能浏览所有文章,下载所有带链接的Python资源。)

发表在 python, turtle | Python基于中心点颜色对称的八字彩环图形已关闭评论

Python画八字彩环图形

Python画八字彩环图形

"""Python画八字彩环图形,本程序用到了coloradd模块,可以从pip install coloradd安装"""

import turtle
from coloradd import *

screen = turtle.getscreen()       # 获取屏幕对象
screen.bgcolor("black")           # 设置屏幕背景
screen.delay(0)                   # 设置绘画延时 
screen.setup(480,360)             # 设置画布大小
screen.title("python8字彩环www.lixingqiu.com")

turtle.setheading(180)            # 设置初始方向
turtle.pensize(6)                 # 设置画笔大小

color = (1,0,0)                   # 设置初始颜色

如需要查看完整代码,请

成为会员后,登陆才能继续浏览!联系微信scratch8即可办理会员。
(会员专属:能浏览所有文章,下载所有带链接的Python资源。)

发表在 python, turtle | Python画八字彩环图形已关闭评论

Python海龟画图之3D红框

Python海龟画图之3D红框by李兴球www.lixingqiu.com

以下是部分代码预览:

"""
3D红框,本程序画一个具有3D效果的红色框架
"""

import turtle
from coloradd import *

screen = turtle.getscreen()
screen.delay(0)
screen.bgcolor("black")
screen.setup(480,360)
screen.title("3D红框by李兴球www.lixingqiu.com")

turtle.setheading(180)
turtle.pensize(6)
turtle.speed(0)
...............

screen.exitonclick()               # 关击屏幕关闭窗口
    

如需要查看完整代码,请

成为会员后,登陆才能继续浏览!联系微信scratch8即可办理会员。
(会员专属:能浏览所有文章,下载所有带链接的Python资源。)

发表在 python, turtle | Python海龟画图之3D红框已关闭评论

python彩点圆艺术图形,海龟画图tkinter图像生成演示程序

python彩点圆艺术图形,海龟画图tkinter图像生成演示程序www.lixingqiu.com

以下是部分代码预览:

"""python彩点圆艺术图形,海龟画图tkinter图像生成演示程序,本程序在海龟画图屏幕上打不同大上的彩色圆点,然后保存为ps矢量图形。
"""
from turtle import *
from random import randint,choice
from time import sleep

width,height = 600,600
color_list = ['red','orange','yellow','green','cyan','blue','purple']

screen = Screen()                       
screen.title("python彩点圆艺术图形,海龟画图tkinter图像生成演示程序www.lixingqiu.com")         
screen.bgcolor("black")
screen.setup(width,height) 
screen.delay(0)

t = Turtle(shape='circle')   # 形状为圆形
t.color("white",'white')     # 画笔颜色和填充颜色为白色
t.penup()

screen.mainloop()
 

如需要查看完整代码,请

成为会员后,登陆才能继续浏览!联系微信scratch8即可办理会员。
(会员专属:能浏览所有文章,下载所有带链接的Python资源。)

发表在 python, turtle | python彩点圆艺术图形,海龟画图tkinter图像生成演示程序已关闭评论

python奥特曼打怪兽多媒体演示动画,订制python游戏

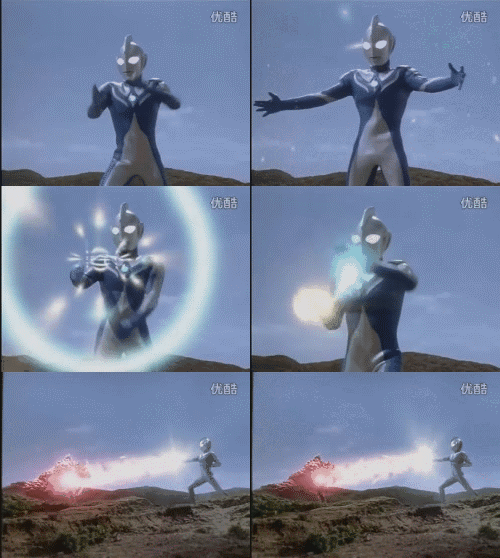
本程序演示以下gif动画:
python奥特曼打怪兽多媒体演示动画,订制python游戏,图像帧已经通过python拆分好了

"""python奥特曼打怪兽多媒体演示动画,订制python游戏,图像帧已经通过python拆分好了"""

from turtle import *
from time import sleep
import os
from winsound import PlaySound,SND_ASYNC

background_image=[] 
music_file= "迪迦奥特曼主题曲.wav"
PlaySound(music_file, SND_ASYNC) # 异步播放音效
ultraman_path= os.getcwd() + "\\奥特曼动画帧"

screen=Screen()
screen.bgcolor("black")
screen.title("python奥特曼打怪兽多媒体演示动画www.lixingqiu.com")


如需要查看完整代码,请

成为会员后,登陆才能继续浏览!联系微信scratch8即可办理会员。
(会员专属:能浏览所有文章,下载所有带链接的Python资源。)

发表在 python, turtle | python奥特曼打怪兽多媒体演示动画,订制python游戏已关闭评论

turtle小女孩跳舞多媒体动画_scratch程序改编python程序

python小女孩跳舞多媒体动画_婷婷的舞蹈,scratch程序改编python程序www.lixingqiu.com

以下是部分代码预览:


"""python小女孩跳舞多媒体动画_婷婷的舞蹈,scratch程序改编python程序"""

from turtle import *
from winsound import PlaySound,SND_ASYNC

# 背景列表
background_list = ["b0.png","b1.png","b2.png","b3.png","b4.png","b5.png","b6.png","b7.png"]
bgamount = len(background_list)                   #背景数量
girls_list = ["girl0.gif","girl1.gif","girl2.gif","girl3.gif"]
gamount = len(girls_list)          # 女孩造型数量

s = Screen()
s.setup(480,360)
s.title("婷婷的舞蹈_python海龟画图版by李兴球")
..............
def play_music():
    PlaySound("Cave.wav",SND_ASYNC)
    s.ontimer(play_music,7300)
play_music()

s.mainloop()

下载完整源代码与素材,请

成为会员后,登陆才能继续浏览!联系微信scratch8即可办理会员。
(会员专属:能浏览所有文章,下载所有带链接的Python资源。)

发表在 python, turtle | turtle小女孩跳舞多媒体动画_scratch程序改编python程序已关闭评论

python时光倒流的秘密,本程序演示海龟的撤销功能

Python时光倒流的秘密,本程序演示海龟的撤销功能www.lixingqiu.com

以下是部分代码预览:

""" 时光倒流的秘密,本程序演示海龟的撤销功能。
#undobufferentries() 可撤销次数。
#时光倒流的秘密在哪? 请把程序中画正方形的代码块定义成一个函数。
"""
from turtle import * 
from tkinter import messagebox

screen = Screen()
screen.delay(12) 
screen.bgcolor("black")
screen.setup(680,200)
screen.title("时光倒流的秘密www.lixingqiu.com")


t= Turtle(shape = 'turtle')
t.penup()
t.pensize(1)
t.pencolor("white")

t.bk(250)
colorList = ['red','orange','yellow','green','cyan','blue','purple','pink','gray','white']
 
answer = messagebox.askyesno("提示","要关闭窗口吗?")
if answer : screen.bye()

如需要查看完整代码,请

成为会员后,登陆才能继续浏览!联系微信scratch8即可办理会员。
(会员专属:能浏览所有文章,下载所有带链接的Python资源。)

发表在 python, turtle | python时光倒流的秘密,本程序演示海龟的撤销功能已关闭评论

Python多彩弹珠球

python 3d bounce ball 多彩弹球三

python 3d bounce ball 多彩弹球三

以下是部分代码预览:

""" 多彩弹球三.py。 本程序新建Ball类,它继承自Turtle。"""

from glob import glob
from turtle import Screen,Turtle
from random import randint,choice
 
class Ball(Turtle):
    def __init__(self,image):
        """image:已注册的gif图"""
        Turtle.__init__(self,shape=image)
        self.penup()
        self.xspeed = choice(speeds)         # 此处用到了全局变量speeds
        self.yspeed = choice(speeds)
        self.sw = self.screen.window_width()  # 屏幕宽度属性
        self.sh = self.screen.window_height() # 屏幕高度属性

    def move(self):
        """移动小球方法"""
        x = self.xcor() + self.xspeed        # 新的x坐标是原坐标加xspeed
        y = self.ycor() + self.yspeed        # 新的y坐标是原坐标加yspeed
        
if __name__ == "__main__":
    
    width,height = 800,600
    gif_images = glob("images/*.gif")
    speeds = [x for x in range(-3,3) if x!=0] # 如果x不是0则加到列表中

    screen = Screen()
    screen.delay(0)                           # 屏幕延时为0毫秒
    screen.bgcolor("black")                   # 设定屏幕背景色
    screen.setup(width,height)                # 设定屏幕宽高
    screen.title("多彩弹球三")
    [screen.addshape(image) for image in gif_images] # 注册所有gif到屏幕

    while running:
        balls[index].move()                    # 移动小球
        index = index + 1                      # 索引号加1
        index = index % amounts                # 索引对总数量求余
                                    
    screen.bye()                               # 关闭窗口

下载完整源代码与素材,请

成为会员后,登陆才能继续浏览!联系微信scratch8即可办理会员。
(会员专属:能浏览所有文章,下载所有带链接的Python资源。)

发表在 python, turtle | Python多彩弹珠球已关闭评论

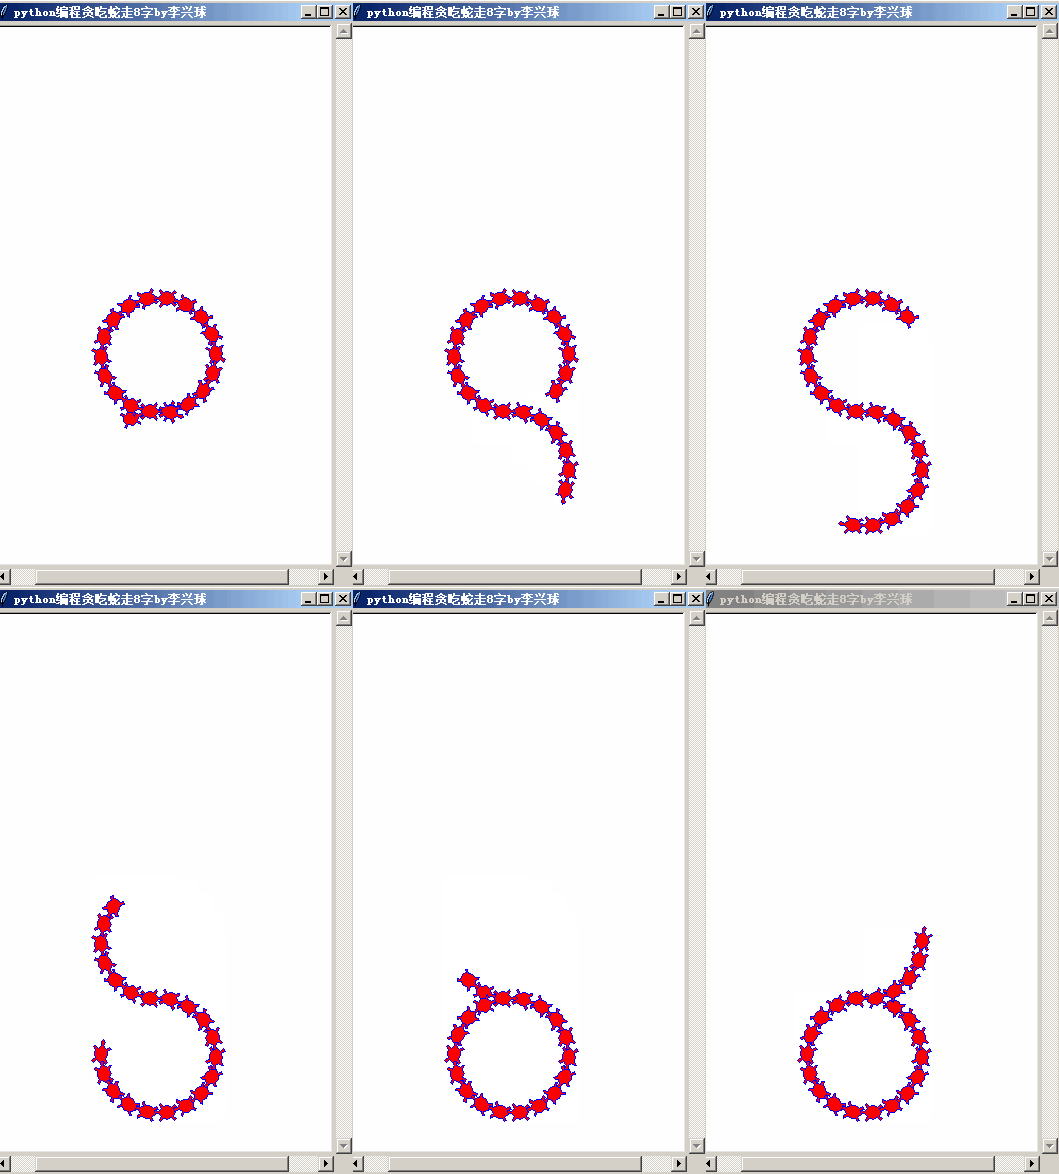
python编程贪吃蛇走8字

python贪吃蛇预备程序

通过图章功能就能制作贪吃蛇游戏了。这个程序是一个预备程序,相信读者理解原理后就能做出自己的贪吃蛇小游戏了。
以下是部分代码预览:

from turtle import *
from time import sleep

屏幕 = Screen()     
屏幕.title("python编程贪吃蛇走8字")      
 
t=Turtle(shape='turtle')
t.setheading(180)
t.color("blue","red")
t.penup()
 
for i in range(20):
    t.stamp()                # 图章()
    sleep(0.01)
 

如需要查看完整代码,请

成为会员后,登陆才能继续浏览!联系微信scratch8即可办理会员。
(会员专属:能浏览所有文章,下载所有带链接的Python资源。)

发表在 python, turtle | python编程贪吃蛇走8字已关闭评论

Python萤火虫找女朋友__arcade迷宫解密型游戏

萤火虫找女朋友_by李兴球_arcade迷宫解密型游戏

以下是部分代码预览:

"""
萤火虫找女朋友.py
请按上下左右方向箭头操作萤火虫去找另一只萤火虫。按W或S键
能改变它的发光强度,不过如果发光强了,可能会被癞蛤蟆发现,
所以要注意有时候光度不能太强!在迷宫还有陷阱,有钻石可拾取,可是它的女朋友在哪里呢?

本游戏主要用arcade模块实现,用turtle模块实现开始界面。

"""

import random
import arcade

SPRITE_SCALING = 1
SCREEN_WIDTH = 800
SCREEN_HEIGHT = 600
SPRITE_PIXEL_SIZE = 64
GAME_NAME = "萤火虫找女朋友_by李兴球_arcade迷宫解密型游戏"
# 距离屏幕边距的最小距离 

VIEWPORT_MARGIN = 40
MOVEMENT_SPEED = 5

class MyGame(arcade.Window):
    """主应用程序类. """

    def __init__(self, width, height,title):
        """
        初始化器
        """
        super().__init__(width, height,title)

        self.game_over = False

        # 角色列表
        
        self.toad_list = None
        self.diamond_list = None
        self.trap_list = None       

        # 设置游戏及玩家相关变量
        self.score = 0
        self.player_sprite = None     # 雄性萤火虫 (玩家)
        self.femail_firefly = None    # 雌性萤火虫
        self.wall_list = None
        self.physics_engine = None
        self.view_bottom = 0
        self.view_left = 0

    def setup(self):
        """ 实例化变量 """
        
        self.found_girl_friend = False

        # 地图块角色列表
        self.wall_list = arcade.SpriteList()

        # 设置蒙板       
        self.mask = arcade.Sprite("images/mask.png")
        self.mask.scale = 0.6
        
        # 下面是加载地图        
        my_map = arcade.read_tiled_map(f"bigroom_1.tmx", SPRITE_SCALING)
        
        # 读取不可移动的平台数据阵列'ground'是一图层的名称
        map_array = my_map.layers_int_data['ground']        
          
        # 从墙生成地图列表
        self.wall_list = arcade.generate_sprites(my_map, 'ground', SPRITE_SCALING)
        self.wall_list.move(SPRITE_PIXEL_SIZE ,0)   # 水平方向和垂直方向移动 
                
        self.toad_list.move(SPRITE_PIXEL_SIZE ,0)       

        # 设置背景颜色
        arcade.set_background_color(arcade.color.AMAZON)

        # 设置视口边界
        self.view_left = 0
        self.view_bottom = 0

    def detect_collision_radius_with_toads(self):
        """检测和每个癞蛤蟆的距离,蒙板越大,萤火虫越容易死"""
   
    def on_draw(self):
        """
        渲染屏幕
        """
        # 开始渲染
        arcade.start_render()

        # 画各个角色
        self.wall_list.draw()
   
    def on_key_press(self, key, modifiers):
        """当按键时调用此方法 """                

    def on_key_release(self, key, modifiers):
        """当松开按键时调用此方法 """

    def update(self, delta_time):
        """ 游戏逻辑设定,结果都是更新坐标/角度,删除/添加角色等。"""

        if self.game_over == True :return
        # 调用物理引擎
        self.physics_engine.update()

def show_game_UI():
    
    import turtle
    screen = turtle.getscreen()
    screen.title(GAME_NAME)
    screen.setup(610,610)
    screen.bgpic("images/bg.png")
    screen.onkeypress(lambda:screen.bye(),"space")
    screen.onclick(lambda x,y:screen.bye())
    screen.listen()
    screen.mainloop()    
    
def main():
    """ 主要方法"""

    show_game_UI()
    
    window = MyGame(SCREEN_WIDTH, SCREEN_HEIGHT,GAME_NAME)
    window.setup()
    arcade.run()

if __name__ == "__main__":
    main()


下载完整源代码与素材,请

成为会员后,登陆才能继续浏览!联系微信scratch8即可办理会员。
(会员专属:能浏览所有文章,下载所有带链接的Python资源。)

发表在 arcade, python, turtle | Python萤火虫找女朋友__arcade迷宫解密型游戏已关闭评论

python街机萤火虫勇闯黑夜迷宫_大型滚动地图

python arcade 萤火虫勇闯黑夜迷宫_大型滚动地图 lixingqiu下面gif动录制作软件把图片进行了压缩,所以呈现了“圆圈”效果。实际上效果像上图这样。python arcade 萤火虫勇闯黑夜迷宫_大型滚动地图 lixingqiu

以下是部分代码预览:

"""
萤火虫勇闯黑夜迷宫_大型滚动地图

"""

import random
import arcade
import os

SPRITE_SCALING = 1

SCREEN_WIDTH = 800
SCREEN_HEIGHT = 600
SPRITE_PIXEL_SIZE = 64

# 距离屏幕边距的最小距离 

VIEWPORT_MARGIN = 40
MOVEMENT_SPEED = 5

class MyGame(arcade.Window):
    """主应用程序类. """

    def __init__(self, width, height):
        """
        初始化器
        """
        super().__init__(width, height,"萤火虫勇闯黑夜迷宫_大型滚动地图 lixingqiu")

        self.game_over = False

        # 角色列表
        self.player_list = None
        self.coin_list = None

        # 设置游戏及玩家相关变量
        self.score = 0
        self.player_sprite = None
        self.wall_list = None
        self.physics_engine = None
        self.view_bottom = 0
        self.view_left = 0

    def setup(self):
        """ 实例化变量 """

        # 角色列表
        self.player_list = arcade.SpriteList()
        self.wall_list = arcade.SpriteList()

        # 设置蒙板
        self.mask = arcade.Sprite("images/mask.png")
        self.mask.scale = 2

        # 实例化玩家操作的角色
        self.score = 0
        self.player_sprite = arcade.Sprite("images/lixingqiu.png", 0.4)
        self.player_sprite.center_x = 128
        self.player_sprite.center_y = 270
        self.player_list.append(self.player_sprite)

    def on_draw(self):
        """
        渲染屏幕
        """

        # 开始渲染
        arcade.start_render()

        # 画各个角色
        self.wall_list.draw()
        self.player_list.draw()
        self.小东西_list.draw()
        self.mask.draw()
                

    def on_key_press(self, key, modifiers):
        """当按键时调用此方法 """

        if key == arcade.key.UP:
            self.player_sprite.change_y = MOVEMENT_SPEED
        elif key == arcade.key.DOWN:
            self.player_sprite.change_y = -MOVEMENT_SPEED
        elif key == arcade.key.LEFT:
            self.player_sprite.change_x = -MOVEMENT_SPEED
        elif key == arcade.key.RIGHT:
            self.player_sprite.change_x = MOVEMENT_SPEED

    def on_key_release(self, key, modifiers):
        """当松开按键时调用此方法 """

        if key == arcade.key.UP or key == arcade.key.DOWN:
            self.player_sprite.change_y = 0
        elif key == arcade.key.LEFT or key == arcade.key.RIGHT:
            self.player_sprite.change_x = 0

    def update(self, delta_time):
        """ 游戏逻辑设定,结果都是更新坐标/角度,删除/添加角色等。"""

        # 调用物理引擎
        self.physics_engine.update()

        # 蒙板跟随玩家角色
        self.mask.center_x = self.player_sprite.center_x
        self.mask.center_y = self.player_sprite.center_y


def main():
    """ 主要方法"""
    window = MyGame(SCREEN_WIDTH, SCREEN_HEIGHT)
    window.setup()
    arcade.run()

if __name__ == "__main__":
    main()

下载完整源代码与素材,请

成为会员后,登陆才能继续浏览!联系微信scratch8即可办理会员。
(会员专属:能浏览所有文章,下载所有带链接的Python资源。)

发表在 arcade, python | python街机萤火虫勇闯黑夜迷宫_大型滚动地图已关闭评论

在windows中上传自己的模块_在Pypi打造自己的Python轮子详细步骤

在windows中上传自己的模块_在Pypi打造自己的Python轮子详细步骤

假设要发布自己模块的名称为coloradd,那么按以下步骤上传这个模块。

1、在https://pypi.org/注册用户名和密码,我注册的为 lixingqiu 密码  .com

2、检测自己命名的模块有没有和已经注册的模块重名,可以在Pypi.org网站搜索一下。

3、新建coloradd_release目录,新建setup.py文件,内容如下所示:

from setuptools import setup

setup(name=’coloradd’,
version=’0.1′,
description=’This is the color increase command that matches the turtle drawing command.配合Python海龟画图命令使用的颜色增加模块。’,
url=’https://github.com/lixingqiu/coloradd’,
author=’lixingqiu’,
author_email=’406273900@qq.com’,
license=’MIT’,
packages=[‘coloradd’],
zip_safe=False)

4、在coloradd_release目录下再新建coloradd,这个才是真正要上传的内容。

在这个coloradd文件夹下新建__init__.py,在此文件中可以编写程序,定义函数与类,那么当导入coloradd模块时就能导入这些名字了。以下是一个例子:

print(“导入成功!”)
def call_lixingqiu():
print(“呼叫李兴球”)

5、测试模块是否能正常安装使用:

回到上级目录:coloradd_release,打开命令提示符工具,切换到这个目录。
假设这个目录名为:e:/coloradd_release,那么在运行对话框里输入cmd后,输入cd /d e:/coloradd_release就能进入这个目录了。
输入命令:pip install .
正常的话就能顺利安装自己的coloradd模块。
然后自己在Python的IDLE中导入一下,导入成功后应该会打印“导入成功!”这几个字,并且你能调用call_lixingqiu函数。

6、创建用户验证文件 .pypirc

注意这个要在当前用户目录下,如果用的是windows系统,用户为administrator,那么这个目录一般为:c:/users/administrator。
打开记事本,输入以下内容:

[distutils]
index-servers=pypi

[pypi]
repository = https://upload.pypi.org/legacy/
username = 用户名
password = 密码

保存的时候要选择所有文件(*.*),然后输入.pypirc即可。

7、生成上传包

输入命令:python setup.py sdist
它新建dist文件夹,生成coloradd-0.1.tar.gz压缩档案。

8、上传包
输入命令:python setup.py sdist upload
用户名密码都正确的话,就能看到最后的提示,表示上传成功,最后两行提示为:
Submitting dist\coloradd-0.1.tar.gz to https://upload.pypi.org/legacy/
Server response (200): OK

9、让别人使用你的模块

输入命令:pip install coloradd
一切正常的话,就会下载模块在 Python的安装目录的Lib\site-packages\coloradd中。

10、最后在IDLE中测试吧,这个不用说了。

注:coloradd命令主要用来配合海龟画图使用,让画笔的颜色渐变,从而产生更炫的效果。

发表在 python, Uncategorized | 在windows中上传自己的模块_在Pypi打造自己的Python轮子详细步骤已关闭评论

arcade关卡选择界面

"""这是一个毛胚程序,作为一个作品关卡选择器。
多关卡界面,运行本程序会显示两个按钮,单击不同的按钮会进入不同的界面。
"""

import arcade

SCREEN_WIDTH = 600                               # 常量定义,屏幕宽度
SCREEN_HEIGHT = 480                              # 常量定义,屏幕高度
SCREEN_TITLE = " arcade关卡选择界面by lixingqiu" # 常量定义,屏幕标题
SPRITE_SCALING = 0.5
SPRITE_PIXEL_SIZE  = 32

def point_in_sprite(x,y,sprite):
    """
       判断点是否角色的矩形内,x,y:坐标点,left:最左边x坐标,right:最右边x坐标,top:最上边y坐标,bottom:最下边y坐标。
    """
    left = sprite.left
    right = sprite.right
    top = sprite.top
    bottom  = sprite.bottom
    return x > left and x < right  and y < top and y > bottom

class MyGame(arcade.Window):
    """    继承自窗口类的游戏类,在具体的游戏中,重写以下方法,删除不需要重写的方法。    """
    button_index = None

    def __init__(self, width, height, title):
        super().__init__(width, height, title)                #  调用父类的初始化方法新建一个窗口
        arcade.set_background_color(arcade.color.AMAZON)      #  设置背景颜色为亚马逊绿
        
    def load_level(self,mapfile):
        """根据单击不同的关卡按钮,加载不同的tmx地图文件"""
         #  加载 地图
        my_map = arcade.read_tiled_map(mapfile, SPRITE_SCALING)
        
        # 读取不可移动的平台数据阵列'ground'是一图层的名称
        map_array = my_map.layers_int_data['ground']        
          
        # 从墙生成地图列表
        self.wall_list = arcade.generate_sprites(my_map, 'ground', SPRITE_SCALING)
        self.wall_list.move(SPRITE_PIXEL_SIZE ,0)   # 水平方向和垂直方向移动
    
          
        # 读取key阵列, picked是地图中的一个层,这个层里是可拾取的道具。
        keys_array = my_map.layers_int_data['picked']
        
        # 生成key列表,在地图设计中,可增加多个key
        self.key_list = arcade.generate_sprites(my_map, 'picked', SPRITE_SCALING)
        self.key_list.move(SPRITE_PIXEL_SIZE ,0)       


    def setup(self):
        """ 这个方法是在实例化Mygame后对游戏进行一些设置。 """
        self.button_list = arcade.SpriteList()
        
        self.button1 = arcade.Sprite("button.png")
        self.button1.left = 100
        self.button1.bottom = 300        
        self.button_list.append(self.button1)        
        
        self.button2 = arcade.Sprite("button.png")
        self.button2.left = 100
        self.button2.bottom = 100        
        self.button_list.append(self.button2)

    def on_draw(self):
        """ 渲染屏幕  ,帧率为60左右,即每60份之一秒会自动调用此方法  """        
        arcade.start_render()    # 此命令会用背景色填充屏幕,
        if MyGame.button_index == None:
           self.button_list.draw()         # 重画
        else:
            self.wall_list.draw()
            self.key_list.draw()                

    def update(self, delta_time):
        """ 所有的角色移动等游戏逻辑都在这里编写代码   """
        self.button_list.update()

    def on_mouse_press(self, x, y, button, key_modifiers):
        """ 当按鼠标键时会自动地调用此方法     """
        if MyGame.button_index != None:return
        if point_in_sprite(x,y,self.button1):
            print("单击到按钮1")
            self.load_level(f"house_1.tmx")
            MyGame.button_index = 1     
             
            
        if point_in_sprite(x,y,self.button2):
            print("单击到按钮2")            
            self.load_level(f"house_2.tmx")
            MyGame.button_index = 2
            
    
    def on_mouse_motion(self, x, y, delta_x, delta_y):
        """ 当鼠标移动时会自动地调用此方法 """          
 

def main():
    """主要的函数"""
    game = MyGame(SCREEN_WIDTH, SCREEN_HEIGHT, SCREEN_TITLE)  #  实例化一个游戏
    game.setup()                                  # 对游戏进行设置
    arcade.run() # 进入选关卡循环
    

if __name__ == "__main__":  
      main()


发表在 arcade, python | arcade关卡选择界面已关闭评论

turtle画布上的弹球

python海龟画图模块画布弹球程序lixingqiu

以下是部分代码预览:

"""python海龟画图模块画布弹球程序"""

from turtle import *
from random import randint
from time import sleep

width,height=480,360

screen = Screen()
screen.bgcolor("navy")
screen.title("python海龟画图模块画布弹球程序by lixingqiu")
screen.setup(width,height)
canvas = screen.cv                                    # 获取画布
canvas.create_line(0, 0, 90, 90, fill="red", width=3) # 这条线看出坐标系
ball = canvas.create_oval(0,0,50,50,fill='cyan')      # 创建圆形,返回的是编号

xspeed = randint(-5,5)                                # 设定x速度
yspeed = randint(-5,5)                                # 设定y速度

如需要查看完整代码,请

成为会员后,登陆才能继续浏览!联系微信scratch8即可办理会员。
(会员专属:能浏览所有文章,下载所有带链接的Python资源。)

发表在 python, tkinter, turtle | turtle画布上的弹球已关闭评论

python海龟画图合成gif动图原理程序

以下是部分代码预览:

"""python海龟画图合成gif动图原理程序

本程序把tkinter的画面所画的圆形保存为jpg图像。
turtle是基于tkinter的,所以能调用画布的诸多功能进行画图。
在海龟画的过程中可以把每个步骤都保存为图片,最后就能合成gif动图了。

"""

import io
from turtle import *
from PIL import Image

width,height=480,360

screen = Screen()
screen.setup(width,height)
canvas = screen.cv                                    # 获取画布
canvas.create_line(0, 0, 90, 90, fill="red", width=3) # 这条线看出坐标系
ball = canvas.create_oval(0,0,50,50,fill='blue')      # 创建圆形,返回的是编号
# 下面把球保存为jpg图像


如需要查看完整代码,请

成为会员后,登陆才能继续浏览!联系微信scratch8即可办理会员。
(会员专属:能浏览所有文章,下载所有带链接的Python资源。)

发表在 python, turtle | python海龟画图合成gif动图原理程序已关闭评论

Python海龟画图用鼠标控制角色的射击游戏

Python海龟画图用鼠标控制角色的射击游戏练习程序

"""
Python海龟画图用鼠标控制角色的射击游戏练习程序。
本程序可以实时获取鼠标指针的x,y坐标,作者:李兴球
原理:通过获取screen的canvas,对<Motion>鼠标移动事件进行绑定.
由于turtle的坐标系的不同,所以要进行坐标转换.
"""
#从海龟模块导入所有命令

from turtle import *
import math

class Bullet(Turtle):
    def __init__(self,x,y,h):
        Turtle.__init__(self,visible=False,shape="circle")
        self.penup()
        self.dead = False
        self.goto(x,y)
        
    def move(self):
        """朝自己的方向移动"""
        self.fd(10)        

def follow_mouse(event):
    """本函数让小海龟面朝鼠标指针移动"""
    x = event.x - 240              # 转换成海龟坐标系中的x坐标
    y = 180 - event.y              # 转换成海龟坐标系中的y坐标
    dy = y - blue_turtle.ycor()
    dx = x - blue_turtle.xcor()

def shoot(x,y):
    """发射子弹"""
    b = Bullet(x,y,blue_turtle.heading())
 
def born_turtle():
    """生成海龟对象"""
    blue= Turtle(shape='turtle')


if __name__ =="__main__":
    
    blue_turtle = born_turtle()              # 生成海龟
    bullets = []                             # 子弹列表现
    screen = Screen()                        # 新建屏幕对象
    screen.bgcolor("gray")                   # 设置背景灰度
    screen.setup(480,360)                    # 设置屏幕宽高
    screen.delay(0)                          # 设置屏幕延时
    screen.cv.bind("<Motion>",follow_mouse)  # 绑定鼠标移动事件
    screen.onclick(shoot)                    # 单击屏幕,发射子弹
    screen.mainloop()


如需要查看完整代码,请

成为会员后,登陆才能继续浏览!联系微信scratch8即可办理会员。
(会员专属:能浏览所有文章,下载所有带链接的Python资源。)

发表在 python, turtle | Python海龟画图用鼠标控制角色的射击游戏已关闭评论

python幸运大抽奖大转盘粗犷风格小程序

python 幸运大抽奖大转盘by李兴球lixingqiu

"""幸运大抽奖小程序,本作品要求安装pygame模块才有声音
按空格键开始抽奖。
"""

# 1、模块导入
import sys
from turtle import *
from random import randint

# 2、屏幕初始化 
screen = Screen()
screen.title("幸运大抽奖 by lixingqiu")
screen.setup(800,600)
screen.bgpic("转盘.png")
screen.delay(0)
vertex = ((0,0),(25,0),(25,100),(50,100),(0,150),(-50,100),(-25,100),(-25,0)) # 顶点表
screen.addshape("bigarrow",vertex)                        # 添加大箭头各顶点到形状列表

class Sprite(Turtle):
    def __init__(self,costume_list,x,y):
        Turtle.__init__(self,visible=False)
        self.up()
        self.costume_amount = len(costume_list) 
        self.costume_list = costume_list     # 造型列表
        self.costume_index = 0               # 初始造型索引
        self.goto(x,y)                       # 定位
        self.showturtle()

sprite1 = Sprite(sprite1_images,-300,200)
sprite2 = Sprite(sprite2_images,300,200)
sprite3 = Sprite(sprite3_images,-300,-200)
sprite4 = Sprite(sprite4_images,300,-200)
                      
# 6、箭头角色与旋转

arrow = Turtle(shape = "bigarrow")
arrow.color("black","purple")
numbers = randint(50,100)     # 旋转次数
angle = 30                    # 每次旋转的角度

screen.listen()
screen.mainloop() 
    

下载完整源代码与素材,请

成为会员后,登陆才能继续浏览!联系微信scratch8即可办理会员。
(会员专属:能浏览所有文章,下载所有带链接的Python资源。)

发表在 python, turtle | python幸运大抽奖大转盘粗犷风格小程序已关闭评论

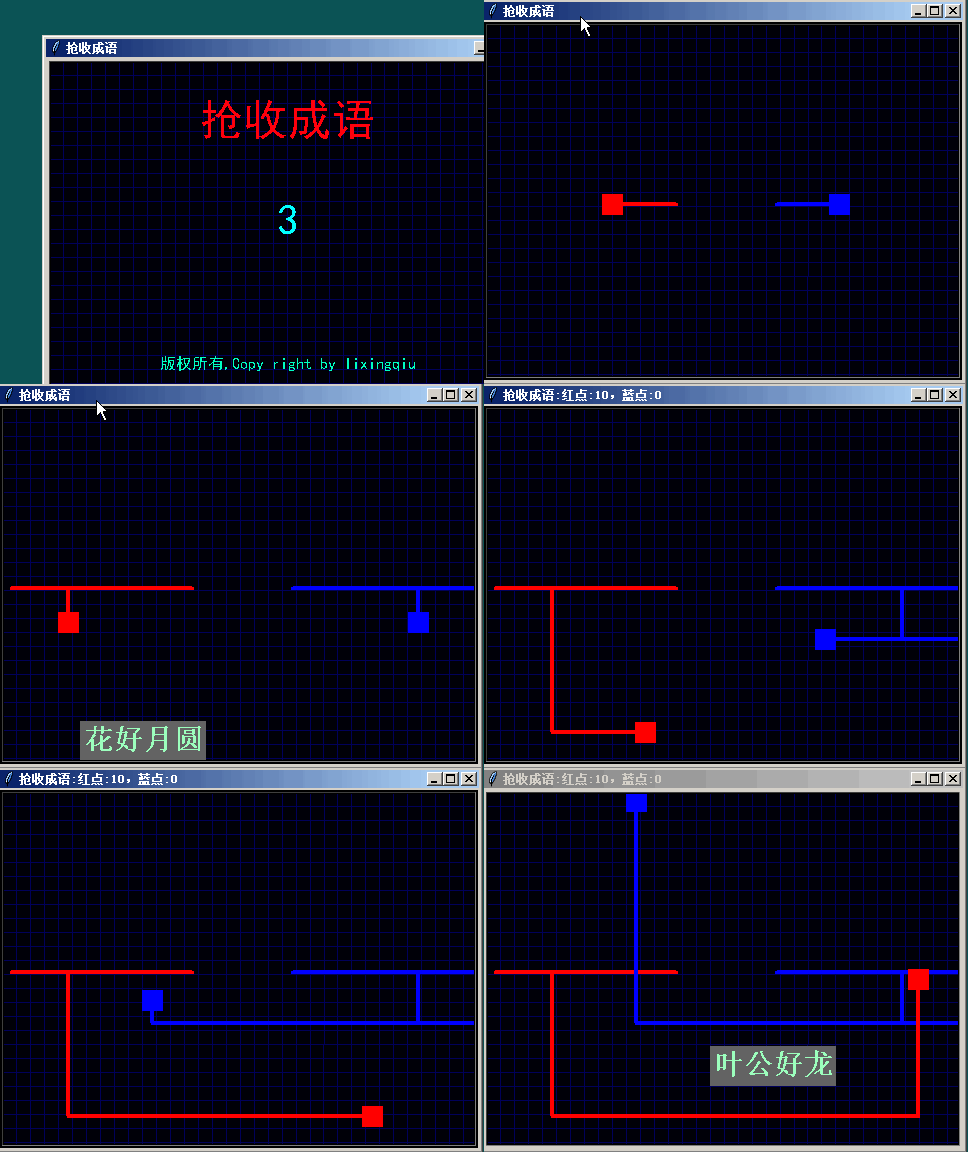
python抢收成语双人创意游戏主程序

python 抢收成语双人创意游戏l作者:李兴球 lixingqiu

本程序共分有5个模块进行编写,以下是部分代码预览:

"""这是一个双人小游戏,在屏幕上会时不时的出现一些成语,玩家操作小方块去碰这些成语即可得分。

制作日期:2018/9月,这是去年制作的一个作品,成语的gif图片是用photoshop一个个制作的。其实可以用pillow自动生成。

"""
 
from writer import *        # 从writer模块导入Writer类
from idiom import *         # 导入成语表 idiomList和Idiom类
from square import *        # 导入方块类 Square
from time import sleep      # 从时间模块导入延时命令
from turtletools import *   # 从turtletools模块导入所有命令 
         
def clearlines():
    """清除方块所画的线条图形"""
    [square.clear() for square in squares] 
    
def end_of_countdown():
    """倒计时结束游戏"""
  
if __name__=="__main__":
    
    """初始化屏幕"""
    game_name = "抢收成语"
    screen_width,screen_height = 480,360   # 定义全局变量屏幕宽度和高度
    ps = game_name,"black",screen_width,screen_height,"background2.gif"
    screen = init_screen(*ps)              # 调用初始化屏幕函数
    """把每个成语gif图片注册到形状列表,idiomList从模块idiom中来"""
    [screen.addshape(idiom) for idiom in idiomList] # 注册所有成语到形状列表

    """初始化声音"""
    have_pygame,bumpsound = init_sound("Popcorn1.wav","叮.wav")

    """写游戏的题目"""
    myfont = ("黑体",32,"normal")
    title_writer = Writer(0,100,myfont,game_name,3,screen) # Writer类

    """写版权所有"""
    copy_right = "版权所有,Copy right by lixingqiu"
    ps = 0,50-screen_height/2 ,("黑体",12,"normal"),copy_right,3,screen
    copyright_writer = Writer(*ps)
  
    """倒计时显示,准备开始游戏"""  
    countdown(4,myfont,"cyan")            # 4,3,2,1倒计时

    """生成红色小方块"""
    ps = screen,"红点",-50,0,180,"red","Up","Down","Left","Right"
    redsquare = Square(*ps)              # 方块类,生成后会自己移动

    """生成蓝色小方块"""
    ps = screen,"蓝点",50,0,0,"blue","w","s","a","d"
    bluesquare = Square(*ps)             # 方块类,生成后会自己移动

    """把小方块装到列表里,方便管理"""
    squares = [redsquare,bluesquare]
    
    """生成一个成语对象,成语随机出现"""
    ps = 137,42,[redsquare,bluesquare],screen,have_pygame,bumpsound,game_name
    idiom = Idiom(*ps)                       # 生成后,它等待被撞,然后换造型

    """注册空格键事件,如果按空格键,那么清除所有笔迹"""
    screen.onkeypress(clearlines,"space")    # 按空格键清除所画的图形

    """倒计时结束,显示画面"""
    endimage = "结束画面.png"
    gametime = 60                            # 设置游戏时间
    end_of_countdown()                       # 异步等待游戏结束

    """设置屏幕焦点,进入主循环"""
    screen.listen()
    screen.mainloop()    

下载完整源代码与素材,请

成为会员后,登陆才能继续浏览!联系微信scratch8即可办理会员。
(会员专属:能浏览所有文章,下载所有带链接的Python资源。)

发表在 python, turtle | python抢收成语双人创意游戏主程序已关闭评论

python simple tank war 简单坦克大战 used turtle module by lixingqiu

坦克是用海龟画图画出来的,不是很漂亮哦。下面是封面。
python turtle坦克大战tank war by lixingqiu李兴球

以下是部分代码预览:

"""坦克大战,小坦克被一群大坦克包围,情况十分危急。
  小坦克的优势在于速度快,能连续发射。制作日期:2018年10月。
  这是一个用python的海龟画图模块制作的射击小游戏,需要用鼠标指针操作小坦克突围!
  制作日期:2018年10月,作者:李兴球。

"""
#从海龟模块导入所有命令

from turtle import *
import math
from random import randint

def load_sound():
    """加载声音与播放背景音乐"""
    sound_normal = True
    explode_sound= None
    shoot_sound = None
    return sound_normal,explode_sound,shoot_sound
        
def init_screen():
    """初始化屏幕,注册坦克形状"""
    screen = Screen()
    screen.setup(width,height)
    p = ((0,0),(50,0),(50,80),(10,80),(10,150),(-10,150),(-10,80),(-50,80),(-50,0))
    screen.addshape("tank",p)        # 注册tank形状
    screen.bgcolor("blue")           # 屏幕背景色
    screen.title(gametitle)          # 设定屏幕标题
    screen.colormode(255)            # 设定颜色模式
    screen.delay(0)                  # 屏幕延时为0
    screen.bgpic("封面设计.png")     # 封面加载


class Bullet(Turtle):
    """炮弹类,炮弹生成后会自己移动,直到碰到边缘。"""
    def __init__(self,x,y,h):
        Turtle.__init__(self,visible=False,shape="circle")
        self.penup()
        self.dead = False
        self.goto(x,y)
        self.setheading(h)
        self.showturtle()
        self.move()
        
    def move(self):
        """炮弹移动,碰到边缘就‘死亡’"""
        self.fd(10)
        if self.bumpedge():self.dead = True


    def bumpedge(self):
        """碰到边缘返回True,否则False"""
        return abs(self.xcor())>width/2 or abs(self.ycor())>height/2
        
class NPCtank(Turtle):
    deadcount = 0                         #统计数量的类变量
    def __init__(self,mytank,my_bullet):
        """敌方坦克的敌人就是mytank,my_bullet是我方炮弹列表"""
        Turtle.__init__(self,shape='tank',visible=False)
         
        self.shapesize(0.3,0.3)
        color1 = randint(0,255),randint(0,255),randint(0,255)
        self.color("black",color1)
        self.penup()
        self.setheading(randint(1,360))
        self.fd(randint(200,height*0.4))   # 配合随机方向让npc随机移到一个地方    
        self.enemy = mytank
        self.enemy_bullet = my_bullet         
        self.face_enemy()                  # 一出生就面向mytank
        self.dead = False
        self.move()
        
    def move(self):
        """移动npc坦克,有时会面向mytank"""
        self.fd(1)
        self.shoot()      # 设置一定的机率发射炮弹
        self.bumpedge()   # 碰到屏幕边缘就向后转
        self.bumpenemy()  # 碰到敌人(mytank)后会爆炸,mytank当然也会爆炸,游戏结束
        self.bumpbullet() # 碰到我方炮弹就爆炸

    def bumpenemy(self):
        """碰到敌人就两方都死亡,npc的敌人就是mytank"""
        r = self.distance(self.enemy)
            
            
    def bumpbullet(self):
        """碰到我方炮弹就死亡"""
             
    def bumpedge(self):
        """bumpedge就掉头"""
        faraway = abs(self.xcor())>width/2 or abs(self.ycor())>height/2  
        if faraway:self.right(180) # 掉转头

    def face_enemy(self):
        """面向敌人,NPC的敌人就是mytank,可以增加代码让转向更平滑"""
        self.setheading(self.towards(self.enemy.position()))
        
    def shoot(self):
        """敌坦克的发射方法,同时把‘死了’的炮弹移去"""
 
        
class Bomb(Turtle):
    """炸弹类,它实例化后,自己就会切换造型,从而“爆炸”"""
    def __init__(self,x,y,images):
        """x,y是爆炸的坐标,images是已注册到屏幕形状列表的造型图片"""
        Turtle.__init__(self,visible=False)
        self.penup()
        self.goto(x,y)
        self.index = 0                 # 造型索引编号从0开始
        self.amount  = len(images)     # 造型数量
        self.images = images           # 造型列表
        self.showturtle()              # 显示
        if snd_normal: explode_sound.play()
        self.next_costume()      # 利用屏幕的定时器功能使之循环一定的次数
        
    def next_costume(self):
        if self.index < self.amount:     # 小于总数量就换造型       
           self.shape(self.images[self.index]) # 从列表取指定索引的图片,设为海龟的形状
           self.index = self.index + 1
           screen.ontimer(self.next_costume,50)

def make_mytank():
    """生成我方坦克对象,并返回到主程序"""

def mytank_wait_bump_enemybullet():
    """我方坦克每隔10豪秒等待是否碰到敌方炮弹"""
 

def follow_mouse(event):
    """本函数让小海龟面朝鼠标指针移动"""
        
    
def shoot(x,y):
    """mytank发射函数,被绑定在screen.onclick事件上"""


class Writer(Turtle):
    """用来在屏幕上写字的海龟对象"""
    def __init__(self,y):
        Turtle.__init__(self,visible = False)
        self.penup()
        self.sety(y)
        self.color("cyan")
        self.font = ("黑体",20,"normal")
    def print(self,string):
        self.clear()        
        self.write(string,align='center',font=self.font)
           

def start_game():
    screen.bgpic("草地.png")
     
    
if __name__ =="__main__":
    
    gametitle = "坦克大战_海龟画图版_作者:李兴球"
    tanksamount = 20                          # 坦克数量
    width,height=800,700                      # 屏幕宽度,高度
    enemybullet = []                          # 敌方炮弹列表
    mybullet = []                             # 我方炮弹列表
    """声音是否正常,爆炸声,射击声"""
    snd_normal,explode_sound,shoot_sound = load_sound()   # 加载声音
    screen,explosion_images = init_screen()   # 初始化屏幕,显示封面,返回screen和爆炸造型列表
    mytank = make_mytank()                    # 我方坦克
    top_turtle = Writer(310)                  # 顶部写字龟
    top_turtle.print("当前击毁敌方坦克数:0") # 在顶部写些字
    bottom_turtle = Writer(-330)              # 底部写字龟    
    screen.onkeypress(start_game,"space")     # 注册按空格事件,生成敌方坦克等等
    mytank_wait_bump_enemybullet()            # 等待碰到敌方炮弹 
    screen.listen()                           # 给屏幕设置焦点
    screen.mainloop()                         # 进入主循环    


下载完整源代码与素材,请

成为会员后,登陆才能继续浏览!联系微信scratch8即可办理会员。
(会员专属:能浏览所有文章,下载所有带链接的Python资源。)

发表在 python, turtle | python simple tank war 简单坦克大战 used turtle module by lixingqiu已关闭评论

python 漂亮的花框音乐盒子flower frame box music player

python 花框音乐盒子flower frame box music box player by lixingqiu李兴球

"""这是一个用海龟画图模块和pygame的混音模块制作的简易音乐播放器。
作者:李兴球,日期:2018/8/26"""

from turtle import *

def init_screen():
    """初始化屏幕"""
    screen = Screen()
    screen.setup(width,height)
    screen.bgpic("舞台.png")
    screen.title(gametitle)
    screen.delay(0)
    return screen

def init_mixer():
    """初始化混音器,注意在函数内部导入的模块的作用范围"""
    have_pygame = False

    
class Button(Turtle):
    """按钮类,每个按钮有两张图片,自带音乐"""
    
    def __init__(self,costume_list,x,y,music,width,height):
        Turtle.__init__(self,visible=False)
        self.penup()
        self.costume_list = costume_list     # 造型列表
        self.costume_index = 0               # 造型初始索引号
        self.shape(self.costume_list[self.costume_index]) # 设置造型为索引为0的图
         
    def play(self,x,y):
        """先停止音乐再播放音乐"""
        pygame.mixer.music.stop()           # 停止正在播放的音乐
        pygame.mixer.music.load(self.music)
        screen.title(gametitle + ",正在播放:" + self.music  + " 作者:李兴球")
        pygame.mixer.music.play(-1,0)    # -1表示循环播放,0表示从头开始播放
        
    def onmousemove(self,event):
        """判断鼠标指针是否在按钮坐标范围内"""


def make_button():
    """加载资源,生成播放按钮"""
    c1_list = ("Losing_Sleep0.gif","Losing_Sleep1.gif")
    [screen.addshape(image) for image in c1_list]
    music1 = "Alan Walker - Losing Sleep.mp3"
    b1 = Button(c1_list,-250,0,music1,200,150)
    screen.cv.bind("<Motion>",b1.onmousemove,add=True)
    
    c2_list = ("和兰花在一起0.gif","和兰花在一起1.gif")
    [screen.addshape(image) for image in c2_list]
    music2 = "Yanni - With An Orchid.mp3"
    b2 = Button(c2_list,00,0,music2,200,150)
    screen.cv.bind("<Motion>",b2.onmousemove,add=True)

    c3_list = ("Faded0.gif","Faded1.gif")
    [screen.addshape(image) for image in c3_list]
    music3 = "Alan Walker - Faded (纯音乐).wav"
    b3 = Button(c3_list,250,0,music3,200,150)
    screen.cv.bind("<Motion>",b3.onmousemove,add=True)
    
    c4_list = ("兰贵人0.gif","兰贵人1.gif")
    [screen.addshape(image) for image in c4_list]
    music4 = "胡伟立-兰贵人.mp3"
    b4 = Button(c4_list,-250,-200,music4,200,150)
    screen.cv.bind("<Motion>",b4.onmousemove,add=True)

    c5_list = ("Spectre0.gif","Spectre1.gif")
    [screen.addshape(image) for image in c5_list]
    music5 = "Alan Walker - Spectre.mp3"
    b5 = Button(c5_list,0,-200,music5,200,150)
    screen.cv.bind("<Motion>",b5.onmousemove,add=True)
    
    c6_list = ("新古典主义0.gif","新古典主义1.gif")
    [screen.addshape(image) for image in c6_list]
    music6 = "新古典主义-组曲.mp3"
    b6 = Button(c6_list,250,-200,music6,200,150)
    screen.cv.bind("<Motion>",b6.onmousemove,add=True)
    

if __name__ == "__main__":

    gametitle = "花框音乐盒"
    width,height = 800,600
    screen = init_screen()
    mixer_success,pygame = init_mixer()
    if mixer_success:
        print("成功初始化混音器。")
    else:
        print("初始化混音器出现问题。")
    make_button()
    screen.mainloop()


下载完整源代码与素材,请

成为会员后,登陆才能继续浏览!联系微信scratch8即可办理会员。
(会员专属:能浏览所有文章,下载所有带链接的Python资源。)

发表在 python, turtle | python 漂亮的花框音乐盒子flower frame box music player已关闭评论

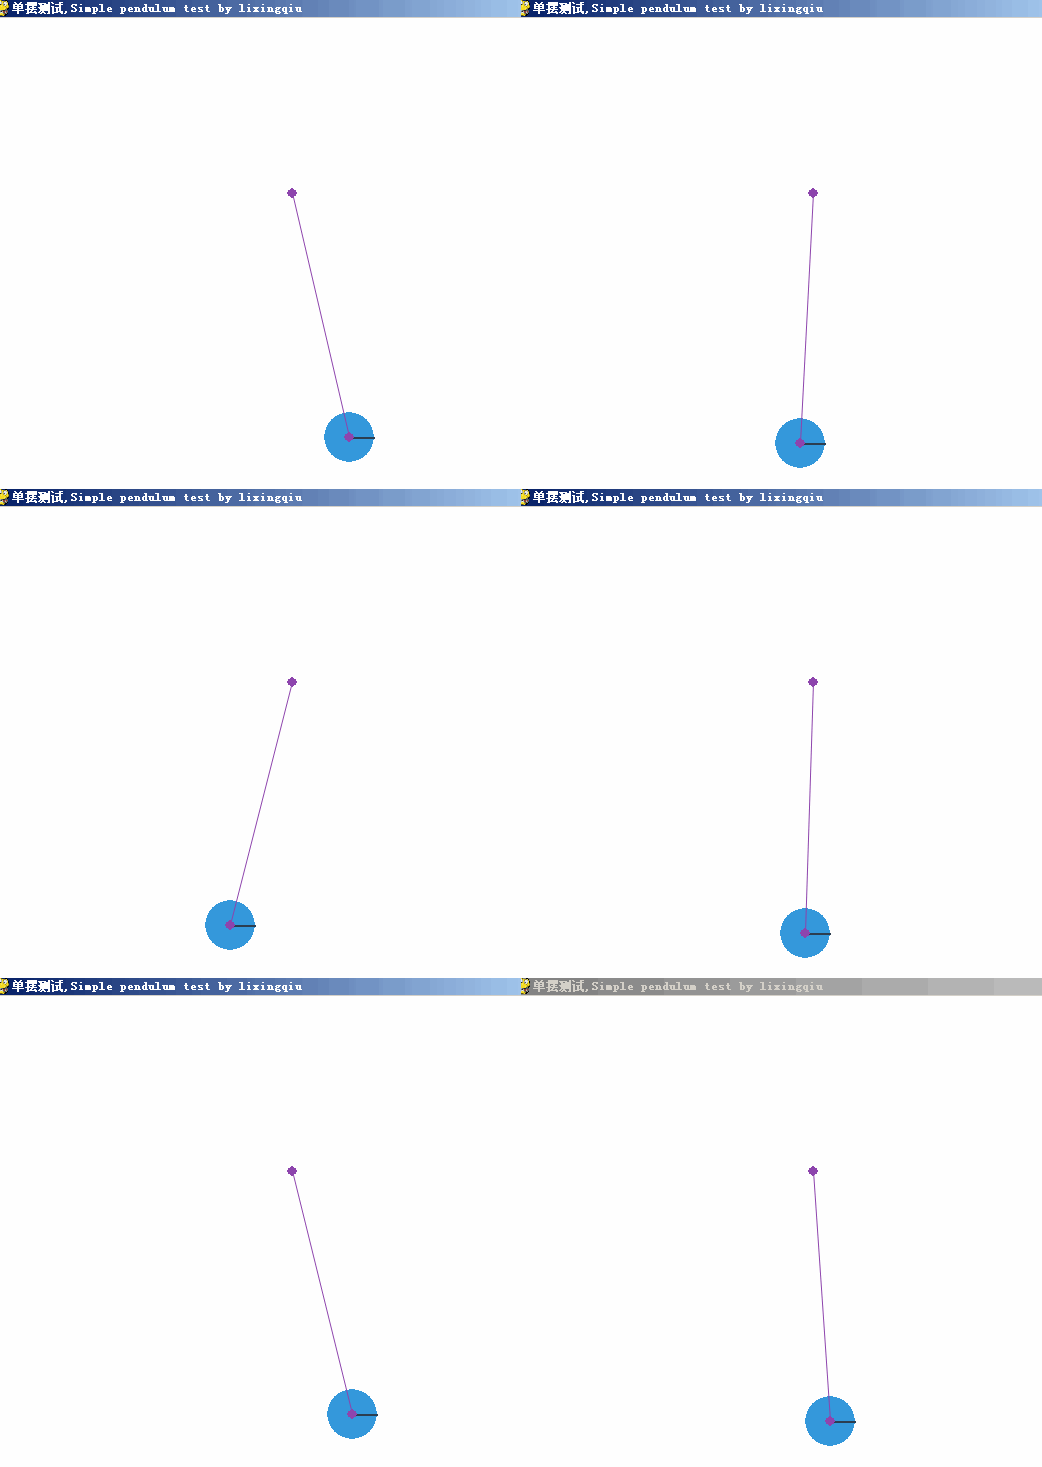
pygame和pymunk制作的单摆示例程序

单摆测试,Simple pendulum test by lixingqiu

以下是部分代码预览:

"""pygame和pymunk制作的单摆示例程序"""

import sys
import random
import pygame
import pymunk
import pymunk.pygame_util
from pygame.locals import *

# 新建屏幕
size = width,height = 600,600
pygame.init()
screen = pygame.display.set_mode(size)
pygame.display.set_caption("单摆测试,Simple pendulum test by lixingqiu")

# 重力空间
space = pymunk.Space()
space.gravity = (0.0, -2000.0)

center_x = width // 2
center_y = height //2
mass = 10                               # 球的质量
radius = 25                             # 球的半径
moment = pymunk.moment_for_circle(mass, radius ,radius )
body = pymunk.Body(mass, moment)
body.position = (center_x,center_y-125)

shape = pymunk.Circle(body, radius)
shape.elasticity = 0.9999999
space.add(body, shape)

body.force=(100000,0)              # 给力
running = True

clock = pygame.time.Clock()
while running:
    for event in pygame.event.get():
        if event.type in( QUIT,KEYDOWN,K_ESCAPE):
            running = False
            break         

    space.step(1/50.0)

    screen.fill((255,255,255))        
    space.debug_draw(draw_options)  # 重画重力空间内的shape
 
    pygame.display.flip()
    clock.tick(50)

pygame.quit()
 

下载完整源代码与素材,请

成为会员后,登陆才能继续浏览!联系微信scratch8即可办理会员。
(会员专属:能浏览所有文章,下载所有带链接的Python资源。)

发表在 pymunk, python | pygame和pymunk制作的单摆示例程序已关闭评论

python愤怒的小鸟,撞击单摆练习程序_pymunk_pendulum

python愤怒的小鸟,撞击单摆练习程序_by_李兴球_arcade_pymunk_angry_bird__pendulum
以下是部分代码预览:

"""
练习做单摆程序,把它加到愤怒的小鸟程序,拉小鸟,去撞击单摆球,然后球就会在重力的作用下晃荡,本程序用arcade模块和pymunk模块实现,运行之要用pip先安装.

"""
__author__ = "lixingqiu"
__date__ = "2019/5/3"

import os
import math
import arcade
import pymunk
import timeit
from PIL import Image
 

SCREEN_WIDTH = 1200
SCREEN_HEIGHT = 800
SCREEN_TITLE = "愤怒的小鸟,撞击单摆练习程序_by_李兴球"

class PhysicsSprite(arcade.Sprite):
    def __init__(self, pymunk_shape, filename):
        super().__init__(filename, center_x=pymunk_shape.body.position.x, center_y=pymunk_shape.body.position.y)
        self.pymunk_shape = pymunk_shape


class CircleSprite(PhysicsSprite):
    def __init__(self, pymunk_shape, filename):
        super().__init__(pymunk_shape, filename)
        self.width = pymunk_shape.radius * 2
        self.height = pymunk_shape.radius * 2


class BoxSprite(PhysicsSprite):
    def __init__(self, pymunk_shape, filename, width, height):
        super().__init__(pymunk_shape, filename)
        self.width = width
        self.height = height

 
def make_sprite(mass,image,position,space):      
    """生成一个受重力的角色"""
   

class MyGame(arcade.Window):
    """ 最顶层的游戏类,继承自窗口 """

    def __init__(self, width, height,title):
        super().__init__(width, height,title)
        
        arcade.set_background_color(arcade.color.DARK_SLATE_GRAY)

        # -- Pymunk的重力空间
        self.space = pymunk.Space()
        self.space.gravity = (0.0, -900.0)

        # 所有角色列表
        self.background = arcade.Sprite("images/background.png")
        self.background.left = self.background.bottom = 0
        self.sprite_list = arcade.SpriteList()
        self.static_lines = []

        # 用鼠标拖曳的角色相关变量
        self.shape_being_dragged = None
        self.last_mouse_position = 0, 0

        self.draw_time = 0
        self.processing_time = 0
    

        self.reset_shoot = True
        
    def reset_shoot_bird(self):
        """重新发射"""
        self.virtual_bird.center_x = self.shoot_position[0]
        self.virtual_bird.center_y = self.shoot_position[1]
        self.physic_bird.pymunk_shape.body.velocity = (0,0)
        self.physic_bird.pymunk_shape.body.position = self.shoot_position
        self.physic_bird.pymunk_shape.body.angle = 0 
        
        self.reset_shoot = True
        self.shape_being_dragged = None
        
    def on_key_press(self, key, modifiers):
        """
        当按键时调用此方法
        """
        if key == arcade.key.SPACE:
           self.reset_shoot_bird()       
        
         
    def on_draw(self):
        """
        渲染屏幕
        """

        # 开始渲染屏幕
        arcade.start_render()

        # 开始计时
        draw_start_time = timeit.default_timer()

        # 画背景图片
        self.background.draw()

        # 画所有的角色
        self.sprite_list.draw()

        # 画静止的线条
        for line in self.static_lines:
            body = line.body
            pv1 = body.position + line.a.rotated(body.angle)
            pv2 = body.position + line.b.rotated(body.angle)
            arcade.draw_line(pv1.x, pv1.y, pv2.x, pv2.y, arcade.color.WHITE, 2)

        if self.reset_shoot :  self.virtual_bird.draw()

        # 画皮筋
        x1,y1 = self.shoot_position
        x2,y2 = self.virtual_bird.position
        dd = (x1-x2)*(x1-x2) + (y1-y2)*(y1-y2)
         
        if dd>1 and self.reset_shoot:
          arcade.draw_line(x1, y1, x2, y2, arcade.color.ORANGE, 4)


        # 画单摆线
        ball_x = self.physic_ball.pymunk_shape.body.position[0]
        ball_y = self.physic_ball.pymunk_shape.body.position[1] +  22
        arcade.draw_line(self.pin_x, self.pin_y, ball_x, ball_y, arcade.color.ORANGE, 4)


def main():
    MyGame(SCREEN_WIDTH, SCREEN_HEIGHT,SCREEN_TITLE)

    arcade.run()

if __name__ == "__main__":
    main()


下载完整源代码与素材,请扫码付款。

发表在 arcade, pymunk, python | python愤怒的小鸟,撞击单摆练习程序_pymunk_pendulum已关闭评论

小虫密室逃脱Python的arcade模块制作的简易迷宫游戏

python小虫密室逃脱by李兴球_arcade简易迷宫游戏

以下是部分代码预览:

"""
小虫密室逃脱.py
小虫子被困在密室了,只要帮它碰到密码箱,正确输入密码,才能让它逃脱。
可是有一只狗在把守密码箱,俗话说狗拿耗子,多管闲事。有一只老鼠被闲在笼子里。
只要小虫子拿到钥匙,笼子就会自动打开,耗子就会跑,狗就会去抓耗子。趁这个时候虫子就能去碰密码箱了。
请用上左右方向箭头操作小虫子,让它碰到钥匙后再去碰保险箱。本程序用arcade模块实现主程序,用turtle模块实现密码输入界面。

"""
 
import arcade

PASSWORD = "888"                      # 解锁密码
SPRITE_SCALING = 1                    # 定义缩放比例
SCREEN_WIDTH = 1280                   # 定义所渲染的屏幕宽度 
SCREEN_HEIGHT = 960                   # 定义所渲染的屏幕高度 
SCREEN_TITLE = "小虫密室逃脱by李兴球_arcade简易迷宫游戏"
SPRITE_PIXEL_SIZE = 64                # 地图方块尺寸 

# 定义物理常数 
MOVEMENT_SPEED = 5
JUMP_SPEED = 23
GRAVITY = 1.1

class MyGame(arcade.Window):
    """ 继承自窗口的游戏类. """
    input_password = False
    def __init__(self):
        """
        初始化方法
        """
        super().__init__(SCREEN_WIDTH, SCREEN_HEIGHT, SCREEN_TITLE)
        
        # 定义角色列表
        self.wall_list = None       
        self.key_list = None

        # 定义玩家相关变量        
        self.player_sprite = None
        self.physics_engine = None         
             

    def setup(self):
        """ 设置与初始化变量的值. """   

        # 老鼠,代表猎物
        self.rat = arcade.Sprite("images/mouse_right.png")
        self.rat.textures.append(arcade.load_texture("images/mouse_left.png"))
        self.rat.status = "hide"                                             # 这是自定义属性
        self.rat.center_x = 300
        self.rat.center_y = 80        


    def let_rat_go(self):
        """设定让耗子跑的状态"""
        self.rat.status = "run"
        self.rat.change_x =  10
        
    def let_rat_dead(self):
        """让老鼠死的状态"""        
        self.rat.status = "dead"
        self.rat.change_x =  0
        
        
    def on_draw(self):
        """        渲染屏幕        """
       

        # 开始渲染屏幕
        arcade.start_render()       
        # 画所有的角色       

        
    def on_key_press(self, key, modifiers):
        """
        当按键时调用此方法
        """

    def on_key_release(self, key, modifiers):
        """
        当松开键时调用此方法
        """       

    def update(self, delta_time):
        """ 移动与游戏的逻辑,这个方法不断地执行,如果本关key数加载完了,那么此关结束 """           

def show_password_input_UI():
    """显示密码输入界面,本函数定义了一个Square类,用来实例化三个小方块,单击它们会换造型"""
    print(" 这里显示密码输入界面")
    images = ["images/" + str(i) + ".gif" for i in range(10)]
    import turtle
    import random
                           
            
    screen = turtle.Screen()
    screen.delay(0)    
    screen.setup(SCREEN_WIDTH//3,SCREEN_HEIGHT//3)
    screen.bgcolor("#999999")
    screen.title("请输入密码,用鼠标单击数字即可")
    [screen.addshape(image) for image in images]
    turtle.penup()
    turtle.ht()
    turtle.goto(0,100)
    turtle.write("请用鼠标单击输入密码箱的密码:",font=("黑体",16,"normal"),align='center')
    square1 = Square(images)             # 左边方块
    square1.goto(-100,0)                  
    square2 = Square(images)             # 中间方块
    square3 = Square(images)             # 右边方块
    square3.goto(100,0)
    screen.mainloop()

def main():
    window = MyGame()
    window.setup()
    arcade.run()

if __name__ == "__main__":
    main()

下载完整源代码与素材,请

成为会员后,登陆才能继续浏览!联系微信scratch8即可办理会员。
(会员专属:能浏览所有文章,下载所有带链接的Python资源。)

发表在 arcade, python, turtle | 小虫密室逃脱Python的arcade模块制作的简易迷宫游戏已关闭评论

Tiled制作动图快速入门_for_arcade

地图由图块组成,新建地图方法之一就是在地图上铺PNG图片,这些图片也就是图块。

它们的大小或许是32X32像素,或许是64X64像素。

所以在新建地图之前,要准备好这些PNG图片。

在名为“1、新建图块集合.gif”演示中,新建了一个图块集。

其实它们记录的是一个个PNG文件的路径,以XML文件的形式。

tiled软件把图块文件设定的扩展名是tsx。可以用记事本打开“first.tsx“文件查看。

<?xml version="1.0" encoding="UTF-8"?>
<tileset version="1.2" tiledversion="1.2.2" name="first" tilewidth="64" tileheight="64" tilecount="4" columns="0">
 <grid orientation="orthogonal" width="1" height="1"/>
 <tile id="0">
  <image width="64" height="64" source="PNG/platformPack_item007.png"/>
 </tile>
 <tile id="1">
  <image width="64" height="64" source="PNG/platformPack_item015.png"/>
 </tile>
 <tile id="2">
  <image width="64" height="64" source="PNG/platformPack_item017.png"/>
 </tile>
 <tile id="3">
  <image width="64" height="64" source="PNG/platformPack_tile004.png"/>
 </tile>
</tileset>


以下是动画演示:

tiled新建图块集合

图块集合准备好了,就能新建地图了。
地图是分图层的,默认只有一个层。比如最低层可以通过双击的形式重命名为ground,代表地面。
可以新建一个picked层,用来放道具。当选中了哪个图层时,就是对哪个图层进行操作。
设计好了后就保存为tmx文件。

图块集合准备好了,就能新建地图了。 选择文件/创建新地图,设定宽度,高度等参数即可。
地图是分图层的,默认只有一个层。比如最低层可以通过双击的形式重命名为ground,代表地面。
这时我们可以选择右下角的图块,把它们铺上去。

如果要放一些诸如钻石,钥匙之类的,那应该新建一个层,用来放道具,图中名叫picked。

当选中了哪个图层时,就是对哪个图层进行操作。设计好了后就保存为tmx文件。

tmx文件也是一个xml文件,它记录的是地图的映射数据表。下面的tmx文件使用的是first.tsx图块文件。
在id为1的layer这个层下,data标签下面的数据为0的代表这里没有图块,为4的代表这里有一个图块,它是first.tsx中的第4个图块。
在id为2的layer这个层下也是一样,0代表没有图,有数字则代表有相应的图块。

<?xml version="1.0" encoding="UTF-8"?>
<map version="1.2" tiledversion="1.2.2" orientation="orthogonal" renderorder="right-down" width="12" height="8" tilewidth="64" tileheight="64" infinite="0" nextlayerid="3" nextobjectid="1">
 <tileset firstgid="1" source="first.tsx"/>
 <layer id="1" name="ground" width="12" height="8">
  <data encoding="csv">
0,0,0,0,0,0,0,0,4,4,4,4,
0,0,0,0,0,0,0,0,0,0,0,4,
0,0,0,0,0,0,0,0,4,4,4,4,
0,0,0,0,0,0,0,0,0,0,0,4,
0,0,0,4,4,4,4,0,0,0,0,4,
0,0,0,0,0,0,0,0,0,0,0,4,
4,0,0,0,0,0,0,0,0,0,0,4,
4,0,0,0,0,0,0,0,0,0,0,4
</data>
 </layer>
 <layer id="2" name="picked" width="12" height="8">
  <data encoding="csv">
0,0,0,0,0,0,0,0,0,0,0,0,
0,0,0,0,0,0,0,0,0,0,0,0,
0,0,0,0,0,0,0,0,0,0,0,0,
0,0,0,3,3,3,3,0,0,0,0,0,
0,0,0,0,0,0,0,0,0,0,0,0,
0,0,0,0,0,0,0,0,0,0,0,0,
0,0,0,1,1,1,1,1,1,0,0,0,
0,0,0,0,0,0,0,0,0,0,0,0
</data>
 </layer>
</map>

tiled新建地图演示

Arcade模块通过以下代码读取地图:

my_map = arcade.read_tiled_map(f"house_1.tmx", SPRITE_SCALING)

# 读取不可移动的平台数据阵列'ground'是一图层的名称
map_array = my_map.layers_int_data['ground']        
  
# 从墙生成地图列表
self.wall_list = arcade.generate_sprites(my_map, 'ground', SPRITE_SCALING)

上面的代码读到的地图用my_map引用。然后通过图层的名称定位到要使用哪一层地图数据。

最后把这一层地图所有的图块生成角色对象,并把它们都放到wall_list列表中。

发表在 arcade, 杂谈 | Tiled制作动图快速入门_for_arcade已关闭评论

python简单雷电飞机大战turtle版

python雷电射击游戏turtle制作

扫码付款各模块源代码即可见,以下是部分代码预览:

"""雷电射击游戏,这是一个简单的飞机大战类型的射击游戏。采用python的turtle即海龟画图模块制作而成。
这是主程序模块文件,负责总调度。还有4个模块。分别是:
1、enemy.py模块,这个模块设计了Enemy类,这是敌人类,它在实例化的时候要传入4个参数,
第一个参数代表敌飞机的图像,第二个是爆炸效果图像,第三个是玩家飞机,第四个子弹列表。
2、bullet.py模块,这个模块设计了Bullet类。此类实例化时有三个参数。第一个参数是子弹的图像,第二个参数是玩家飞机,第三个参数是子弹的移动方向。
3、plane.py模块,这个模块设计了Plane类。它实例化后就是玩家飞机,可以用方向箭头操作飞机。射击是自动的。
4、scrollscreen.py模块。这个模块没有设计类。它只是设计了一个函数,名叫scroll_screen。这个函数一启动就会生成会上下滚动的背景效果。
"""

from enemy import *
from bullet import *
from plane import *
from scrollscreen import *

plane_image = "飞机.gif"
enemy_image = "敌机.gif"
explosion_image = "爆炸.gif"
bullet_image = "子弹.gif" 
pics = "background1.gif","background2.gif","background3.gif","background4.gif"

# 新建可滚动的背景
screen = scroll_screen(480,360,"雷电_by李兴球","blue",pics)
screen.addshape(plane_image)
screen.addshape(enemy_image)
screen.addshape(explosion_image)
screen.addshape(bullet_image)

myplane = Plane(plane_image,explosion_image)  # 新建玩家习机

# 新建三个方向的子弹,它们会不断地自动移到玩家飞机的位置
bs = []
for i in range(3):
    direction = 45 + i * 45
    bs.append(Bullet(bullet_image,myplane,direction))

# 新建敌机,它们会不断地自动从下移到下面。   
[Enemy(enemy_image,explosion_image,myplane,bs) for i in range(10)]

screen.listen()
screen.mainloop()
   

下载完整源代码与素材,请

成为会员后,登陆才能继续浏览!联系微信scratch8即可办理会员。
(会员专属:能浏览所有文章,下载所有带链接的Python资源。)

发表在 python, turtle | python简单雷电飞机大战turtle版已关闭评论

python粒子效果演示动画turtle版

下图截gif的时候,其软件对图片进行压缩,实际效果是更好的。python粒子效果particle effect

以下是部分代码预览:

"""用python的海龟画图制作的粒子效果演示动画,
这个程序建立了一个叫Particle的类,这个类继承自海龟类"""

from turtle import *
from random import randint
from time import sleep

class Particle(Turtle):
     def __init__(self):
        Turtle.__init__(self,visible=False,shape="circle")
        self.penup()
        self.speed(0)
        color = (randint(0,255),randint(0,255),randint(0,255))
        self.color(color)
        self.shapesize(0.1,0.1)          # 形状为1/10
        self.sw = self.screen.window_height() # 定义属性,让它能访问屏幕高度
        self.accspeed = -0.1             # 加速度

     def move(self):
        """移动粒子,到了最下边则隐藏重新移动"""
        x = self.xcor() + self.xspeed    # 水平方向移动
        y = self.ycor() + self.yspeed    # 垂直方向受重力移动            

if __name__=="__main__":                 # 如果程序由自身启动,(非做为模块启动)
     
     width,height = 480,360
     screen  = Screen()
     screen.setup(width,height)
     screen.title("python海龟画图的彩色粒子效果by李兴球")
     screen.bgcolor("black")
     screen.bgpic("月圆之日.png")
     screen.colormode(255)
     screen.delay(0)         
     

下载完整源代码与素材,请

成为会员后,登陆才能继续浏览!联系微信scratch8即可办理会员。
(会员专属:能浏览所有文章,下载所有带链接的Python资源。)

发表在 python, turtle | python粒子效果演示动画turtle版已关闭评论

python模拟3D星空动画turtle版右出

python模拟3D星空动画

以下是部分代码预览:

"""
 模拟3D星空-海龟画图版-星星从右边出来,这个程序让很多星星从右边出来,越大的速度越快,越小的速度越慢。所以这样就模拟了一种3D效果。

"""
from turtle import *
from random import random,randint

screen = Screen()
width ,height = 800,600
screen.setup(width,height)
screen.title("模拟3D星空_海龟画图版_作者:李兴球")
screen.bgcolor("black")
screen.mode("logo")
screen.delay(0)                 # 这里要设为0,否则很卡

t = Turtle(visible = False,shape='circle')
t.color("white")
t.penup()
t.setheading(-90)
t.goto(width/2,randint(-height/2,height/2))

stars = []
for i in range(200):
    star = t.clone()            # 克隆一个海龟对象
    s =random() /3              # s做为新对象的大小的比例 
    star.shapesize(s,s)         # 设定新的星星的大小
    star.speed(int(s*10))       # 设定新的星星的速度
    star.setx(width/2 + randint(1,width)) # 设置初始x坐标
    star.sety( randint(-height/2,height/2)) # 设置初始y坐标
    star.showturtle()           # 显示海龟对象
    stars.append(star)          # 添加到星星列表

下载完整源代码与素材,请

成为会员后,登陆才能继续浏览!联系微信scratch8即可办理会员。
(会员专属:能浏览所有文章,下载所有带链接的Python资源。)

发表在 python, turtle | python模拟3D星空动画turtle版右出已关闭评论

闪亮的五角星阵列点

python动画闪亮的五角星

以下是部分代码预览:

"""python动画闪亮的五角星,本程序为讲解模块化与类而设计。在point模块中有Point类,用来代表一个坐标点。
"""

from turtle import *
from random import randint

class Star(Turtle):
    def __init__(self,images,pos):
        Turtle.__init__(self,visible=False)
        self.penup()
        self.images = images
        self.index = 0
        self.goto(pos.x,pos.y)
        self.twinkle()
        self.st()
        
    def twinkle(self):
        """闪烁方法"""
        self.index = 1 - self.index
        self.shape(self.images[self.index])
        self.screen.ontimer(self.twinkle,randint(300,800))

if __name__ == "__main__":

    screen = Screen()
    screen.setup(800,600)
    screen.title("闪亮的五角星by李兴球")
    screen.delay(0)
    screen.bgpic("bg2.png")
    screen.addshape("star1.gif")
    screen.addshape("star2.gif")
    images = ["star1.gif","star2.gif"]

    point_list = []
    t = Turtle(visible=False)
    t.penup()
    t.goto(-100,0)
    for i in range(5):
        for j in range(20):
            x,y = t.position()
            point_list.append(Point(x,y))    # 把点坐标添加到点列表
            t.fd(10)
        t.rt(144)
            
    while point_list:
        p = point_list.pop()
        Star(images,p)       

    screen.mainloop()   
    

如需要查看完整代码,请

成为会员后,登陆才能继续浏览!联系微信scratch8即可办理会员。
(会员专属:能浏览所有文章,下载所有带链接的Python资源。)

发表在 python, turtle | 闪亮的五角星阵列点已关闭评论

scratch和Python创意编程指南

创意编程,做为一个整体的概念被提出,也是近几年的事情。全国中小学比赛中就有创意编程类目。创意编程什么最重要?创意最重要,并不是算法最重要。创意基于什么?想像力,广博的知识,清晰的逻辑与精巧的设计还不够呢。还要有美工,更要有配音,配音运用得好一个作品才会活起来。许多人看恐怖电影,觉得毛骨悚然那都是配音效果。至于用什么计算机语言实现,那倒是其次,小学生推荐用scratch,初中以上可以用python来实现。

用scratch做创意编程,这里推荐一个基本的套路。在主题想好后,首先要找一些能配合主题思想的,较精美的gif动画,这是用来做序幕的。只要把它们导入scratch中,简单的拖几个积木块,精美的序幕就来了。这是角色一,名字叫序幕。角色二是什么呢?可以是一个用photoshop设计好的封面,封面上还可以写上操作说明等等。给角色二编程,让它被单击或按了空格键后游戏就正式开始了。第三、第四等角色就是游戏中的主角与反面等角色了。游戏完了后,最后一个显示的画面当然也可以是用photoshop设计的一个图片。

现在用python做创意编程的人还是相当少。大家都用python去挖数据或什么机器学习之类的去了,所以没几个人去关注这个细分领域。本人现在也是接到有些大学生要做毕业设计,找到我,让我帮忙用Python设计一个游戏之类的活。不过随着Python在中小学的普及度逐步增加,以后会有越来越多的人要求订制作Python创意编程作品的。用Python做创意游戏可以用海龟模块,虽说它是用来画图的。但也是可以用来做一些小游戏的。因为它基于tkinter,有画布,有事件检测功能,所以可以做动画与游戏。其次可以用pygame模块做游戏。pygame就显得更加专业了,能控制fps,而用turtle模块做是无法控制fps,因为它没有这个机制(或许我还没查到相关资料如何控制画布渲染的FPS吧)。除了用pygame还有一些,诸如arcade模块,它更倾向于是一个框架,而不是像pygame更倾向于库。本人没有看到其它人用这个模块做游戏。我用这个模块倒是做了些小游戏与动画之类的。arcade的官网例子里就有本人的作品。我和arcade模块的作者一段时间还经常互通电子邮件。除了arcade模块,要用到物理引擎的话那目前pymunk是最好的选择。虽然国内pymunk用的人少,但其它的pybox和pyglet之类的用的人好像更少。更重要的是pymunk官网资料丰富,例子多。所以用pymunk是不二的选择。用python做创意游戏制作,推荐用面向对象编程的方法。创意编程,其它诸如美工配音都是一致的。现在scratch创意编程例子这么多,我要做的事情就非常多了。单就一个把scratch创意作品转换成python创意作品就是一个要花时间的事件。自己的作品积累了这么多了,就算审核一次都要好久好久。这是什么呢?因为在审核的过程中可能会觉得过去的设计不太好,会不自觉的修改,所以就又入了坑了。如果把它做成PPT幻灯片用来教学,那花的时间就更长了。

以后也可能会有人用javascript之类的来做。因为它能操控HTML5的画布, 这相当于做页游了。javascript本人还是20年前学过,现在没有怎么使用,就不能多说了。用了python这么久,感觉有花括号的计算机语言都更难,前段时期花些时间看了react,则觉得这个框架更难,算了不去研究什么react了,还是把pymunk研究研究才是正道。创意编程,尤其是用scratch来做,技术性并不是主要的。正所谓汝果欲学诗,功夫在诗外。

发表在 杂谈 | scratch和Python创意编程指南已关闭评论

python代码版计算机游戏基本理论之游戏循环与fps及pygame具体实现

一、游戏循环

游戏循环是电子游戏的核心。在这个循环中总是不断地渲染画面,而要改变这个画面,则是由预先设定的程序所决定。
如果没有人为的参与等外部因素,那么游戏就只会显示一幅动态的画面。基本的游戏框架如下所示:

running = True

while running:

   event_check()
   update_game()
   render_game()

event_check是对在游戏中发生的事件进行检测。如按键检测可能改变某个角色的移动速度,而在update_game的时候角色就会以不同的速度定位坐标。
最后render_game就会重新画这个角色。再比如有关闭窗口事件,也就是单击了windows左上角的X按钮,这时退出事件发生了。我们可以在event_check中检测到这个事件,如果此事件发生,我们就让running为False,这样while循环就退出了。游戏也就结束了。

二、FPS (frames per second)

fps就是每秒显示的画面,一个画面就是一帧。在一个while游戏循环中,计算机是以最快的速度更新游戏逻辑与重画。可能每秒能重画几百次画面,换成专业术语就是说fps能达到几百。
可是我们经常不需要这么快,为什么呢?这样会耗费大量的计算时间,让计算机CPU及GPU温度升高。对于手机就更不是一个好事情了。一般只要有个每秒画60次画面就行了。所以在render_game后,我们来一个等待一定的时间,当时间到了后才进行下一次循环,这样就能控制fps了。
如果还不明白,那么举个例子,我想fps为1,那这个fps就很慢了,1秒才渲染一幅画。假设event_check,update_game与render_game运行完只要0.00001秒。那么就需要等待0.99999秒。
所以要控制帧率,那么程序大概如下所示:


running = True
clock = Tick()

成为会员后,登陆才能继续浏览!联系微信scratch8即可办理会员。
(会员专属:能浏览所有文章,下载所有带链接的Python资源。)

发表在 python, 杂谈 | python代码版计算机游戏基本理论之游戏循环与fps及pygame具体实现已关闭评论

Python单击球游戏turtle创意编程

Python击球游戏turtle创意编程

"""本程序会自动生成一些小球,单击它们会消失,请设计策略让游戏结束"""

import os,sys
from turtle import *
from random import randint,choice
from time import sleep

class Ball(Turtle):
    clicks = 0
    containers = []
    def __init__(self,image,sound):
        Turtle.__init__(self,visible=False)         # 调用Turtle的初始化方法
        self.shape(image)                           # 设定形状
        self.sound = sound                          # 音效
        self.penup()                                # 抬笔
        self.speed(0)                               # 速度为最快
        self.dead = False                           # 标志死亡的逻辑变量
        self.screen_width = self.screen.window_width()
        self.screen_height = self.screen.window_height()
        x = randint(-100,100)
        y = randint(-100,100)

   def move(self):
       """ 让小球移动"""       
       self.fd(2)

    def die(self,x,y):
        self.dead = True
        self.hideturtle()

if __name__ == "__main__":

   game_start = True
   gametitle = "单击球小游戏"
   pygame_exist = False         # 标识pygame存不存在的逻辑变量
   width,height = 480,360
   try:
      import pygame
      pygame_exist = True   
   except:
      print("pygame模块没有正确安装。\n请在命令提示符下输入:'pip install -U pygame --user'进行安装。")

   if pygame_exist:
      pygame.mixer.init()
      #音乐文件= "My Musicfmusic1.wav"
      #pygame.mixer.music.load(音乐文件)
      #pygame.mixer.music.play(-1,0) 
      pop =pygame.mixer.Sound("pop.wav")

   screen =Screen()
   screen.setup(width,height)
   screen.bgpic("slopes.gif")
   screen.title(gametitle)
   
   balls = ["ball-a.gif","ball-b.gif","ball-c.gif","ball-d.gif","ball-e.gif"]
   ...................    
   screen.mainloop()

下载完整源代码与素材,请

成为会员后,登陆才能继续浏览!联系微信scratch8即可办理会员。
(会员专属:能浏览所有文章,下载所有带链接的Python资源。)

发表在 python, turtle | Python单击球游戏turtle创意编程已关闭评论

pygame动画制作男孩女孩趣味对话

Python男孩女孩对话_pygame创意编程

以下是部分代码预览:

"""这是我用pygame制作的一个对话小程序,一个男孩和一个女孩进行对话。"""

import pygame
from pygame.locals import *

width,height = 960,720
sentences = ["我爱Python","真的吗?","当然是真的,我每天都用Python","我跟你学可以吗?","当然可以啊。","现在就开始吧。","。。。。。"]
background_image = "饭桌.png"
boy_image = "男孩.png"
girl_image = "女孩.png"

pygame.init()
screen = pygame.display.set_mode((width,height))
pygame.display.set_caption("pygame动画制作男孩女孩by李兴球@2018")

screen.blit(boy,(0,200))
screen.blit(girl,(700,200))
pygame.display.update()

font = pygame.font.Font("msyh.ttf",26)
colors = [(0,0,250),(205,10,150)]
time_counter  = 0
clock = pygame.time.Clock()


running = True
while running:                           # 单击等待结束
    clock.tick(60)
    event = pygame.event.wait()
    if event.type == QUIT or event.type==MOUSEBUTTONDOWN:running = False
    screen.blit(background,(0,0))
    screen.blit(boy,(0,200))
    screen.blit(girl,(700,200))
    pygame.display.update()

pygame.quit()

下载完整源代码与素材,请

成为会员后,登陆才能继续浏览!联系微信scratch8即可办理会员。
(会员专属:能浏览所有文章,下载所有带链接的Python资源。)

发表在 pygame, python | pygame动画制作男孩女孩趣味对话已关闭评论

孙悟空的72变_Python创意编程_Turtle创意编程

配合着西游记音乐的锣鼓声,孙悟空会说他有72变,单击鼠标,它会变身!>

"""孙悟空的72变_Python创意编程_Turtle创意编程"""

from turtle import *
from time import sleep
from random import choice
from tkinter import messagebox
from winsound import PlaySound,SND_ASYNC,SND_LOOP

screen = Screen()
screen.bgpic("背景2.gif")
screen.title("孙悟空的72变by lixingqiu")
screen.setup(480,360)                         # 设定屏幕分辨率

screen.onclick(lambda x,y:sunwukong.shape(choice(sprites))) # 单击屏幕,从sprites列表中随机选择一张图片

music = "西游记片头曲敲鼓.wav"
 
PlaySound(music,SND_ASYNC|SND_LOOP)
       
screen.mainloop()

下载完整源代码与素材,请

成为会员后,登陆才能继续浏览!联系微信scratch8即可办理会员。
(会员专属:能浏览所有文章,下载所有带链接的Python资源。)

发表在 python, turtle | 孙悟空的72变_Python创意编程_Turtle创意编程已关闭评论

pygame旋转缩放演示程序,可以把这个程序发展成一个电子相册

python旋转缩放演示可做电子相册动画
以下是部分代码预览:

"""pygame旋转缩放演示程序,可以把这个程序发展成一个电子相册"""

import os
import pygame
from time import sleep
from pygame.locals import *

images = os.getcwd() + os.sep  + "images"
width,height = 800,600

screen = pygame.display.set_mode((width,height))
pygame.display.set_caption("pygame旋转缩放演示程序可做dn 电子相册by李兴球@2018")

images = [ images + os.sep + filename for filename in os.listdir(images)]
images = [pygame.image.load(image) for image in images]
image_amounts = len(images)

index = 0
running = True
clock = pygame.time.Clock()
while running:
    image = images[index]

    sleep(1)
        
    index = index + 1
    index = index % image_amounts

pygame.quit()
                       

如需要查看完整代码,请

成为会员后,登陆才能继续浏览!联系微信scratch8即可办理会员。
(会员专属:能浏览所有文章,下载所有带链接的Python资源。)

发表在 pygame, python | pygame旋转缩放演示程序,可以把这个程序发展成一个电子相册已关闭评论

漂亮有什么用呢?

“嗯,您的这个作品整体的设计包括封面、内涵,创意、续尾都非常好、颜色搭配也非常恰当、功能还比较完备,所有这些元素都很漂亮,但是这些漂亮我们都似乎在别的地方见过,也只是让我感到漂亮而已。最好要有与众不同的特色,这样才能让别人难以忘记。比漂亮只是一种大众意识,比来比去最后大家都觉得无味。更要比的是独一无二,原创才是最美的,你说是吗?”

所有的人都想漂亮,结果都朝着一个方向改变,正如所谓的网红脸,让人产生脸盲症,别人无法记住你。从另一方面来说是一种“丑”。在设计领域来说,这会发展成一种误区了。春节联欢晚会,每年都是这样艳,有意思吗?人们见多了,所以春晚“不行了”。我自己也很多年没看春晚。因为我知道,无非是那几样。现在开发游戏, 漂亮的能吸引小孩子一会儿,没有内涵,马上弃之。可玩性强的游戏则能吸引小孩很久,就像充满马赛克的《我的世界》,这就是特色。

所以说界面终究是个外壳,花而不实没有用,人们都见多了,会不管用。最重要的还是内涵,老祖宗早就总结了一句话叫:绣花枕头一包草。

发表在 杂谈 | 漂亮有什么用呢?已关闭评论

python机器人和电脑对话_随机回答命令行参数

本程序使用方法:在命令提示符下输入 play.py 你好。然后就会弹出一个窗口,一个机器人会随机挑选一句话进行回答。
python机器人随机回答命令行参数练习
以下是部分代码预览:

from turtle import Turtle,Screen
from time import sleep
from random import choice
import sys

def init_screen(width,height,title,picture):
    """新建屏幕对象,参数说明:
    width:宽度
    height:高度
    title:标题
    picture:背景图(png)
    """
    screen = Screen()
    screen.title(title)
    screen.setup(width,height)
    screen.bgpic(picture)
    screen.delay(0)
    return screen

def make_sprite(image,x,y):
    """显示角色,参数说明:
    image:角色的造型图片,gif
    x,y:坐标
    """
    t = Turtle(visible=False)
    t.penup()
    t.shape(image)
    t.goto(x,y)
    t.showturtle()

def draw_frame(t,startpos,endpos,thickness,color):
    """画框,参数说明:
    t:海龟对象
    startpos:起始坐标
    endpos:结束坐标
    thickness:比触宽度
    color:颜色
    """
    
def say_sentence(t,startpos,sentence):
    """写文字,参数说明:
    t:海龟对象
    startpos:起始位置
    info:要写的文字
    """
    t.goto(startpos)
    for word in sentence:
        sleep(0.1)
        t.write(word,move=True,font=("楷体",20,"normal"))

if __name__ == "__main__":

    hellos = ["你也好","How are you","Hi,我是机器人9号","Hi there!"]
    answer_names = ['My name is whitedog','我的名字是小白','我叫白居易','我是Mr White']    
    answer_play = ['会啊','这是我最拿手的','想玩什么?','好哇']  
    answer_qq = ['qq游戏最好玩了','qq是1234567','qq啊,我玩qq空间。']
    answer_weixin = ['我也常玩微信呢','机器人已经内置微信功能了','微信已经被淘太了。']
    answer_fly = ['这个功能科学家还在开发中。','我不能飞。','你看我这样子像能飞的吗?']    
    answer_jump = ['宝宝不会跳哟。','我不能跳。','你看我这样子像能跳的吗?']
    
    title = "和电脑对话"
     
    screen.exitonclick()


下载完整源代码与素材,请

成为会员后,登陆才能继续浏览!联系微信scratch8即可办理会员。
(会员专属:能浏览所有文章,下载所有带链接的Python资源。)

发表在 python, turtle | python机器人和电脑对话_随机回答命令行参数已关闭评论

python自定义Drawturtle类在命令提示符下通过命令行参数运行

"""在程序中定义了一个继承自Turtle的类,给它增加了一些画多边形,画8字等方法。请给本程序增加功能,让在命令提示符下输入 draw.py circle 时,会画一个圆圈"""

from turtle import *
import sys

import colorsys
def coloradd(color,dh):
    """颜色增加原理:
        color是三元组,分别为0-255的值.此函数把颜色转换成hls模式,对h进行增加dh的操作
       然后转换回去,dh是小于1的浮点数.
    """
addcolor = coloradd   # 定义别名

def colorset(color):
    """设定颜色,color范围为1到360"""
    
setcolor = colorset    # 定义别名

class Drawturtle(Turtle):
    yanse = (255,0,0)
    def __init__(self,shape = "turtle",visible = True,undobuffersize = 1000):
        """初始化海龟"""
        Turtle.__init__(self,shape = shape,visible = visible,undobuffersize = undobuffersize)
        if self.screen.colormode()!=255:self.screen.colormode(255)
        self.pencolor(Drawturtle.yanse)
        

if __name__ == "__main__":

    parameters = ['polygon','sun','star','8']
    helpinfo = """本程序目前支持以下四种用法:\n    
    draw.py polygon"
    draw.py sun
    draw.py star
    draw.py 8

    """
     
    p = sys.argv                          # 命令行参数列表

    if len(p) == 1 :
        print(helpinfo)
        sys.exit(0)

    p = p[1]

    if not p in parameters:sys.exit(0)

    screen = Screen()    
    screen.setup(640,480)
    screen.colormode(255)
    screen.bgcolor("black")
    screen.title("Python海龟画图_命令行参数练习")

    t = Drawturtle()
    t.color("cyan")
    t.pensize(3)
    t.screen.delay(2)
    t.setheading(180)    
    
    if p == "polygon" :
        t.draw_polygon(5,150)
    elif p == "sun":
        t.draw_sun(60,10,100)
    elif p == "star":
        t.draw_star(100)
    elif p == "8":
        t.draw8(10)

    t.screen.exitonclick()


如需要查看完整代码,请

成为会员后,登陆才能继续浏览!联系微信scratch8即可办理会员。
(会员专属:能浏览所有文章,下载所有带链接的Python资源。)

发表在 python, turtle | python自定义Drawturtle类在命令提示符下通过命令行参数运行已关闭评论

python暴力破解zip文件演示原理附生成7位数的所有排列组合

"""暴力破解zip文件演示原理,请预先准备扩展名为zip的文件,不要用rar或7z文件。"""

import zipfile  
import time 
  

filename = "test.zip"                       # 待破解密码的zip文件

if filename.endswith('.zip'):               # 如果是zip文件,则加载密码字典

  fp = zipfile.ZipFile(filename)

  "加载密码字典"
  pass_list = []
  f = open("dict.txt")                      # 打开密码字典
  for line in f:
    if line.strip()!="":
      pass_list.append(line.strip())
  f.close()

  "遍历密码字典"
  for password in pass_list:
    try:
        password = str(password)
        fp.extractall(path='.', pwd=password.encode('utf-8'))  # 尝试用password解压,失败则下一个密码
        print("成功破解,它的密码是{}".format(password))
        break        
    except:
        pass 


下面是生成dict.txt密码字典

"""生成7位数的所有排列组合

"""

import itertools as its
words = "1234567890"              # 字符表

all_comb = []

for n in range(7):
    r = its.product(words,repeat=n)
    for i in r:
        all_comb.append("".join(i))


f = open("dict.txt",'w')         # 写入文件
for s in all_comb:
    f.write(s + "\n")
f.close()


发表在 python, 杂谈 | python暴力破解zip文件演示原理附生成7位数的所有排列组合已关闭评论

神笔马良旋转雪花_画完后会自己旋转

以下是部分代码预览:

"""本程序会画一个大大的雪花状图形,画完后它会旋转起来。"""

from turtle import Screen,Turtle  # 从海龟画图导入Screen函数和Turtle类

screen = Screen()                 # 新建屏幕
screen.setup(800,600)             # 设置屏幕宽和高
screen.delay(0)                   # 绘画延时为0
screen.bgcolor("black")           # 背景以为黑色
screen.title("神笔马良旋转雪花_画完后会自己旋转_www.lixingqiu.com")

.................
t.clear()                         # 清除所画图形
screen.addshape("snow",p)         # 给形状列表添加snow形状,形状列表可以由screen.getshapes()得到
t.shape("snow")                   # 设定t的形状为snow
 
while True: t.rt(1)

下载完整源代码与素材,请

成为会员后,登陆才能继续浏览!联系微信scratch8即可办理会员。
(会员专属:能浏览所有文章,下载所有带链接的Python资源。)

发表在 python, turtle | 神笔马良旋转雪花_画完后会自己旋转已关闭评论

python画蒙德里安矩形抽象画

python蒙德里安矩形抽象画_www.lixingqiu.com

"""蒙德里安矩形抽象画.py
20世纪荷兰艺术家蒙德里安用一种简明的色彩矩阵”征服世界”。
这种色彩矩阵是在长方形里不断地画不相等的长方形。
"""
from random import randint
from turtle import Turtle,Screen

def drawRectangle(t,x1, y1, x2, y2):
    """用海龟t从左上角和右下角坐标画一个随机颜色的矩形.
    参数说明:
    t:海龟对象
    x1,y1:左上角坐标
    x2,y2:右下角坐标
    """

def mondrian(t,x1,y1,x2,y2,level):
    """用给定的层数画蒙得里安矩形抽象画."""
    
def main():

    screen = Screen()
    screen.delay(0)
    screen.bgcolor("black")
    screen.setup(800,800)
    screen.colormode(255)
    screen.title("蒙德里安矩形抽象画_www.lixingqiu.com")
    
    t = Turtle(visible=False)
    left,top = -200,200
    right,bottom =  200,-200
    mondrian(t,left,top,right,bottom,10)

    screen.mainloop()

if __name__=="__main__":

    main()
    

如需要查看完整代码,请

成为会员后,登陆才能继续浏览!联系微信scratch8即可办理会员。
(会员专属:能浏览所有文章,下载所有带链接的Python资源。)

发表在 python, turtle | python画蒙德里安矩形抽象画已关闭评论

python画漂亮的树一束鲜花送情人_火树红花

python画漂亮的树一束鲜花送情人_火树红花_李兴球

以下是部分代码预览:

from turtle import *
from random import randint
from time import sleep

color_list = ["yellow","purple","red","cyan","green","blue"]
r = [1.2,1.6]

screen = Screen()
screen.setup(800,800)
screen.bgcolor("black")
screen.bgpic("background.png")
screen.title("一束鲜花送情人_火树红花_作者:李兴球")

t = Turtle(visible=False)            # 新建海龟,先写字,再画树
t.penup()                            # 抬笔
t.color("white")                     # 画笔颜色为白色
t.setheading(90)                     # 朝上
t.bk(130)
t.pendown()                          # 落笔
 
.................
for i in range(200):
    x = randint(-15,15)
    t.goto(x,-130)    
    t.fd(50)
    t.bk(50)
screen.update()
screen.mainloop()

下载完整源代码与素材,请

成为会员后,登陆才能继续浏览!联系微信scratch8即可办理会员。
(会员专属:能浏览所有文章,下载所有带链接的Python资源。)

发表在 python, turtle | python画漂亮的树一束鲜花送情人_火树红花已关闭评论

python模拟水波纹,单击会画同心圆,用来模拟ripple

模拟水波纹,单击会画同心圆,用来模拟ripple

以下是部分代码预览:

''' 本程序模拟水波纹,单击会画同心圆,用来模拟ripple'''

from turtle import Turtle,Screen     # 导入海龟类
from random import randint
 
def draw(x,y):     
    radius = 10
    t = Turtle(visible = False)
    t.color(29,153,231)
    t.pensize(4)
    t.penup()
    t.speed(0)
    
if __name__ == "__main__":

    bg_index = 0                             
    screen = Screen()
    screen.title('水波纹模拟用circle画的圆环 by lixingqiu')     # 写上窗口标题
    screen.setup(800,600)        # 设定窗口大小
    screen.bgcolor('black')      # 背景颜色为黑
    screen.delay(0)
    screen.colormode(255)   
    
    screen.onclick(draw)
    screen.onclick(clear_draw,3)
    animate_screen()
    screen.mainloop()

下载完整源代码与素材,请

成为会员后,登陆才能继续浏览!联系微信scratch8即可办理会员。
(会员专属:能浏览所有文章,下载所有带链接的Python资源。)

发表在 python, turtle | python模拟水波纹,单击会画同心圆,用来模拟ripple已关闭评论