每隔1秒印一个彩色格子,自定义事件

"""
   每隔1秒印一个彩色格子,自定义事件,按行和列数均分矩形对象函数。
   当然下面的程序直接设置等待1秒钟也可以实现同样的功能,但是这样就阻塞了程序的运行.
   在游戏循环中是不可取的,设置定时器才是最佳方案。
   
"""
import pygame
from pygame.locals import * 
from random import randint

def split_rect(rect,rows,cols):
    """
     均分矩形对象,rect是四元组,rect[0]是左上角x坐标,
     rect[1]是左上角y坐标, rect[2]是宽度,rect[3]是高度
     rect:源矩形,rows:行数,cols:列数
     返回列表
     """
    rect_list = [] 
    width = rect[2]
    height = rect[3]
    row_height = height//rows   # 行高
    col_width = width//cols     # 列宽
    x = 0
    y = 0
    for r in range(0,rows):
        for c in range(0,cols):           
            rect = (x,y,col_width,row_height)
            rect_list.append(rect)
            x = x +  col_width 
        x = 0
        y = y +  row_height 
    return rect_list

成为会员后,登陆才能继续浏览!联系微信scratch8即可办理会员。
(会员专属:能浏览所有文章,下载所有带链接的Python资源。)

发表在 pygame, python | 每隔1秒印一个彩色格子,自定义事件已关闭评论

按行和列数均分矩形对象函数

"""
   按行和列数均分矩形对象函数
   
"""
import pygame
from random import randint

def split_rect(rect,rows,cols):
    """
     均分矩形对象,rect是四元组,rect[0]是左上角x坐标,
     rect[1]是左上角y坐标, rect[2]是宽度,rect[3]是高度
     rect:源矩形,rows:行数,cols:列数
     返回列表
     """
    rect_list = [] 
    width = rect[2]
    height = rect[3]
    row_height = height//rows   # 行高
    col_width = width//cols     # 列宽
    x = 0
    y = 0
    for r in range(0,rows):
        for c in range(0,cols):           
            rect = (x,y,col_width,row_height)
            rect_list.append(rect)
            x = x +  col_width 
        x = 0
        y = y +  row_height 
    return rect_list

成为会员后,登陆才能继续浏览!联系微信scratch8即可办理会员。
(会员专属:能浏览所有文章,下载所有带链接的Python资源。)
发表在 pygame, python | 按行和列数均分矩形对象函数已关闭评论

fill命令鲜为人用的参数rect_用fill画彩色格子图_pygame image process

彩色格子图形_pygame lixingqiu image process
下面是部分代码预览:

"""
   fill命令鲜为人用的参数rect_用fill画彩色格子图。
   这是一个pygame图像处理小程序。
"""
__author__ = "lixingqiu"
import pygame
from random import randint

width,height = 480,360
image = pygame.Surface((width,height))
rows = 10                     # 定义行数
cols = 10                     # 定义列数
row_height = height//rows     # 每行高度
col_width = width//cols       # 每列宽度


成为会员后,登陆才能继续浏览!联系微信scratch8即可办理会员。
(会员专属:能浏览所有文章,下载所有带链接的Python资源。)

发表在 pygame, python | fill命令鲜为人用的参数rect_用fill画彩色格子图_pygame image process已关闭评论

可视化的mask碰撞检测原理示例程序

"""
   mask碰撞检测原理示例程序。mask是由010101...组成的。1代表相应的像素点不透明。0代表相应坐标的像素点是透明,即那里是空的。
"""
import pygame

pygame.init()
screen = pygame.display.set_mode((480,360))

width,height = 50,50
x1,y1 = 100,100
sur1 = pygame.Surface((width,height)).convert_alpha()
sur1.fill((255,100,100,0))                # 最后的0代表完全透明
sur1_rect = sur1.get_rect(topleft=(x1,y1))  # 定位
sur1_mask = pygame.mask.from_surface(sur1)  # 取掩膜
print(sur1_mask.get_at((1,1)))              # 取(1,1)掩膜值
screen.blit(sur1,sur1_rect)

x2,y2 = 120,128
sur2 = pygame.Surface((width,height)).convert_alpha()
sur2.fill((100,100,255))
sur2_rect = sur2.get_rect(topleft=(x2,y2)) # 定位
sur2_mask = pygame.mask.from_surface(sur2)  # 取掩膜
screen.blit(sur2,sur2_rect)                 # 贴到屏幕
pygame.display.update()

offset = x2 - x1 , y2 - y1

p = sur1_mask.overlap(sur2_mask,offset)
print(p)


成为会员后,登陆才能继续浏览!联系微信scratch8即可办理会员。
(会员专属:能浏览所有文章,下载所有带链接的Python资源。)

发表在 pygame, python | 可视化的mask碰撞检测原理示例程序已关闭评论

最简的pygame定时器事件举例_simplest user custom timer event example

"""
   定时器事件举例
   本程序会定义一个自定义事件,它会每隔1秒发生一次。
   由于不在屏幕上显示什么,所以连update都省了。
"""
import time
import pygame
from pygame.locals import *

width ,height = 480,360

screen = pygame.display.set_mode((width,height))
pygame.display.set_caption("定时器事件举例")

PRINTEVENT = USEREVENT + 1
pygame.time.set_timer(PRINTEVENT,1000)

running = True
while running:
    for event in pygame.event.get():
        if event.type == PRINTEVENT:
            print(time.ctime())
        if event.type == QUIT:running = False

pygame.quit()


发表在 pygame, python | 最简的pygame定时器事件举例_simplest user custom timer event example已关闭评论

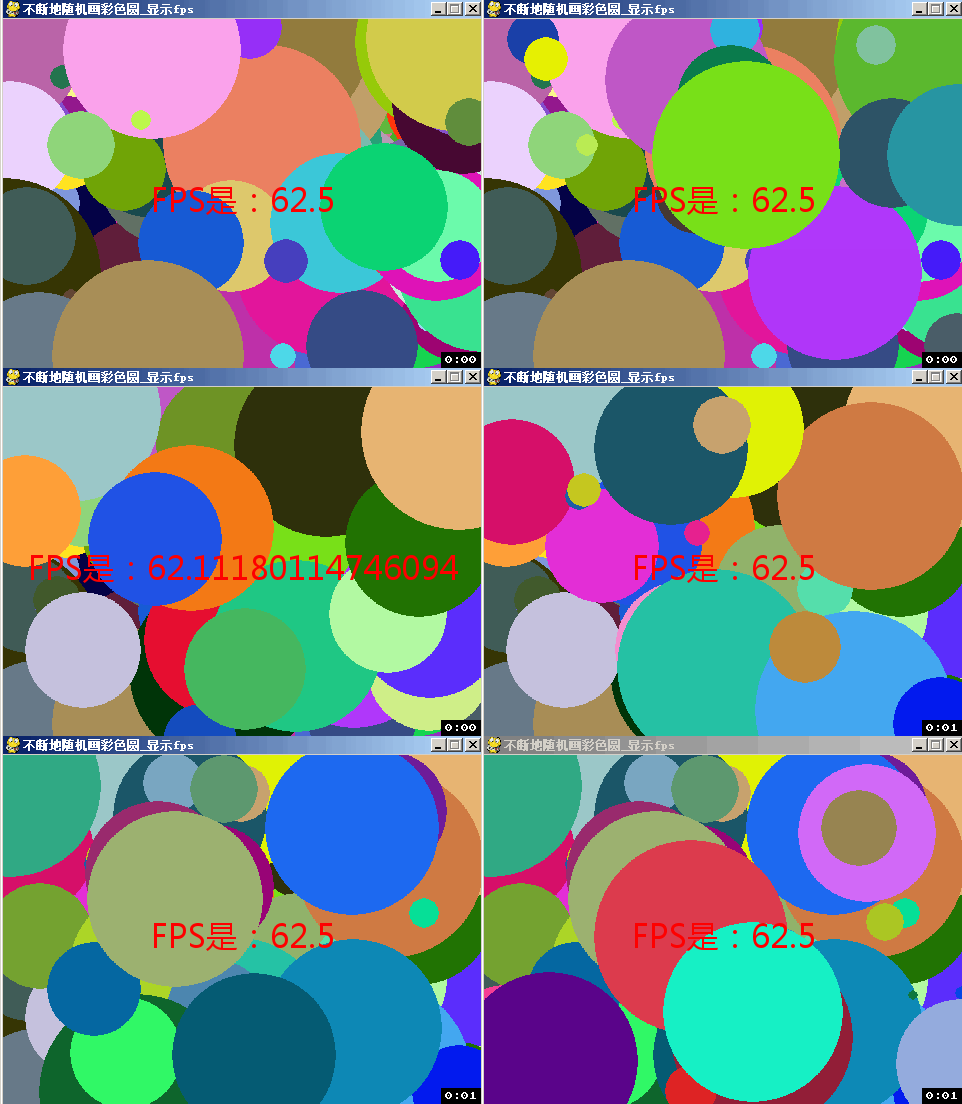
不断地随机画彩色圆_显示fps

不断地随机画彩色圆_pygame显示fps李兴球lixingqiu
下面是部分代码预览:

"""
   不断地随机画彩色圆_显示fps
   本程序会在屏幕上不断地画彩色的圆圈,并且会显示fps值。
"""
import pygame
from random import randint

def random_draw_circle(surface,pos):
    """
       在surface上不断地画彩色圆圈
    """
    r = randint(0,255)
    g = randint(0,255)
    b = randint(0,255)
    radius = randint(1,100)
    pygame.draw.circle(surface,(r,g,b),pos,radius)
    
width,height = 480,360
pygame.init() 
screen = pygame.display.set_mode((width,height))
pygame.display.set_caption("不断地随机画彩色圆_显示fps")
sur = pygame.Surface((width,height))

myfont = pygame.font.Font("msyh.ttf",32)
title = myfont.render("FPS是:",True,(255,0,0))
w,h = title.get_size()

running = True
clock = pygame.time.Clock()
while running:    
    fps = clock.get_fps()             # 得到fps    
    for event in pygame.event.get():  # 遍历每个事件 
        if event.type == pygame.QUIT:running = False
    
    pos = randint(0,width),randint(0,height)
    random_draw_circle(sur,pos)      # 随机画圆
    title = myfont.render("FPS是:" + str(fps),True,(255,0,0))
    w,h = title.get_size()                
    
    screen.fill((0,0,0))             # 填充背景颜色
    screen.blit(sur,(0,0))
    screen.blit(title,(width//2-w//2,height//2-h//2)) 
    pygame.display.update()
    clock.tick(60)                  # 设定fps
    
pygame.quit()

如需要查看完整源代码,请

成为会员后,登陆才能继续浏览!联系微信scratch8即可办理会员。
(会员专属:能浏览所有文章,下载所有带链接的Python资源。)

发表在 pygame, python | 不断地随机画彩色圆_显示fps已关闭评论

手动计算fps的pygame动画

python mid autumn happy中秋快乐pyame

python mid autumn happy中秋快乐pyame


下面是部分代码预览:

"""
   手动计算fps的pygame动画。
   本程序粗略地计算了fps。
"""
import pygame
import time

width,height = 543,360
screen = pygame.display.set_mode((width,height))
pygame.display.set_caption("中秋快乐动画")

# 加载图形帧,转换成surface
images = [pygame.image.load(f"中秋快乐/{index:04d}.png")
          for index in range(1,30)]

amounts = len(images)
index = 0
running = True
    
pygame.quit()


下载完整源代码与素材,请

成为会员后,登陆才能继续浏览!联系微信scratch8即可办理会员。
(会员专属:能浏览所有文章,下载所有带链接的Python资源。)
发表在 pygame, python | 手动计算fps的pygame动画已关闭评论

毛毛虫动画.py

python毛毛虫动画_李兴球_turtle

"""
   毛毛虫动画.py
   用turtle模块制作的一个蓝色的毛毛虫在沿着正方形轨迹移动.
   while循环示例,计数器示例。
"""

from turtle import *

t = Turtle()
t.shape("turtle")
t.color("blue")
t.penup()

for x in range(10):
    t.stamp()

c = 0

while True:
    counter = 0
    while counter < 10:
        t.stamp()
        t.fd(10)
        t.clearstamps(1)
        counter = counter + 1
    t.right(90)
发表在 python, turtle | 毛毛虫动画.py已关闭评论

单击屏幕手动画贝赛尔曲线

pygame单击屏幕手动画贝赛尔曲线程序示例
下面是部分代码预览:

"""
   单击屏幕手动画贝赛尔曲线
   为什么画到一定的点数后会和原点(0,0)相连?
"""

import pygame
import pygame.gfxdraw

def main():
    pygame.init()
    screen = pygame.display.set_mode((500,500))    
    pygame.display.set_caption("pygame单击屏幕手动画贝赛尔曲线程序示例www.lixingqiu.com")
    sur = pygame.Surface(screen.get_size(), pygame.SRCALPHA, 32)

    # 贝塞尔曲线上的坐标点
    points = []    
    color = (255,0,255)
    steps = 5
  

if __name__ == "__main__":

    main()

如需要查看完整源代码,请

成为会员后,登陆才能继续浏览!联系微信scratch8即可办理会员。
(会员专属:能浏览所有文章,下载所有带链接的Python资源。)

发表在 pygame, python | 单击屏幕手动画贝赛尔曲线已关闭评论

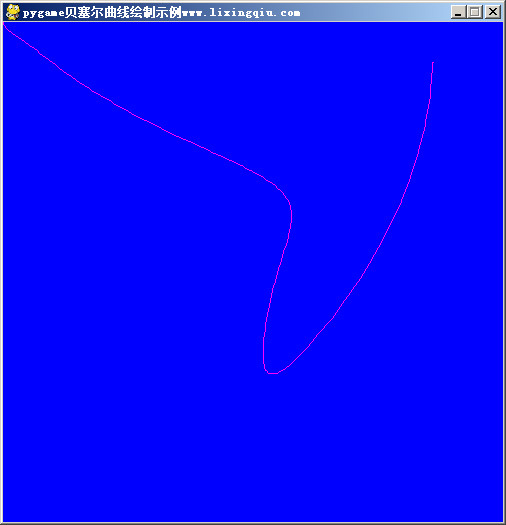
pygame贝塞尔曲线绘制示例

"""pygame贝塞尔曲线绘制示例"""

import pygame
import pygame.gfxdraw

def main():
    pygame.init()
    screen = pygame.display.set_mode((500,500))
    screen.fill((0, 0, 255))
    pygame.display.set_caption("pygame贝塞尔曲线绘制示例")
    sur = pygame.Surface(screen.get_size(), pygame.SRCALPHA, 32)

    # 贝塞尔曲线上的坐标点
    points = [(0,0),(10,20),(15,15),(50,5),(60,80),(100,200),(400,100)]
    points.extend([(410,200),(300,200),(200,150),(250,250),(400,400),(10,450)])
    points.extend([(420,400),(430,40)])    
    color = (255,0,255)
    steps = 10

    pygame.gfxdraw.bezier(sur, points,steps,color)
 
    screen.blit(sur, (0, 0))
    pygame.display.flip()

    while not pygame.event.get(pygame.QUIT):pass
    pygame.quit()

if __name__ == '__main__':
    main()

pygame贝塞尔曲线绘制示例

发表在 pygame, python | pygame贝塞尔曲线绘制示例已关闭评论

左右键移动火箭飞行交互动画_按键检测与函数全局变量示例程序

"""
   左右键移动火箭飞行交互动画。
   本程序会生成一枚火箭,用左右键可以改变它的方向。
   按空格键来切换它是否要移动。
"""

import turtle

screen = turtle.getscreen()
screen.setup(400,500)
 
screen.title("左右键移动火箭飞行交互动画")
screen.bgcolor("black")
rocket = turtle.Turtle()
rocket.color('cyan')
  
should_move = False

def move_control():
    global should_move
    should_move = not should_move

def move_rocket():
    global should_move
    if should_move:       
        rocket.pendown()
        rocket.forward(2)
    else:     
        rocket.penup()
    screen.ontimer(move_rocket, 25)

def close_window():
    screen.bye()

screen.onkey(move_control, "space")
screen.onkey(close_window, "q")
screen.onkey(lambda:rocket.left(90), "Left")
screen.onkey(lambda:rocket.right(90), "Right")

screen.listen()                      
move_rocket()

screen.mainloop()


发表在 python, turtle | 左右键移动火箭飞行交互动画_按键检测与函数全局变量示例程序已关闭评论

海龟画恐龙字符画


下面是部分代码预览:

"""
   海龟画恐龙字符画,本程序会根据字符列表绘制作一个恐龙像素画
"""

import tkinter as tk
from turtle import Turtle, Screen


character_list = [
    ",,,,,,,,,,,,,,,,,,,,,,,,,",
    ",,,,,,****,,,,,,,,,*,,,,,",
    ",,,,,*!!!!*,,,,,,,*¤*,,,,",
    ",,,,*!!!!!!*,,,,,,*¤¤*,,,",
    ",,,,*!!!!!!*,,,,,,*¤¤*,,,",
    ",,,*!!!!!!!!*,,,,*¤¤¤¤*,,",
    ",,*!!!!,*!!!*,,,,*¤¤%¤*,,",
    ",,*!!!!**!!!!*,,,*¤%%¤*,,",
    ",,*!!!!**!!!!*,,,,*%**,,,",
    ",,,*!!!!!!!!!!*,,,*!*,,,,",
    ",,,,**!!!!!!!!!*,*!!*,,,,",
    ",,,,,,***!!*!!!**!!*,,,,,",
    ",,,,,,,*%%*!!!!!*!!*,,,,,",
    ",,,,,,,*%%%**!!!*!*,,,,,,",
    ",,,,,,*,*%%%!!!!**,,,,,,,",
    ",,,,,,,***%%!!!**,,,,,,,,",
    ",,,,,,,,,,***!**,,,,,,,,,",
    ",,,,,,,,,,,*,!,*,,,,,,,,,",
    ",,,,,,,,,,,,****,,,,,,,,,",
    ",,,,,,,,,,,,,,,,,,,,,,,,,"
]

colors = {
            ","  :  "white",
            "*"  :  "black",
            "!"  :  "orange",
            "¤"  :  "red",
            "%"  :  "yellow"
}
tk.ROUND = tk.BUTT
SCALE = 5 

screen = Screen()
screen.delay(0)
screen.title("海龟画恐龙字符画")
width = screen.window_width() / SCALE 
height = screen.window_height() / SCALE
screen.setworldcoordinates(-width//2, -height//2, width//2, height//2)

 
如需要查看完整源代码,请

成为会员后,登陆才能继续浏览!联系微信scratch8即可办理会员。
(会员专属:能浏览所有文章,下载所有带链接的Python资源。)

发表在 python, tkinter, turtle | 海龟画恐龙字符画已关闭评论

弹起的字体效果,_控制帧率即fps的动画_control fps by pygame and turtle

弹起的字体效果,这是个控制帧率即fps的动画。
在海龟画图屏幕中也能控制fps,这里借用了pygame的Clock类。下面是部分代码预览:

"""
   弹起的字体效果,这是个控制帧率即fps的动画。
   程序是用turtle和pygame制作的。
   运行后会有汉字以自由落体形式掉落下去。
   本程序结合了pygame的时钟功能,从而更加精准的控制FPS
"""

import turtle
import pygame

screen = turtle.getscreen()   # 获取屏幕
screen.delay(0)
screen.tracer(0)              # 关闭自动刷新
screen.bgcolor("#327899")

turtle.shape('turtle')
turtle.ht()
turtle.penup()
turtle.color('brown')

fps = 60                      # 设定帧率
clock = pygame.time.Clock()
x = 0
y = 150                       # y坐标
dy = 0                        # 垂直速度
acc = -1                      # 加速度
myfont = ("黑体",32,"normal")
string = "风火轮编程欢迎你"
title = string + "_控制帧率动画:"  + str(fps)

如需要查看完整源代码,请

成为会员后,登陆才能继续浏览!联系微信scratch8即可办理会员。
(会员专属:能浏览所有文章,下载所有带链接的Python资源。)

发表在 pygame, python, turtle | 弹起的字体效果,_控制帧率即fps的动画_control fps by pygame and turtle已关闭评论

控制帧率的海龟画圆动画_control fps in turtle animation


下面是部分代码预览:

"""
   控制帧率的海龟画圆动画_control fps in turtle animation
   本程序结合了pygame的时钟功能,这样能控制帧率fps
"""

import turtle
import pygame

screen = turtle.getscreen()   # 获取屏幕

turtle.shape('turtle')
turtle.penup()

fps = 60                      # 设定帧率
clock = pygame.time.Clock()

 
如需要查看完整源代码,请

成为会员后,登陆才能继续浏览!联系微信scratch8即可办理会员。
(会员专属:能浏览所有文章,下载所有带链接的Python资源。)
发表在 pygame, python, turtle | 控制帧率的海龟画圆动画_control fps in turtle animation已关闭评论

tkinter原生海龟拖动它画画示例_tkinter and RawTurtle example

"""
   tkinter原生海龟示例_tkinter and RawTurtle example
   本程序新建tkinter窗口,然后新建一块300X300的画布,再在画布上放一只海龟。
   定义了几个事件,可以拖动海龟画画。
"""

import turtle
import tkinter

root = tkinter.Tk()      # 新建一个窗口
cv = tkinter.Canvas(root,width=300,height=300)
cv.pack()
t = turtle.RawTurtle(cv) # 在画布上新建原生海龟
t.shape('turtle')
s = t.getscreen()        # 获取屏幕对象

def toggledown():
    """切换画笔状态"""
    if t.isdown():       # 如果是落笔则抬笔
        t.penup()
    else:
        t.pendown()

成为会员后,登陆才能继续浏览!联系微信scratch8即可办理会员。
(会员专属:能浏览所有文章,下载所有带链接的Python资源。)

发表在 python, tkinter, turtle | tkinter原生海龟拖动它画画示例_tkinter and RawTurtle example已关闭评论

多线程碰到边缘就反弹弹球例子_multithread bounce on edge turtle example

"""
   多线程碰到边缘就反弹弹球例子_multithread bounce on edge turtle example 
"""
from time import sleep
from queue import Queue
from random import randint
from turtle import Screen, Turtle
from threading import Thread, active_count

QUEUE_SIZE = 1 

def bounce_on_edge(turtle):
    """
       碰到边缘就反弹的一个线程
    """
    dx = randint(-5,5)
    dy = randint(-5,5)
    x, y = turtle.position()
    screen = turtle.getscreen()
    width = screen.window_width()
    height = screen.window_height()
    while True:        
        if abs(x) > width//2: dx = -dx
        if abs(y) > height//2 : dy = -dy
        x = x + dx
        y = y + dy
        actions.put((turtle.goto,  (x,y)))        

def process_queue():
    """处理队列,动作列表不空就执行"""
    while not actions.empty():
        action, argument = actions.get()
        action(argument)
        screen.update()

    if active_count() > 1:
        screen.ontimer(process_queue, 100)

成为会员后,登陆才能继续浏览!联系微信scratch8即可办理会员。
(会员专属:能浏览所有文章,下载所有带链接的Python资源。)
发表在 python, turtle | 多线程碰到边缘就反弹弹球例子_multithread bounce on edge turtle example已关闭评论

多线程海龟移动动画例子_multithread turtle example

"""
   多线程海龟移动动画例子_multithread turtle example 
"""
from queue import Queue
from random import randint
from turtle import Screen, Turtle
from threading import Thread, active_count

QUEUE_SIZE = 1
turtle_SPEED = 3

def move_turtle(turtle, direction):
    """
       移动海龟线程,超过x坐标288就往下移50
    """
    x, y = turtle.position()

    while True:
        while direction == "right":

            if x > 288:
                y -= 50
                actions.put((turtle.sety, y))
                direction = "left"
            else:
                x += turtle_SPEED
                actions.put((turtle.setx, x))

        while direction == "left":
            if x < -288:
                y -= 50
                actions.put((turtle.sety, y))
                direction = "right"
            else:
                x -= turtle_SPEED
                actions.put((turtle.setx, x))

成为会员后,登陆才能继续浏览!联系微信scratch8即可办理会员。
(会员专属:能浏览所有文章,下载所有带链接的Python资源。)

发表在 python, turtle | 多线程海龟移动动画例子_multithread turtle example已关闭评论

线程安全的同时移动海龟

"""
   线程安全的同时移动海龟
   本程序演示36只海龟同时移动效果.
   这是用screen的timer定时器无法做到的.
   
"""
from queue import Queue
from turtle import Screen, Turtle
from threading import Thread, active_count

QUEUE_SIZE = 1
amounts = 36
colors = ['red','orange','yellow','green','cyan','blue','purple']

def process_queue():
    while not actions.empty():
        # 获取动作及其参数,在这里就是forward和1
        action, *arguments = actions.get()
        action(*arguments)

    if active_count() > 1:
        screen.ontimer(process_queue, 100)
         
screen = Screen()
screen.delay(0)
screen.setup(800,640)
screen.title("线程安全的同时移动海龟")

ts = []         # 海龟列表
one = Turtle('turtle', visible=False)
one.color('red')
ts.append(one)
for h in range(1,amounts):   # 克隆其它海龟
    t = one.clone()
    t.color(colors[h%len(colors)])
    t.setheading(h * 360/amounts)
    ts.append(t)
  

成为会员后,登陆才能继续浏览!联系微信scratch8即可办理会员。
(会员专属:能浏览所有文章,下载所有带链接的Python资源。)

发表在 python, turtle | 线程安全的同时移动海龟已关闭评论

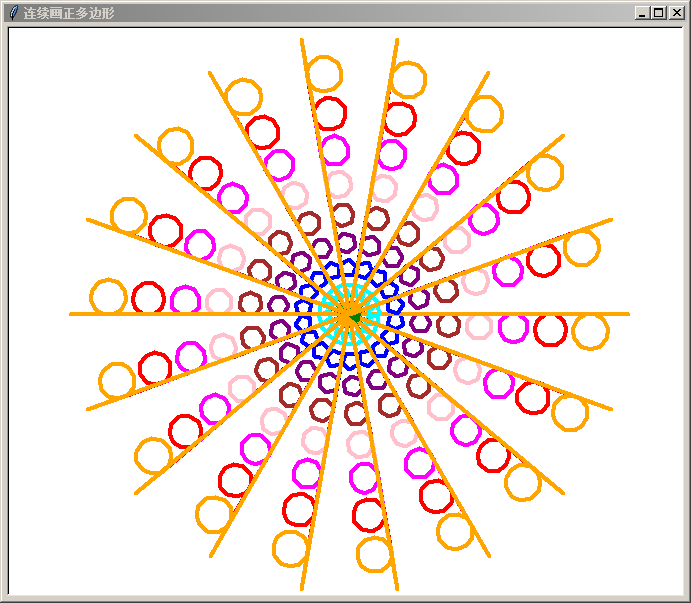
连续画正多边形while循环示例

"""
   连续画正多边形.py
"""

from turtle import *

colors = ['red','orange','yellow','green','cyan',          
          'blue','purple','brown','pink','magenta']
t = Turtle()

screen = t.getscreen()
screen.delay(0)
screen.title("连续画正多边形")

t.width(4)
for i in range(18):
    
    n = 3
    while n < 12 :
        index = n % len(colors)    # 通过求余设定索引
        ys = colors[index]         # 取颜色
        t.color(ys)                # 设定颜色
        
        c = 0
        while c < n :
            t.fd(10)
            t.right(360/n)
            c = c + 1
            
        t.fd(10+n*3)
        n = n + 1

    t.goto(0,0)         # 回到屏幕中央
    t.right(20)
    

连续画正多边形while海龟画图示例

发表在 python, turtle | 连续画正多边形while循环示例已关闭评论

闪烁的文字效果动画_pygame flash text animation


下面是部分代码预览:

"""
   闪烁的文字效果,本程序会生成360张文字图片,
   每张的颜色都不一样,让它们轮流显示,从而形
   成闪烁的文字效果动画。
   
"""
import pygame
from pygame import *

def coloradd(color,dh):
    """
       颜色增加函数,本函数把颜色的色相进行增加。其它指标不变。
       color:pygame.Color实例化后的颜色
       dh:一个int,色相增加的值
    """

BGCOLOR = (32,76,150)
WIDTH,HEIGHT = 480,360

pygame.init()
# 新建屏幕对象,它是最底层的surface
screen = pygame.display.set_mode((WIDTH,HEIGHT))
screen.fill(BGCOLOR)
pygame.display.set_caption("闪烁的文字效果www.lixingqiu.com")

images = []
color = pygame.Color('red')
myfont = pygame.font.Font("msyh.ttf",88)

w = images[0].get_width()     # 获取图像的宽度
x = WIDTH//2 - w//2           # 设定渲染的左上角x坐标
y = HEIGHT//2 -100            # 设定渲染的左上角y坐标
index = 0
clock = pygame.time.Clock()   # 时钟对象

pygame.quit()

 
如需要查看完整源代码,请

成为会员后,登陆才能继续浏览!联系微信scratch8即可办理会员。
(会员专属:能浏览所有文章,下载所有带链接的Python资源。)

发表在 pygame, python | 闪烁的文字效果动画_pygame flash text animation已关闭评论

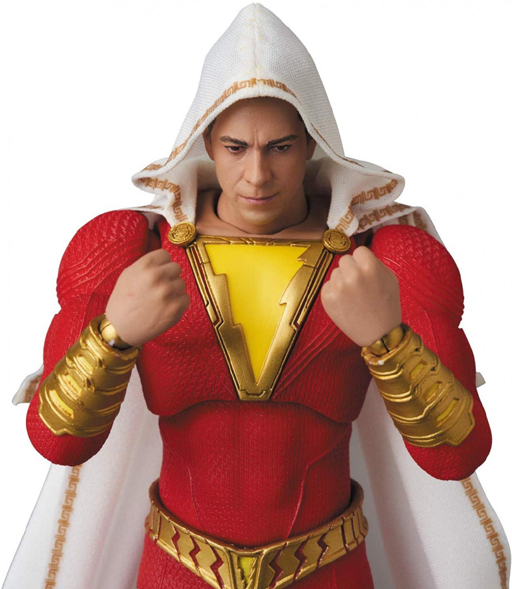
pygame游戏封面页制作示例

python cover shazam封面页制作

python cover shazam封面页制作

下面是部分代码预览:

"""
   简易封面制作一例
   这个程序显示一个非常简单的游戏封面。
   按空格键可以“进入游戏”。
   本程序还主要演示了字体对象的使用方法。
   字体对象可以通过pygame.font.Font新建一个。
   它有render方法,把文字渲染后实际成了一个surface。
   正确运行本程序需要有msyh.ttf微软雅黑字体文件。
   还要准备一张图片,做个样子。
   
"""

import pygame
from pygame import *

def display_cover():
    """显示封面函数"""


def press_space_to_continue():
    """按空格键继续"""


def enter_game():
    """进入游戏,这只里是显示一个画面,一个示意而已"""
 
        
RED = (255,0,0)
GREEN = (0,255,0)
GRAY = (160,160,165)
BGCOLOR = (32,76,150)

WIDTH,HEIGHT = 512,589
pygame.init()

# 新建屏幕对象,它是最底层的surface
screen = pygame.display.set_mode((WIDTH,HEIGHT))
screen.fill(BGCOLOR)
pygame.display.set_caption("简易封面制作")

display_cover()             # 显示封面

press_space_to_continue()   # 按空格键开始

enter_game()                # 进入游戏 

 
如需要查看完整源代码,请

成为会员后,登陆才能继续浏览!联系微信scratch8即可办理会员。
(会员专属:能浏览所有文章,下载所有带链接的Python资源。)
发表在 pygame, python | pygame游戏封面页制作示例已关闭评论

pygame拖动图片与缩放示例_python图像查看器雏形程序

pygame图像查看器雏形
下面是部分代码预览:

"""
   拖动图片与缩放示例
   稍微改下这个程序就能制作一个图片查看器了.
   
"""

import pygame
from pygame.locals import *

width,height = 680,660
pos = [width//2,height//2]
image = 'beauty.jpg'

screen = pygame.display.set_mode((width,height))
pygame.display.set_caption("拖动图片与缩放示例www.lixingqiu.com")
image = pygame.image.load(image).convert_alpha()
rect = image.get_rect(center=pos)
image2 = image

w,h = image.get_width(),image.get_height()
k = h/w                                   # 高度和宽度之比
step = 10
start_drag = 0
running = True
while running:
    for event in pygame.event.get():
              
        if event.type == QUIT:running = False
        
        if event.type == MOUSEBUTTONDOWN:

            if event.button ==4 :            # 向上滚动变大
                w = w + step
                h = int(w * k)
                image2 = pygame.transform.scale(image,(w,h))
                rect = image2.get_rect(center=pos)                
            if event.button ==5 :          # 向下滚动变小
                w = w - step
                w = max(1,w)
                h = int(w * k)
                image2 = pygame.transform.scale(image,(w,h))
                rect = image2.get_rect(center=pos)
            if event.button == 1:
                start_drag = 1                # 开始拖动
                
        if event.type == MOUSEBUTTONUP:
            start_drag = 0                    # 结束拖动
        if event.type == MOUSEMOTION:
            c = rect.collidepoint(event.pos)  # 鼠标指针在图像rect内
            if start_drag == 1 and c:
                pos[0] += event.rel[0]        # 水平方向相对移动量
                pos[1] += event.rel[1]        # 垂直方向相对移动量
                rect.center = pos                    

        screen.fill((0,0,0))
        screen.blit(image2,rect)
        pygame.display.update()

pygame.quit()

下载完整源代码与素材,请

成为会员后,登陆才能继续浏览!联系微信scratch8即可办理会员。
(会员专属:能浏览所有文章,下载所有带链接的Python资源。)
发表在 pygame, python | pygame拖动图片与缩放示例_python图像查看器雏形程序已关闭评论

按鼠标滚轮缩放图像pygame示例

按鼠标滚轮缩放图像pygame示例
下面是部分代码预览:

"""
   按鼠标滚轮缩放图像pygame示例
"""

import pygame
from pygame.locals import *

width,height = 680,660
pos = width//2,height//2
image = 'beauty.jpg'

screen = pygame.display.set_mode((width,height))
pygame.display.set_caption("按鼠标滚轮缩放图像pygame示例 www.lixingqiu.com")

w,h = image.get_width(),image.get_height()
k = h/w                                   # 高度和宽度之比
step = 10
running = True
while running:
    for event in pygame.event.get():
        if event.type == QUIT:running = False

    screen.fill((0,0,0))
    screen.blit(image2,rect)
    pygame.display.update()

pygame.quit()            

下载完整源代码与素材,请

成为会员后,登陆才能继续浏览!联系微信scratch8即可办理会员。
(会员专属:能浏览所有文章,下载所有带链接的Python资源。)
发表在 pygame, python | 按鼠标滚轮缩放图像pygame示例已关闭评论

pygame不断旋转地动画练习答案

"""
   pygame不断旋转地动画练习答案。
   本程序会让一张女孩图片不断地旋转。
"""
import pygame
   
image = "girl.png"
width,height = 480,360
中心点 = width//2,height//2
screen = pygame.display.set_mode((width,height))
pygame.display.set_caption("pygame不断旋转的动画")

image = pygame.image.load(image).convert_alpha()
image_rect = image.get_rect(center=中心点) # 获取矩形对象
screen.blit(image,image_rect)              # 渲染在screen上
pygame.display.update()                    # 更新显示

angle = 1
while not pygame.event.get(pygame.QUIT):
    
    image2 = pygame.transform.rotate(image,angle) # 逆时针旋转angle度
    image2_rect = image2.get_rect(center=中心点)

成为会员后,登陆才能继续浏览!联系微信scratch8即可办理会员。
(会员专属:能浏览所有文章,下载所有带链接的Python资源。)

发表在 pygame, python | pygame不断旋转地动画练习答案已关闭评论

pygame面向对象编程最简学习示例代码

"""
   pygame的Sprite类。
   pygame面向对象编程最简学习示例代码。
   
"""
import pygame

class Sprite:
    def __init__(self,image,pos):
        """
          image:一个surface
          pos:中心点坐标
        """
        self.image = image          # image是一个surface
        self.rect = self.image.get_rect(center=pos)


image = "girl.png"
width,height = 480,360
center = width//2,height//2

查看完整源代码,请

成为会员后,登陆才能继续浏览!联系微信scratch8即可办理会员。
(会员专属:能浏览所有文章,下载所有带链接的Python资源。)

发表在 pygame, python | pygame面向对象编程最简学习示例代码已关闭评论

pygame旋转图像最简示例_按任意键继续执行

"""
   pygame旋转图像最简示例_按任意键继续执行.py
   本程序会显示一个女孩的图像,按任意键会旋转她。
   再按任意键会关闭Pygame窗口。
   
"""
import pygame

def press_any_key_to_continue():
    """
       不断检测有没有按任意键,如果按了则退出while循环
    """
    while not pygame.event.get(pygame.KEYDOWN):
        pass
    
image = "girl.png"
width,height = 480,360
中心点 = width//2,height//2
screen = pygame.display.set_mode((width,height))
pygame.display.set_caption("pygame旋转图像最简示例")

image = pygame.image.load(image).convert_alpha()
image_rect = image.get_rect(center=中心点) # 获取矩形对象
screen.blit(image,image_rect)              # 渲染在screen上
pygame.display.update()                    # 更新显示

press_any_key_to_continue()                # 按任意键继续
 

需要查看完整源码,请

成为会员后,登陆才能继续浏览!联系微信scratch8即可办理会员。
(会员专属:能浏览所有文章,下载所有带链接的Python资源。)

发表在 pygame, python | pygame旋转图像最简示例_按任意键继续执行已关闭评论

turtle和pygame结合的彩色螺旋图

turtle和pygame结合的彩色螺旋图
下面是部分代码预览:

"""
  turtle和pygame结合的彩色螺旋图.py
   本程序演示如何让颜色的色相部分产生渐变。
"""
import turtle              # 导入海龟模块
from math import *         # 从数学模块导入函数
from pygame import Color   # 从pygame导入Color类
    
def coloradd(color,dh):
    """
       颜色增加函数,本函数把颜色的色相进行增加,其它指标不变。
       color:Color实例化后的颜色
       dh:一个int,色相增加的值
    """

width,height = 480,360
screen = turtle.getscreen()
screen.setup(width,height)
screen.title("turtle和pygame结合的彩色螺旋图www.lixingqiu.com")
screen.colormode(255)
screen.delay(0)

turtle.width(30)
yanse = Color('red')

如需要查看完整源代码,请

成为会员后,登陆才能继续浏览!联系微信scratch8即可办理会员。
(会员专属:能浏览所有文章,下载所有带链接的Python资源。)

发表在 pygame, python, turtle | turtle和pygame结合的彩色螺旋图已关闭评论

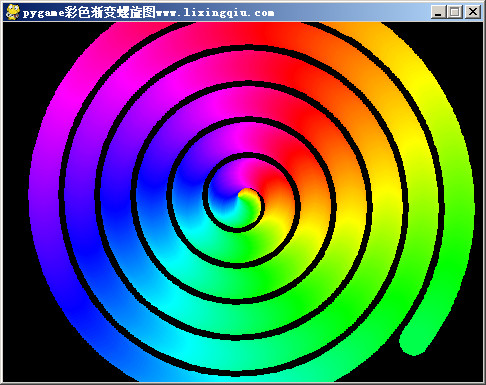
pygame彩色渐变螺旋图

pygame彩色渐变螺旋图rgb,hsva
下面是部分代码预览:

"""
   pygame彩色渐变螺旋图.py
   本程序演示如何让颜色的色相部分产生渐变。
"""

import pygame
from math import *

def update_loop():
    """
       不断更新屏幕显示,直到按了关闭按钮就退出
    """
    while not pygame.event.get(pygame.QUIT):
        pygame.display.update()
    pygame.quit()

    
def coloradd(color,dh):
    """
       颜色增加函数,本函数把颜色的色相进行增加。其它指标不变。
       color:pygame.Color实例化后的颜色
       dh:一个int,色相增加的值
    """

width,height = 480,360
centerx,centery = width//2,height//2

screen = pygame.display.set_mode((width,height))
pygame.display.set_caption("pygame彩色渐变螺旋图www.lixingqiu.com")

color = pygame.Color('red')
radius = 1
angle = 0

如需要查看完整源代码,请

成为会员后,登陆才能继续浏览!联系微信scratch8即可办理会员。
(会员专属:能浏览所有文章,下载所有带链接的Python资源。)

发表在 pygame, python | pygame彩色渐变螺旋图已关闭评论

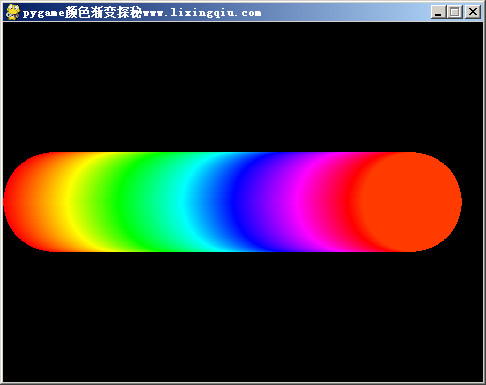
pygame颜色渐变探秘_pygame.Color用法

pygame颜色渐变探秘rgb,hsva
下面是部分代码预览:

"""
   颜色渐变探秘.py
   本程序演示如何让颜色的色相部分产生渐变。
"""

import pygame

def coloradd(color,dh):
    """
       color:pygame.Color实例化后的颜色
       dh:一个int,色相增加的值
    """

width,height = 480,360
screen = pygame.display.set_mode((width,height))
pygame.display.set_caption("pygame颜色渐变探秘www.lixingqiu.com")

while not pygame.event.get(pygame.QUIT):
    pygame.display.update()
pygame.quit()

如需要查看完整源代码,请

成为会员后,登陆才能继续浏览!联系微信scratch8即可办理会员。
(会员专属:能浏览所有文章,下载所有带链接的Python资源。)

发表在 pygame, python | pygame颜色渐变探秘_pygame.Color用法已关闭评论

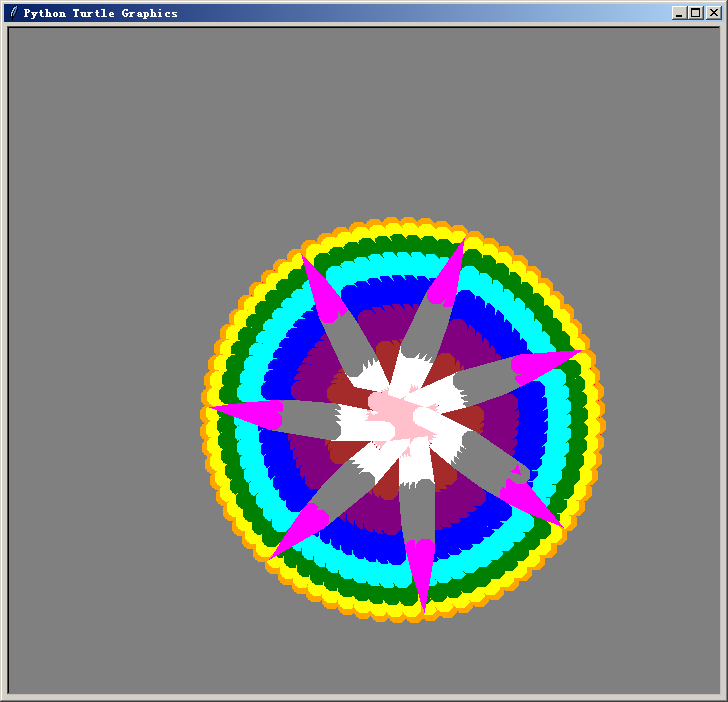
python海龟图腾花 turtle

python海龟图腾花turtle
下面是部分代码预览:

"""
   海龟图腾花.py
"""

import turtle

colors = ['red', 'orange', 'yellow', 'green', 'cyan', 'blue', 'purple',
          'brown', 'pink', 'white', 'gray', 'magenta', 'black']

screen = turtle.getscreen()
screen.bgcolor('gray')
screen.delay(0)

turtle.penup()
turtle.setx(-150)
turtle.width(20)
turtle.speed(0)
turtle.pendown()
        

如需要查看完整源代码,请

成为会员后,登陆才能继续浏览!联系微信scratch8即可办理会员。
(会员专属:能浏览所有文章,下载所有带链接的Python资源。)
发表在 python, turtle | python海龟图腾花 turtle已关闭评论

按左右方向箭头设置整体透明度


下面是部分代码预览:

"""
   按左右方向箭头设置整体透明度.py。
   本程序按左键透明度会增加,按右键透明度会减小。
   
"""
import pygame
from random import randint
from pygame.locals import *

width,height = 480,360

screen = pygame.display.set_mode((width,height))
pygame.display.set_caption("surface整体透明度测试程序")

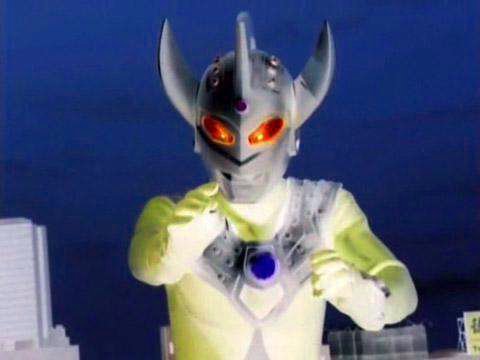
# ultraman做为背景
ultraman = pygame.image.load('ultraman.png').convert()
superman = pygame.image.load("superman.jpg").convert()
width2 = superman.get_width()//2
height2 = superman.get_height()//2
# 把超人贴到屏幕中央坐标
center = width//2 - width2,height//2 -height2

alpha = 127
superman.set_alpha(alpha)    # 设置整体透明度

running = True
while running:
    for event in pygame.event.get():                
        if event.type == QUIT : running = False
    
    screen.blit(ultraman,(0,0))   # 奥特曼合成到screen
    screen.blit(superman,center)  # 超人合成到screen
    pygame.display.update()

pygame.quit()


下载完整源代码与素材,请

成为会员后,登陆才能继续浏览!联系微信scratch8即可办理会员。
(会员专属:能浏览所有文章,下载所有带链接的Python资源。)

发表在 pygame, python | 按左右方向箭头设置整体透明度已关闭评论

单击鼠标左键画彩色圆形

pygame单击左键画大小不一的彩圆

"""
   单击鼠标左键画彩色圆形.py
   简单的pygame示例程序,供大家学习。
"""
import pygame
from pygame.locals import *
from random import randint

screen = pygame.display.set_mode((480,360))
pygame.display.set_caption("单击鼠标左键画彩色圆形")

running = True


需要查看完整源代码,请

成为会员后,登陆才能继续浏览!联系微信scratch8即可办理会员。
(会员专属:能浏览所有文章,下载所有带链接的Python资源。)

发表在 pygame, python | 留下评论

包括鼠标滚动事件的pygame鼠标按键事件测试程序

"""
   鼠标按键事件测试程序.py
"""
import pygame
from pygame.locals import *

screen = pygame.display.set_mode((480,360))
pygame.display.set_caption("鼠标按键事件测试")

running = True

需要查看完整源代码,请

成为会员后,登陆才能继续浏览!联系微信scratch8即可办理会员。
(会员专属:能浏览所有文章,下载所有带链接的Python资源。)

发表在 pygame, python | 留下评论

迷你入侵者射击游戏

"""
   迷你入侵非面向对象版本中文注释.py
   这个版本用方块代替外星飞船和玩家。
   玩家按空格键发射子弹,然后需要等一定的时间才能发射第二颗子弹。
   这个机制是通过设定reloaded_event事件与配合reloaded逻辑变量实现的。
   开始时reloaded是为True,当按空格键后,它的值变为False,这时设定
   reloaded_event的发生时间。当时间到了,那么就把reloaded设为True,
   并清除reloaded_event事件发生的时间。
"""
# 导入pygame模块
import pygame

# 每500毫秒发射一颗子弹
RELOAD_SPEED = 500

# 向两边及下向移动间隔时间
MOVE_SIDE = 1000
MOVE_DOWN = 3500

# 创建屏幕对象
screen = pygame.display.set_mode((300, 200))
clock = pygame.time.Clock()

pygame.display.set_caption("迷你入侵非面向对象版本中文注释")

# 创建自定义事件
move_side_event = pygame.USEREVENT + 1
move_down_event = pygame.USEREVENT + 2
# 重装子弹事件
reloaded_event  = pygame.USEREVENT + 3

move_left, reloaded = True, True

invaders, colors, shots = [], [] ,[]
for x in range(15, 300, 15):
    for y in range(10, 100, 15):
        invaders.append(pygame.Rect(x, y, 7, 7))
        colors.append(((x * 0.7) % 256, (y * 2.4) % 256))

# 给移动事件设置定时器
pygame.time.set_timer(move_side_event, MOVE_SIDE)
pygame.time.set_timer(move_down_event, MOVE_DOWN)

player = pygame.Rect(150, 180, 10, 7) # 玩家方块

需要查看完整源代码,请

成为会员后,登陆才能继续浏览!联系微信scratch8即可办理会员。
(会员专属:能浏览所有文章,下载所有带链接的Python资源。)

发表在 pygame, python | 留下评论

pygame.event.poll demo获取事件演示程序.py

"""
   pygame.event.poll demo获取事件演示程序.py
"""
import pygame
from pygame.locals import *

width,height = 480,360            # 设定分辨率
screen = pygame.display.set_mode((width,height))

running = True
while running:
    
    event = pygame.event.poll()   # 获取一个事件
    if event.type == QUIT:
        running = False

    screen.fill((0,0,0))          # 填充screen为黑色

    pygame.display.update()

pygame.quit()


发表在 pygame, python | 留下评论

pygame ActiveEvent事件demo.py

"""
   ActiveEvent事件demo.py
"""
import pygame
from pygame.locals import *

width,height = 480,360
screen = pygame.display.set_mode((width,height))

running = True
while running:
    for event in pygame.event.get(): # 遍历每个事件

        if event.type == ACTIVEEVENT :
            if event.gain == 0 :
                pygame.display.set_caption("鼠标指针不在窗口内")
            if event.gain == 1 :
                pygame.display.set_caption("鼠标指针在窗口内")            

        if event.type == QUIT: running = False

    screen.fill((0,0,0))

    pygame.display.update()

pygame.quit()


发表在 pygame, python | 留下评论

pygame的方块类鼠标单击示例样本程序

python rect and point collide彩色方块

python rect and point collide彩色方块


本程序会判断单击的点是否在彩色矩形内,下面是部分代码预览:

"""
   pygame的方块类鼠标单击示例样本程序.py
"""

import pygame

BLACK = (0, 0, 0)
RED   = (255, 0, 0)
GREEN = (0, 255, 0)
SIZE = WIDTH,HEIGHT = 480,360

class  Square(pygame.sprite.Sprite):
    """
       定义类,继承自Sprite类
    """
    
    def __init__(self,pos,color,size):
        """
           pos:方块中心点坐标
           color:颜色
           size:宽高
        """
        pygame.sprite.Sprite.__init__(self)
        self.color = color
        self.size = size
        self.image = pygame.Surface(size)
        self.image.fill(color)
        self.rect = self.image.get_rect()
        self.rect.center = pos


def main():
    """
       主函数
    """
    pygame.init()
    screen = pygame.display.set_mode(SIZE)
    pygame.display.set_caption("pygame的方块类鼠标单击示例样本程序")

    # 这个红色广块叫安源
    安源 = Square((10,10),RED,(100,100))

    # 下面的方块叫北桥          
    北桥 = Square((100,100),GREEN,(50,50))

    all_sprites = pygame.sprite.Group()
    all_sprites.add(安源, 北桥)

if __name__ == "__main__":

    main()


下载完整源代码与素材,请

成为会员后,登陆才能继续浏览!联系微信scratch8即可办理会员。
(会员专属:能浏览所有文章,下载所有带链接的Python资源。)
发表在 pygame, python | 留下评论

pygame的surface的colorkey透明度程序.py

"""
   pygame的surface的colorkey.py
   当一个图像要渲染到另一个图像上时,我们可以选择某种颜色不渲染。
   这种颜色就叫colorkey。
   如果图像是每像素格式,那么设置的colorkey无效。
   
"""
import pygame
from random import randint
from pygame.locals import *
    
screen = pygame.display.set_mode((480,360))
pygame.display.set_caption("pygame的surface的colorkey测试程序 www.lixingqiu.com")

# ultraman做为背景
ultraman = pygame.image.load('ultraman.png').convert()
earth = pygame.image.load("earth.png").convert()

earth.set_colorkey((102,255,204))  # 设置不渲染的颜色
pos = 100,100
ultraman.blit(earth,pos)        # 把earth贴到ultraman上
screen.blit(ultraman,(0,0))     # 把ultraman贴到screen上
pygame.display.update()

"""上面把earth贴到ultraman上的时候,右边有一个空心的小圆圈。
这是由于它的颜色为102,255,204引起的,即colorkey这个值。
此颜色不会渲染出来,所以就看到透明效果了。
"""


发表在 pygame, python | 留下评论

surface整体透明度测试程序_pygame whole alpha test program

下面是部分代码预览:

"""
   surface整体透明度测试程序.py
   用surface的set_alpha设定透明度。
   这种情况的透明度只能给图像设置一个整体透明度。
   不象每像素透明度设置那样可以精确到每一个像素的a值来给图像设置透明度。
   pygame the full Surface alpha test program  by lixingqiu
"""
import pygame
from random import randint
from pygame.locals import *
    
screen = pygame.display.set_mode((480,360))
pygame.display.set_caption("surface整体透明度测试程序 www.lixingqiu.com")

# ultraman做为背景
ultraman = pygame.image.load('ultraman.png').convert()
earth = pygame.image.load("earth.png").convert()
width2 = earth.get_width()//2
height2 = earth.get_height()//2 


下载完整源代码与素材,请

成为会员后,登陆才能继续浏览!联系微信scratch8即可办理会员。
(会员专属:能浏览所有文章,下载所有带链接的Python资源。)
发表在 pygame, python | 留下评论

pygame每像素透明度效果测试程序_per pixel alpha effect test

pygame每像素透明度效果测试程序
下面是部分代码预览:

"""
   pygame每像素透明度效果测试程序.py
   本程序中地球越往右透明度越低。
   它的透明度指标就是像素值中最后一个值。
   这个四元组中的这个值最大为255。
   越大,越不透明。那么在合成的时候它占的分量达到了100%。
   本程序充份说明了每像素透明度的概念。
"""

import pygame
from random import randint
from pygame.locals import *

def set_random_alpha(image):
    """给图像设置的透明度"""
    
screen = pygame.display.set_mode((480,360))

# 转换为每个像素透明度都起作用的模式
ultraman = pygame.image.load('ultraman.jpg').convert_alpha()
earth = pygame.image.load("earth.png").convert_alpha()
width2 = earth.get_width()//2
height2 = earth.get_height()//2
set_random_alpha(earth)


下载完整源代码与素材,请

成为会员后,登陆才能继续浏览!联系微信scratch8即可办理会员。
(会员专属:能浏览所有文章,下载所有带链接的Python资源。)

发表在 pygame, python | 留下评论

pygame灰度化图像基本原理


下面是部分代码预览:

"""
   灰度化图像.py
"""
import pygame
from random import randint

def gray_pixel(r,g,b):
    """灰度化像素"""

image = pygame.image.load('董明珠.jpg')
width,height = image.get_size()     # 获取宽高

pygame.image.save(image,'董明珠_灰度图.jpg') # 保存到文件    

 
如需要查看完整源代码,请

成为会员后,登陆才能继续浏览!联系微信scratch8即可办理会员。
(会员专属:能浏览所有文章,下载所有带链接的Python资源。)

发表在 pygame, python | 留下评论

反转像素_反相基本原理演示程序


这是一个用pygame进行图像处理的小程序,它会把图像进行反相操作,就像底片效果一样.
下面是部分代码预览:

"""
   反转像素_反相基本原理演示程序.py
"""
import pygame
from random import randint

# 下面的函数就是反转像素值的基本原理

image = pygame.image.load('ultraman.jpg')
width,height = image.get_size()     # 获取宽高

pygame.image.save(image,'ultraman_c.jpg') # 保存到文件

 
如需要查看完整源代码,请

成为会员后,登陆才能继续浏览!联系微信scratch8即可办理会员。
(会员专属:能浏览所有文章,下载所有带链接的Python资源。)

发表在 pygame, python | 留下评论

pygame帧渲染到tkinter窗口示例程序


pygame的屏幕渲染到了tkinter里的Frame组件中去了,下面是部分代码预览:

"""
   pygame帧渲染到tkinter窗口示例程序.py
"""
import os
import pygame
from tkinter import *

root =  Tk()
root.title("pygame帧渲染到tkinter窗口示例程序")

# 创建左边框架,用于渲染pygame帧
left_frame =  Frame(root, width = 500, height = 500) 
left_frame.pack(side = LEFT) # 放于左边对齐

# 创建右边框架,用来放按钮
right_frame =  Frame(root, width = 75, height = 500)
right_frame.pack(side = LEFT)

 
如需要查看完整源代码,请

成为会员后,登陆才能继续浏览!联系微信scratch8即可办理会员。
(会员专属:能浏览所有文章,下载所有带链接的Python资源。)

发表在 pygame, python, tkinter | 留下评论

两个矩形碰撞原理演示程序_跟随鼠标移动的矩形


本程序自己编写碰撞检测代码,方便学习矩形碰撞的基本原理。下面是部分代码预览:

"""
   两个矩形碰撞原理演示程序_跟随鼠标移动的矩形.py
"""
import pygame
from pygame.locals import *

WIDTH,HEIGHT = 480,360
screen = pygame.display.set_mode((WIDTH,HEIGHT))

r1 = pygame.Rect(0,0,100,100)
r1.center = (WIDTH//2,HEIGHT//2) # r1在屏幕中央,宽高为100

r2 = pygame.Rect(0,0,50,50)      # r2先在左上角的位置

running = True
while running :
    event = pygame.event.poll()  # 从事件队列中取一个事件
    if event.type == QUIT:running = False

    x,y = pygame.mouse.get_pos()
    r2.center = x,y              # 跟随鼠标移动的矩形

    c1 = r2.right<r1.left
    c2 = r2.bottom<r1.top
    c3 = r2.left>r1.right
    c4 = r2.top>r1.bottom
    
    if  c1 or c2 or c3 or c4:
        pygame.display.set_caption("没有重叠")
    else:
        pygame.display.set_caption("重叠了")
    
    screen.fill((0,0,0))
    pygame.draw.rect(screen,(180,180,0),r1,2)
    pygame.draw.rect(screen,(180,0,130),r2,2)
    
    pygame.display.update()

pygame.quit()


如需要查看完整源代码,请

成为会员后,登陆才能继续浏览!联系微信scratch8即可办理会员。
(会员专属:能浏览所有文章,下载所有带链接的Python资源。)

发表在 pygame, python | 留下评论

矩形对象的点与矩形碰撞原理演示程序

"""
   矩形对象的点与矩形碰撞原理演示程序.py
"""
import pygame
from pygame.locals import *

WIDTH,HEIGHT = 480,360
screen = pygame.display.set_mode((WIDTH,HEIGHT))

r = pygame.Rect(0,0,100,100)
r.center = (WIDTH//2,HEIGHT//2)

running = True

需要查看完整源代码,请

成为会员后,登陆才能继续浏览!联系微信scratch8即可办理会员。
(会员专属:能浏览所有文章,下载所有带链接的Python资源。)

发表在 pygame, python | 留下评论

海龟快跑,turtle碰撞检测小游戏


交互小游戏一个,操作小海龟赶快逃跑吧,要不然被追上就没命了。下面是部分代码预览:

"""
   海龟快跑!
   turtle碰撞检测小游戏。
   本程序主要演示如何对两只海龟进行碰撞检测。
"""
from turtle import Turtle, Screen

screen = Screen()

screen.screensize(250, 250)      # 调整画布尺寸
screen.bgcolor("black")
screen.title("海龟快跑,turtle碰撞检测示例")
screen.delay(0)

player = Turtle("turtle")
player.color("blue")
player.penup()
player.setposition(250, 250)

catcher = Turtle("turtle")
catcher.color("red")
catcher.penup()
catcher.setposition(-250, -250)

def k1():
    player.forward(10)

def k2():
    player.left(10)

def k3():
    player.right(10)

def k4():
    player.backward(10)

def close_window():
    screen.bye()

def is_collided_with(a, b):
    """两只海龟的水平和垂直距离都小于10,则认为它们发生了碰撞"""
    
    return abs(a.xcor() - b.xcor()) < 10 and abs(a.ycor() - b.ycor()) < 10

def catch_player():
    """去“抓“玩家,每隔10毫秒重设方向。"""
    catcher.setheading(catcher.towards(player))
    catcher.forward(min(catcher.distance(player), 1))

    if is_collided_with(catcher, player):
        print('追到你了!(发生了碰撞)')
        close_window()
    else:
        screen.ontimer(catch_player, 10)

screen.onkey(k1, "Up")    # 按上移方向箭头调用k1函数
screen.onkey(k2, "Left")  # 按下移方向箭头调用k2函数
screen.onkey(k3, "Right") # 按右移方向箭头调用k3函数
screen.onkey(k4, "Down")  # 按左移方向箭头调用k4函数

screen.listen()           # 监听键盘按键

catch_player()

screen.mainloop()


如需要查看完整源代码,请

成为会员后,登陆才能继续浏览!联系微信scratch8即可办理会员。
(会员专属:能浏览所有文章,下载所有带链接的Python资源。)

发表在 python, turtle | 留下评论

python纯画笔大雪纷飞景像模拟

python turtle snow fall simulation大雪纷飞模拟景象

python turtle snow fall simulation大雪纷飞模拟景象

"""
   python大雪纷飞景像模拟2.py
   本程序中只有一个海龟对象,但却有330个雪花,
   这是如何实现的呢?
"""

import time
from turtle import *
from random import randint

class Snow:
    """雪花类"""
    def __init__(self,rect):
        """
           rect:所在的矩形区域大小,值为(width,height)
        """

rect = width,height = 640,480
screen = Screen()
screen.tracer(0,0)
screen.bgcolor('black')
screen.setup(width,height)
screen.title("python大雪纷飞景像模拟2")

t = Turtle(visible=False)          # 新建海龟对象
t.penup()

snows = [Snow(rect) for i in range(330)]

 
如需要查看完整源代码,请

成为会员后,登陆才能继续浏览!联系微信scratch8即可办理会员。
(会员专属:能浏览所有文章,下载所有带链接的Python资源。)

发表在 python, turtle | 留下评论

python纯画笔动画弹球

python pure pen ball 纯画笔弹球

python pure pen ball 纯画笔弹球


下面是部分代码预览:

"""
   python纯画笔动画弹球.py
   注意本程序虽然海龟移动了,但重点在于演示它画的画(打的圆点)在移动,
   所以叫纯画笔动画。本程序是动画原理演示动画。
"""

import time
import turtle
from random import randint

ball = turtle
width,height = 960,720
screen = ball.getscreen()
screen.bgcolor("black")
screen.title("纯画笔动画弹球")
screen.setup(width,height)
screen.tracer(0)       # 关闭自动刷新

ball.color('cyan')
ball.up()              # 抬笔
ball.ht()              # 和本身形状无关,所以隐藏

diameter = 100         # 设定直径为100
radius = diameter//2   # 半径
dx = randint(-10,10)   # 单位水平位移
dy = randint(-10,10)   # 单位垂直位移

while True:
    ball.clear()       # 擦除以前所画的一切

    # 下面是修改坐标
    x = ball.xcor() + dx
    y = ball.ycor() + dy
    ball.goto(x,y)
    ball.dot(diameter)  # 在此坐标画个圆
    if (x + radius) > width//2 or (x-radius) <= -width//2:
        dx = -dx
    if (y + radius) > height//2 or (y-radius) <= -height//2:
        dy = -dy

    # 最后重画
    screen.update()
    time.sleep(0.01)            

 
如需要查看完整源代码,请

成为会员后,登陆才能继续浏览!联系微信scratch8即可办理会员。
(会员专属:能浏览所有文章,下载所有带链接的Python资源。)

发表在 python, turtle | 留下评论

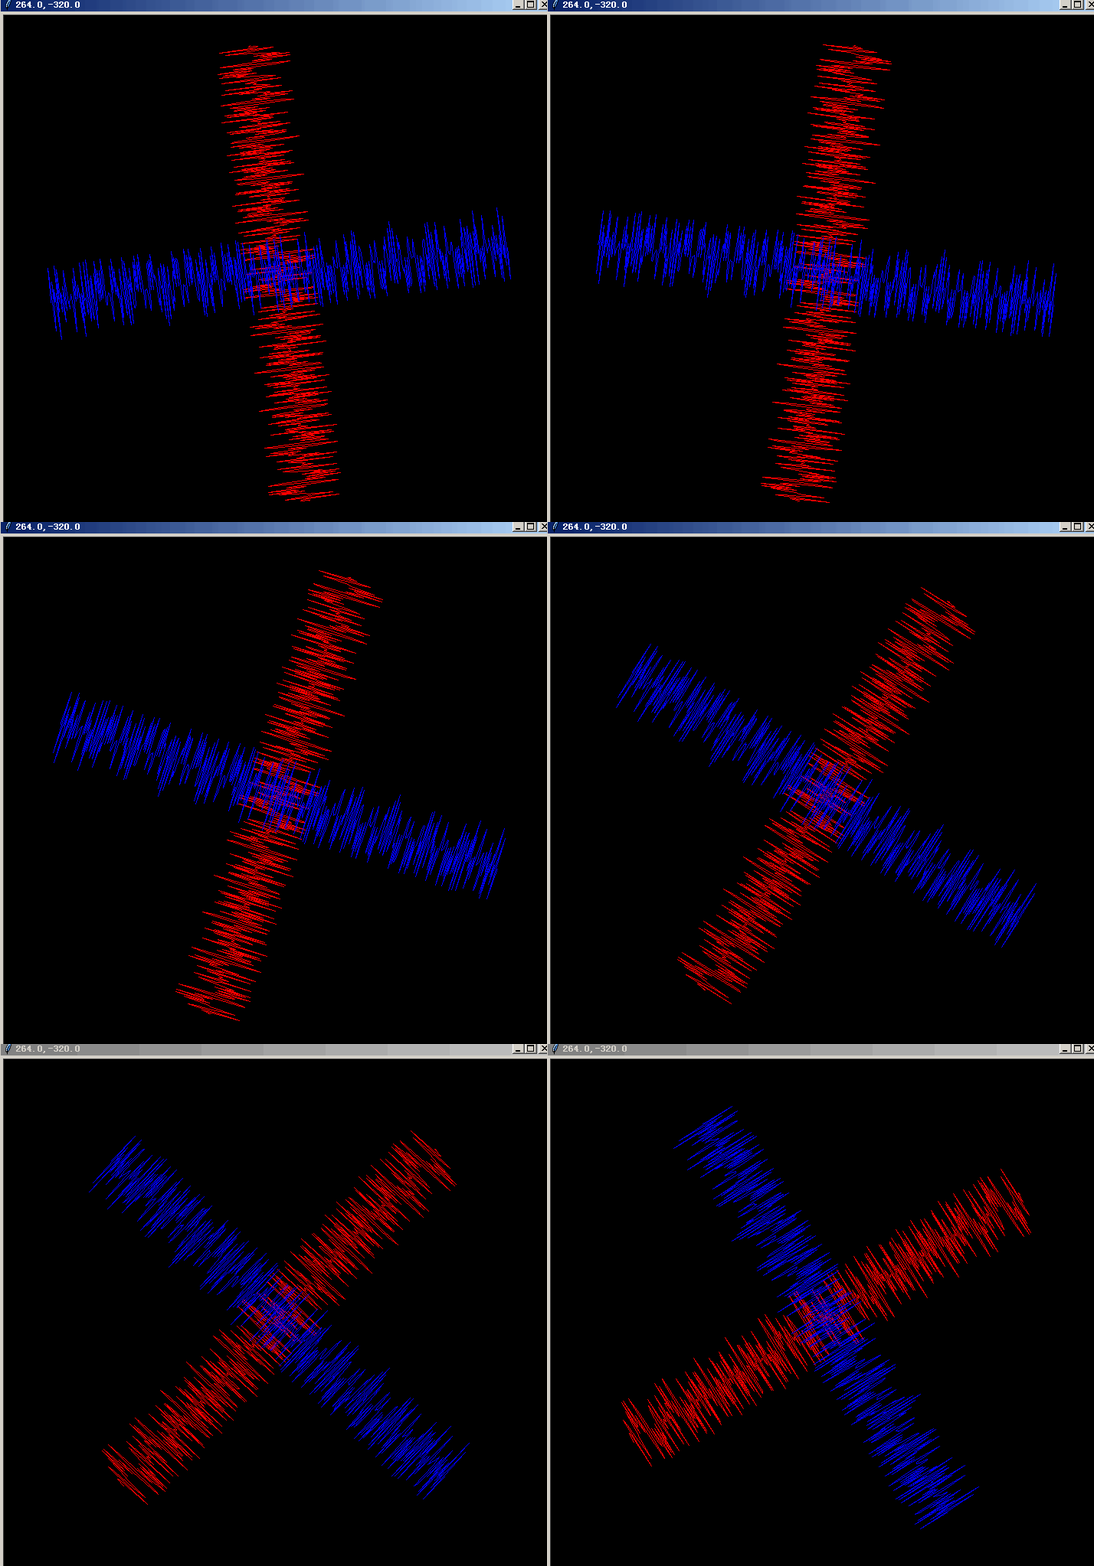
旋转的赫兹_三角函数与海龟画图示例程序

"""
   旋转的赫兹.py
   三角函数与海龟画图示例程序
"""

import math
from turtle import Turtle, Screen

screen = Screen()
screen.bgcolor("black")
screen.title("旋转的赫兹")
screen.tracer(0)

# 这个海龟叫萍乡
pingxiang = Turtle(visible=False)
pingxiang.pu()
pingxiang.setpos(0, 500)
pingxiang.pd()
pingxiang.setpos(0, -500)
pingxiang.pu()
pingxiang.setpos(-650, 0)
pingxiang.pd()
pingxiang.setpos(0, 0)
pingxiang.write("0", align="right", font=("Times New Roman", 14, "normal"))
pingxiang.setpos(650, 0)

# 这个海龟叫安源
anyuan = Turtle(visible=False)

for r in range(0, 600000):

    anyuan.clear()

    anyuan.pu()
    anyuan.setpos(-300 * math.cos(r * math.pi / 100), 300 * math.sin(r * math.pi / 100))
    anyuan.pd()
    anyuan.pencolor("red")

    for x in range(-300, 301):
        g = math.sin(x)
        t = math.cos(x)
        y = 100 * g * t * math.sin(2 * x**2 * math.pi / 100)
        tmp = r * math.pi / 100
        anyuan.setpos(x * math.cos(tmp) + y * math.sin(tmp), -x * math.sin(tmp) + y * math.cos(tmp))

    anyuan.pu()
    anyuan.setpos(-300 * math.sin(r * math.pi / 100), -300 * math.cos(r * math.pi / 100))
    anyuan.pd()
    anyuan.pencolor("blue")

    for y in range(-300, 301):
        c = math.sin(y)
        d = math.cos(y)
        x = 100 * c * d * math.cos(2 * y**2 * math.pi / 100)
        tmp = r * math.pi / 100
        anyuan.setpos(x * math.cos(tmp) + y * math.sin(tmp), -x * math.sin(tmp) + y * math.cos(tmp))

    screen.update()


screen.exitonclick()     # 单击关窗 

发表在 python, turtle | 留下评论

pygame.draw系列命令演示程序和表格

画多边形命令

pygame.draw.polygon

polygon(Surface, color, pointlist, width=0) -> Rect

Surface:图形,color:颜色,pointlist:坐标点列表,width:线宽。返回矩形对象。

画圆形命令

pygame.draw.circle

circle(Surface, color, pos, radius, width=0) -> Rect

pos:圆形中心坐标点,radius:半径

画直线命令

pygame.draw.line

line(Surface,color,start_pos,end_pos,width=1) -> Rect

start_pos:起始坐标点,end_pos:结束坐标点

画折线命令

pygame.draw.lines

lines(Surface, color, closed, pointlist, width=1) -> Rect

closed:是否封闭,如果为True,那么起点和终点将会连接。

画反锯齿直线命令

pygame.draw.aaline

aaline(Surface, color, startpos, endpos, blend=1) -> Rect

最后一个blend是混合参数,它会把Surface和线条指定的颜色进行像素运算。并且这个命令无法指定线宽。

画反锯齿折线命令

pygame.draw.aalines

aalines(Surface, color, closed, pointlist, blend=1) -> Rect

closed:是否闭合,pointlist:坐标点列表。

"""
   pygame.draw系列命令演示程序
"""

import pygame
from math import pi
 
# 初始化pygame引擎
pygame.init()
 
# 定义颜色常量
GRAY = (127,127,127)
WHITE = (255, 255, 255)
YELLOW = (255,255,0)
BLUE =  ( 0,   0, 255)
GREEN = ( 0, 255, 0)
RED =  (255, 0, 0)
CYAN = (0,255,255)
MAGENTA = (255,0,255)
 
# 设置屏宽高
size = [400, 300]
screen = pygame.display.set_mode(size)
 
pygame.display.set_caption("pygame.draw系列命令演示程序")
 
# 画一根线条,5个像素宽.
pygame.draw.line(screen, GREEN, [20, 20], [70,80], 5)

# 根据坐标点列表画一个不闭合的折线.
cors =[[0, 80], [50, 90], [200, 80], [220, 30]]
pygame.draw.lines(screen, GREEN, False, cors, 5)

# 画反锯齿线条
pygame.draw.aaline(screen, YELLOW, [0, 50],[50, 80], True)

# 画空心矩形,品红色
pygame.draw.rect(screen, MAGENTA, [75, 10, 50, 20], 2)
 
# 画一个填充白色的矩形
pygame.draw.rect(screen, WHITE, [150, 10, 50, 20])
 
# 画一个矩形
pygame.draw.ellipse(screen, RED, [225, 10, 50, 20], 2) 

# 画一个椭圆形
r = pygame.Rect(300, 10, 50, 20)
pygame.draw.ellipse(screen, RED,r) 

# 画一个多边形
pygame.draw.polygon(screen, GRAY, [[100, 100], [0, 200], [200, 200]], 5)

# 画4个弧形
pygame.draw.arc(screen, CYAN,[210, 75, 150, 125], 0, pi/2, 2)
pygame.draw.arc(screen, GREEN,[210, 75, 150, 125], pi/2, pi, 2)
pygame.draw.arc(screen, BLUE, [210, 75, 150, 125], pi,3*pi/2, 2)
pygame.draw.arc(screen, RED,  [210, 75, 150, 125], 3*pi/2, 2*pi, 2)

# 画一个圆形,半径是50
pygame.draw.circle(screen, BLUE, [60, 250], 50)

# 更新显示
pygame.display.update()


发表在 pygame, python | 留下评论